How to make paper dolls and paper scenes might not be a question that you ask yourself as a miniaturist, but I thought it was a good idea to talk about on my website, as I find paper crafting adorable!
Let’s just get our thoughts together and dive straight into things.
Updated 20/12/23
This blog post contains affiliate links from Amazon, Etsy and Domestika, no extra charges for you.
But first: what is paper cutting or paper craft?
Paper crafting is all about a fun way of cutting paper.
That’s it, that’s the article. Kidding!
Cutting paper in a certain way to create two or three-dimensional projects is a serious art form, and especially in the East, lots of artists are creating gorgeous things just by using paper or card.
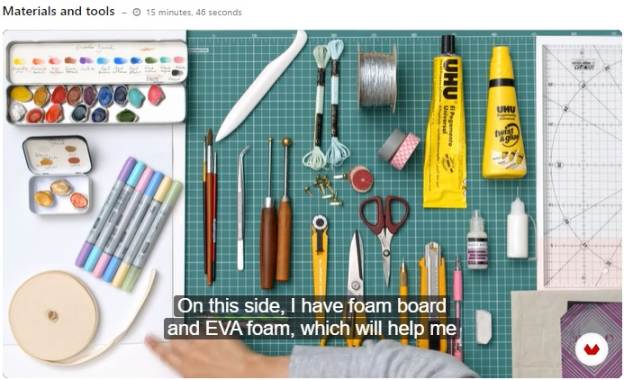
Not a lot of materials are needed for this craft, but of course, there is a little list, divided into essentials and non-essential, but handy.
Beware though that papercut artists can use different kinds of materials, it depends on what you feel most comfortable with.
1. Materials that you Needand will use
A cutting mat
I have several cutting mats, one for rough and “dirty” work, like painting and gluing (I actually mean that it is already dirty lol), and one “clean” one, that is used to film the progress on my dollhouse kits and for cleaner work, like cutting paper and fabric.
So, get a nice and clean or new one for the purpose of this tutorial.
A professional one like this one, with the cms and inches on it, is very handy!
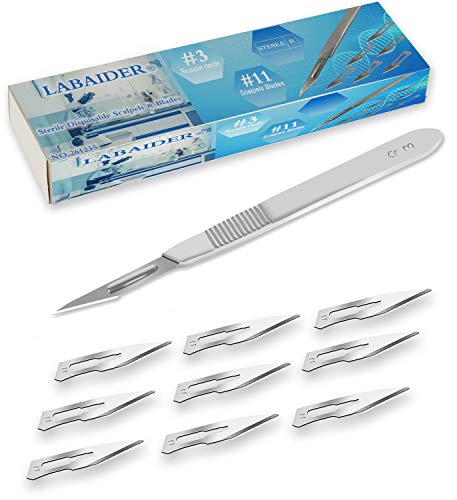
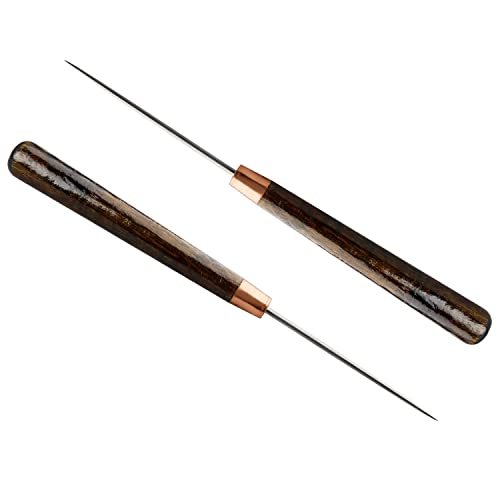
A crafting knife is something that I use a lot in the miniature world. I use it to cut balsawood, but also cardboard and paper. They are pencil-like tools with a blade on top.
A surgical scalpel is a very nice tool for cutting very precisely your paper.
For the crafting knife as well, make sure to always have spare blades available, because you don’t want to stop working on your project, just while you are doing well 😉
A ruler and a rectangle, for obvious reasons. A T-square ruler I tend to find handier, as you can measure something from the vertical side as well as the horizontal side.
an all-purpose glue. You can use UHU glue, but it’s a matter of personal preference.
A small and a large pair of scissors, paper tape, and any kind of thin rope or cord.
Butterfly pins will be needed to hold sheets of paper together.
Besides all of these materials above, there are other things that you could use, but not necessarily, like: rollers; to give paper some texture, precision tongs to let you have a grip on the paper, foam board and EVA foam, bias tape, and more.
You can check out the link below for more information.
Step 2: Think about the caracter of your paper doll and paper scene story.
When creating a layered miniature scene out of paper with a paper doll inside, you need to think about what kind of “story” you want to create.
Think of things like fairytales from your youth, a personal vacation that you made and have pictures of, toys or books from your childhood, cities that you have visited, and so much more..
Step 3: Make an initial sketch– How to draw a paper doll?
Sketching little images gives you an idea of how many layers of paper you will need to create your scene and how many paper doll characters you will implement in it.
Also, while sketching, you can start to think about which colors you will be using for the paper layers.
A course by Noe Arata
Step 4: Create the layers for the miniature scene.
If you want to create a layered paper scene, you need to work layer by layer. As you will need to know which images you will place in the front, in the back, and in between.
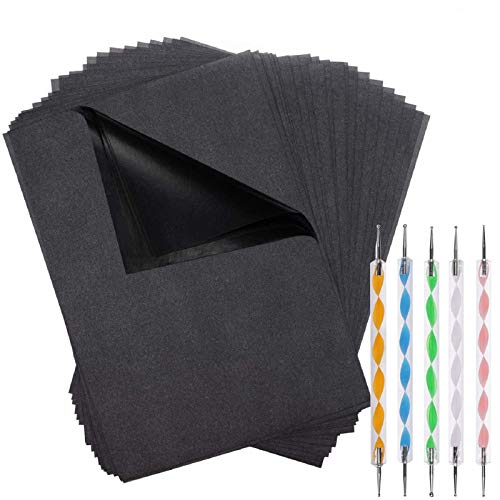
You need to sketch everything on tracing paper so that you can see clearly where each layer will go and see every image.
So in total, this will mostly be a three-layers structure, as creating more layers will make it harder to open and close the final project.
For the first layer in front, you could start for example with the left and right side of the scene, using trees, mushrooms, flowers, etc, etc, the only limit seems your imagination.
The second layer can include images like the previous ones from the first layer, just make sure that they don’t “hide” under the first layer of images. And this layer will fill up the “hole” that was created from the first layer.
The third layer will fill the second “hole” created by the second layer and thus fill up the entire space.
three layers of tracing paper on top of each other by Noe Arata
There is lots more to talk about for this part of layering a miniature scene, but it would take us far too deep into the online course.
Steps Number 5, 6, and 7: Exercises, make a mold, and learn how to use digital software!
To learn the language of papercut, you need to exercise, and exercise, there’s no way around this, unfortunately 🙂
Sadly, there is no way that I could create videos for you myself on how to papercut, that would take me weeks, to be honest, and take a lot of time from me to continue to create my own papercraft videos on Youtube, so for this part, I would like to refer you to this great online course on Domestika.
One of the 7 videos on how to learn papercutting, a mold, and more! By Noe Arata
It is affordable and explains to you in 7! videos how to proceed with paper cutting.
Not just the cutting itself, but also making a mold and even how to use software to create digital scenes in layers.
Step 8: learn how to cut straigt lines, curves, extra elaments, and glueing.
There is still a lot to learn before you really know how to make a paper doll and a paper-layered scene, did you realize this?
I did not know that so many steps would be involved and got quite overwhelmed when following this course, to be honest. Although I have some easy miniature paper crafting projects myself, this is way above my own capacities, haha!
Anyway, for the next steps, you will need to learn how to:
Step 10: Kamishibai: learn how to create an external structure, layering the structure
Kamishibai is part of an ancient Japanese storytelling technique, where a story is told by sliding your finished paper layers in and out of a “story box”.
In the next lesson by Domestika, you will learn how to cut out the external structure, inspired by Kamishibai boxes.
In the final step, you will assemble the final project.
This includes the inner projects in 3 layers: the central part, the part that contains the total structure, and the cutout layers. All of these will be glued together.
Again, Noe Arrata will explain to you how this process works.
An Online course review on how to make paper dolls and a paper miniature scene.
Who is the teacher in this course?
As mentioned at the beginning of this article, this tutorial is based on an online course from Domestika, but it would be way too much to go into detail on the how-tos.
Working with paper, Noe Arata created all kinds of projects for several brands, like Lancôme, Kiehl’s, Isadora, Campari, Brother, Olfa, Natura, Instagram, Ohlala, and others.
A bit of my own Papercraft work is Available on my Youtube channel.
Have you seen my Youtube channel yet, where I already made some dollhouse miniature furniture and miniature plants by using papercraft?
Let me see, so far I have crafted a miniature fridge, a miniature swing, a DIY miniature Christmas tree ( 2 types ), a miniature paper snowman, a miniature stool, a miniature trolley bag, a miniature origami cooking set, a miniature paper broom set, miniature paper plants, and more!
Feel free to check it out and subscribe to my Youtube channel, thanks!
4 thoughts on “How To Make Paper Dolls And Paper Scenes With Depth-A Tutorial And Review”
Hey there! I came across this article about making paper dolls and scenes with depth and I was pretty intrigued. I’ve always been a fan of crafts and I love the idea of making something 3-dimensional from paper.
I noticed in the article that you mentioned using an X-Acto knife. Do you have any favorite tools for cutting out the dolls and scenes? I’m always on the lookout for new tools to add to my craft box.
Overall, I think this article provides a great starting point for anyone interested in making paper scenes. It’s fascinating to see how much detail and depth you can create with just a few simple tools. I’m definitely going to give this a try and see what kind of creations I can come up with. Thanks for sharing this tutorial!
Thank you for your reply, it sure is fascinating, isn’t it?
About your question, I tend to use a regular sharp crafting knife which you can find on Amazon, a fingertip crafting knife from Fiskers is also something that I use a lot.
Although this is not something that I would do myself, I have forwarded the article to my granddaughter who loves to paint, draw and make paper sculptures. I am sure that she will have no problem getting the tools and materials she needs. The instructions are clear and well organized. The one question I have is how detailed to the initial “sketches" need to be. My daughter is a good artist for her young age, but you initial drawing looked very detailed. Her favorite thing to draw and make is any kind of animal. I am forwarding this to here. Thanks for this helpful article.


Hey there! I came across this article about making paper dolls and scenes with depth and I was pretty intrigued. I’ve always been a fan of crafts and I love the idea of making something 3-dimensional from paper.
I noticed in the article that you mentioned using an X-Acto knife. Do you have any favorite tools for cutting out the dolls and scenes? I’m always on the lookout for new tools to add to my craft box.
Overall, I think this article provides a great starting point for anyone interested in making paper scenes. It’s fascinating to see how much detail and depth you can create with just a few simple tools. I’m definitely going to give this a try and see what kind of creations I can come up with. Thanks for sharing this tutorial!
Hello Bob!
Thank you for your reply, it sure is fascinating, isn’t it?
About your question, I tend to use a regular sharp crafting knife which you can find on Amazon, a fingertip crafting knife from Fiskers is also something that I use a lot.
I hope this helps you!
I wish you happy crafting!
Kind regards,
Lizzy
Although this is not something that I would do myself, I have forwarded the article to my granddaughter who loves to paint, draw and make paper sculptures. I am sure that she will have no problem getting the tools and materials she needs. The instructions are clear and well organized. The one question I have is how detailed to the initial “sketches" need to be. My daughter is a good artist for her young age, but you initial drawing looked very detailed. Her favorite thing to draw and make is any kind of animal. I am forwarding this to here. Thanks for this helpful article.
Hi Anastazja!
Thank you for your uplifting comment and I hope that your granddaughter will enjoy it!
The original sketches do not need to be detailed at all, as a matter a fact, the less detailed, the easier the cutting out will be, in my opinion.
I wish you happy crafting!
Kind regards,
Lizzy