In this blog post, I will give you a tutorial, based on an online class that I bought on the topic because I honestly haven’t worked a lot myself with miniature confection. (We all prefer to do something different in the mini world I think?).
Let’s just dive straight into things with these steps for beginners
As an Amazon Associate and Etsy associate, I earn from qualifying purchases, with no extra charges for you.
Step 1:Let’s talk about the materialsyou need to make mini doll clothes.
All the materials that you need, a list.
a normal white sheet to draw on
another sheet but a little thicker, almost like cardboard
carbon paper (to transfer the molds)
a ruler
measuring tape
a pencil and an eraser
different colors of threads, so you can choose the same color of the fabric or a totally opposite color.
Usually, a 100% polyester thread is used and they are suited to knit with a machine as well as by hand.
pins and needles
brooches and little buttons
a seam ripper
Something to mark the fabric. For example: classic chalk, or a specific pen where the marks go away when heated and any kind of line can be drawn on the fabric.
Scissors. Most people have 3 types of scissors available. One to cut the fabric, one that cuts paper and one to cut the thread.
Do not use the same scissors for different jobs, because the edges will get dull.
We can say that 50% of the seaming is ironing. This type of iron is quite useful to do the job, as it is made for miniatures.
There are basically two different kinds of fabrics: “woven” fabrics and “knitted” fabrics. The difference between the two is how they are constructed on weaving looms.
For woven fabrics, several warps (or longitudinal yarns), and wefts (or latitudinal yarns) are used to create them.
Knitting, however, involves interloping or interlacing a single yarn or thread.
This means that the knitted fabrics are going to stretch more than the woven ones, usually.
Usually a selvedge (meaning a kind of edge that is produced on woven fabric during manufacture) will be done on the piece of fabric, and that will prevent it from unravelling.
This latter might not be the case, like for example when it has been cut into small pieces to make miniature clothes.
In that case, the side that is the most flexible when you stretch it out, will not be where the original selvedge was.
But nothing bad is going to happen if you cut the fabric at the right-angle side of the selvedge, because after all, we are working in miniature size here.
For the woven fabrics: one side will always stretch less than the other side as well, although this kind of fabric is stretched more easily. So also, in this case, you can find the original selvedge as well.
Here’s where I will show you in short how to stitch miniature doll clothes by hand. Mind you, even if you do have a sewing machine, you still need to stitch some things by hand.
A little walkthrough of different stitches:
First thread a needle, it doesn’t need to be long, because otherwise they will get entangled a lot. The thread can be left single or double and then just make a knot in the end.
Put the needle in the fabric and pull it out a bit further.
Repeat the process and always try to stitch it at the same distance. Thus we are making a seam.
This kind of stitch can be used as decoration as well.
Another kind of stitch is point back, which is ideal for putting two pieces together and simulating a sewing machine. Insert the needle into the first piece of fabric.
When going further, don’t make the stitches too long, because otherwise, they will open up too quickly. A couple of millimeters is fine and try to keep them at the same distance.
At first, it looks like the first stitch, but instead of going further, we are heading back exactly to the spot where we ended before.
Then you go back, and back again, until you see this result.
This is how it looks when you turn it inside out. You can see that the seam is tightly closed. Now the outside looks good, but the inside will cross each other and not look good, so it is not suitable to be shown on the outside.
There are more stitches that you can do by hand, but that would take us too far into a sewing class, so I would advise you to look at the rest of this class below or other (online) classes.
First of all, if you have bought or borrowed a sewing machine, please check if there is a manual included and do not throw it away.
If there is no manual included, I am sure that you can always look for it on the Internet.
Once you know how to thread a sewing machine, they all work in about the same way, but each machine has a particular form of threading.
Most machines use a thread above and one below. Furthermore, I will explain the rest in a few steps:
This thing in the picture is called a reel which will go on the bottom and top on some kind of “stick” and they will most likely come with the machine that you bought.
The first thing you need to do then of course is turn on the sewing machine. Just press the on-button to “1”.
Put the thread on the stick like in the picture below and put it around the other button as shown in the second picture below.
Turn the thread around the reel above and then “push” the latter against the other button.
Press the pedal of the sewing machine and it should start to get to work.
There is a lot more that has to be learned to be able to use a sewing machine, but that would make a totally different blog post.
So I would advise you to go to a sewing class online or one in your neighborhood if one is available.
You can find patterns online, but you can definitely make your own patterns for Barbies, Blythe dolls, etc..
But if you have another type of doll with other measurements, then it becomes a little bit different. Also when you have a doll that is a bit bigger or a bit smaller.
Then still there is no problem, you can just adjust the patterns and take out half a cm until 1 cm maximum.
If you would need to adjust a lot of the measurements, then it’s better to make a new pattern.
In the picture below you can see an example of a doll that we are going to measure.
What we are doing first, is using a measuring tape to see the measurements from side to side.
Fix it well on one side, go to the other side, and then you have half of your total centimeters (or inches). So multiply this by 2 to have the measurements all around the doll’s body.
Then measure the body from the shoulder to where you want a shirt to go or another piece of clothing.
Now that you have all the sizes, take a sheet of paper and draw 2 lines like this:
On the upper line above, mark a point at 1/4 th of the contour of the doll. If half of the contour was for example 11 cms, then 1/4 th would be at 5,5 cms.
After that, look how far the armpit goes, from the shoulder until the armpit ends. And mark that vertically from the point where you put the 1/4 mark. And draw a horizontal line. That line is the armpit.
Then go ahead and measure the height of the waist and let’s assume it is around 6 cm. Let’s decide the shirt to be at 10 cm. So, this is your waist at 6 cm.
Mark both straight horizontal lines, so one at 6cms and one at 10 cm. And mark the line below as well. This is the result.
Decide how far you want the shirt to go under the neck, so the neckline basicly. Let’s say: 2 cm. Then we also need to know the contour of the neck, let’s go for 2,5 cm. Make a curve between those 2 points, as in the picture below. This is the neck.
Measure the width of the shoulder, let’s assume it is 1,5 cms. And trace the shoulder line.
Draw the line further to the armpit and draw the waistline, like in the picture below. From this point on, you can make any changes that you want. If you want the shirt less tight, you can add one or more cms.
This will be your basic pattern and you can adjust it depending on the size of the doll and if you are making a bathing suit or a wide shirt, for example.
I am going to end this tutorial now because that will take us far too deep into the way clothes patterns are made and it would take me a few weeks to write about all of this 😉
If you would like to dive much deeper into this topic, I would advise you to continue watching a video tutorial from Domestika.
This book by Jan Saunders Maresh is more suitable for beginners who want to save a buck and sew their own clothing, or breathe some life into existing clothes.
It contains easy-to-follow instructions and the step-by-step illustrations make it easier to learn.
There is still a large variety of other books available, but I would think that you would prefer the ones for miniature clothes which have the size of Barbie dolls or similar small sizes.
These particular books can be extra helpful for miniature clothes because they help in the manufacturing process which is specific to these little clothes.
For example, for miniature clothes, you need to join the fabric for the shoulders first, and only then you add the sleeves, which is different from the confection of real-size clothes (it’s the opposite).
In short, I would advise the next sewing books for making miniature clothes:
This book by LittleAmelie is for people who already know how to sew. It has a total of 10 doll clothes sewing patterns with instruction photos included. The patterns are for:
Another form of influencers and inspiration could be Instagram or YouTube.
I just love the clothes that people show off on these social media channels for example their Blythe dolls or Barby dolls.
A perfect example is this one on Instagram called blythe_clothes. Here you can see lots of different styles for dolls, from jeans to dresses and more.
Another amazing Instagram account on dollhouse clothing is called Blythe_dolls_Ella. On this account, Ella sews and knits Blythe dolls for you and posts a lot of pictures on it.
Next on the list of inspiration, is of course to be found on Youtube. Have a look at the video below, as an example, where the lady is making miniature jeans:
And last, but not least, you can definitely use the extended courses from Domestika on making miniature doll clothes. Click on the picture below to see an introduction by the teacher Carolina Annes.
4 thoughts on “How To Make Miniature Doll Clothes – A Tutorial”
This is a perfect site in order to assist people in the making of miniatures. Listen, if you want real family bonding, making miatures together as a family does just that, It is incredible how the daughters will gravitiate to making the creation of minitures a success by helping to sew and craft objects for furniture for a doll house. I have seen brothers constructing the actual dollhouse with dad and together the family was having hours of fun and receiving plenty of bonding opportunities. This is the type of activitty that we need today instead of everyone communicating on the internet with others at the expense of the family!
When I was a teenager, I used to dabble with making clothes for the Barbie doll. I found it quite tricky, as the seams are really small to sew and sometimes the machine couldn’t get into those hard to reach places. Luckily my Aunt supplied the patterns as I didn’t know how to make my own.
But reading this article has taught me that it is not that daunting to make your own pattern. I was pleasantly surprised to see how easily a pattern could be made and will definitely be giving this one a go as my grand daughter loves Barbie, and clothes are so expensive now days.


 Buy Now →
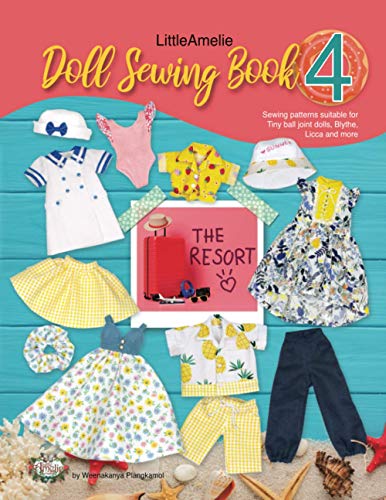


This is a perfect site in order to assist people in the making of miniatures. Listen, if you want real family bonding, making miatures together as a family does just that, It is incredible how the daughters will gravitiate to making the creation of minitures a success by helping to sew and craft objects for furniture for a doll house. I have seen brothers constructing the actual dollhouse with dad and together the family was having hours of fun and receiving plenty of bonding opportunities. This is the type of activitty that we need today instead of everyone communicating on the internet with others at the expense of the family!
Hi there!
I totally agree with you, we can make dollhouses and miniatures all together with friends and family and even exchange things,why not ? 🙂
I wish everybody happy crafting!
Kind regards,
Lizzy
When I was a teenager, I used to dabble with making clothes for the Barbie doll. I found it quite tricky, as the seams are really small to sew and sometimes the machine couldn’t get into those hard to reach places. Luckily my Aunt supplied the patterns as I didn’t know how to make my own.
But reading this article has taught me that it is not that daunting to make your own pattern. I was pleasantly surprised to see how easily a pattern could be made and will definitely be giving this one a go as my grand daughter loves Barbie, and clothes are so expensive now days.
Hi Michel!
You can make your own Barbie dolls for sure, I know you can do it! 😉
And if you still struggle, you can check out the affordable course from Domestika 🙂
I wish you happy crafting with making miniature clothes for your granddaughter’s dolls!
Kind regards,
Lizzy