
In the world of miniature painting tutorials, I have written several ones before, even about how to paint dollhouse furniture with milk paint.
But today, I am going to review a miniature painting tutorial by Domestika, as this is until today, one of my favorite routes to learning everything about miniatures.
While this time the tutorial takes us more into the world of small figurines like Warhammer, it can really teach us something extra about painting small things, in my opinion 😉
So again, I got this course myself, and while I can’t write down everything mentioned in this course (that would be way too long), I can get a very good idea of what this course includes and if the quality is high, etc.
So let’s go!
If you can’t wait, check out this online tutorial on miniature painting by Domestika.org right away. Apply my discount code EVERYTHINGVERYSMALL for 10% OFF.

But first: why paint miniatures?
Well, painting miniatures of all kinds is just a fun and rewarding hobby for not just tabletop gamers, but also collectors or people who just enjoy painting and want to improve their artistic skills.
Here are a few reasons why painting miniatures has become quite popular:
- Customizing and personalization:
By painting your miniatures, you can create something unique and make it your own work, choosing your own colors and details. - Explore different techniques:
Doing the paintwork yourself makes you able to experiment with different techniques like I explained the milk painting technique recently. - A form of relaxation and even meditation:
I don’t know about you, but when I am painting something, I am totally focussed on the project that I am working on and it totally relaxes me 😉 - Socializing:
Many people enjoy sharing their finished work, online or in communities, especially for tabletop games like Warhammer, where the competition factor also plays a role.
Let’s go ahead and look step into the world of miniature painting tutorials.
As an Amazon, Etsy and Anavrin associate, I earn a small commission from your purchase, with no extra charges for you.
Who Is The Teacher in this online miniature painting tutorial?
Angel Giraldez is a professional miniature painter and he is the teacher of this Domestika course.

When first starting out as a professional painter it was very hard to make a living from it, as miniature painting wasn’t very well known yet.
But he made it through and is now working with companies like Games Workshop, CoolMiniOrNot, Mantic Games, and more.
He also published several books on miniature painting, which at the time were very hard to get published.
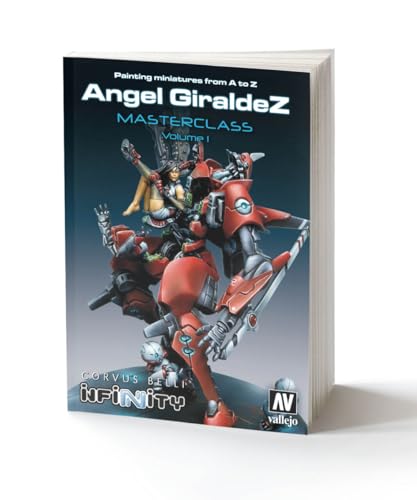
Vallejo Painting Miniatures Masterclass Vol. 1 Book by Ángel Giraldez Black
Buy Now →
You can find Angel Giraldez on:
- Youtube
- And of course on Domestika with his online tutorial.
During the course, he will also take you through all of the people that influenced his work, like Games Workshop, the Games Magazine White Dwarf, Mike McVey, and more.
Which Materials Do You Need For Miniature Painting?
In this next section, we will give more insights into the crafting tools that you need for these miniature painting tutorials.
This section of the tutorial is about 7 minutes long and goes into more detail than I am describing here.

Basically, what you need is:
- A project that you will paint, in this case, the teacher uses a Resin figurine, but there are also metal or plastic ones.
- a modeling blade
- sandpaper
- a pair of pliers
- different types of glues to assemble your figurines
- bicomponent putty to fill up gaps
- a lancet
- a primer, use a spray and never a brush to prime
- something to hold the figurine in while spraying, like a small box
- a manual drill
- three kinds of brushes
- a wet palette
- different colors of paint, the teacher uses the brands: Vallejo Paint, Game Ink, and Model Color.
- a base
- A product to create a terrain, which is a mix of glue and sand
- you could add some stuff like grass
- a cutter mat
- a good magnifying lamp
The course has additional videos and information on all the paints used and a detailed video on how to build your own wet palette!
If you can’t wait, check out this online tutorial on miniature painting by Domestika.org right away. Apply my discount code EVERYTHINGVERYSMALL for 10% OFF.
What will you learn in this miniature painting tutorial by Domestika?
In this course, you will learn the fundamentals and techniques to paint figurines.
The teacher will talk about volumetry and colors, and you will learn how to paint a Barbarian figure, plus all the accessories like a sword, clothes, armor, the base, and more.
He will also explain the different levels of miniature painting (the course is on an exhibition level, not just to play with), and different techniques.
Let’s go further into detail on each mini-tutorial and all the separate videos.
Video 1: Fundamentals and Techniques of Miniature painting-part 1
In this video about 13 minutes long, the teacher will explain to you the correct position of the brush, handling, dilution, and basic techniques to paint your miniatures.

Video 2: Fundamentals and Techniques of Miniature painting-part 2
This next video tutorial is about nine minutes long and in it, you will be taught how to do multiple miniature painting tutorials with different techniques:
- the washing technique uses more diluted paint so it gets more easily in nooks and crannies
- the technique of stippling: this technique applies paint with dots
- the technique of dry-brushing: this technique applies without any water. The paint is added to paper or a napkin and then used to highlight certain surfaces.

Video 3: “Volumetry”
In video tutorial number 3, about 6 minutes long, you will learn where to place lights and shadows and learn about volumetry in figurines, and how to think in geometric shapes.

If you can’t wait, check out this online tutorial on miniature painting by Domestika.org right away. Apply my discount code EVERYTHINGVERYSMALL for 10% OFF.
Video number 4: How to work with colors in miniature painting?
The next thing to consider in miniature painting tutorials is how to work with colors, which is quite an important step I would think.
This video is about 5 minutes long and gives you an introduction to the color theory, focussing on the miniature world.
As an addition to the course, you can find a miniature paints color matcher here as well.

Video number 5: Painting the face and skin-part 1.
Painting the face and skin requires a lot more detailed information and thus this will be explained in 3 separate and longer videos.
Part 1 is about 19 minutes long and explains how to paint the face and skin of a figurine called Rekno, a barbarian 😉

Video number 6: Continuing with the face and skin of the body.
In the next video tutorial about 20 minutes long, you will now see how to apply a third highlight layer of paint on the skin and also you will move to the skin of the body while adding the tones and shadows.

Video number 7: Keep highlighting!
In this video tutorial (about 9 minutes long), the teacher will keep highlighting the figurine and remind you when you apply the layers of light, to reduce the area to be illuminated.
Again, when applying the highlights to the skin of the body, he will move on to the tones and shadows.

Video number 8: How to paint eyes, teeth and hair?
Another detailed job in these miniature painting tutorials is about how to paint the eyes, the teeth, and the hair.
This is again very well explained in this video of about 19 minutes long.

If you can’t wait, check out this online tutorial on miniature painting by Domestika.org right away. Apply my discount code EVERYTHINGVERYSMALL for 10% OFF.
Video Number 9: How to paint metallic miniature objects-part 1
In the next video (about 15 minutes long), you will learn how to paint the miniature armor and mini sword with a technique called “no metallic metal”.
This means that you will use paint without metallic particles to imitate metallic objects, which is achieved by looking for a strong contrast between the lights and the shadows.

Video number 10: Metallic objects, part 2: glazing.
In this 16-minute-long video tutorial, Angel will continue to apply layers of highlights and then apply glazing to give the armor and little sword some more nuances.
After that, he will touch up the shadows and paint the last highlights to make the armor “shine”!

Video number 11: Wooden objects.
In the next lesson about 15 minutes long, you will be taught how to paint a wooden shield.
You will see how to draw a wood grain and give it a weathered look.
When applying lights and shadows always keep in mind the position of the figure and how it is lit in general.

Video number 12: painting miniature clothes- part 1.
Another video tutorial, about 21 minutes long, explains to you how the teacher is painting the “pants” and “leather” parts.

Video Number 13: Painting the belt and tabard.
And in part 2 of clothing and accessories, you will see how Angel paints the belt and tabard and how to get a worn look on clothing, by using the stippling technique. Also, these also will be glazed.
This video is about 19 minutes long.

If you can’t wait, check out this online tutorial on miniature painting by Domestika.org right away. Apply my discount code EVERYTHINGVERYSMALL for 10% OFF.
Video number 14: How to create and paint a miniature base?
We are almost finished with the miniature painting tutorial, as in this last video of about 8 minutes long, you will learn the last steps to take, and that is how to prepare a base for the miniature figurine.
Also painting the base and adding details to it to simulate the terrain where the figure would stand.

Video Number 15: Finish up and variations.
In video number 15, the teacher will show you the finished project and some variations that you could apply for the skin tone and scenery.


Miniature painting tutorials: A Review
I have watched this tutorial myself from start to end and I can now review it for you!
This is my personal opinion only.
What is included in this course?
Included in this tutorial are all the 15 videos that I described above, and the teacher is called Angel Giraldez, who is well-known and an influencer in the miniature painting world.
Together, this tutorial is 3 hours and 34 minutes long and has 18 additional resources (4 files), and is easy to follow online without a time limit.
It is at a beginner’s level and you have unlimited access forever.
Stars on 5:

The Price:
$26,99
Apply my discount code for -10% off the price: EVERYTHINGVERYSMALL
The Good and the Bad:
The Good.
- this is a quality course by a very professional and popular miniature painter/ you are learning from one of the best teachers!
- a very detailed course
- online tutorial at your own pace and the date to view this course never expires
- very suitable for beginners, but even advanced miniature painters can learn from this course!
The Bad.
- The audio is not in English but in Spanish and sometimes the subtitles are badly translated
- If you are an advanced miniature painter, this course might be too easy for you
Check out more details and the current price on this online tutorial on miniature painting by Domestika.org. Apply my discount code EVERYTHINGVERYSMALL for 10% OFF.
My Final Conclusion
Have a look at the general review on (English) Domestika courses company here.
Although this course is only about painting Warhammer miniatures and such and not about painting miniature furniture, for example, this tutorial is amongst the greatest in its category, in my opinion.
Also, you can learn a thing or two if you are about to paint other figurines than just dolls, for example.
I hope that you enjoyed this miniature painting tutorial review and if you have any more questions about this topic or any other topic, please feel free to leave a comment down below in the comment section.
Or join me on my social media pages or my cozy Facebook group 😉
I wish you happy crafting!
Kind regards
Lizzy
Related article:
- How to create needle-felted animals?
- What is the milk painting technique and which miniaturist uses this technique?
- What is a paint brush rinser from Green Stuff world?

Hi everyone!
My name is Lizzy, and I am an amateur miniaturist obsessed with everything in the dollhouse and miniature world, ever since I was a teenager.
So far, I have created 2 dollhouse projects, a backyard shed and a miniature treehouse, tons of DIY dollhouse kits, and “hacked” some.
I also created a fairy garden, and lots of small and simple miniature projects on my YouTube channel. (mostly made from trash or everyday items).
I love to write as well about all things happening in the miniature world, hence the reason why I created this blog!
I wish you happy reading and crafting!
Lizzy


I have always enjoyed reading you various articles Lizzy discussing the intricacies of working with and painting miniatures. This one is just as interesting and informative and I am glad to pick up another tip or two that I can use in my own work with miniatures.
I can easily see how performing this type of work can be relaxing or even meditation like even though many folks would look at the level of detail required and want to pull their hair out, we are all built differently and what seems like a headache to one person may be a haven for others.
I appreciate this review of the Online Domestika course. I understand that you can’t reiterate all of the info in your article but you have given your readers a thorough and helpful overview of the course.
Hello Joseph!
Thank you so much for all the positive comments and being loyal to my website and I wish you happy crafting!
Kind regards,
Lizzy