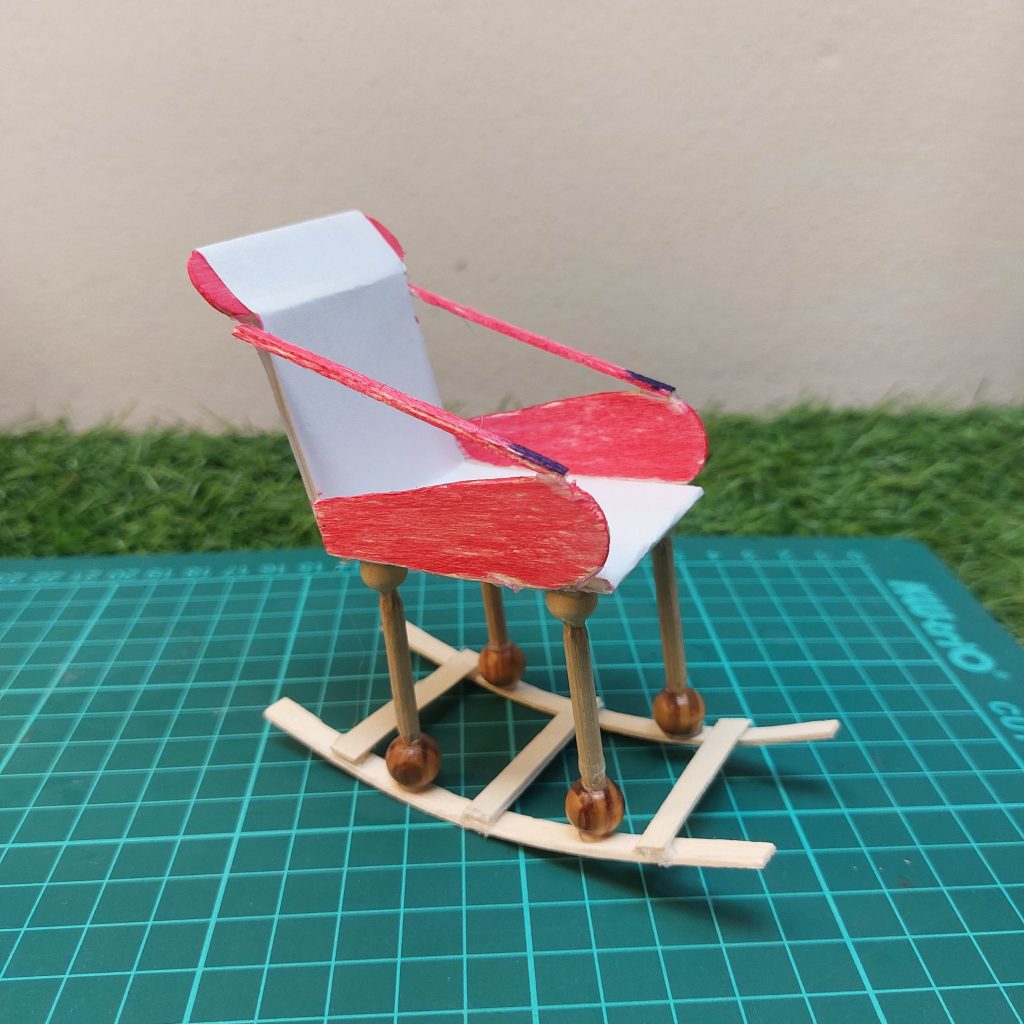
And since this new project, a 1:12 scale DIY miniature swing chair, comes with a lot of step-by-step photos, I figured it deserved its own fresh little corner on the blog.
Just good old popsicle sticks and a simple build, with a little trick included though that might be a bit challenging for you – lol.
So here we go: a brand-new project to add to your growing collection of miniature furniture made from scratch, perfect for your garden scene or balcony.
Dimensions and Materials for This Miniature Swing Chair
This little swing chair is built entirely from popsicle sticks: no fancy laser-cut kits or special tools needed.
I’ve listed the exact lengths I used below, so you can copy them or tweak them a bit depending on the style you’re going for. I built mine in 1:12 scale, which works perfectly for most dollhouses.
It’s a mix of straight cuts for the frame and seat, plus two curved pieces that give it that classic swinging shape underneath.
✂️ Dimensions I Used:
Backrest slats: 3 pieces of 4 cm
Top backrest strip: 1 piece of 5 cm
Seat slats: 3 pieces of 5 cm
Legs: 4 pieces of 3.5 cm
Armrests: 2 pieces of 5 cm
Arm supports: 2 pieces of 6 cm
Swing rails (curved): 2 pieces of 10 cm (made from bent popsicle sticks)
Bottom supports: 3 pieces of 4 cm
🛠️ What You’ll Need:
Popsicle sticks (about 10–12 total)
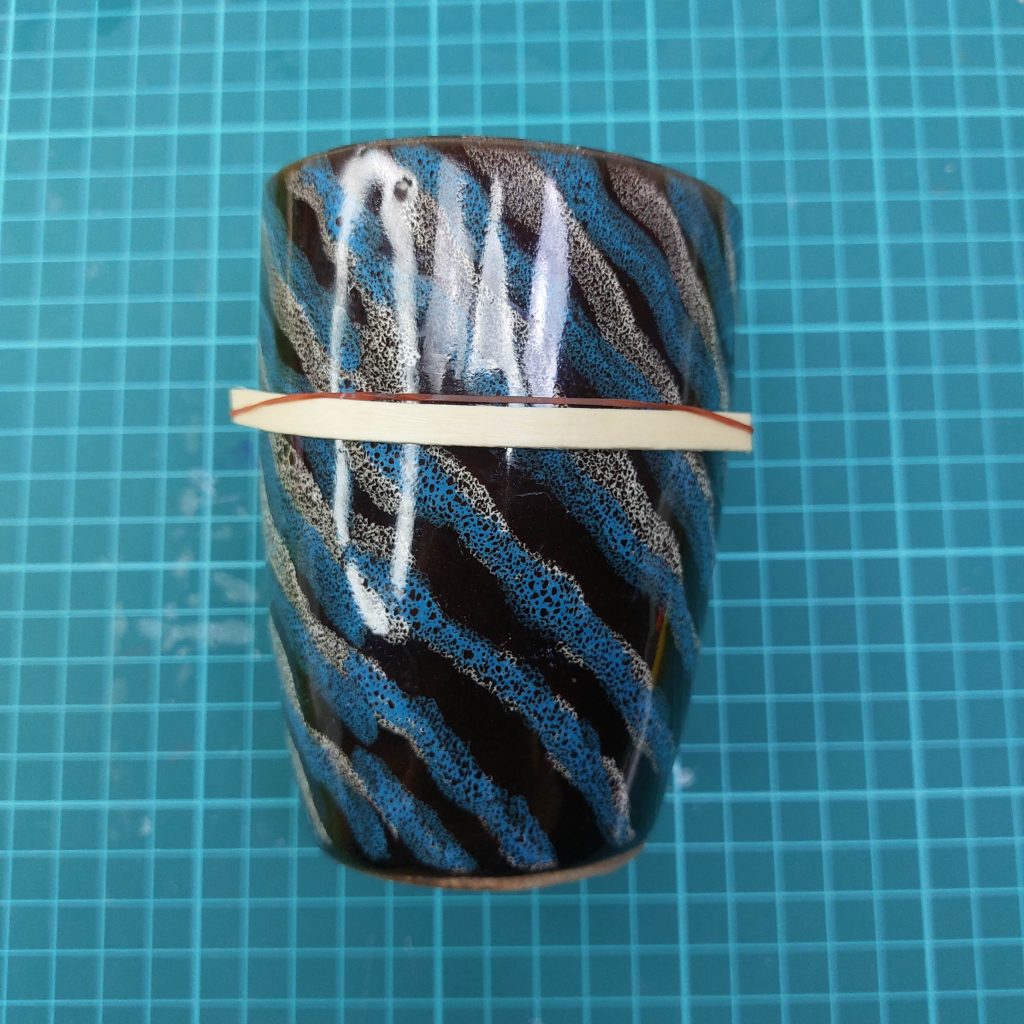
A cup or mug (for bending the swing rails)
Elastic band
8 wooden beads
Water
Wood glue or UHU Glue
Ruler
a sharp Craft knife or mini saw
Cutting mat
white cardstock paper
Optional: fine sandpaper or sanding block and paint/decoration for the chair
In case you were wondering: yes, it really ‘swings’ ! 🙂
Step by step tutorial with pictures.
Let’s get straight to the tutorial now!
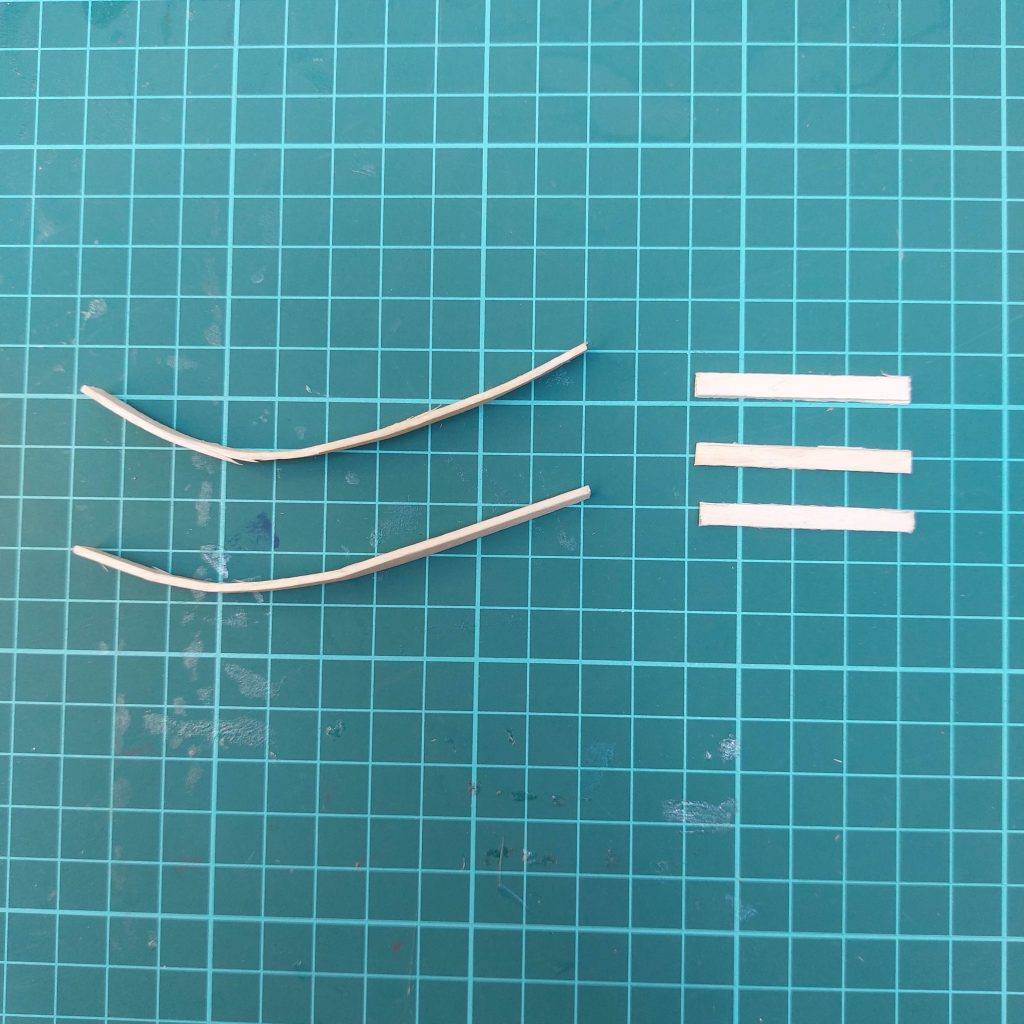
Step 1: Make the Swing Rails
Before starting anything else, I soaked two popsicle sticks in water for about 15–20 minutes to soften them. Once they were flexible, I bent them carefully around a cup and held them in place with an elastic band.
These curved pieces will become the swinging rails under the chair later on. Leave them to dry overnight while you work on the rest of the chair.
The 3 pieces ( of 4 cms) in the picture on the right will fortify the rails.
💡 Tip: Make sure your sticks are fully dry before gluing anything to them. Damp wood doesn’t hold glue well and may warp if rushed.
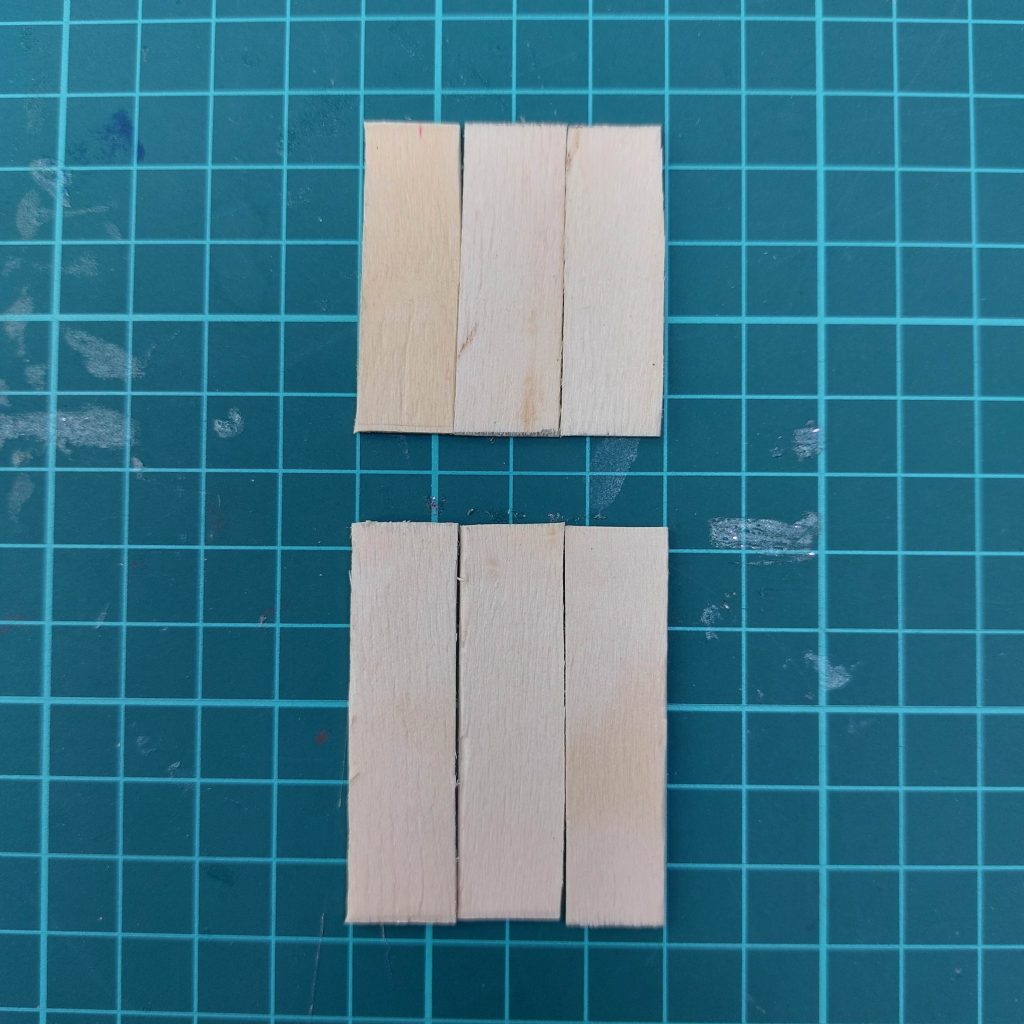
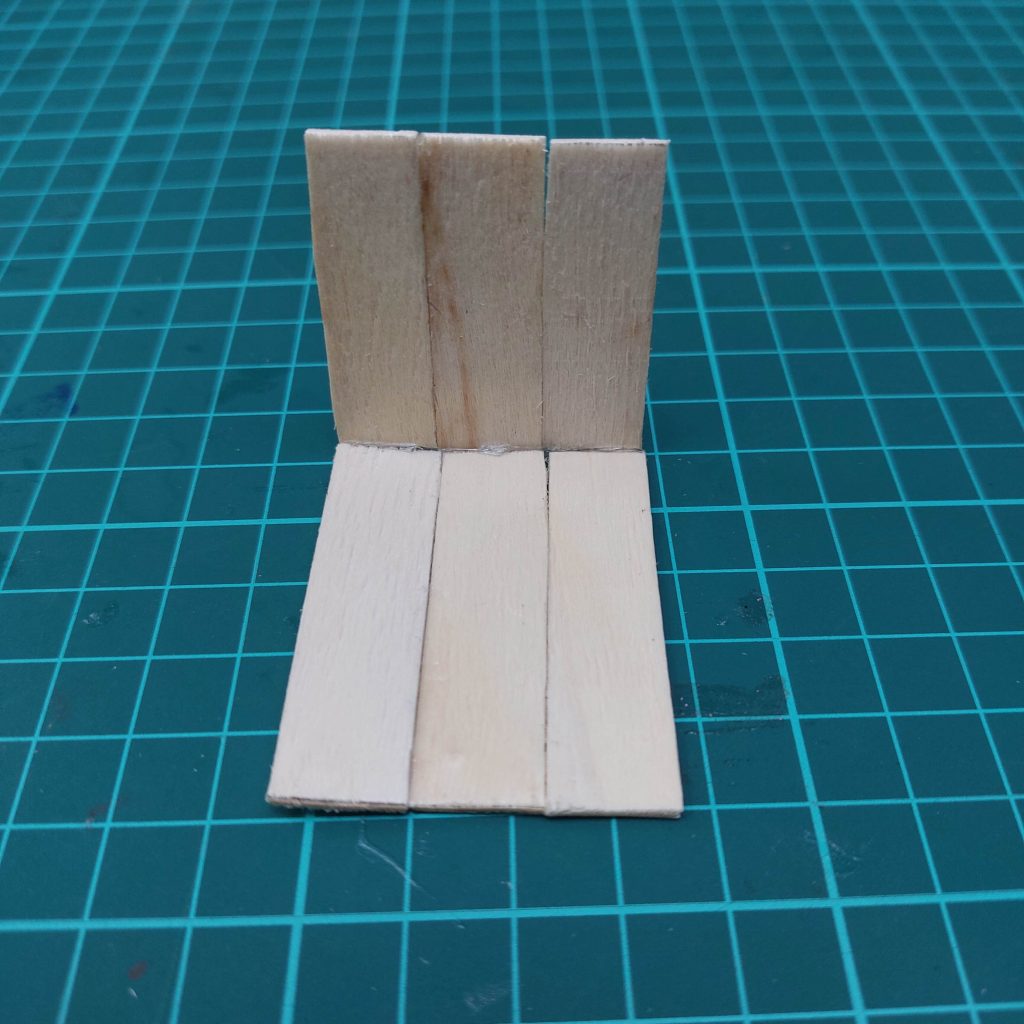
Step 2: Assemble the Seat and Backrest
While the curved swing rails were drying, I started on the basic chair structure: the seat and backrest.
I cut six popsicle stick pieces; three at 5 cm for the seat, and three at 4 cm for the backrest. I laid them side by side on my cutting mat to get a clean edge, and then carefully glued them together edge to edge.
Once those were dry, I glued the seat and backrest together at a right angle. I used the corner of my cutting mat to help align them neatly while they dried. You can already see the classic swing chair shape taking form!
Step 3: Shape the Legs and Glue on Wooden Beads
Now it was time to prepare the legs of the swing chair. I cut four pieces from a wooden chopstick, each about 3.5 cm long.
Then, using a sharp craft knife, I carefully sharpened both ends into soft points.
After that, I glued small round wooden beads onto the top of each leg. It gives them a bit of charm, like little vintage finials, and it ensures stability to the swing rails.
Place 8 beads on each side.
Make sure the beads are centered and the glue is dry before moving on.
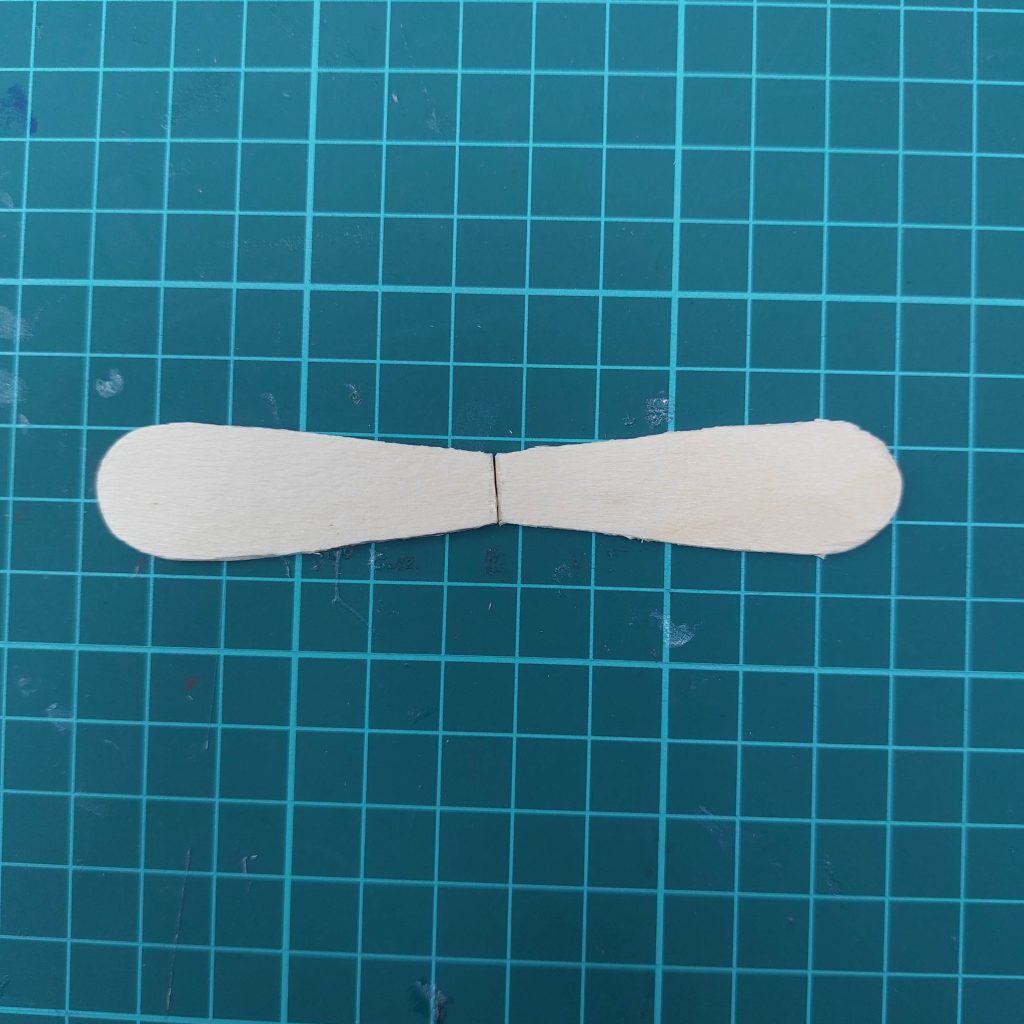
Step 4: Add the Rounded Top Strip to the Backrest
To finish the top of the backrest, I cut a piece of a popsicle stick 3.5 cm long and rounded both ends with a combination of scissors, a craft knife, and sandpaper until I was happy about it 🙂
Then I glued it to the backrest, but not flat: I tilted it slightly backward, so it leans just a bit. This gives the swing chair a more relaxed look.
I used a container to prop it up while the glue set, just to keep it steady and at the right angle. (We use what we can get, right? 🙂 )
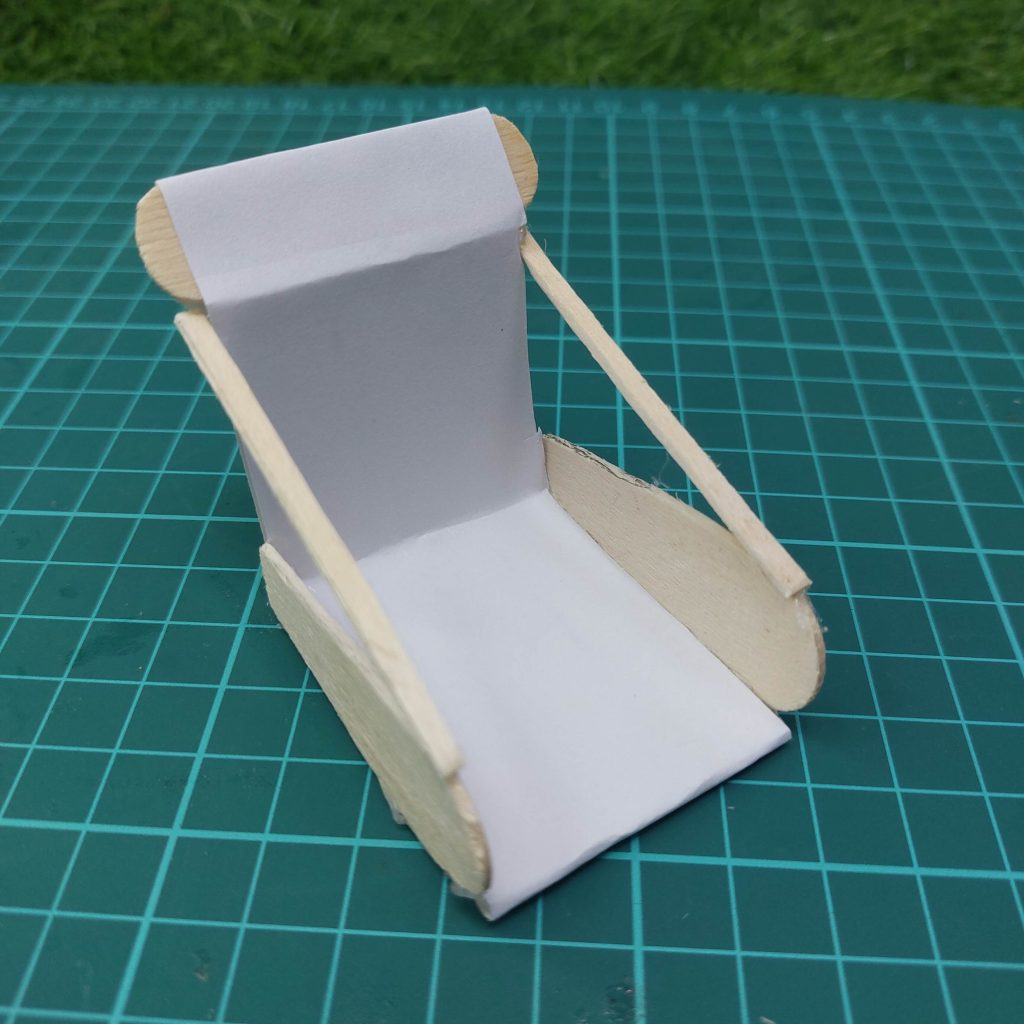
Step 5: Cover the Chair with Paper for a Smooth Finish
Before moving on to adding the legs and sides, cut out a piece of white paper in the exact shape of the assembled chair (seat + backrest, but leave about 1 cm extra on top as well as bottom), and glue it neatly in place.
I used UHU glue for this — it spreads smoothly and holds the paper down without warping. Just make sure the surface is clean and dry before gluing, and press it down firmly to avoid bubbles.
fold it over the edges
Step 6: Cut and Attach the Side Panels
Next, I worked on the side pieces of the chair, the curved armrest shape that gives the swing chair its structure.
I took two wide popsicle sticks and cut each one to about 5 cm in length. Then I rounded both ends to soften the look. You can do this with scissors or a craft knife — just go slowly and even out both sides.
Once they were shaped, I glued each piece to the side of the chair, lining it up just above the seat and back. I used a little UHU glue here again for a clean hold and pressed everything in place until it dried.
Ready for the rest!
Step 7: Add the Arm Supports
To complete the upper frame of the chair, I added the arm supports.
I cut two thin strips from popsicle sticks, each about 6 cm long, and trimmed the ends at an angle so they would sit neatly between the backrest and the front of the side panel.
Then I glued them into place; one end near the top of the backrest (just below the rounded strip), and the other resting just above the seat.
(see also the picture in step 3 in this article to see the long pieces cut out)
These give the whole piece more stability and structure, and they really help define the overall shape of the swing chair.
Step 8: Glue on the Legs
Now it was time to attach the four legs to the underside of the swing chair. Each one had already been shaped and topped with a wooden bead earlier (see Step 3 if you missed that).
I flipped the chair upside down and glued each leg into place near the corners of the seat base, not right on the edge, but slightly inset for a sturdier look.
You can adjust them depending on how wide or narrow you want the chair to be.
Let everything dry completely before moving on; this part holds the weight of the structure, so it needs to set firmly.
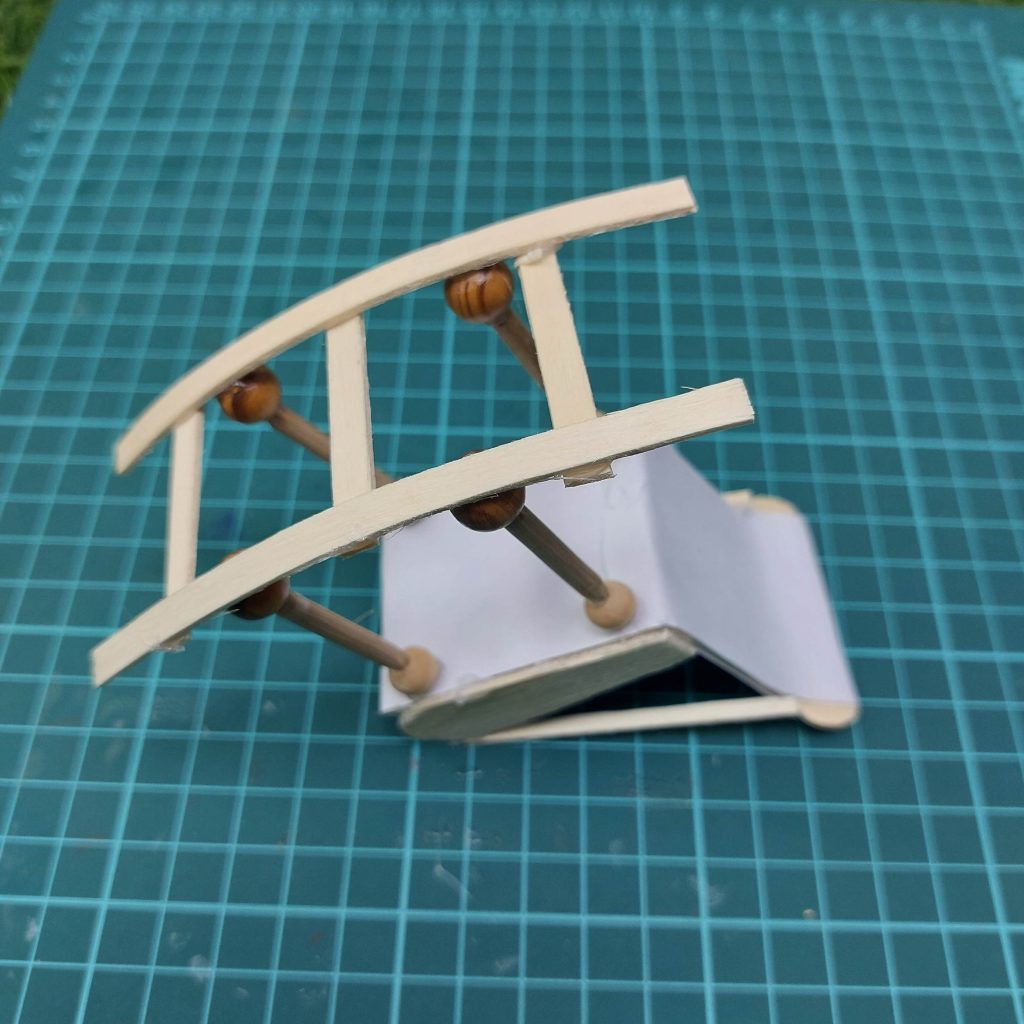
Step 9: Attach the Curved Swing Base
With the chair and legs fully dry, it was time to attach the swing base, the part that makes this piece look like an actual lounge swing.
Remember those curved popsicle sticks we bent back in Step 1? I now glued them under the legs, with the curve facing outward and upward, so they sit like two rails.
Then I added three 4 cm support pieces between the curves to connect them like little ladder steps.
Each leg sits neatly on top of the curved base. You may need to hold things in place a bit while they dry, or support them with some tape or a bit of tacky wax while the glue sets.
Take your time with this step, since this part gives the chair that signature swing shape and really pulls the whole project together.
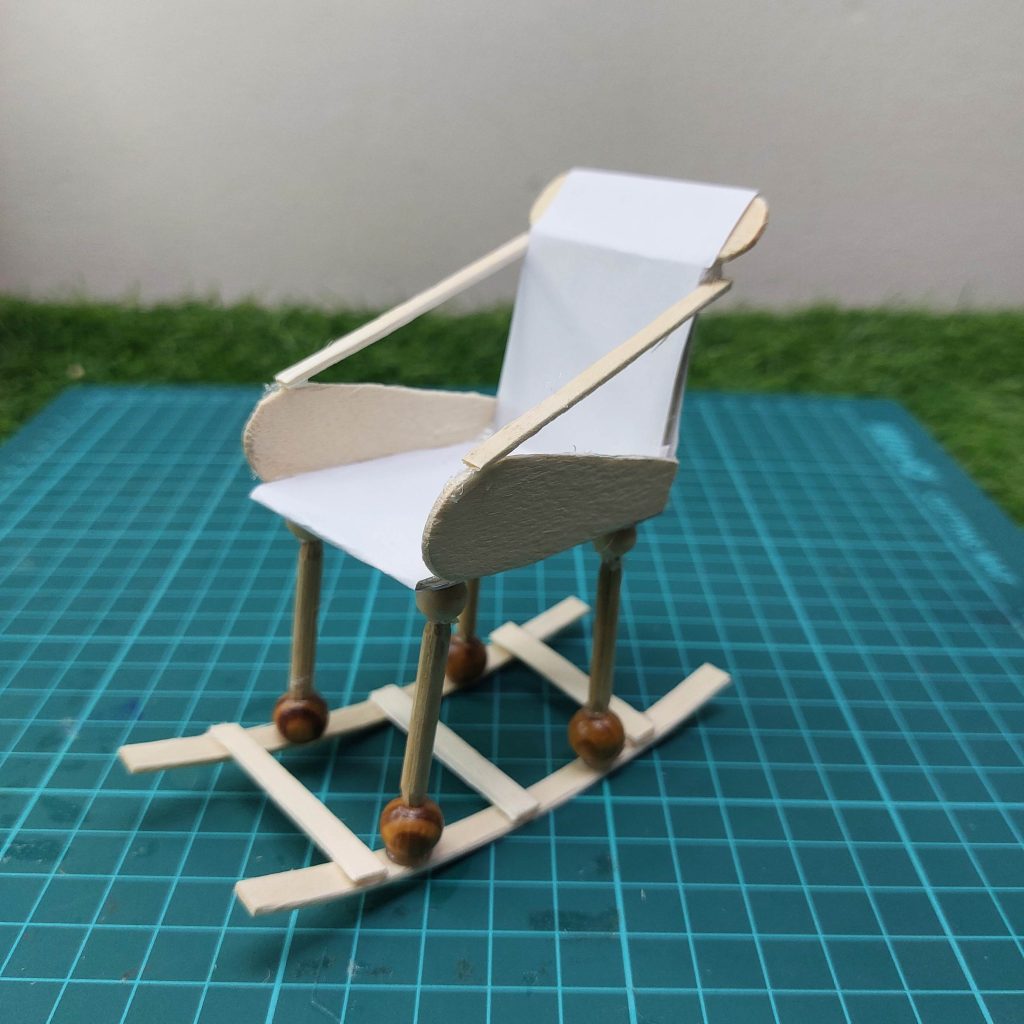
There we go: the basic structure is finished!
How You Can Finish or Decorate Your Miniature Swing Chair
And that’s the basic build done! But of course… it doesn’t have to stop there.
If you want to take it a step further, here are some fun ideas to decorate and personalize your tiny swing chair:
Paint it in any color you like. I recommend acrylic paint — matte or satin finish looks great for furniture.
Add a cushion or mini pillow made from scrap fabric or felt. You could even stuff it with a bit of cotton or cushion filling for that comfy look.
Wrap the top swing bars with twine or thin rope to give it a boho feel.
Make a blanket or drape a tiny towel over the side.
Add tiny books or a mug on the armrest if you’re building a scene around it.
Basically: make it yours. I’d love to see what you do with it. Feel free to tag me if you post it online, I am on many socials!
Leave a comment down below if you have any questions!


")
")


")


i like the chair. i wil make tomorrow for me one or more. thanks a lot
You’re welcome, enjoy!