
Welcome to my first official DIY workshop article! In this blog post, I’m showing you step-by-step how I made a tiny side table (or tray table) for my dollhouse using popsicle sticks and a few simple tools.
I asked you in one of my newsletters, you answered, and this is why this article is the start of a growing series.
I’ll be adding more mini projects here regularly, all with step-by-step photos and measurements. So if you’re looking for inspiration beyond my YouTube channel (yes indeed, video tutorials can be sometimes hard to follow), you’ll find plenty of practical how-tos right here.
( and to be honest, it is less editing work for me as well. You don’t necessarily need all the bells and whistles, do you? hahaha )
Let’s get started with the first project!
1 Miniature Side Table (Tray) – Popsicle Stick Build
This tiny tray table looks cute in any room or garden setup. It’s simple to build, even if you’re just starting out with miniatures.
I made a similar one for my backyard shed, but back then, I used regular plywood.

📏 Measurements
Here’s what I used for this build with popsicle sticks:
- Tray base – 6.2 cm (5 pieces)
- Tray edges (length) – 6.5 cm
- Tray edges (width) – 3.9 cm
- Legs – 7 cm
- Support beams – 5 cm

🛠 What You’ll Need:
- 2 small metal handles (you can skip these if you want a plain tray)
- 1 strip of wood, 2×2 mm
- Wood glue (I used Grab Fast Tacky Glue)
- popsicle sticks (the thinnest ones you can find)
- 2 cocktail sticks
- A small drill bit (1.5 mm). Another use for my mini drill.
A pin vise (manual hand drill) can work to or press and twist a small screw or screwdriver to dig into the wood, though it can split if you’re not gentle. - a sharp crafting knife

✂ Step 1: Cut the Pieces
Start by cutting the popsicle sticks and wooden strip to the measurements listed above. I used a sharp crafting knife. This will form the tray base, edges, legs, and support beams.
🧩 Step 2: Assemble the Tray Top

Glue a small 2.2 cm piece across the popsicle sticks that make up the tray base (this will become invisible upside down), leaving about 1 mm of space between each stick.
Then glue the side strips (6.5 cm and 3.9 cm) around the edge of the tray to form a frame.
Next, cut four 3,5 cm pieces from the 2×2 mm wooden strip. Drill a small hole in the center of each one, then insert a cocktail stick into the hole. Add a little glue on the outside to secure it. These will become the legs.
🔧 Step 3: Assemble the Table
Turn the tray upside down and temporarily hold the legs in place (you could use a bit of temporary Tacky wax). This makes it easier to position the support beams.
Maybe don’t be like me and just hold them in place until the glue dries hahaha.

Glue the 5 cm support stick between the legs on one side, then glue the other between the legs on the other side. This will give the table stability.
Finally, glue the small handles onto the sides of the tray. ( or not )
💡 Tip: When making small holes in popsicle sticks, place the stick on a crafting mat for support. A regular self-healing cutting mat works perfectly: it gives you just enough grip and protection without risking cracks in the wood.
That’s It – Your Tray Table Is Done!

This is such a fun little piece to make, and it fits well in both indoor and outdoor dollhouse scenes.
Have fun building!
Project 2: Miniature Lounge Chair & Matching Bench (Made with Popsicle Sticks and Skewers)
For the second project in this workshop post, I built a miniature lounge chair with a separate bench. It’s the perfect little set for a dollhouse patio, garden, or sunroom.
The materials are simple: popsicle sticks, wooden skewers, and a few rounded pieces.

🛠 What You’ll Need:
For the lounge chair:
- 17 popsicle sticks (10 cm each)
- 2 wooden skewers ( Shashlik Sticks, 16 cm)
- 2 wooden skewers (4.5 cm)
- 1 round stick (6 cm long)
- 4 chopstick pieces, 2 cm each
For the bench:
- 5 popsicle sticks (10 cm each)
- 1 support piece (6 cm wide)
- 4 chopstick pieces (legs), 2 cm each
Glue:
Stick with Tacky Glue or wood glue for clean joints and a strong, neat finish. You can use Tacky Wax temporarily to hold tricky parts like legs while you position them, then reinforce them with glue.
And again, a nice and sharp crafting knife, and some sandpaper.
🧮 Note on Scale:
These lounge pieces are roughly based on a 1:12 scale, but they lean slightly larger, especially the chair. At 10–16 cm long, it translates to around 120–190 cm in real life, which would make it a deep and oversized recliner in full scale. The bench is closer to true 1:12 proportions.
That said, in the world of miniatures, a little size variation is completely normal, especially for garden or patio furniture. It’s more about what looks good in your scene than strict measurements!
🪑 Step 1: Assemble the Lounge Chair
Lay your two 10 cm popsicle sticks parallel to each other—these form the seat and backrest.


Use the 16 cm wooden skewers to connect the popsicle sticks on each side. Add the 4.5 cm skewers as support beams for the headrest.
Then, glue the 6 cm round stick across the top of the chair, so you can glue the headrest on it.
I hope the pictures below show what I mean:


So, your lounge chair should now be at an angle.
After that, you can glue the 4 chopstick pieces vertically to the bottom, as legs.
You could decorate the headrest with a pillow 🙂

🪵 Step 2: Build the Bench
The bench is a quick and satisfying build.
Place the five 10 cm popsicle sticks side-by-side as the seat. Underneath, attach the 6 cm support piece to hold them together.
For legs, glue the four 2 cm chopstick pieces vertically at each end. Make sure they’re level so the bench stands evenly.


✨ Finishing Touches
Once everything is glued and dry, gently sand any rough edges or dried glue. You can leave it natural for a rustic look or paint it to match your dollhouse style.
💡 Tip: If your wooden skewers are slightly curved or uneven, roll them on a flat surface before using—they’ll straighten out with light pressure.
Would you like a variation of a way to create a dollhouse lounge chair? Then you still might want to check out one of my videos!
Project 3: Miniature Clothes Hanger from a Paperclip
This third project is a quick and fun one, perfect as a small detail for a dollhouse bedroom or laundry area. I made a tiny clothes hanger using just a basic paperclip and a bit of patience.


🛠 What You’ll Need:
- big metal paperclip, 5 cm’s
- Small pliers (flat-nose or round-nose are ideal)
- Optional: ruler for more precision
🌀 How I Made It:
- Lay the paperclip flat in front of you.
- Bend it upward, using the smaller curved part.
- Cut off that smaller section.
- Use round-nose pliers to bend the wire further, shaping it gently.
- Form a question mark shape—the total length should be around 3 cm.
- Just below the hook, bend the wire to the right, then bend the end downward. Take a leftover piece and cut it to the correct length.
- Solder the ends together if you like (or use a strong glue), and paint the hanger in any color you want.


💡 Tip: If you’re using silver-colored paperclips, a quick buff with fine sandpaper makes them look a bit more realistic—like brushed metal. Or paint them any color you like
Project 4: A Miniature Birdhouse
For the fourth project in this workshop series, I made a tiny birdhouse that fits perfectly into any dollhouse garden or balcony scene.
It’s a simple build using thin wood and popsicle sticks — and you can decorate it however you like, from a winter scene with snow to a cheerful summer version with flowers and greenery.
🛠 What You’ll Need:
- Popsicle sticks
- 2 mm-thick wood or cardboard
- 2 cocktail sticks
- 4 mm drill bit or similar tool (for the entrance hole)
- Wood glue or Tacky Glue
- Paint (optional: white for snow, green for moss, etc.)
- Decorative “green stuff” or fake snow (optional)
📏 Measurements I Used:
- Birdhouse sides: 4 pieces of 3.5 cm
- Birdhouse front/back: 4 pieces of 2.5 cm
- Roof pieces: 2 pieces of 1.9 × 1.9 cm
- Base platform: 4 × 4 cm
- Perches: 2 pieces of cocktail sticks, 1 cm each (cut from the pointy ends)
🧰 How I Made It:
- Cut the wood pieces:
I cut four 3.5 cm pieces and four 2.5 cm pieces from popsicle sticks for the sides and front/back walls. - Create the base: I sawed a 4 × 4 cm square piece to serve as the bottom of the birdhouse.
- Assemble the walls: I glued the side and front/back panels together and attached them to the base.
- Overlap the sides: I glued the side walls behind the front panel so the birdhouse has a nice shape and stability.
- Add the roof: I cut two small squares of 1.9 × 1.9 cm for the roof. You can adjust the size if you prefer a more dramatic overhang.
- Drill and perch: I drilled a small 4 mm hole in the front for the entrance. Then I cut two 1 cm cocktail stick pieces from the pointed end and glued them just below the holes to make little perches.
- Paint and decorate: you can paint the houses as a bright summer birdhouse with some green moss and flowers. But you can also add a winter scene with fake snow.
💡 Tip: If you don’t have a drill, you can carefully twist a thick sewing needle or push pin to create the entrance hole. Just go slow and use a crafting mat underneath


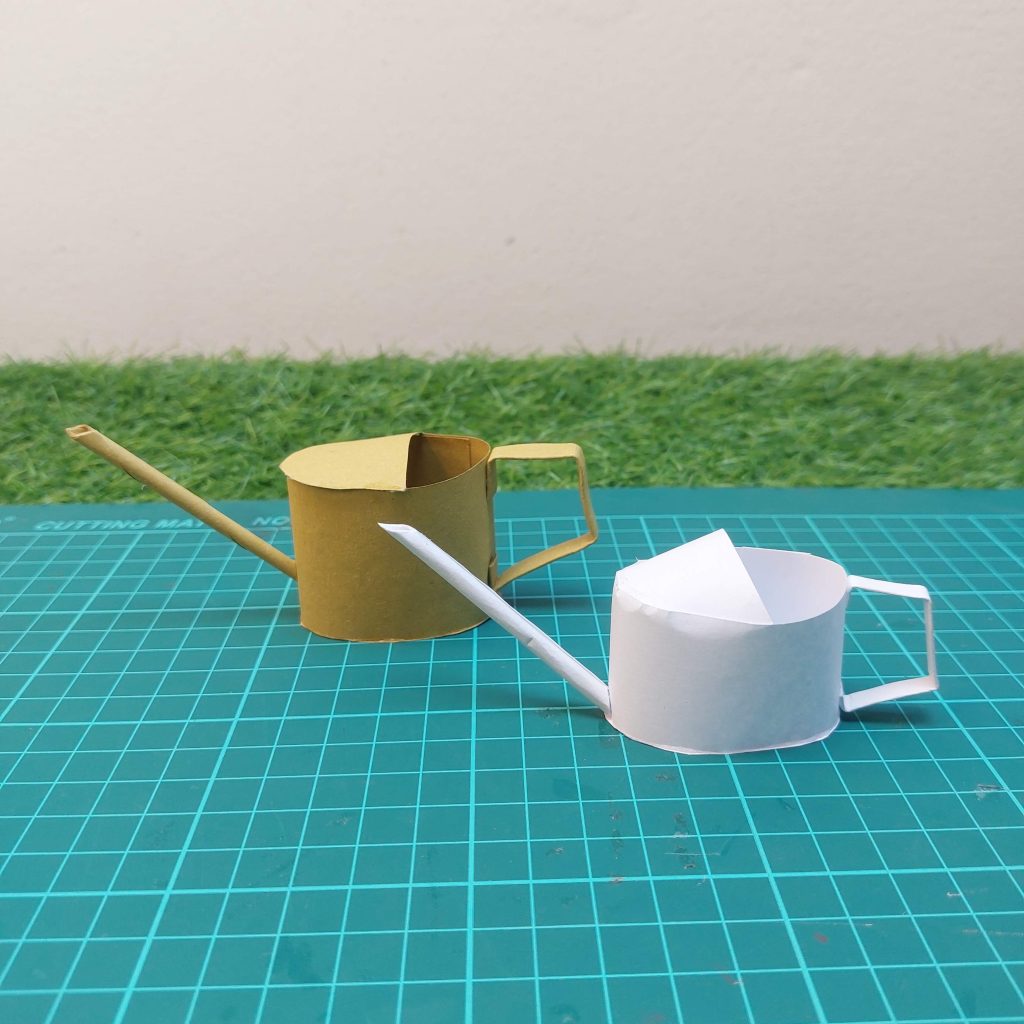
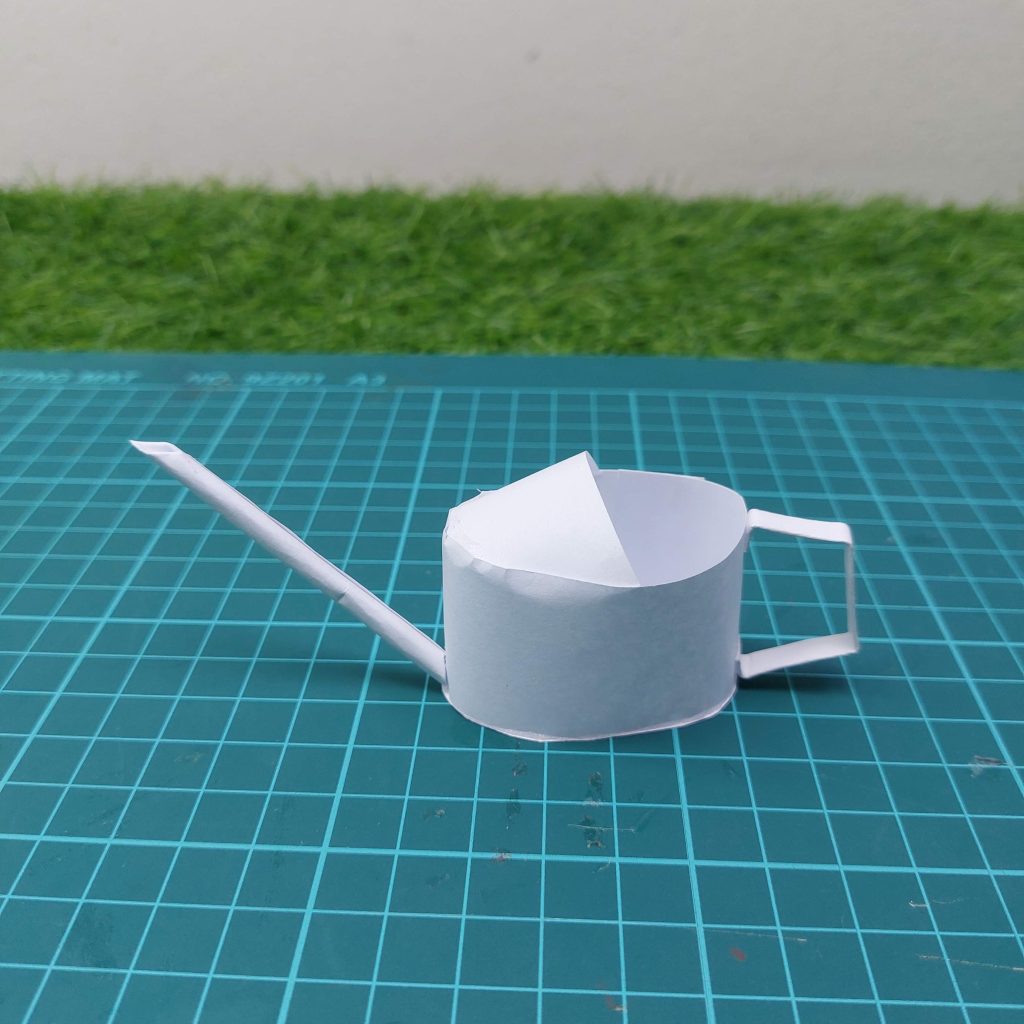
Project 5: How to Make a Miniature Watering Can from Paper (Scale 1:12)
This tiny watering can is made entirely from paper and a skewer stick — and it’s surprisingly sturdy. It’s perfect to place next to a dollhouse garden scene or on a miniature potting table.
Materials Needed
- Thick white paper (approx. 120–160gsm)
- Craft glue or UHU all-purpose glue
- Wooden skewer (or round toothpick)
- Scissors
- Ruler
- Pencil
Dimensions (1:12 scale)
- Body wall / Cylindrical Wall 3×14cm
- Spout: approx. 5 cm
- Handle: approx. 5 cm
- Bottom and top lids: cut from paper and shaped to match the cylinder
Step-by-Step Instructions
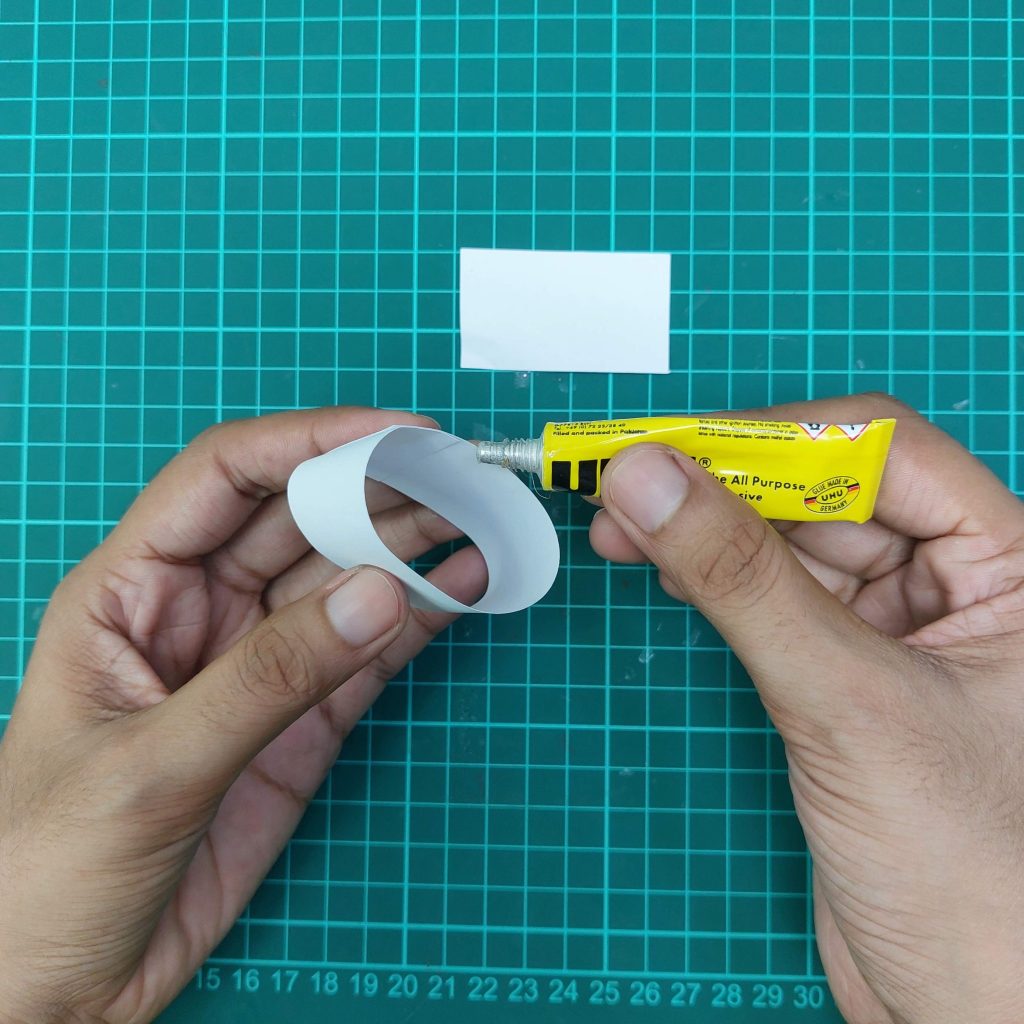
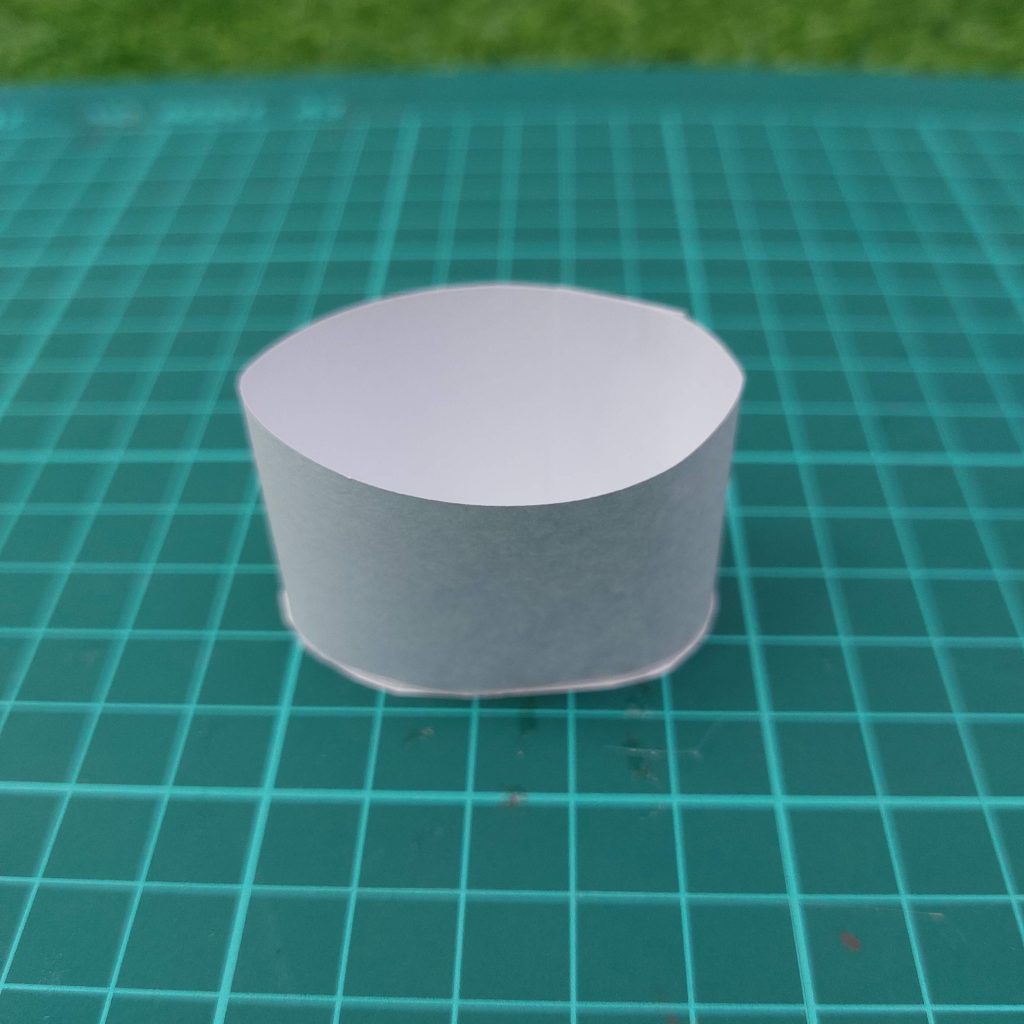
- Make the cylindrical body
Cut a strip of paper 3 cm × 14 cm. Roll it into a cylinder and glue the ends together. Once dry, cut a matching round shape for the base and glue it on.


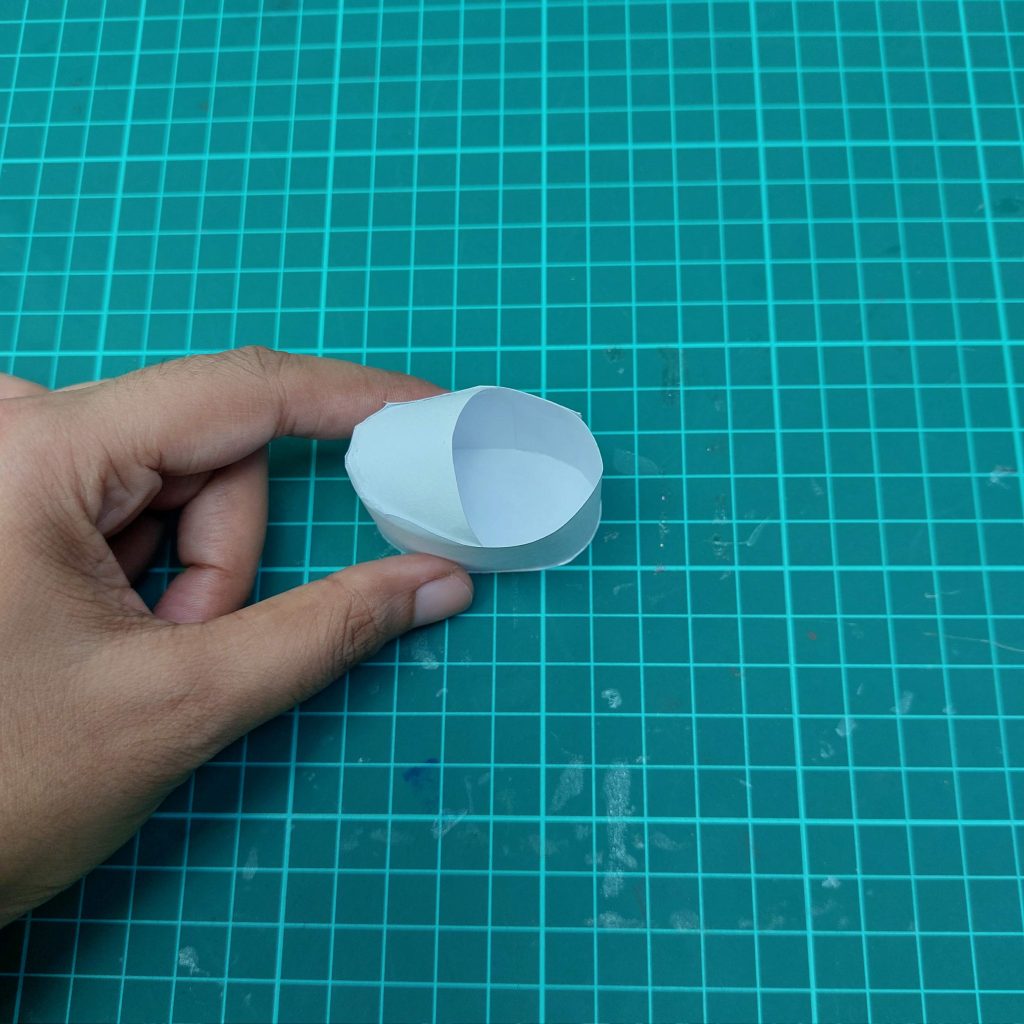
- Add the cone lid
Cut a quarter circle from another piece of paper and form it into a cone. Test it on top of your cylinder before gluing it down. Adjust the shape if needed.

- Shape the spout
Roll a 5 cm strip of paper tightly around a skewer. Glue the edge to hold the tube shape. Gently bend it into shape and snip off the end at an angle. Glue it to the cone top.
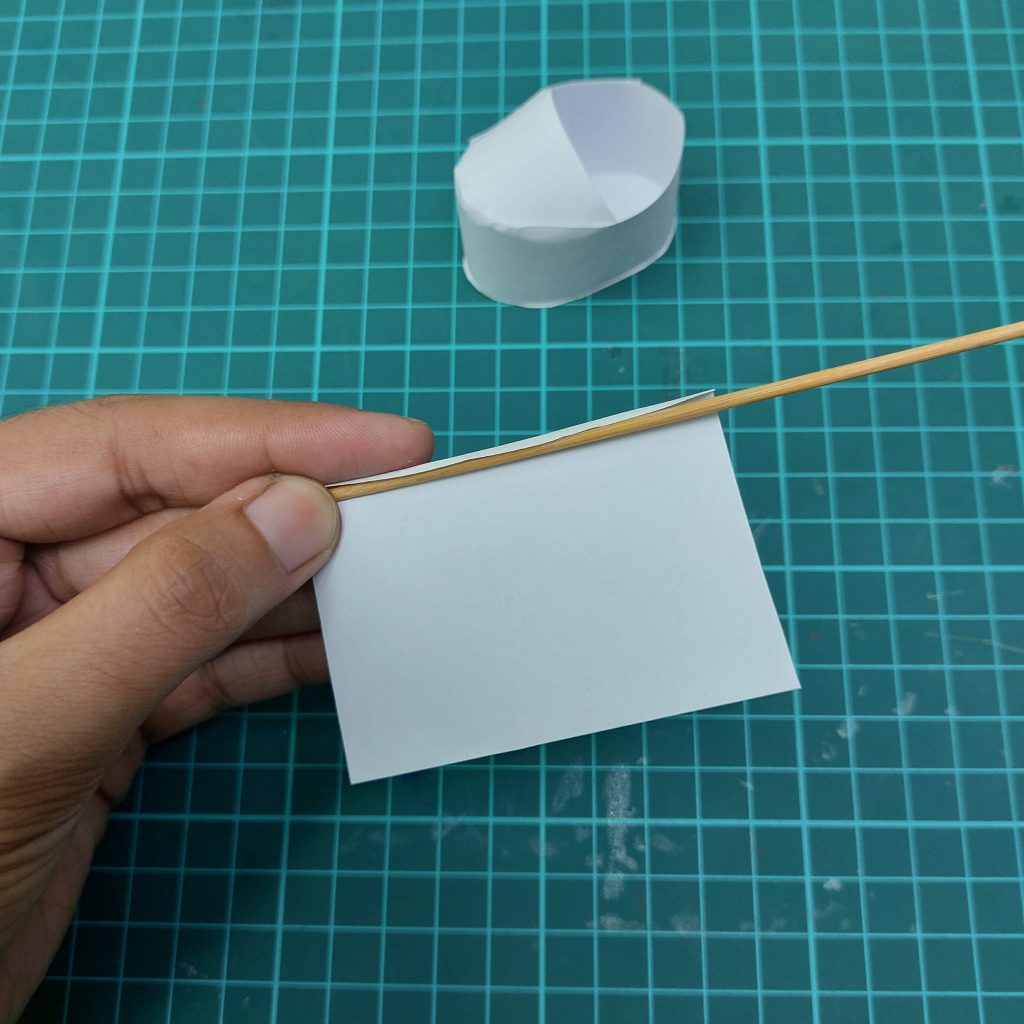
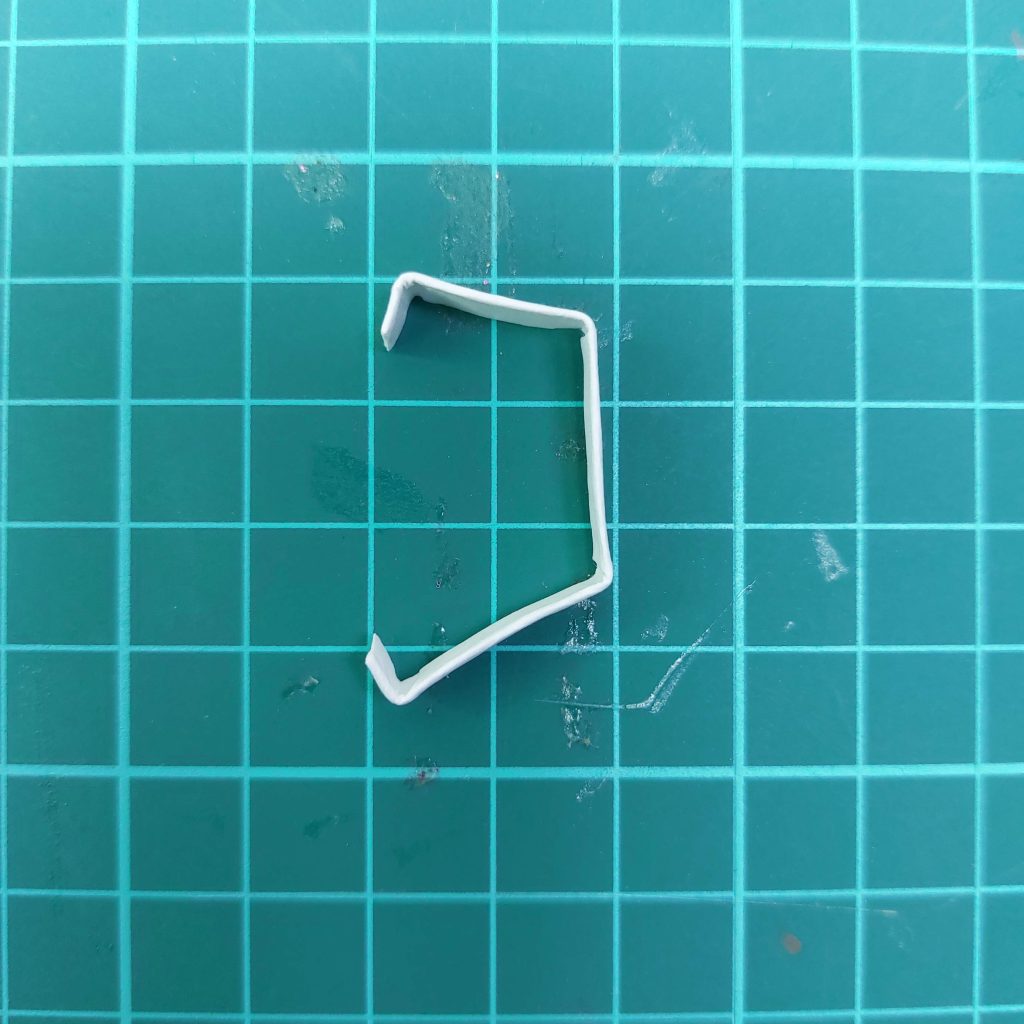
- Create the handle
Cut another strip (5 cm long) and fold it carefully into a squared “C” shape. Glue each end to the body, making sure the handle sticks out a little for a natural look.
- Paint (optional)
Once everything is dry, you can paint the watering can to match your garden scene. I left one white and painted the other a garden-green mustard tone. Both work great!
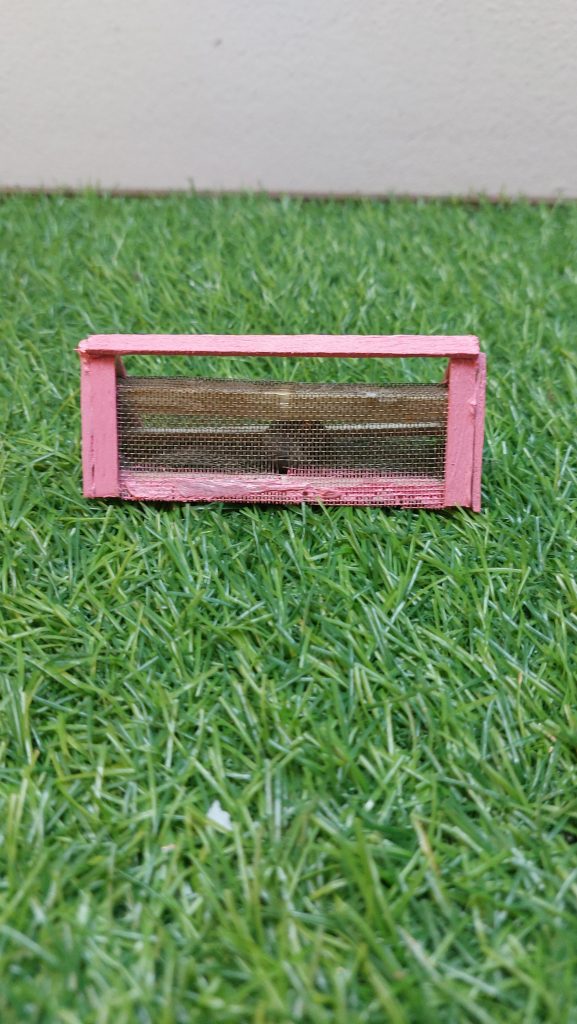
Project 6: How To Create a Miniature Chicken Coop? (1-12 scale)
This new project is a tiny chicken coop, the kind you’d see in a dollhouse garden or farm scene. I kept it simple and used only a few materials like popsicle sticks, cardboard, and mesh. Here’s how I did it, step by step:

What You’ll Need
- 2 mm thick wooden sheet (or cardboard, for the triangle ends)
- Wooden strips:
– 4 pieces of 5.5 cm (2 mm x 5 mm)
– 2 pieces of 13 cm (2 mm x 5 mm)
– 1 strip of 12 cm (5 mm x 5 mm) - Skewer stick: 12.5 cm long
- Wire mesh: cut to 12.5 cm x 15 cm
- Wood glue and strong glue (like Bison glue)
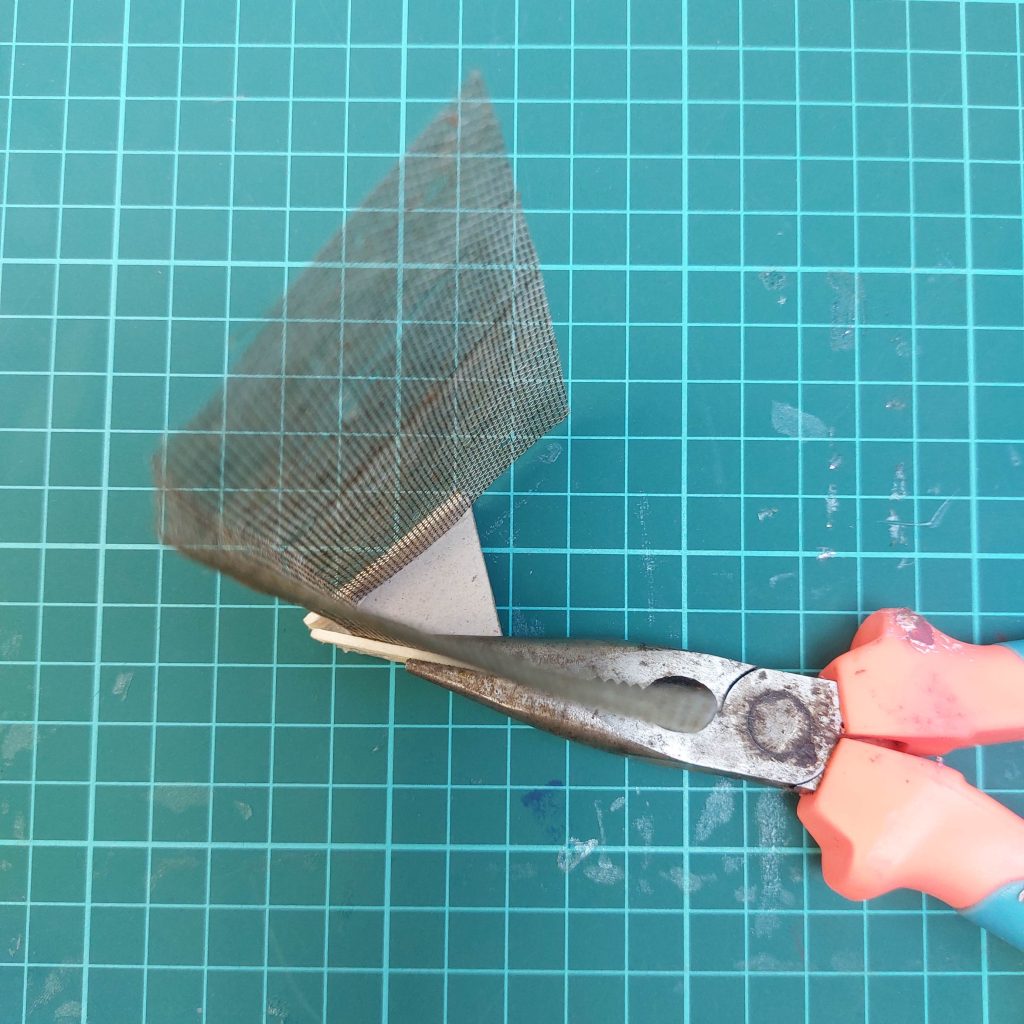
- Scissors or wire cutters
- Craft knife or small saw
- Cutting mat and ruler
Step-by-Step Instructions
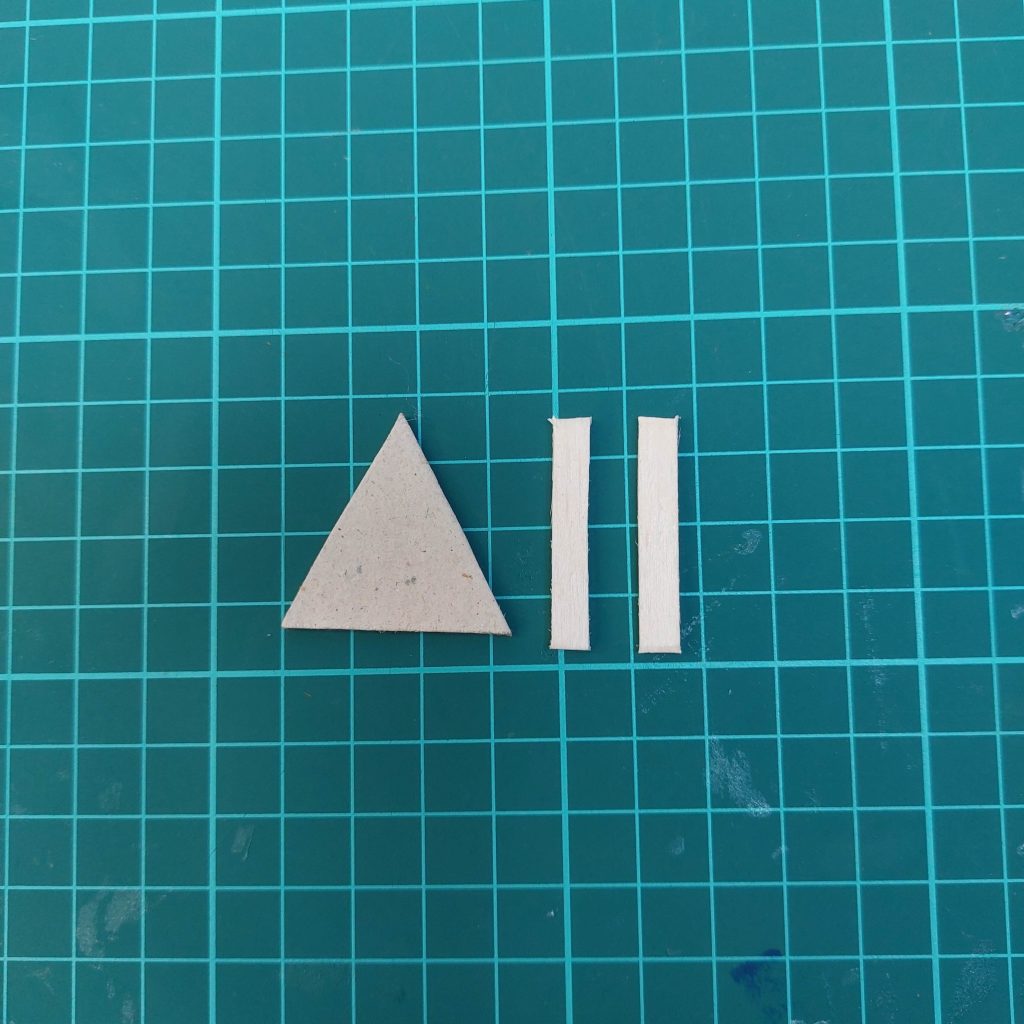
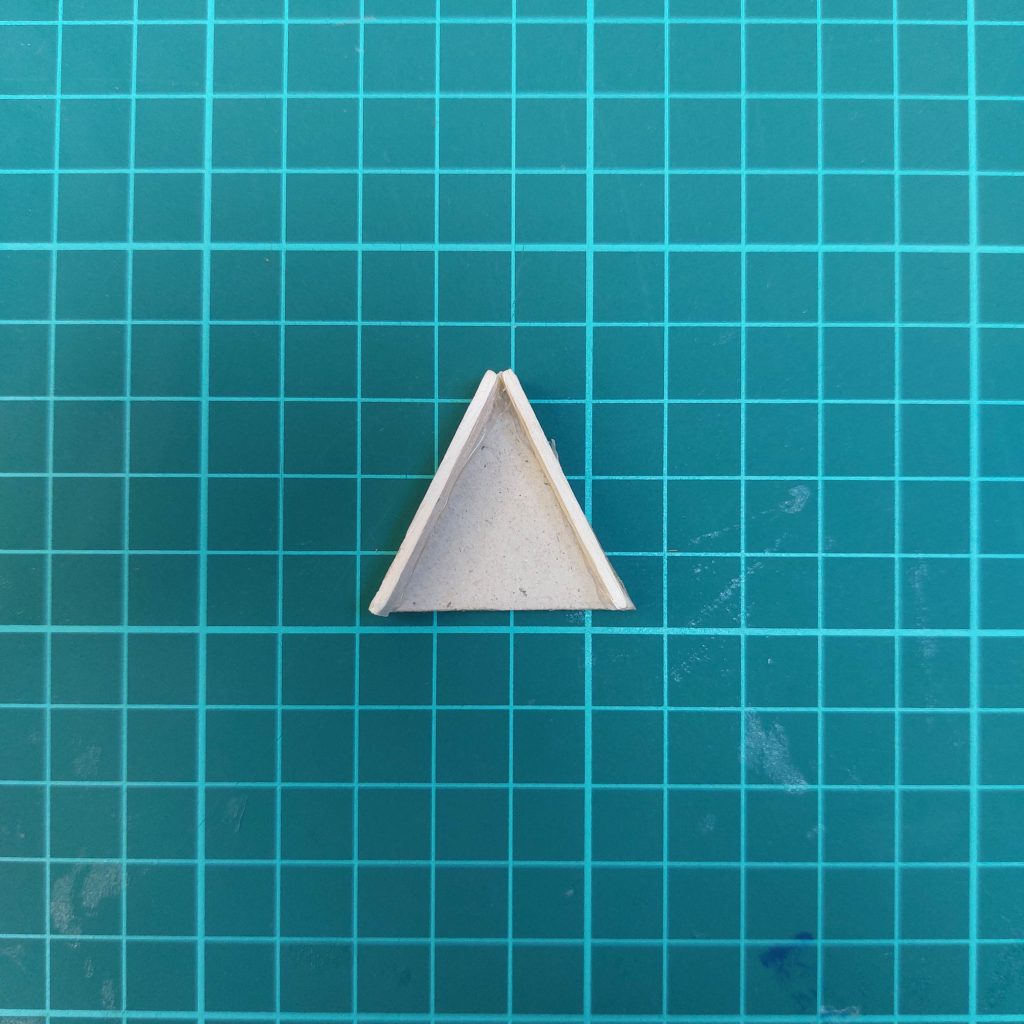
- Step 1: Prepare your pieces
Cut out a cardboard or wooden triangle that’s 5.5 cm tall and 5 cm wide at the base.
Glue the 5.5 cm long strips around the triangle — one on each side — to form the frame. The vertical ones should be glued standing upright. These will help support the mesh later.
- Step 2: Glue the center beam
Glue the 5×5 mm wooden strip (12 cm long) across the top center of the triangle. This will be your main structural beam.
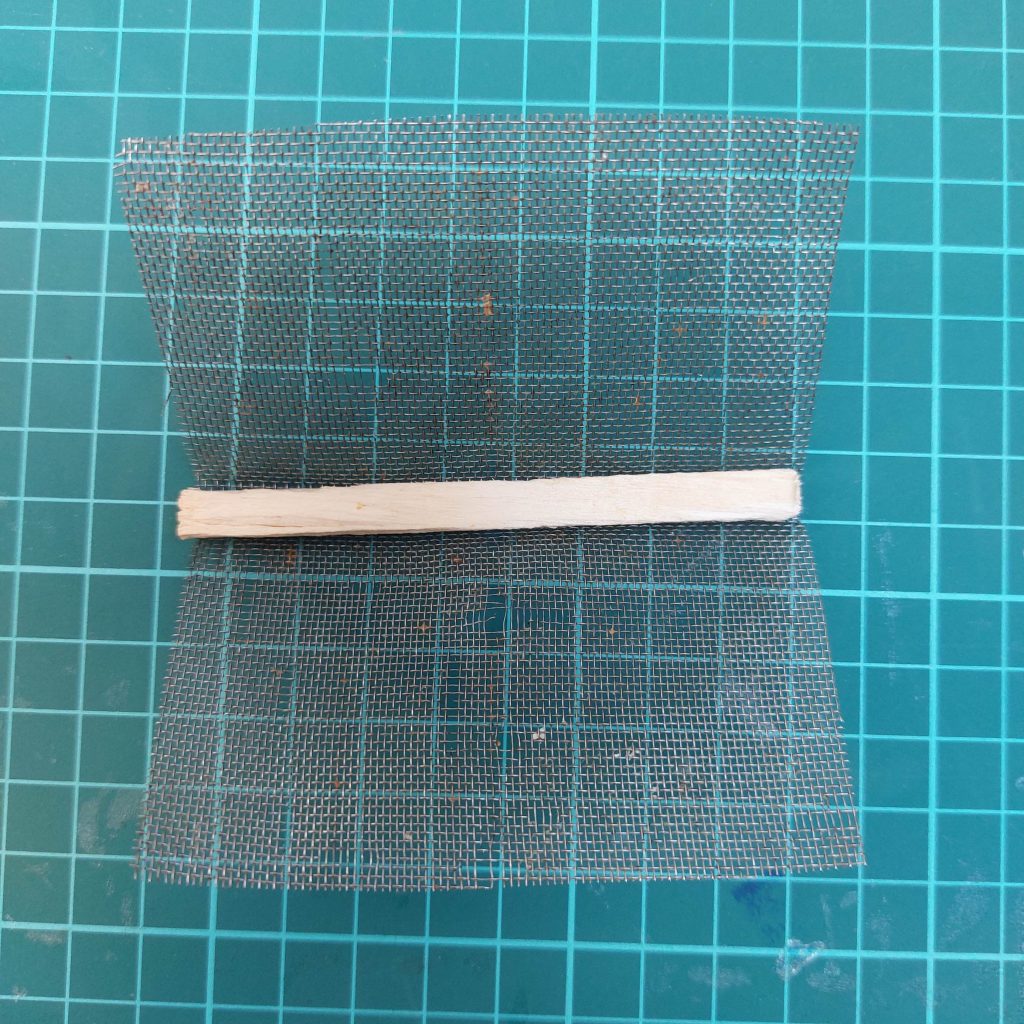
- Step 3: Assemble the side frames
Repeat the same triangle setup for the other side of the coop.
Now glue both triangle ends to your base (or hold them upright) and stretch the wire mesh between them. Bison glue works best here to stick the mesh to the wood.

- Step 4: Finish framing the mesh
Glue one of the 13 cm wooden strips along the bottom edge, pressing the mesh tightly against it.
Then glue the second 13 cm strip on the outside bottom edge as reinforcement.
- Step 5: Add the roof beam
Glue the skewer stick (12.5 cm long) along the top to close the structure and finish the roof beam. You can also paint it for extra charm!
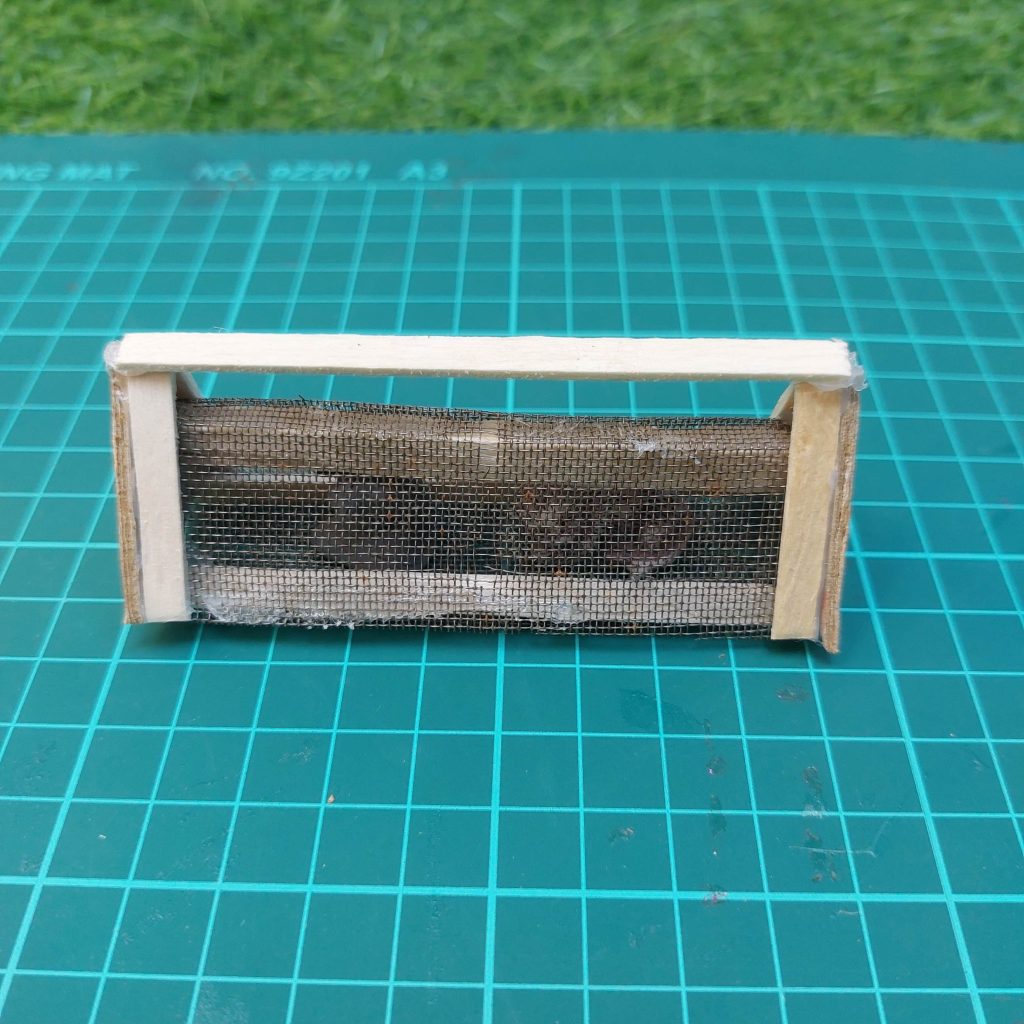
Final Touch
That’s it! Once it’s dry and sturdy, paint it in any color you like — I went for hot pink because… why not? 😊 This little coop works great as a standalone garden piece or as part of a full miniature farm.
Looking at it now, you could also glue another piece of wood to the front and back of the mesh (below), so it would look ‘cleaner’, totally up to you! (if you know what I mean?)
This workshop will be expanded soon!
By the way, have you seen my miniature patio popsicle stick chair yet?
Related article: how to create dollhouse accessories from everyday materials?
My Final Conclusion
If you have any questions about anything from this workshop, feel free to ask them down below in the comment section and I wish you happy crafting!
Kind regards,
Lizzy

Hi everyone!
My name is Lizzy, and I am an amateur miniaturist obsessed with everything in the dollhouse and miniature world, ever since I was a teenager.
So far, I have created 2 dollhouse projects, a backyard shed and a miniature treehouse, tons of DIY dollhouse kits, and “hacked” some.
I also created a fairy garden, and lots of small and simple miniature projects on my YouTube channel. (mostly made from trash or everyday items).
I love to write as well about all things happening in the miniature world, hence the reason why I created this blog!
I wish you happy reading and crafting!
Lizzy
")
")


