If you’re anything like me, you can’t resist adding little handmade touches to your dollhouse setup. That’s why today I’m sharing three easy DIY dollhouse accessories you can make from everyday materials: miniature pencils, a tiny wooden crate, and some bowls and plates made from quilling paper.
These projects are quick, fun, and beginner-friendly, but they still look surprisingly realistic once finished, so grab your glue and let’s get to it!
As an Amazon, Etsy and Anavrin associate, I earn a small commission from your purchase, with no extra charges for you.
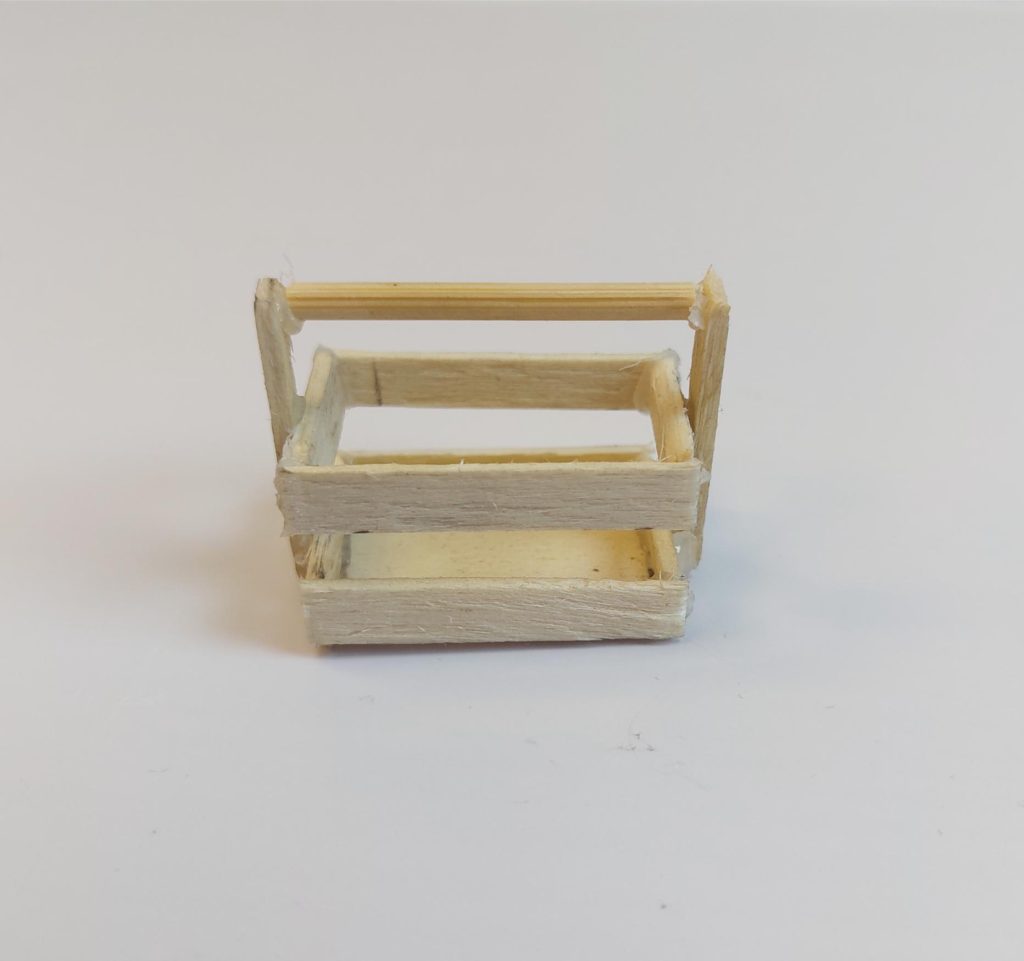
1. DIY Miniature Popsicle Stick Crate
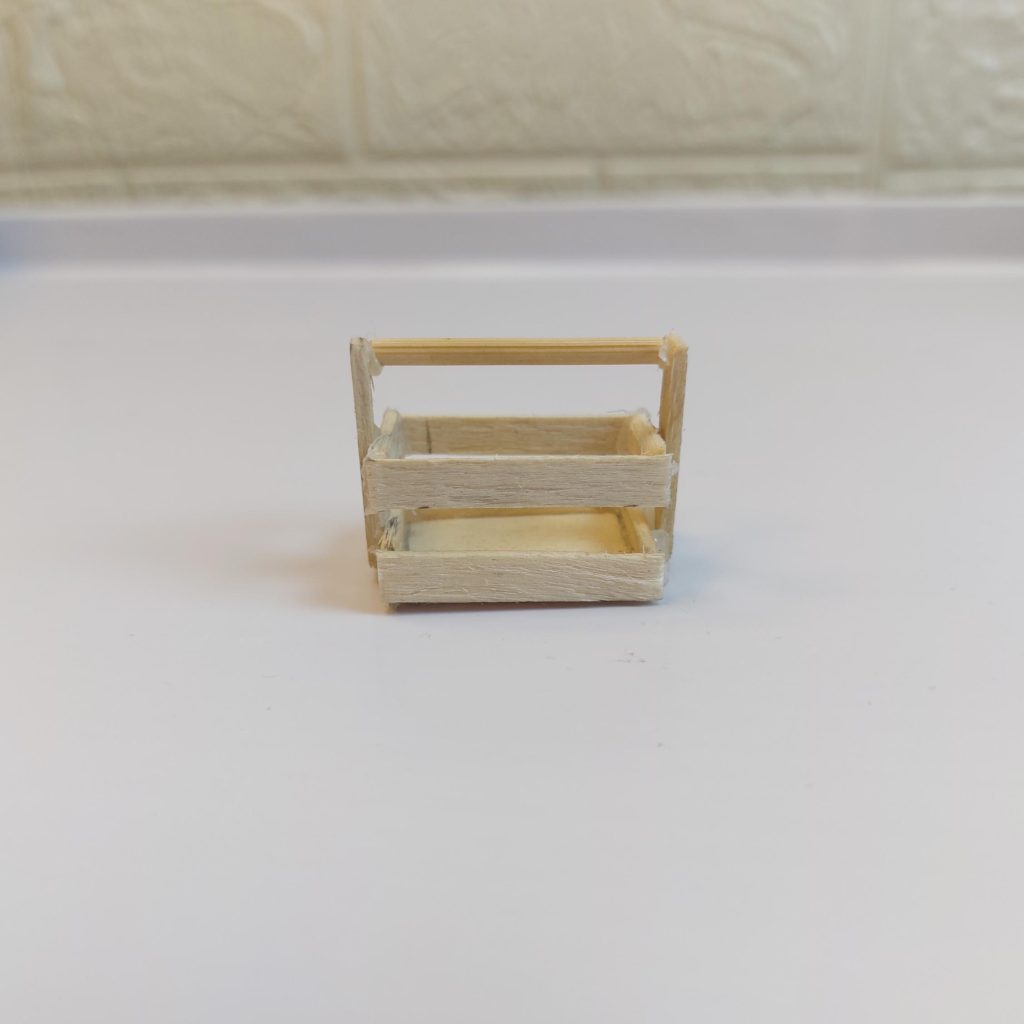
If you’re looking for a quick and fun project to add charm to your dollhouse, this little wooden crate is perfect. It’s simple, rustic, and you can fill it with fruits, bottles, and more. Plus, all you need are popsicle sticks and a bit of glue. Let’s get started!
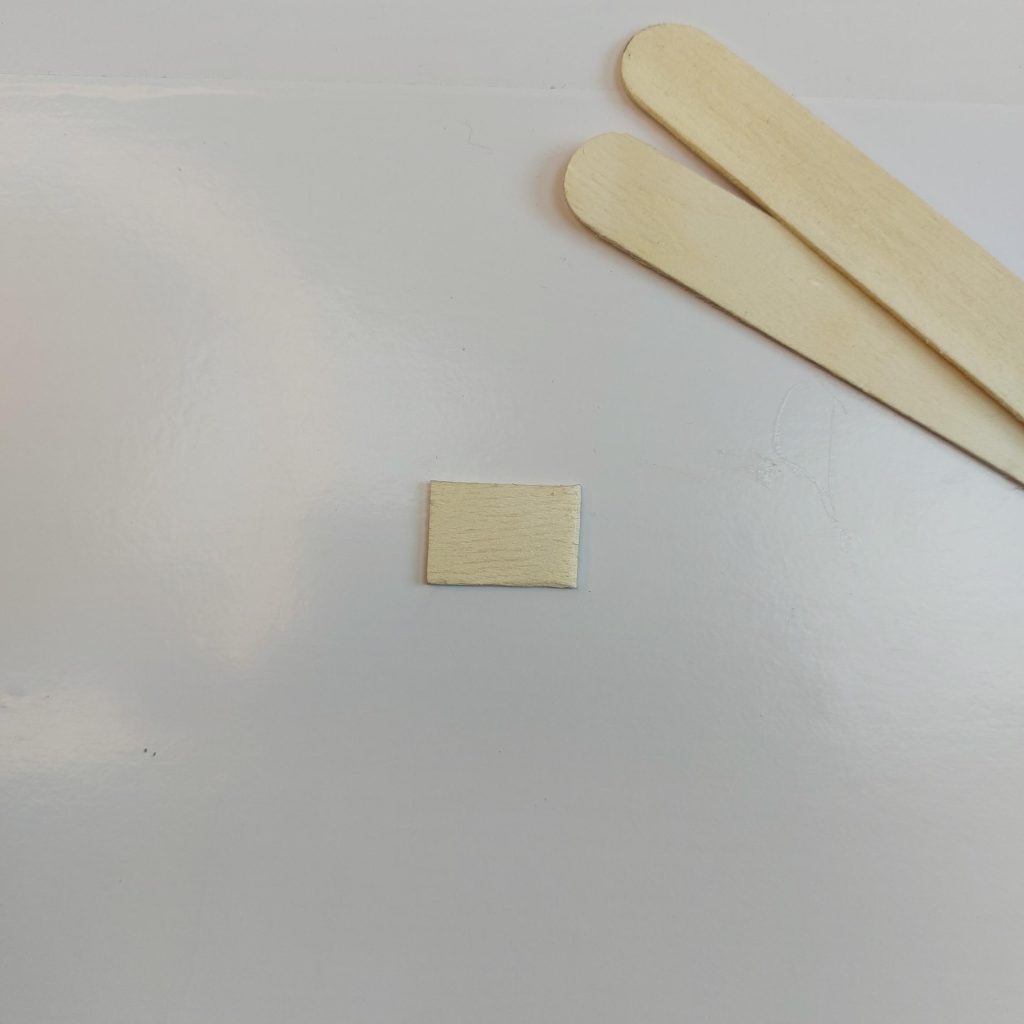
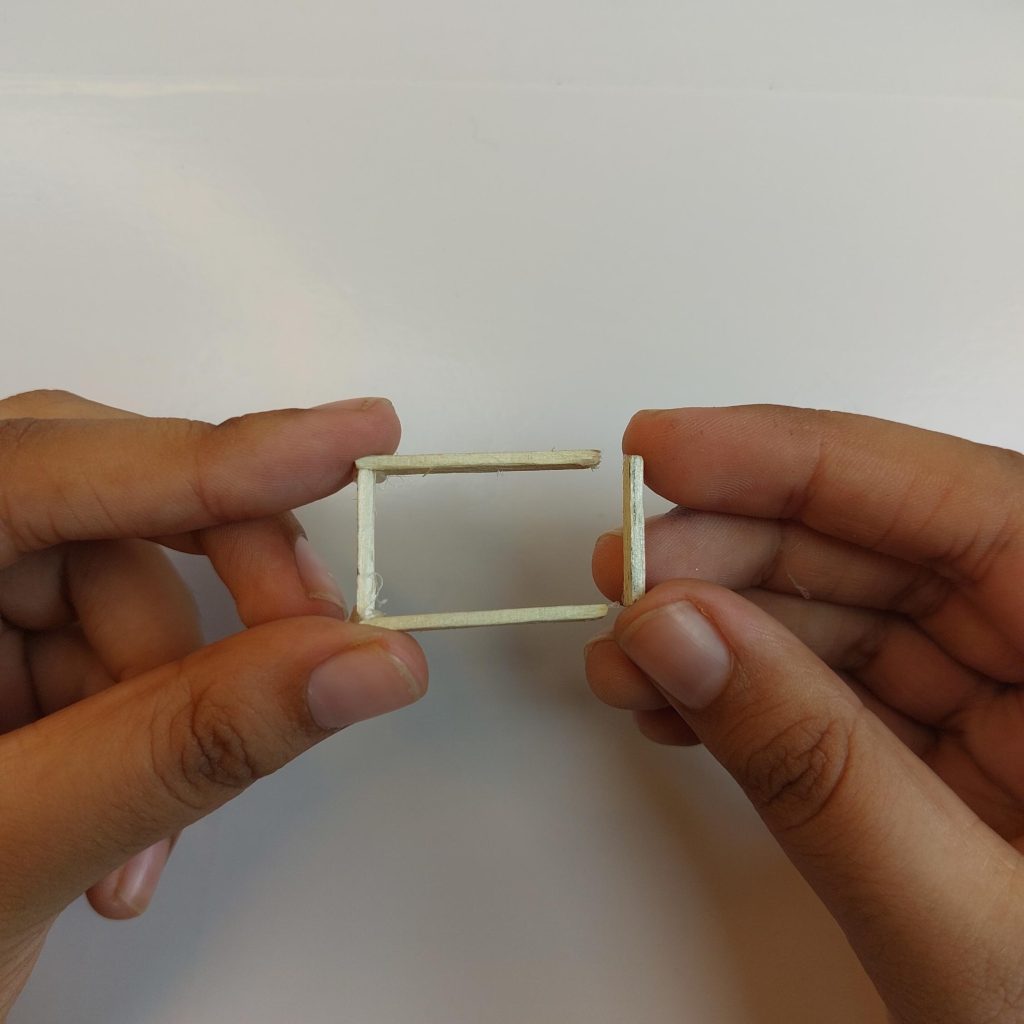
Cut a small rectangle from a popsicle stick. This will be the bottom of your crate. Size is up to you, depending on how big or small you want the crate to be.
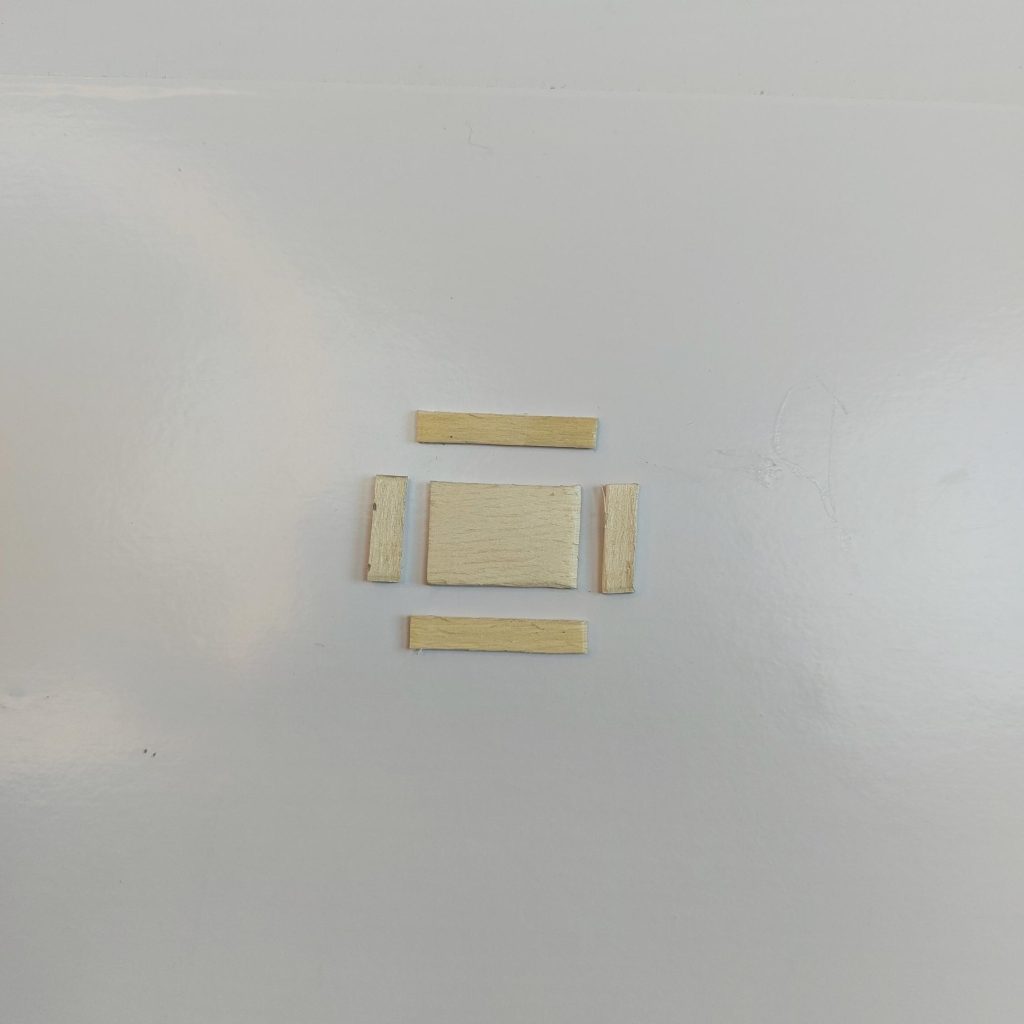
Step 2: Cut the Side Pieces
Cut four narrow strips from popsicle sticks—two long and two short—to match the length and width of your base. These will form the frame of your crate.
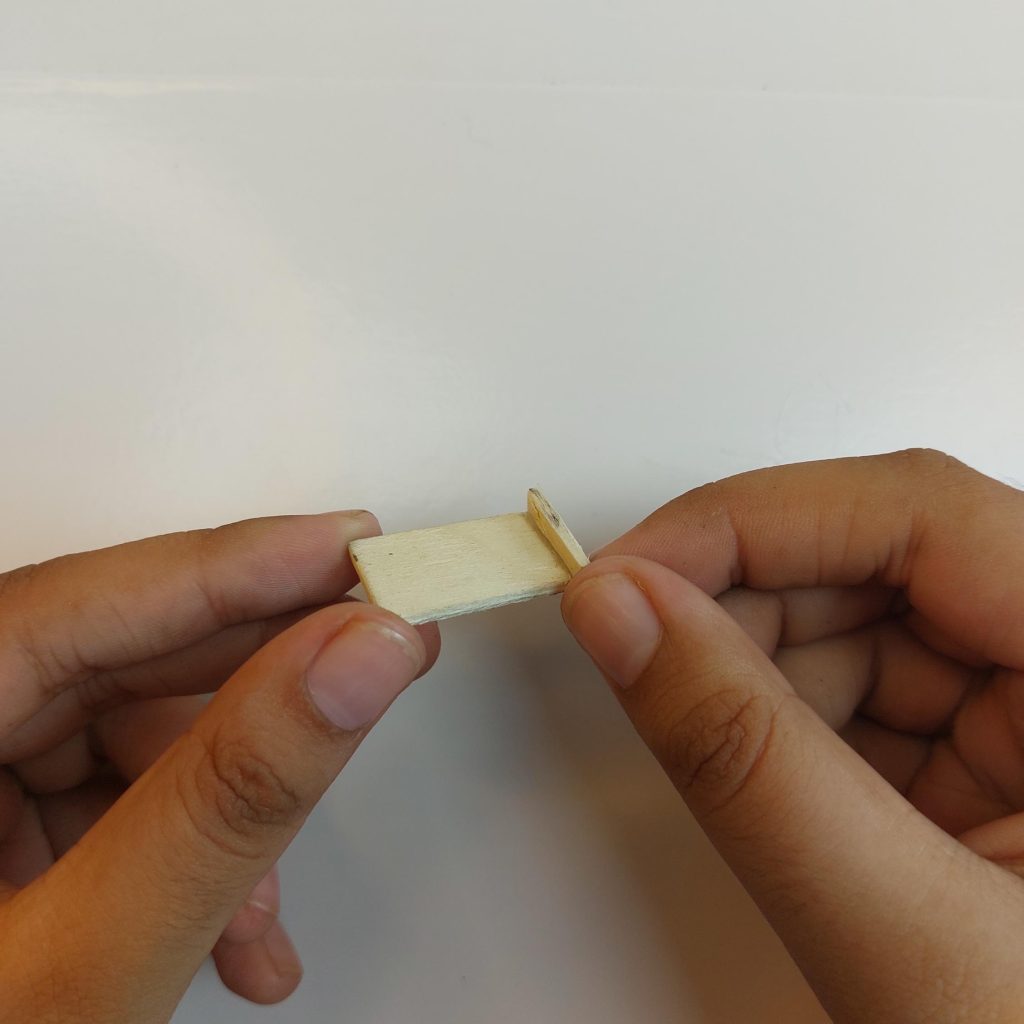
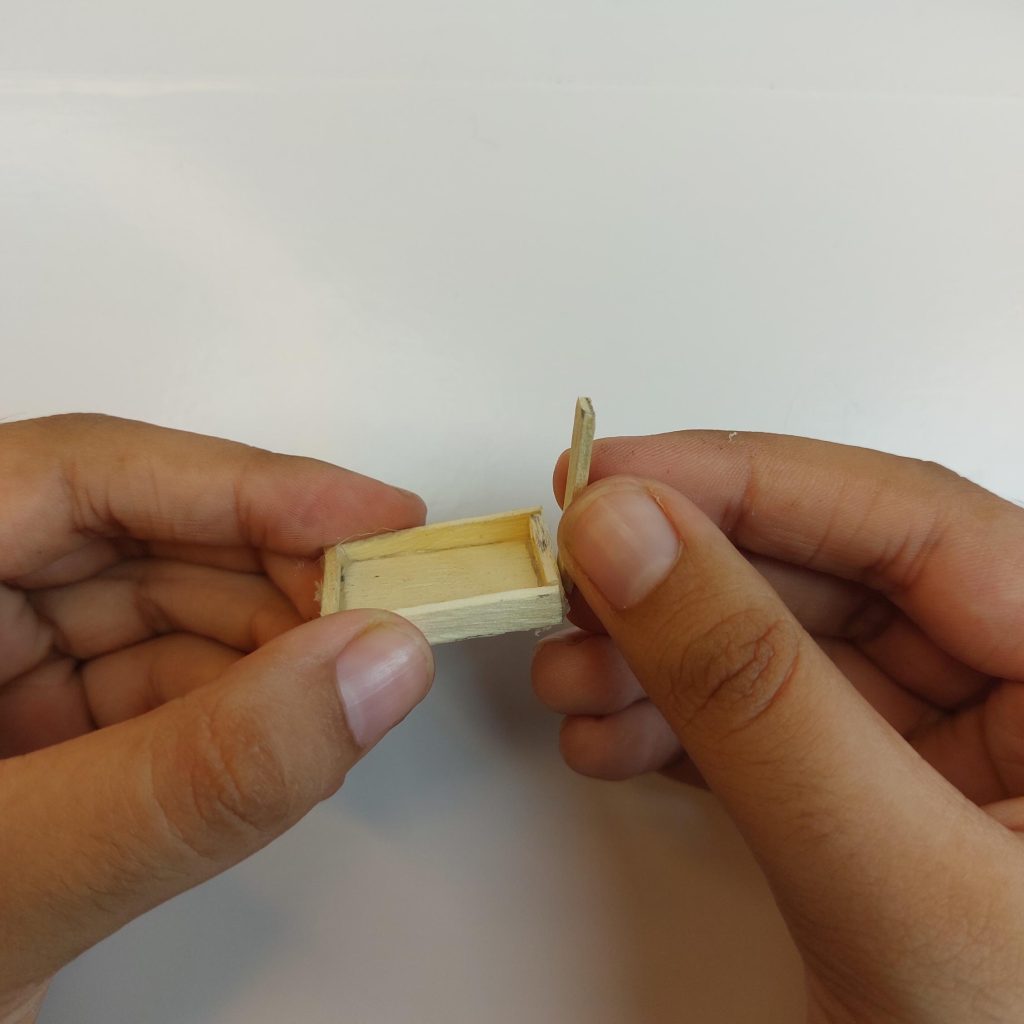
Step 3: Glue the Frame
Glue the strips around the base to make a shallow box. Hold them in place until the glue sets, or use hot glue for quicker results.
Step 4: Add the Side Slats
Cut more popsicle sticks into thin strips and glue them horizontally along the sides of your crate. Add two layers of slats on each side to get that classic crate look.
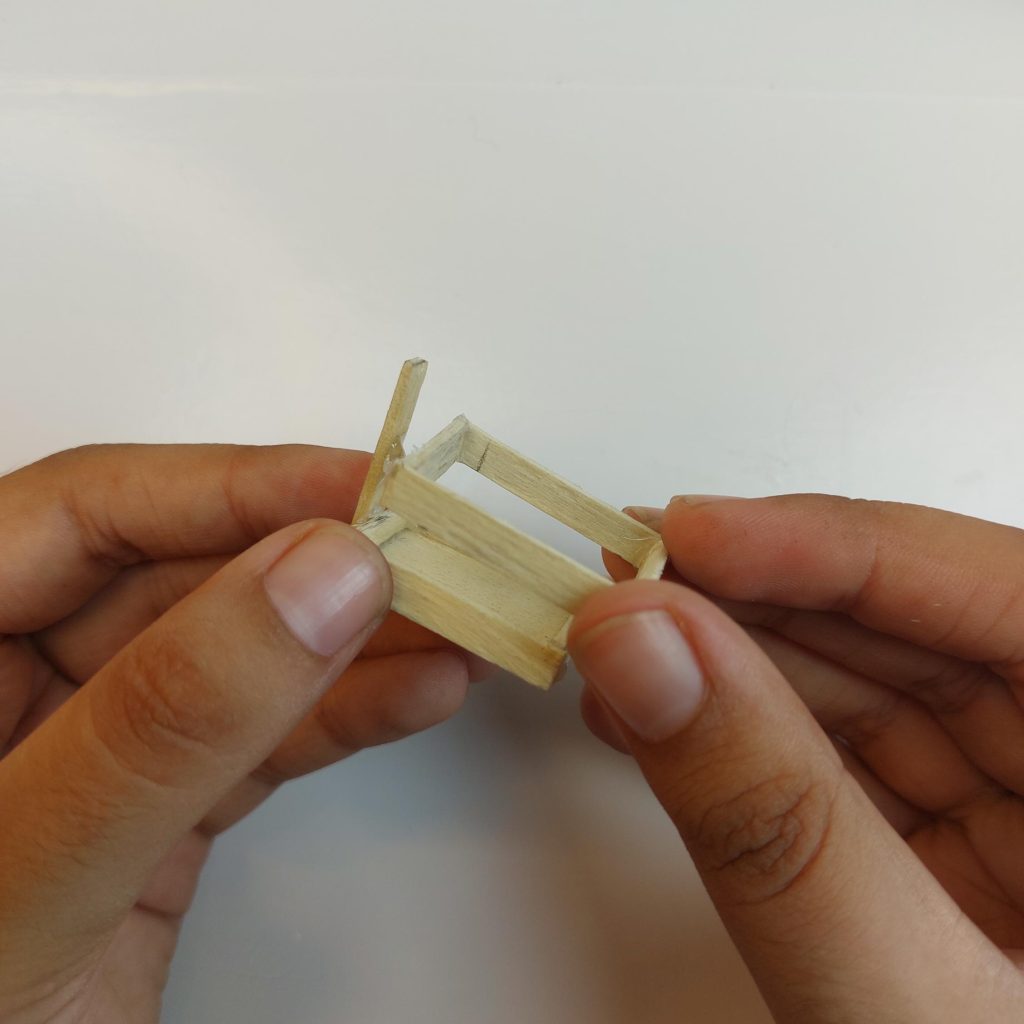
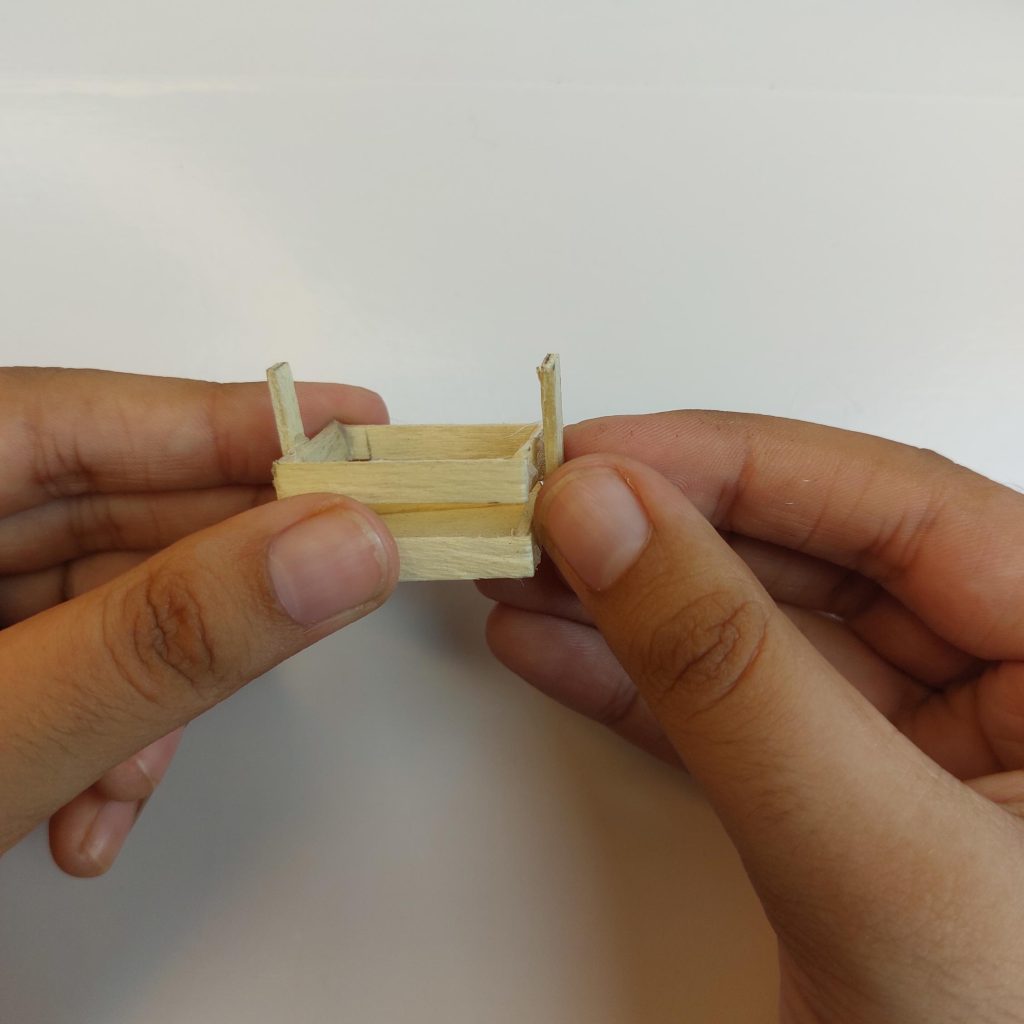
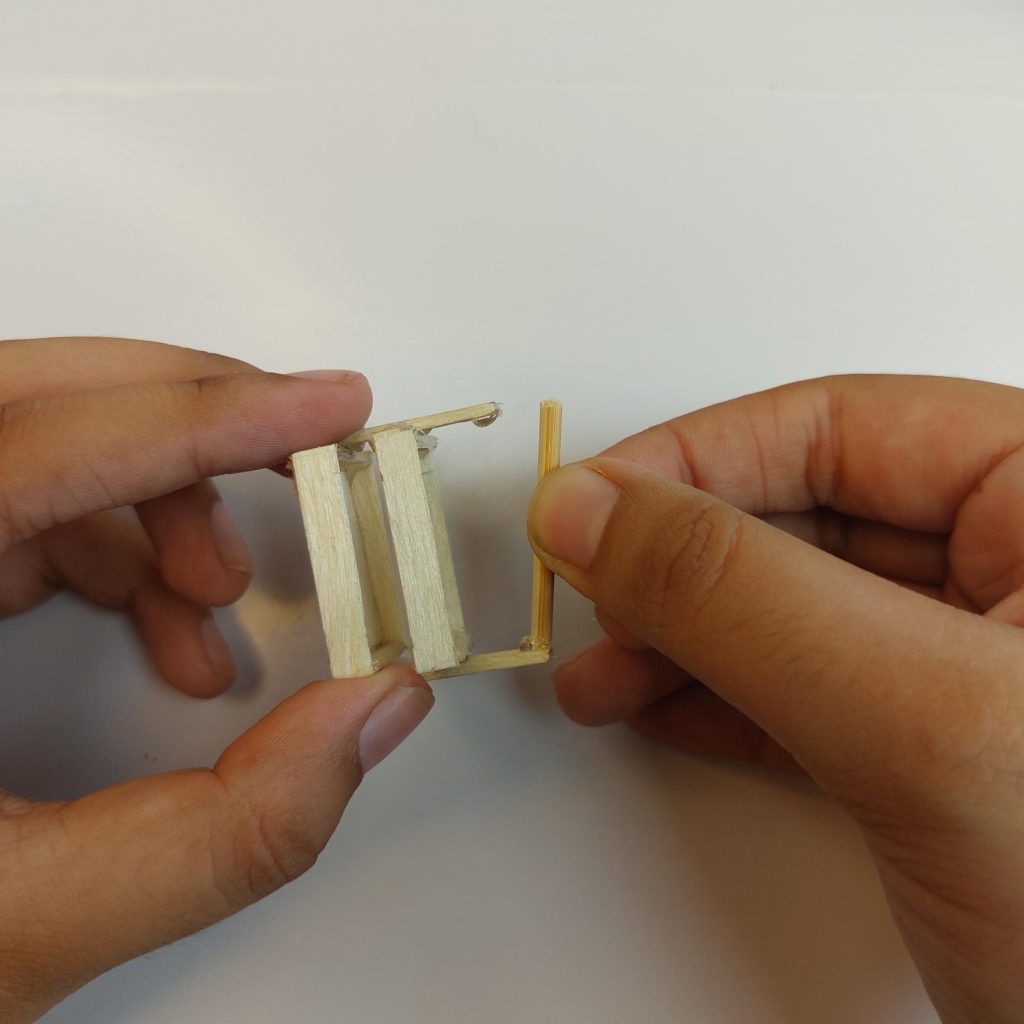
Step 5: Attach the Handles
Take two short vertical sticks and glue them to the middle of your crate on the shorter sides. Then glue a thin wooden skewer across the top as the handle. Trim the skewer so it fits neatly.
Step 6: Finishing Touches
Once the glue is dry, you can leave the crate natural for a rustic look or paint it white for a shabby chic vibe. You could even stain it dark brown to look like aged wood.
2 How to Make Miniature Pencils for Your Dollhouse Scenery
Here’s a little something in between, tiny pencils, how cute is this? Let’s get straight into it!
Materials You Need
Toothpicks (cut to 2.5 cm each)
Craft knife or cutter
Acrylic paints (yellow, red, black)
Thin silver tape or metallic paper strip
Paintbrush
Glue (optional, for securing tape)
Step-by-Step Tutorial
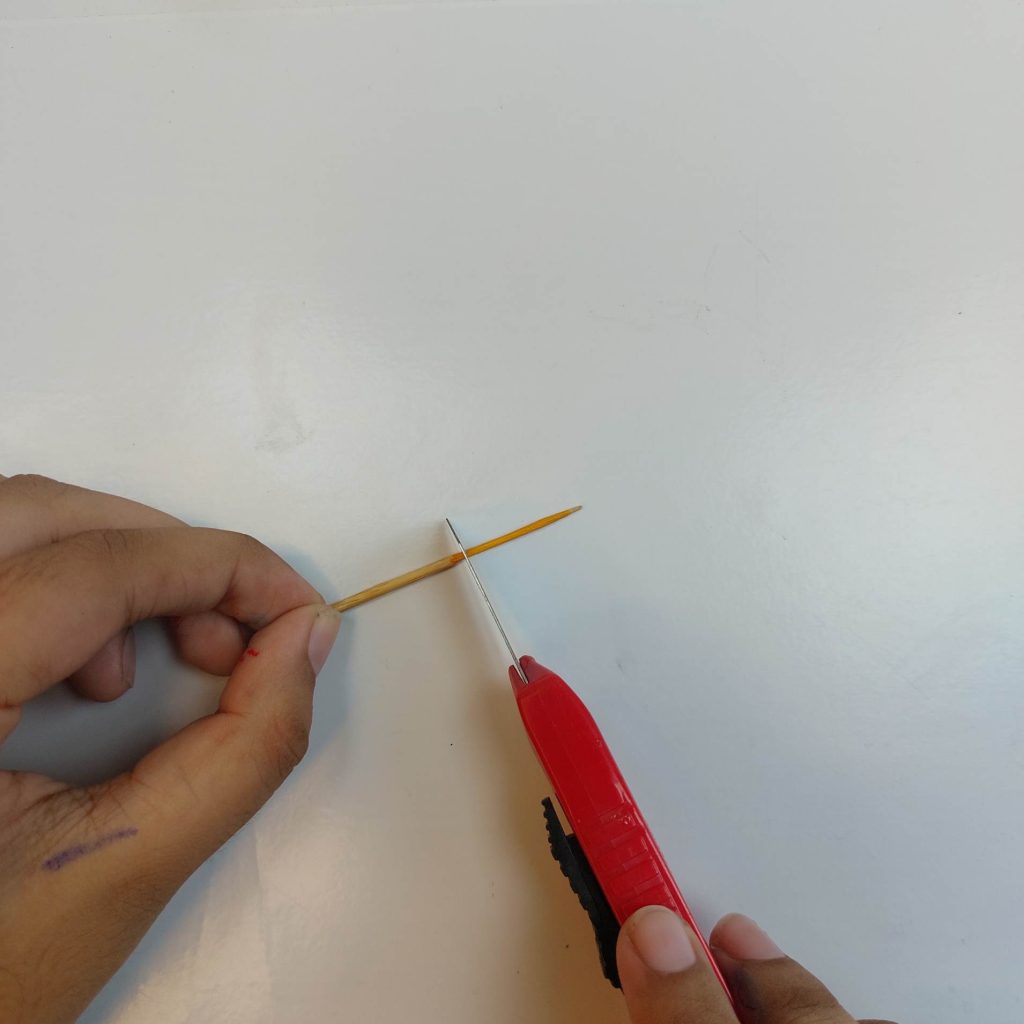
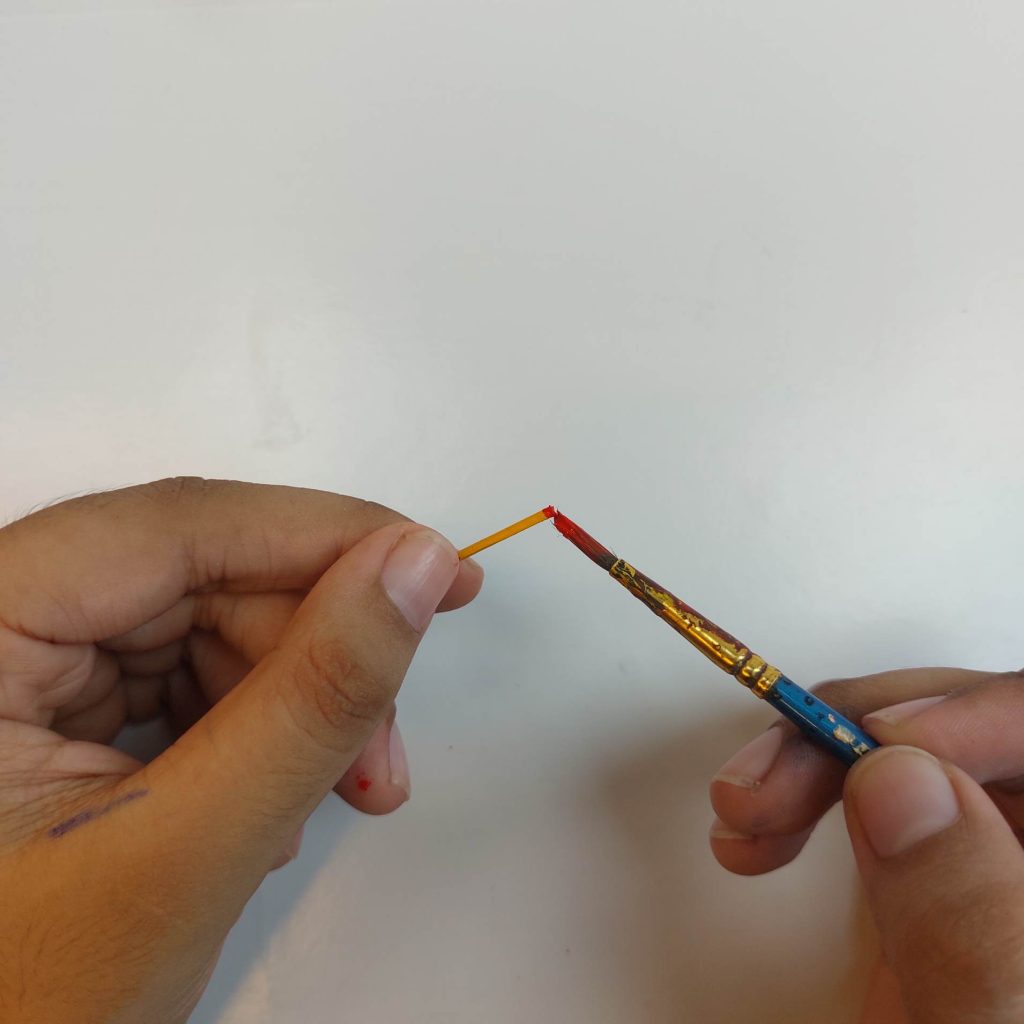
Step 1: Paint the Pencil Body Paint the toothpick piece in a bright yellow shade. This gives you the classic pencil look. Let it dry fully before moving on.
Step 2: Cut the Toothpicks Cut each toothpick down to 2.5 cm in length. This size works perfectly for 1:12 scale dollhouses, making the pencils look realistic without being oversized.
Step 3: Add the Eraser Dip the end of the toothpick in red paint to make the eraser. A small dot of paint is enough—keep it neat so it looks like the real thing.
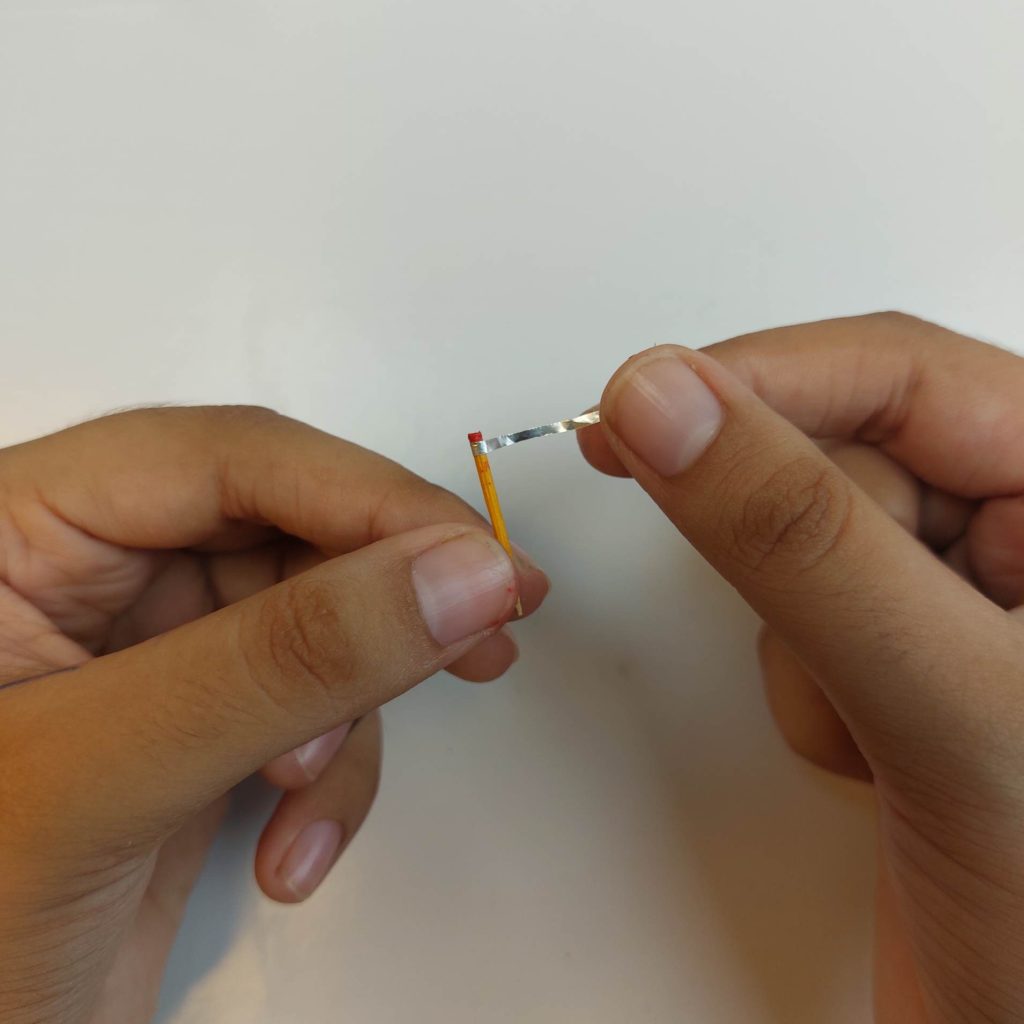
Step 4: Create the Metal Band Cut a tiny strip of silver tape or metallic paper and glue it just below the red eraser. This will act as the metal band that usually holds the eraser on a real pencil. Press it firmly so it sticks.
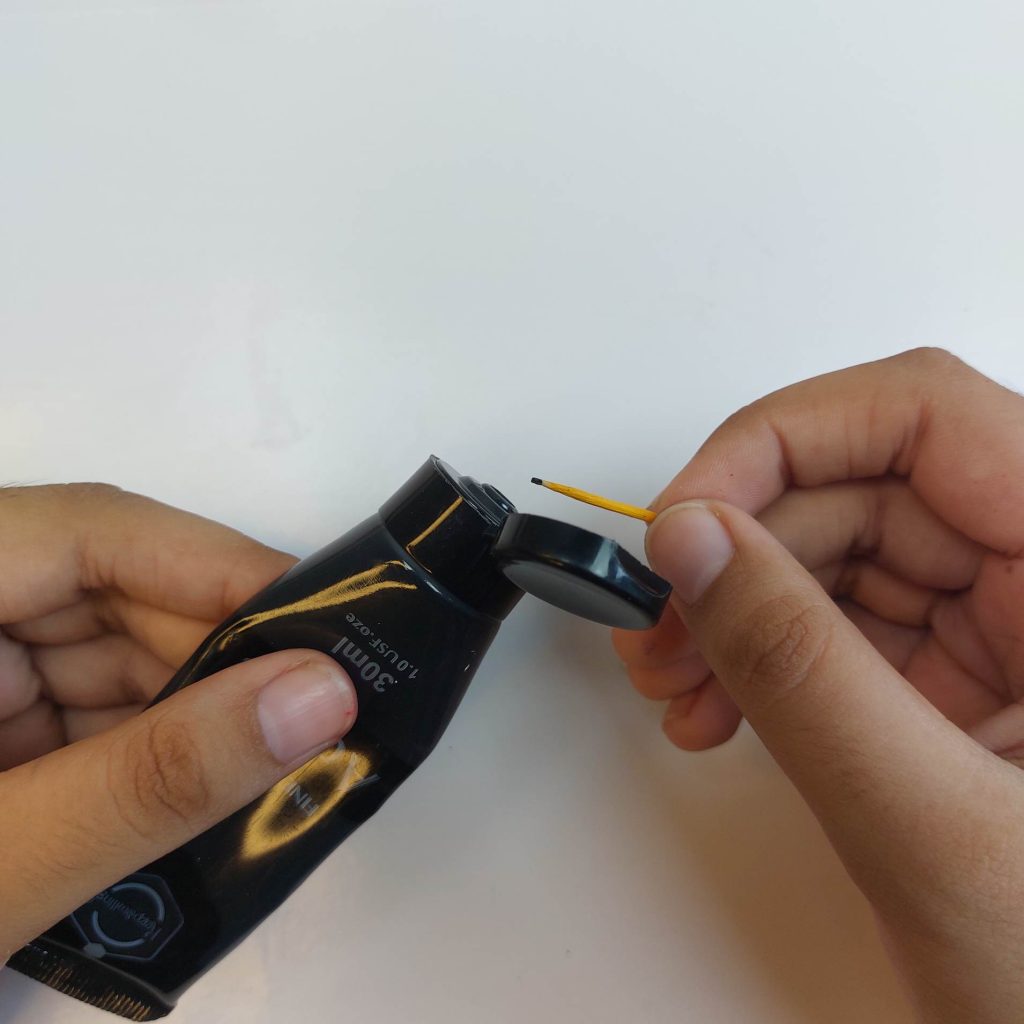
Step 5: Paint the Pencil Tip Use black paint to carefully add a tiny dot at the sharpened end of the pencil. This will be the graphite point. If you want extra realism, taper the end slightly with a craft knife before painting.
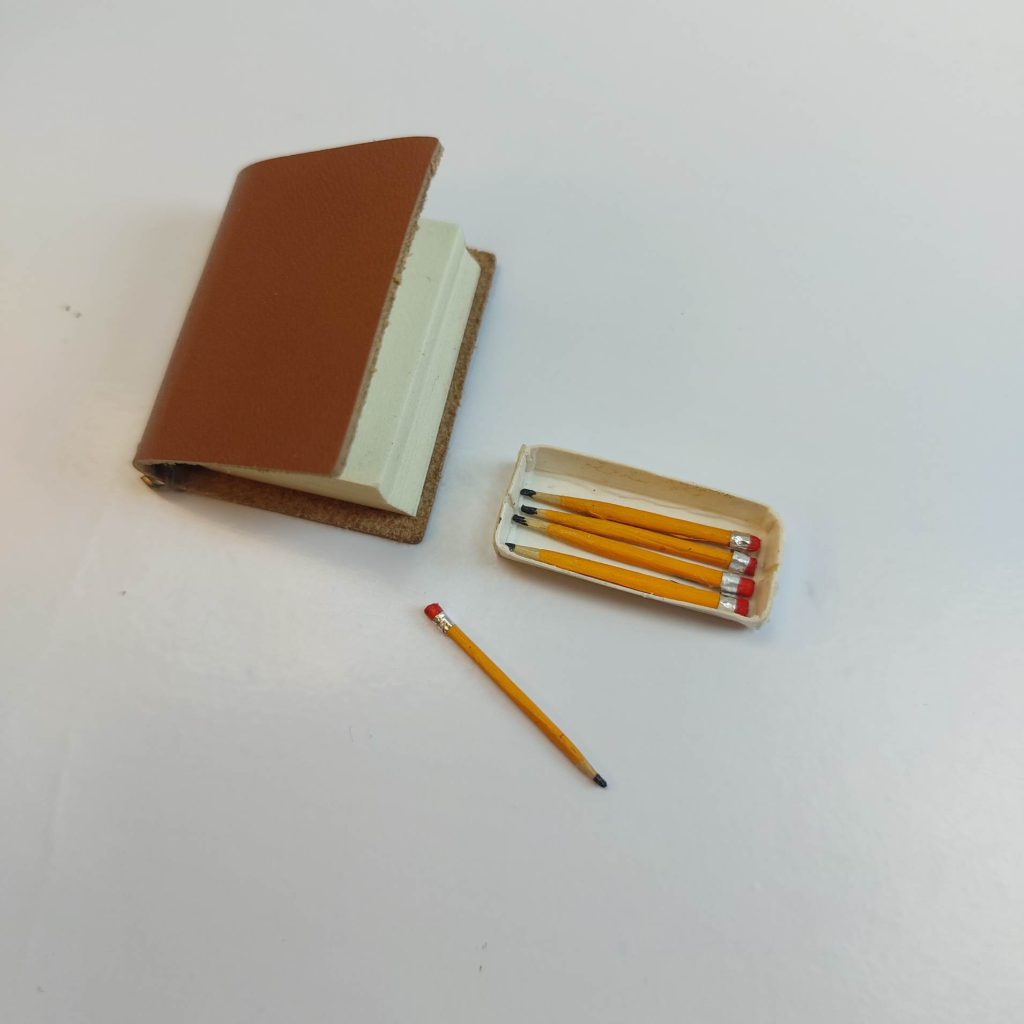
Let It Dry Leave your pencils to dry completely. Once finished, you’ll have realistic, tiny pencils ready to place in a dollhouse desk, school scene, or craft corner!
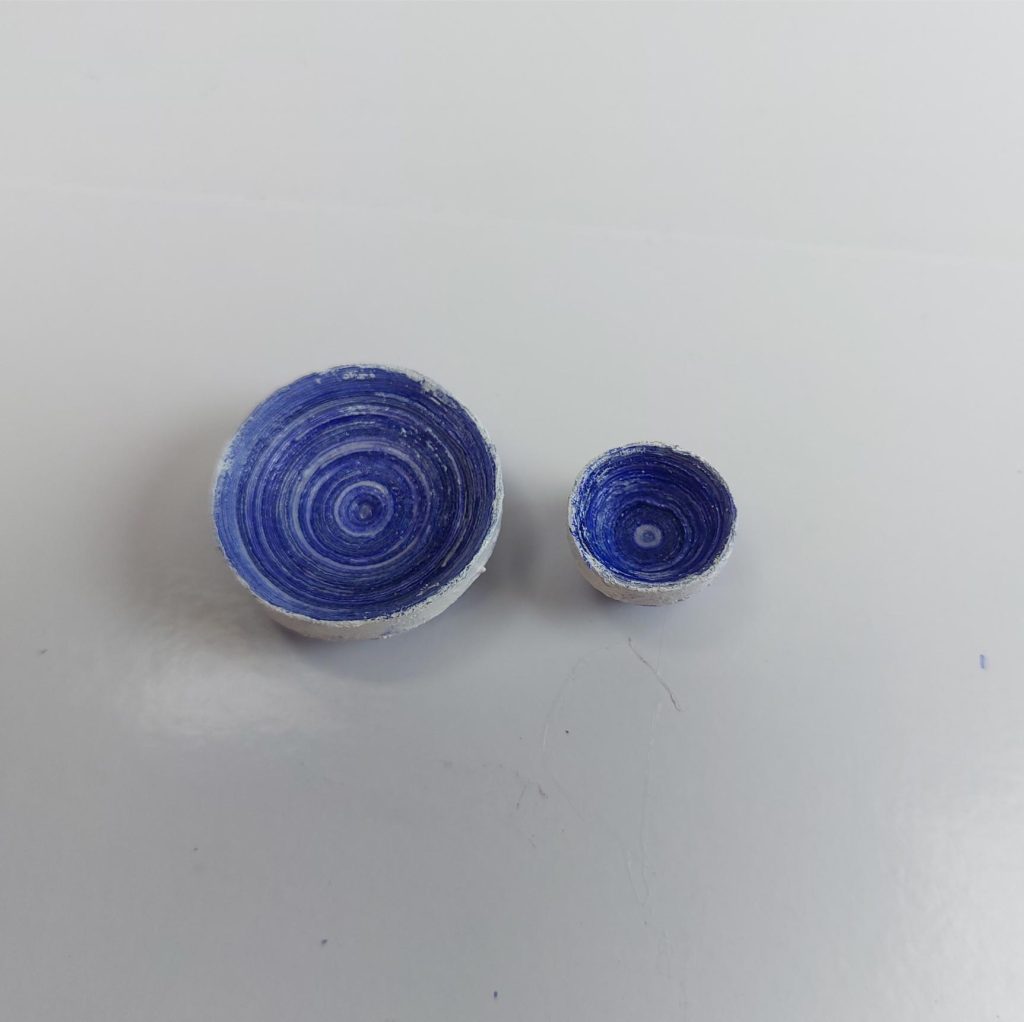
3. How to Make Miniature Bowls and Plates from Quilling Paper
Did you know that you can create fantastic miniature bowls and plates from a method called quilling? Let’s just straight up show you how!
Materials You Need
White paper or quilling strips (5 mm wide)
a blue pin, like a BIC crystal pen
Scissors
Glue (PVA or all-purpose)
Sandpaper (fine grit)
Paints or markers (optional: white + blue)
Step-by-Step Tutorial
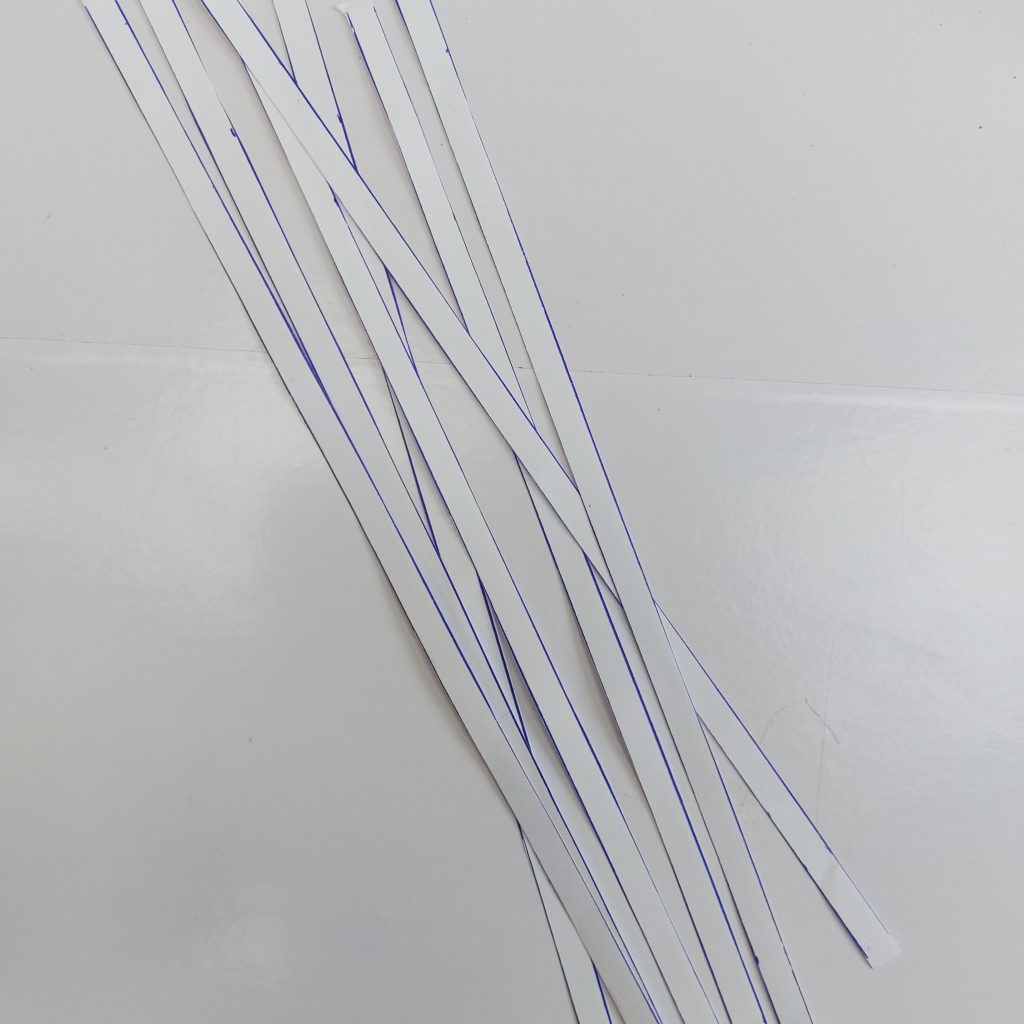
Mark & cut strips: Use a ruler and a blue pen to draw parallel lines 5 mm apart and cut them to make your quilling strips.
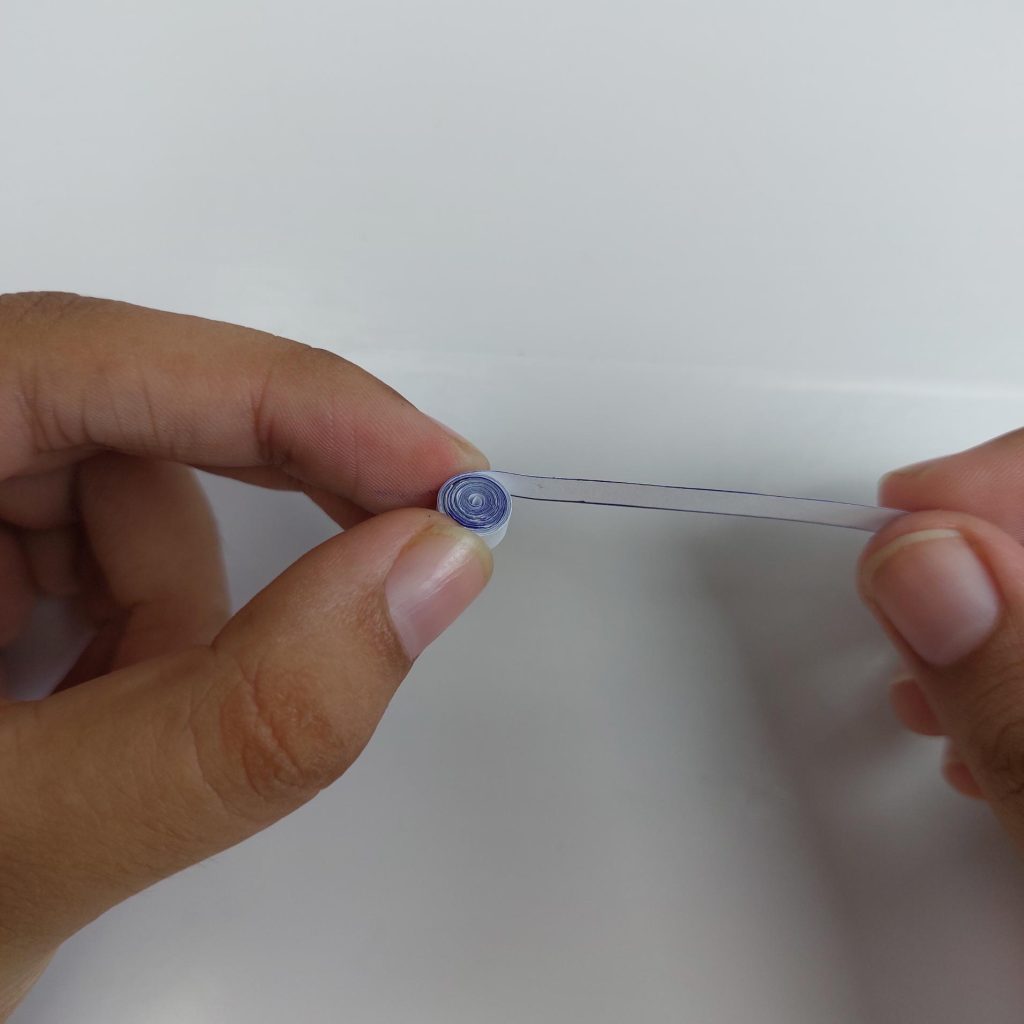
Start a tight coil: Take one strip and roll it snugly. Dab enough glue to lock it, then keep adding strips to grow the coil.
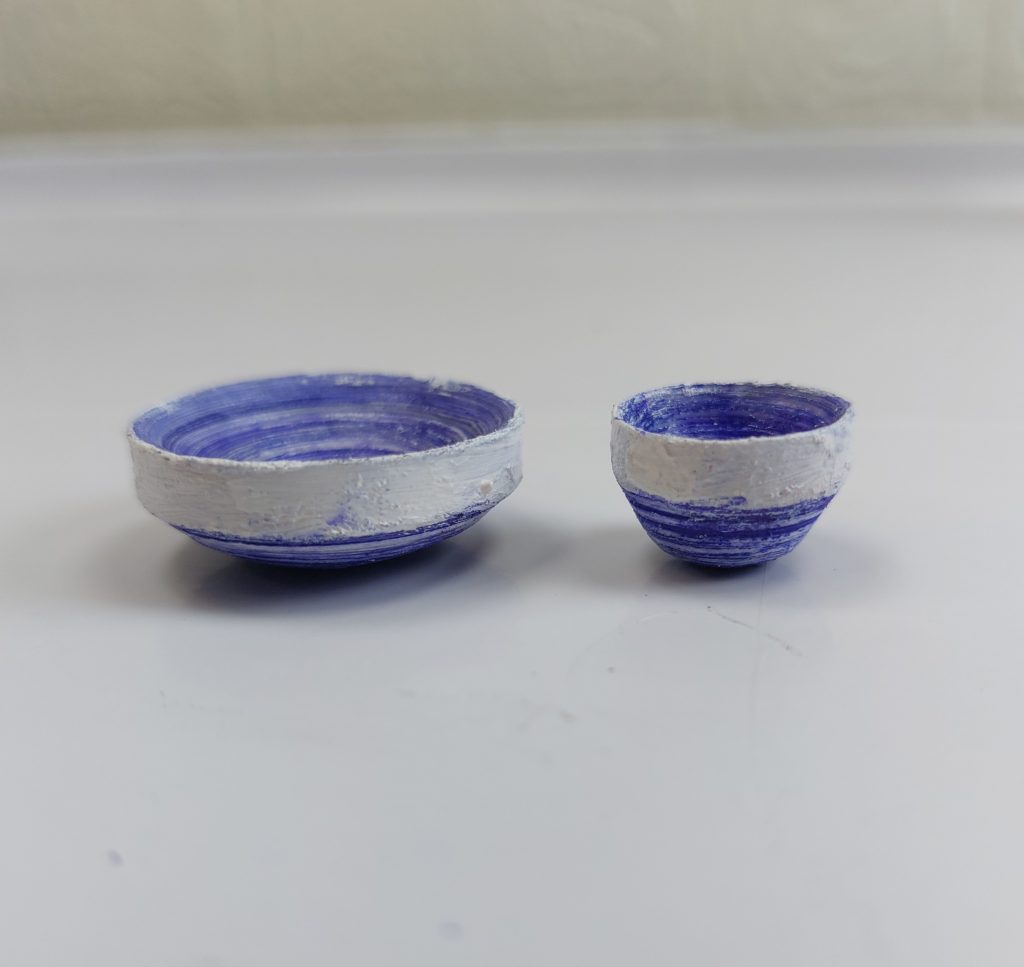
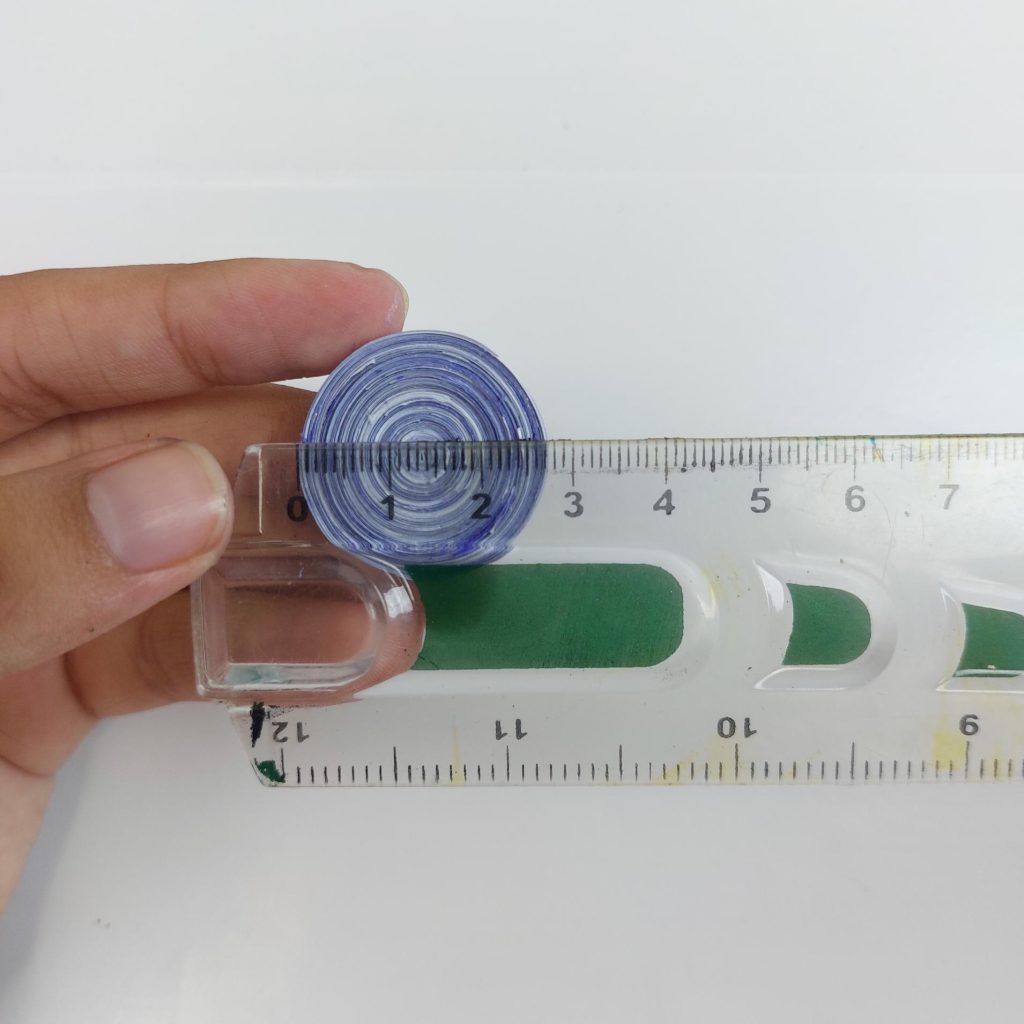
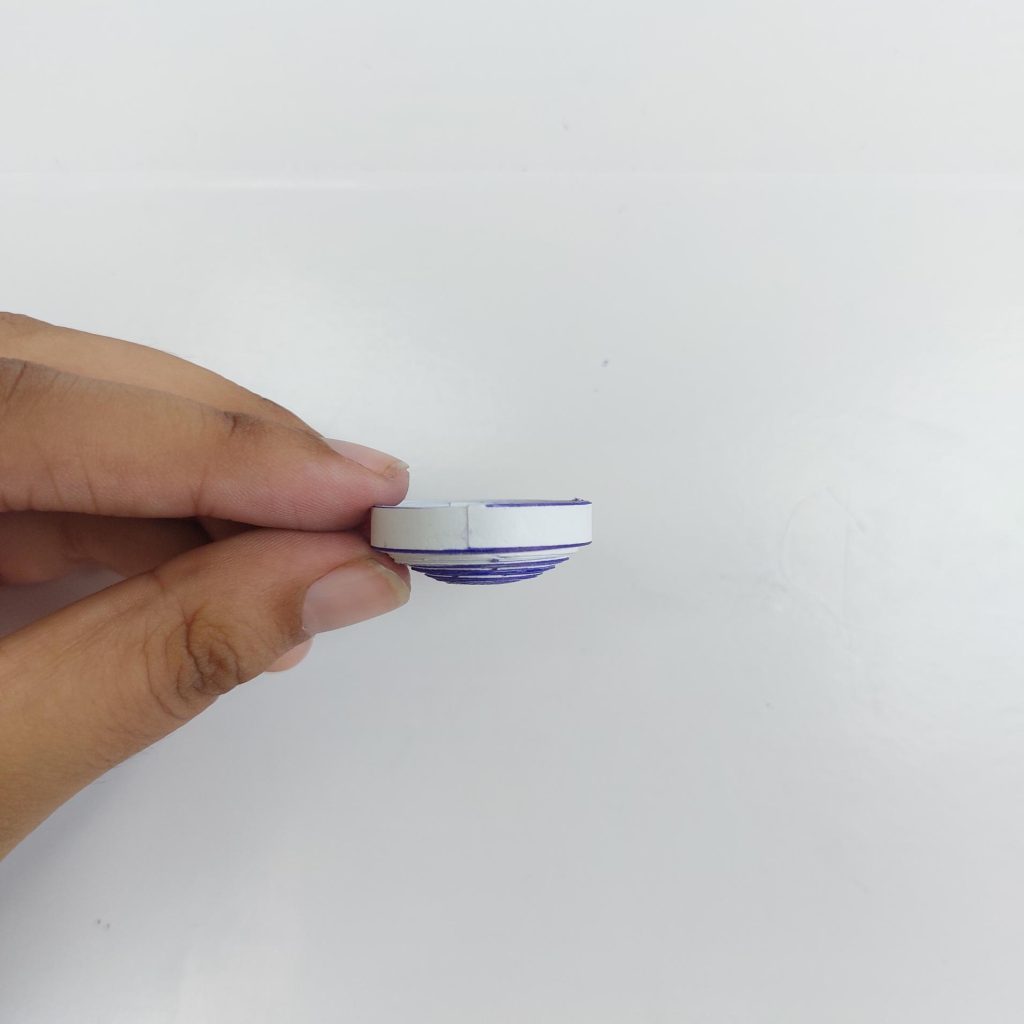
Shape it: For bowls, press the center of the coil against your fingertip to form a shallow dome; keep it flat for (lower) plates. My plate is up to 2.5 cm in diameter.
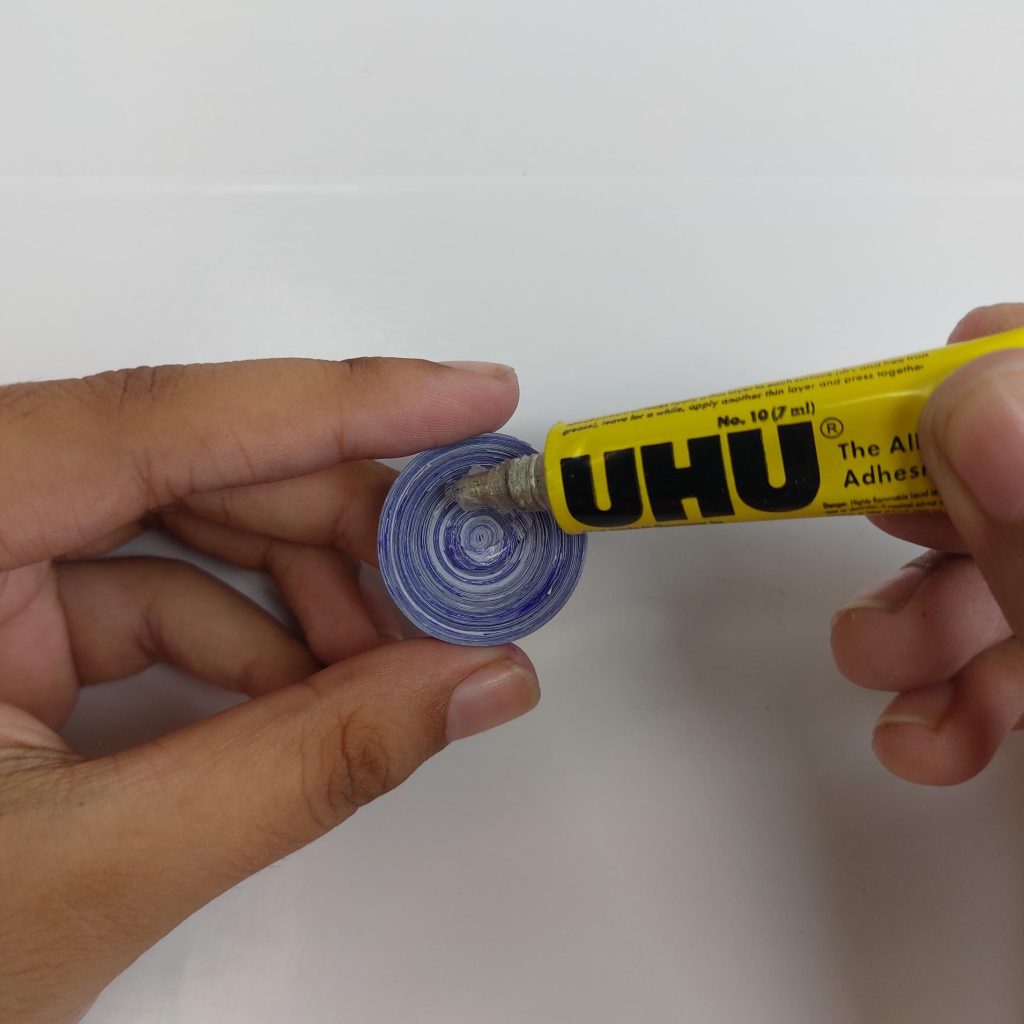
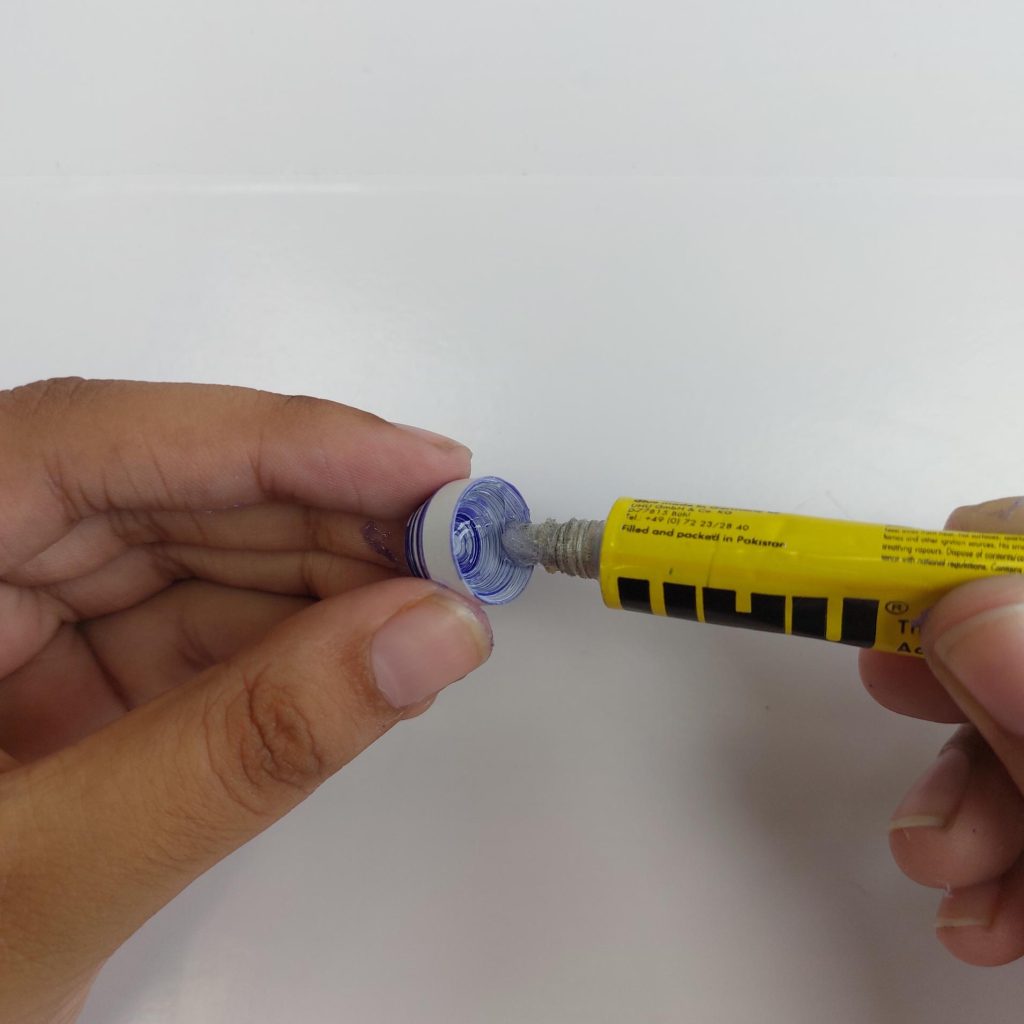
Step 5: Harden with glue: Flood the inside spiral with glue so it soaks in, repeat on the outside and base. Let it dry completely.
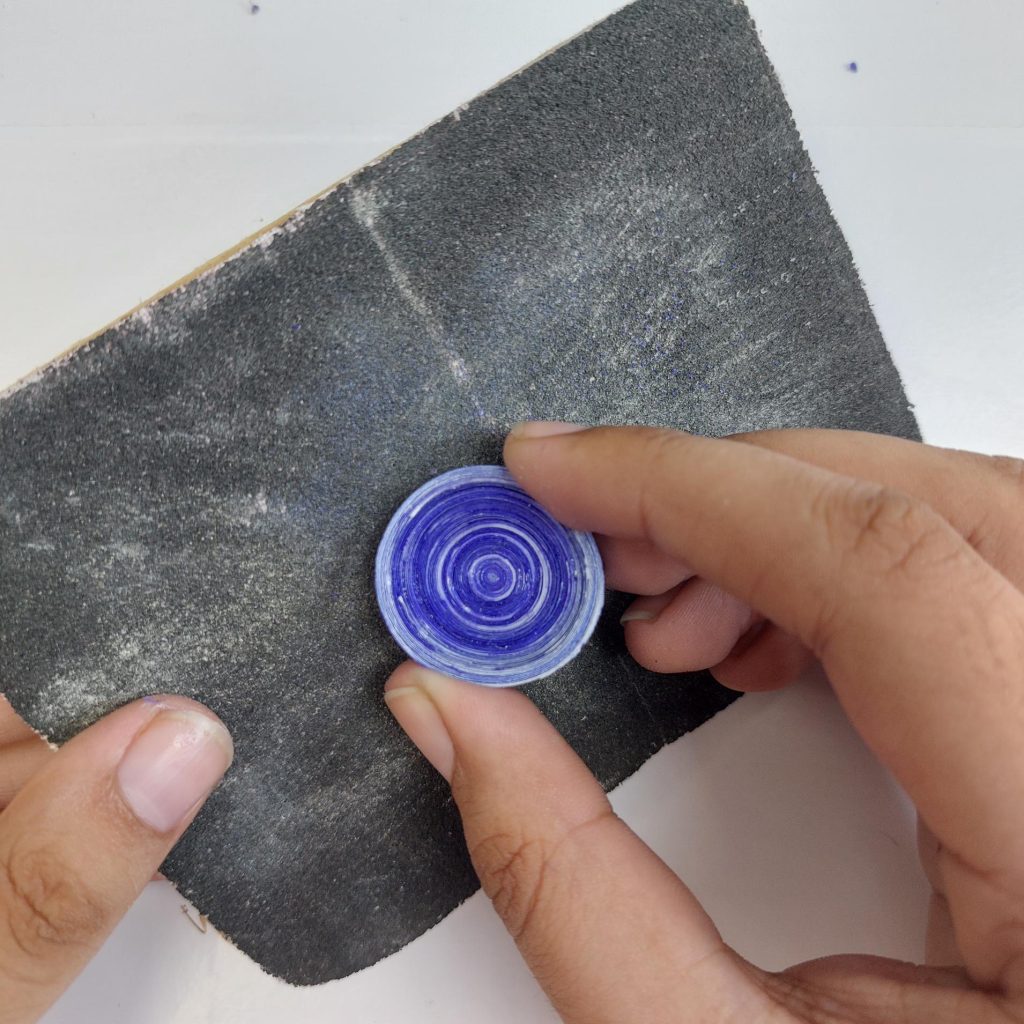
Step 6: Smooth it. Lightly sand the bowl or plate to even out any ridges, be very careful with this!
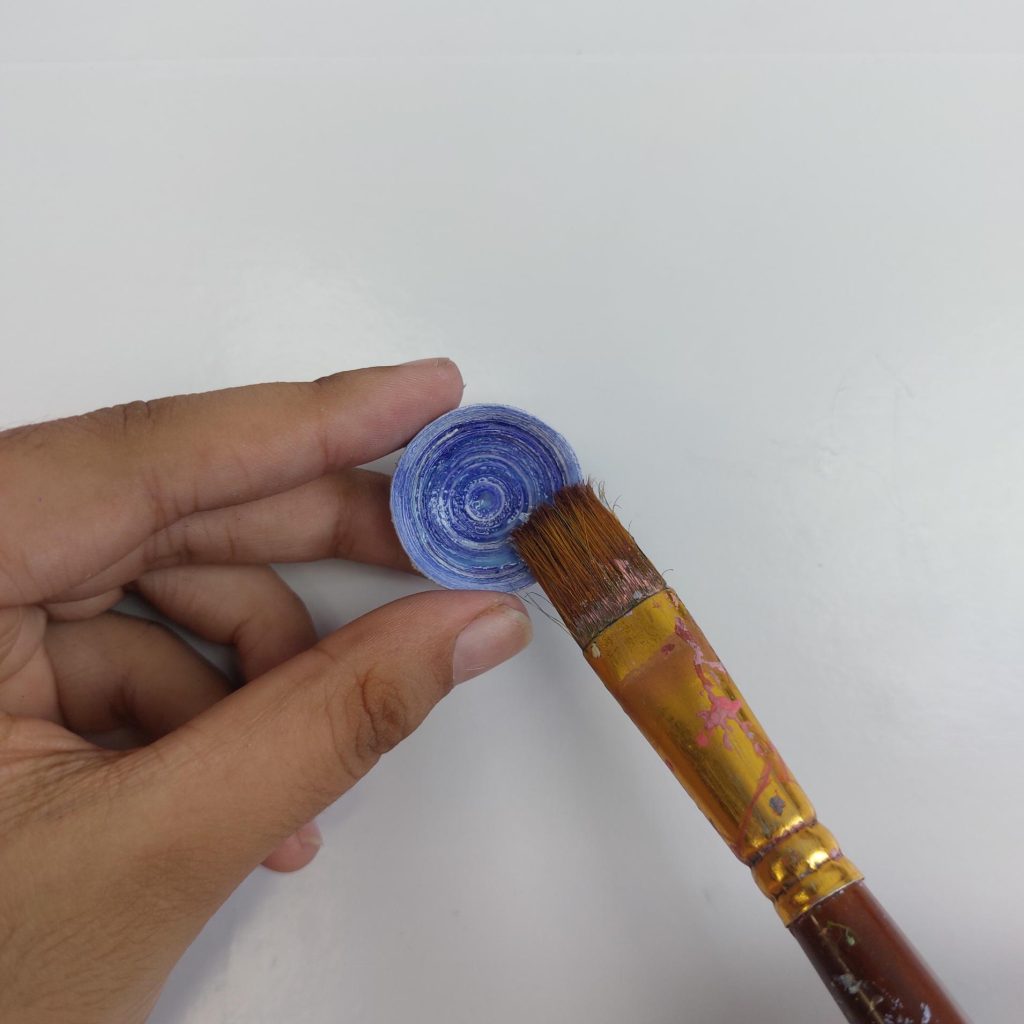
Step 7: seal again. (optional). Add a layer of clear gloss varnish to have that typical ceramic look and for extra strength.
Finish: Allow everything to dry and cure. Your tiny plates and bowls are ready for dollhouse dinners!
My final Conclusion
Making your own dollhouse accessories doesn’t have to be complicated or expensive. With just a few scraps and some imagination, you can end up with realistic little pieces like pencils, crates, and even bowls and plates that bring a miniature scene to life.
Now it’s your turn! Which of these projects will you try first? Let me know in the comments below: I’d love to hear your ideas and see your creations (which you can share in my new Facebook group )