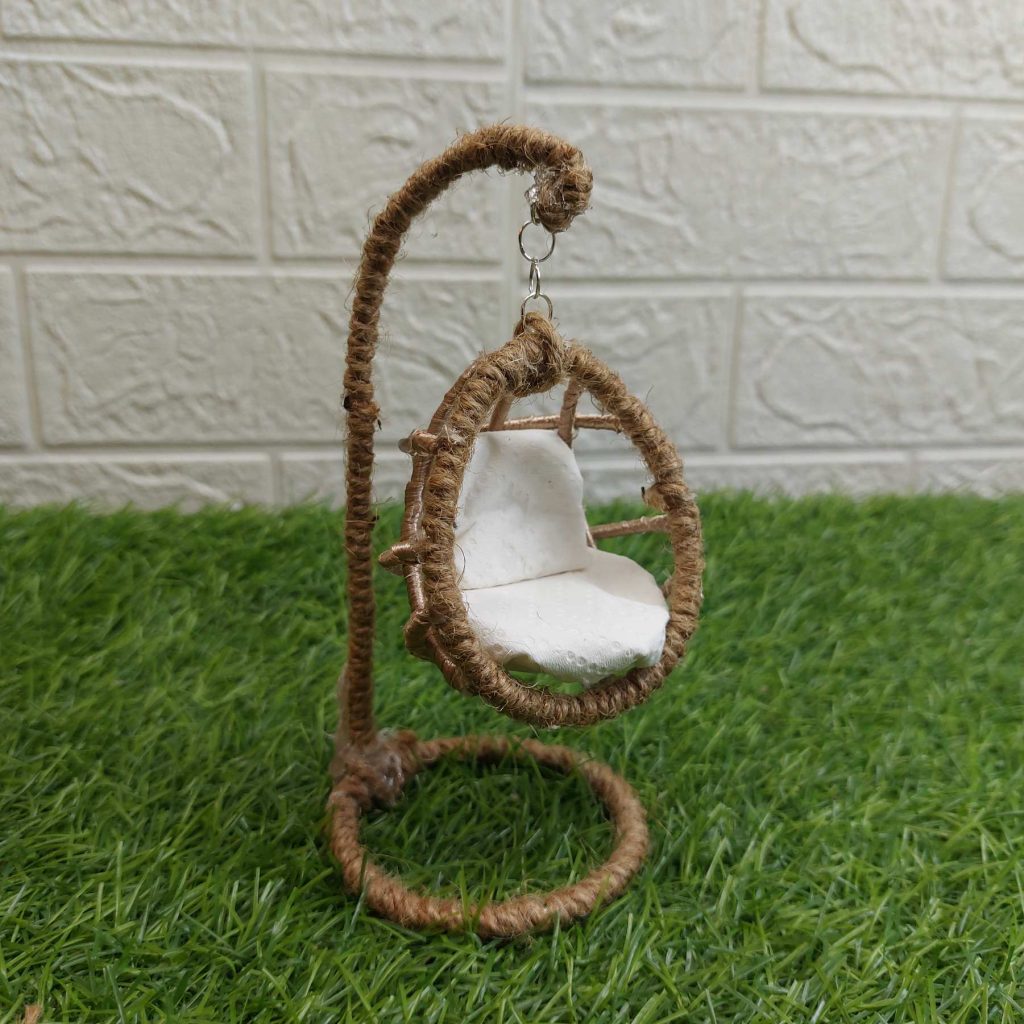
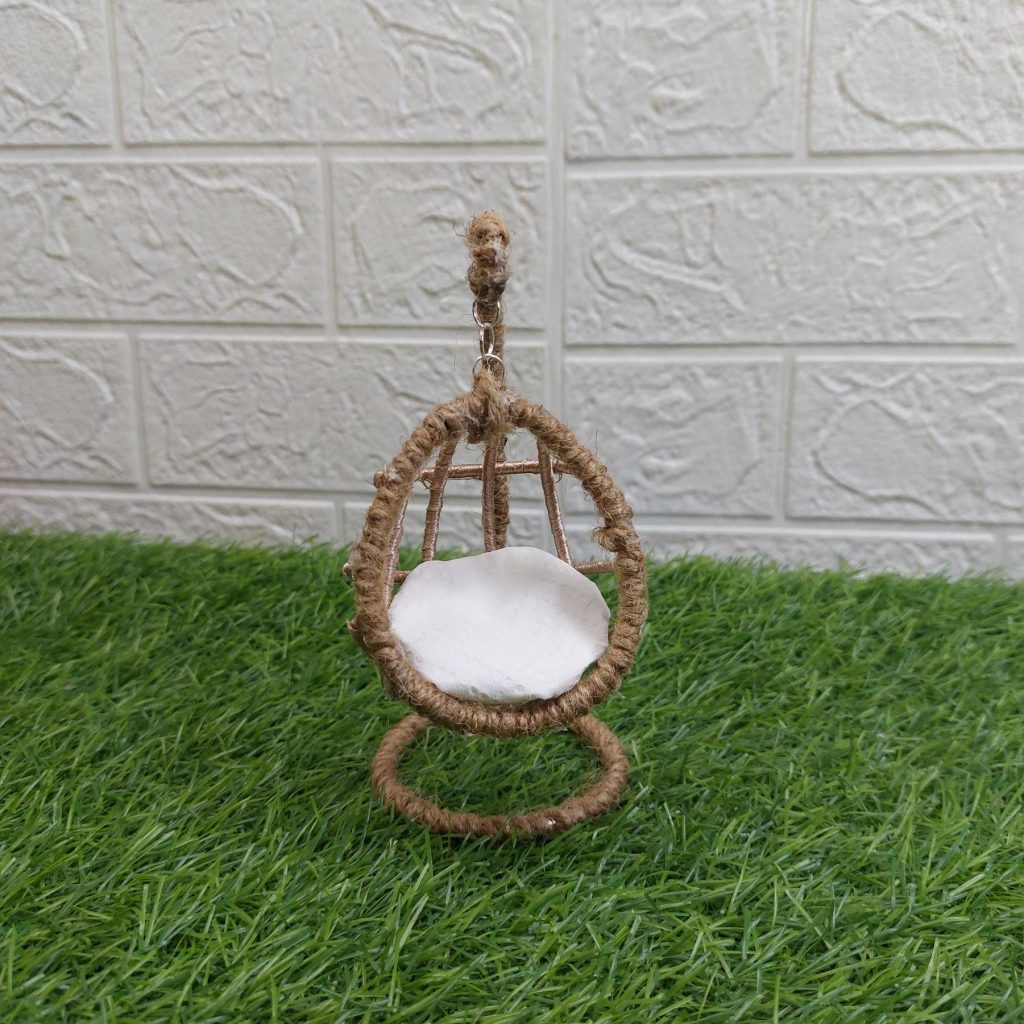
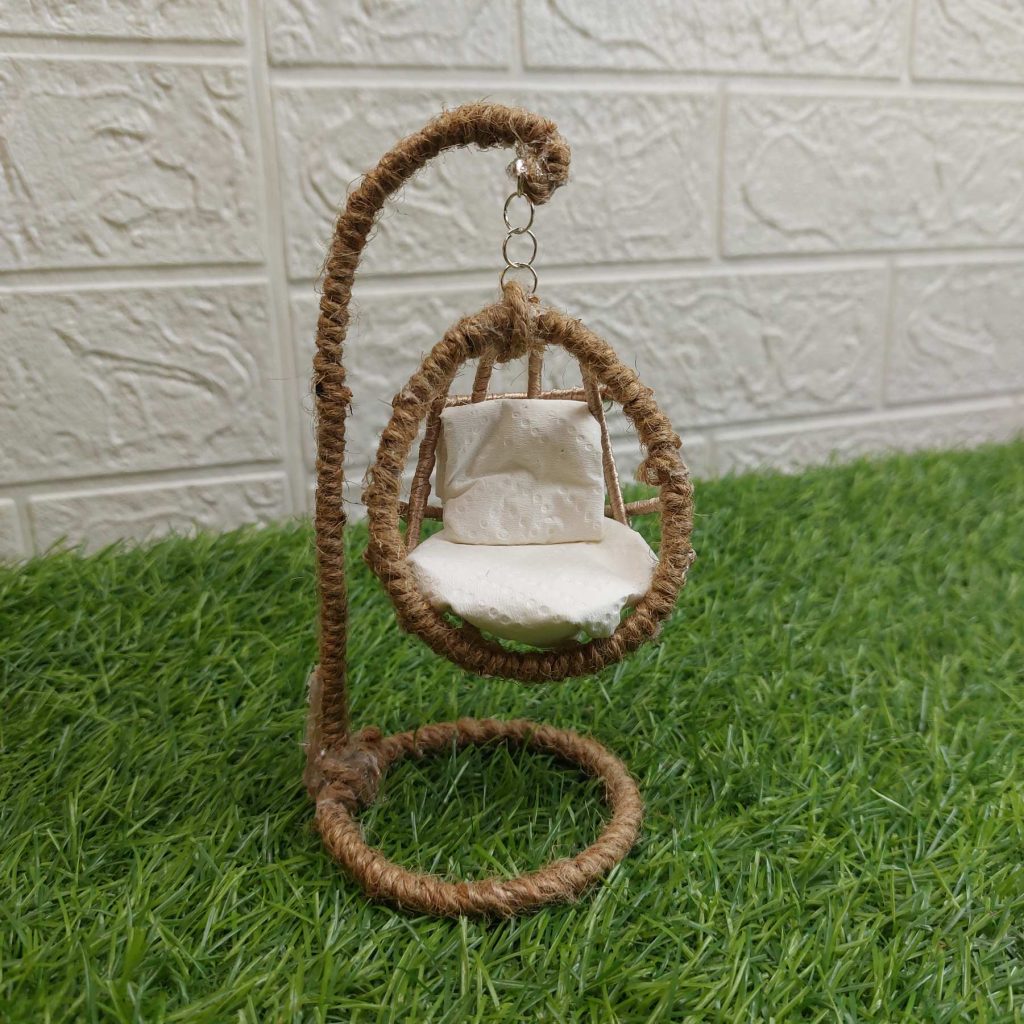
I wanted to make a small hanging chair for my miniature treehouse, and this turned out to be such a cute little boho-style project. I used metal bangles for the round shapes, wrapped them with twine, and then you can add a cushion (which I will create later)
It takes a bit of patience, especially with the wrapping, but the result is worth it.
Let’s start with the list of materials.
Adaptable to your own taste or particular project or your own scale, here’s the list of materials that I used:
Scissors
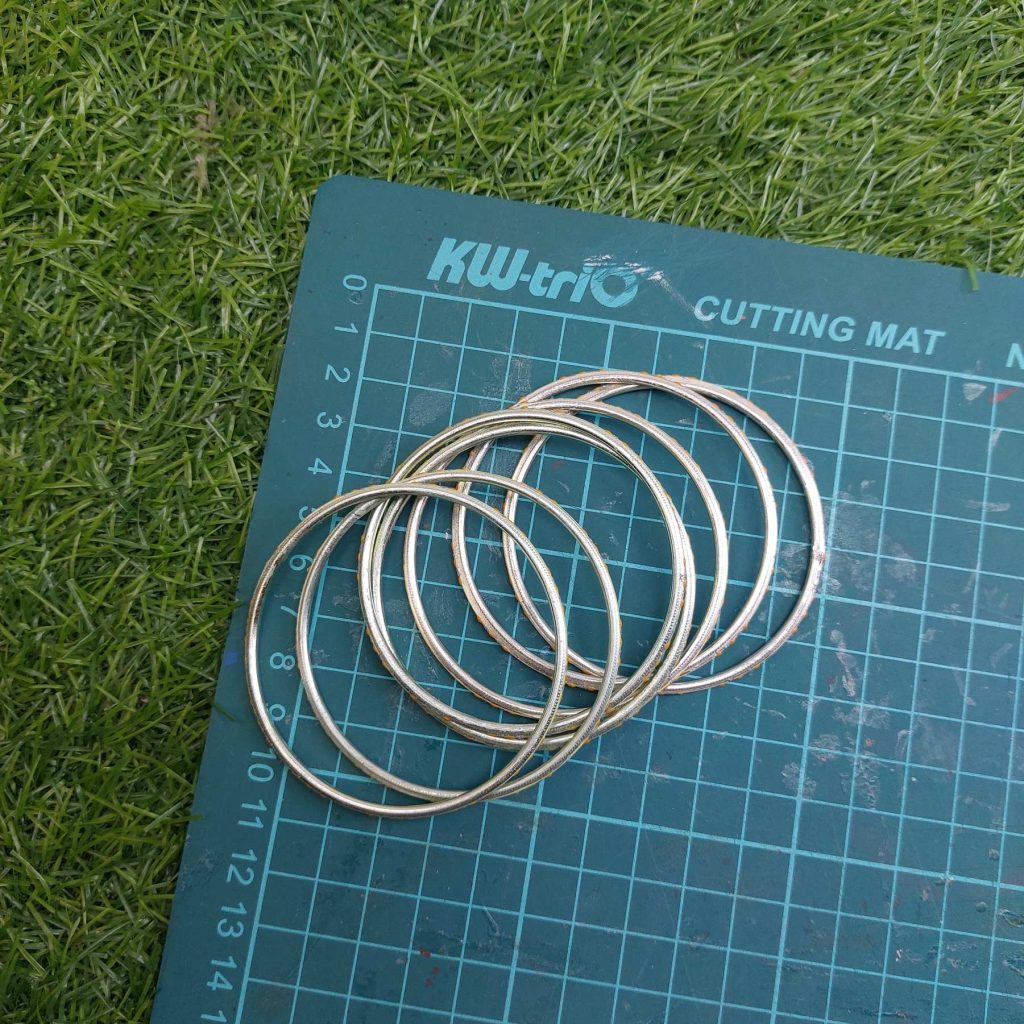
4 metal bangles (approximately 6–7 cm / 2.4–2.75 inches in diameter)
Natural jute twine
Satin ribbon (about 6 mm / ¼ inch wide)
4 small jump rings
materials to create your cushion, I have made a cushion for now from some white clay and kitchen paper, but I will change this later with a real tiny cushion. It is just to show you how it could look when finished.
Hot glue gun and glue sticks. For those who don’t want to work with a glue gun, use UHU glue or grab fast tacky glue.
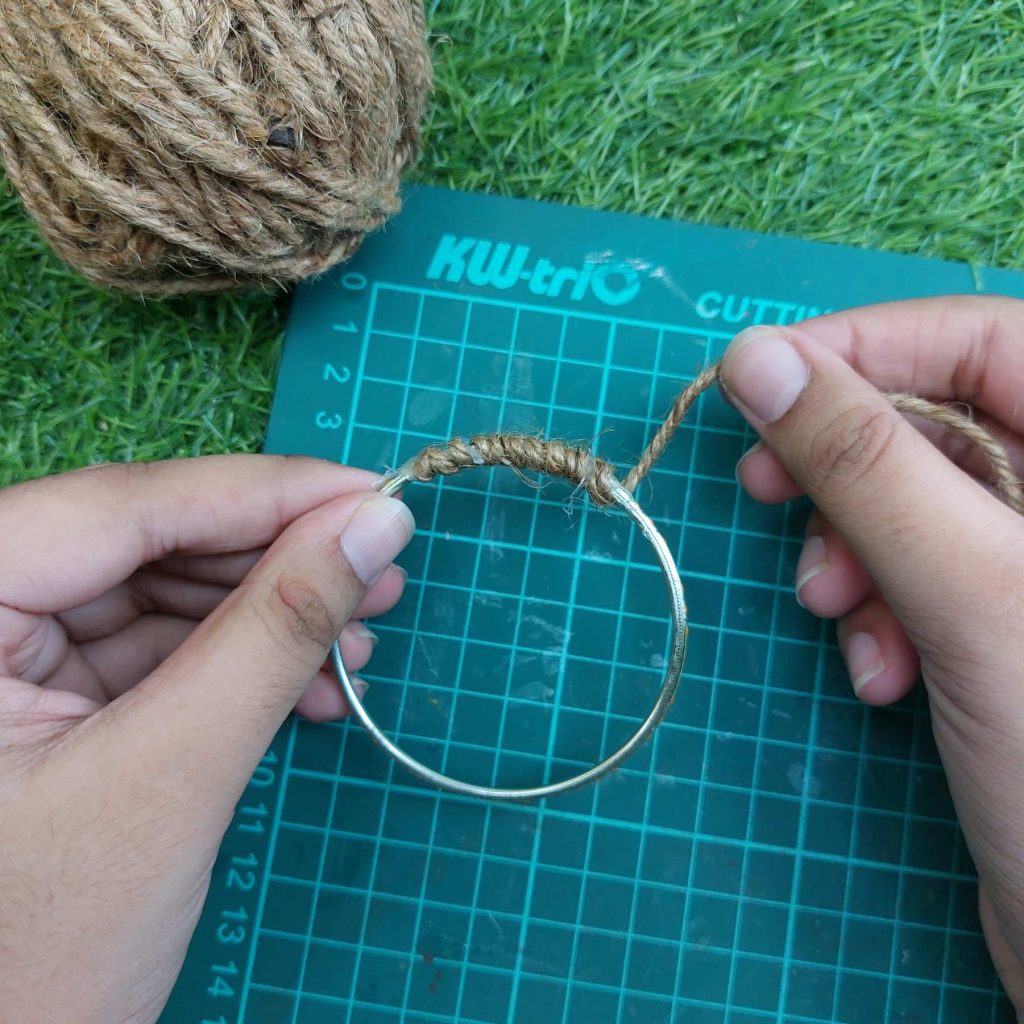
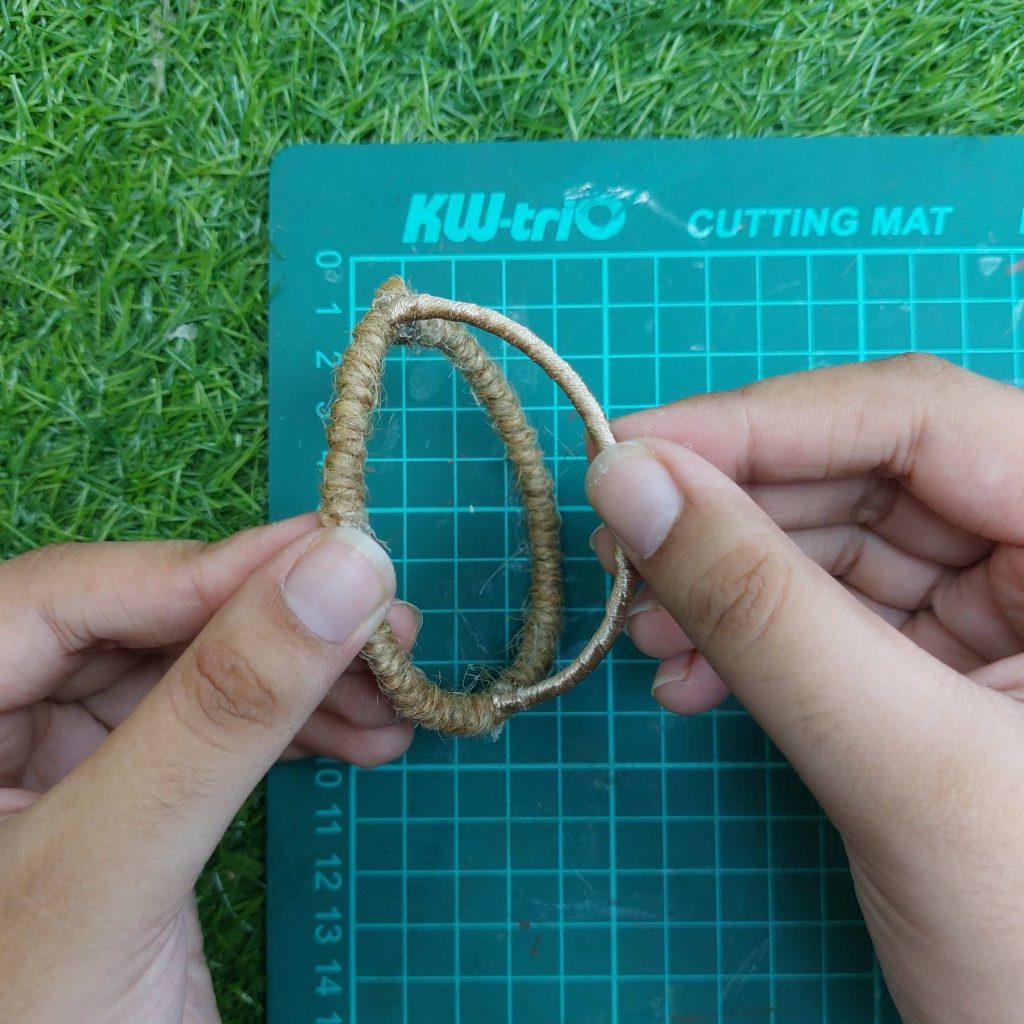
Start with one metal bangle. This will become the main round frame of the hanging chair.
Wrap jute twine tightly around the bangle, working your way around the full circle. Add a little hot glue here and there while wrapping, so the twine stays in place and does not slide around.
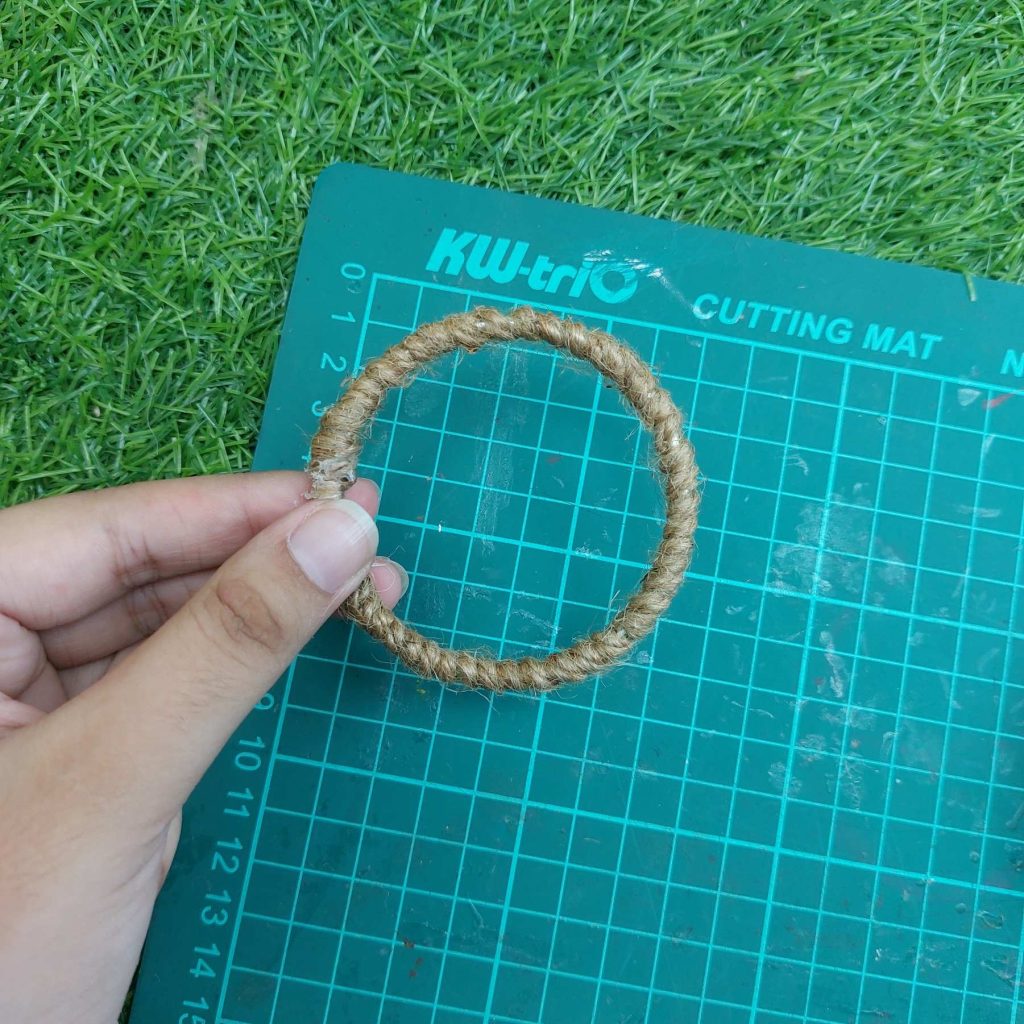
Keep wrapping until the metal ring is completely covered. This gives the chair frame that rustic rope look.
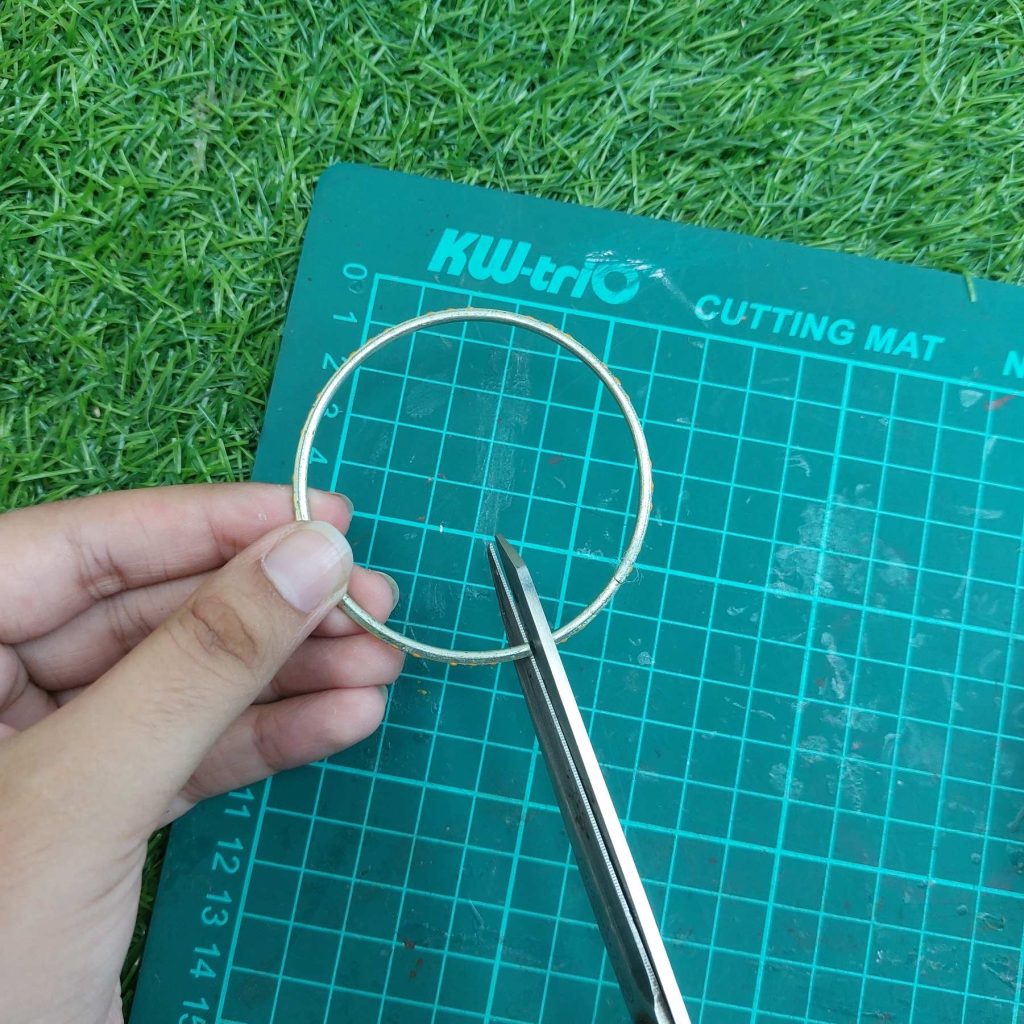
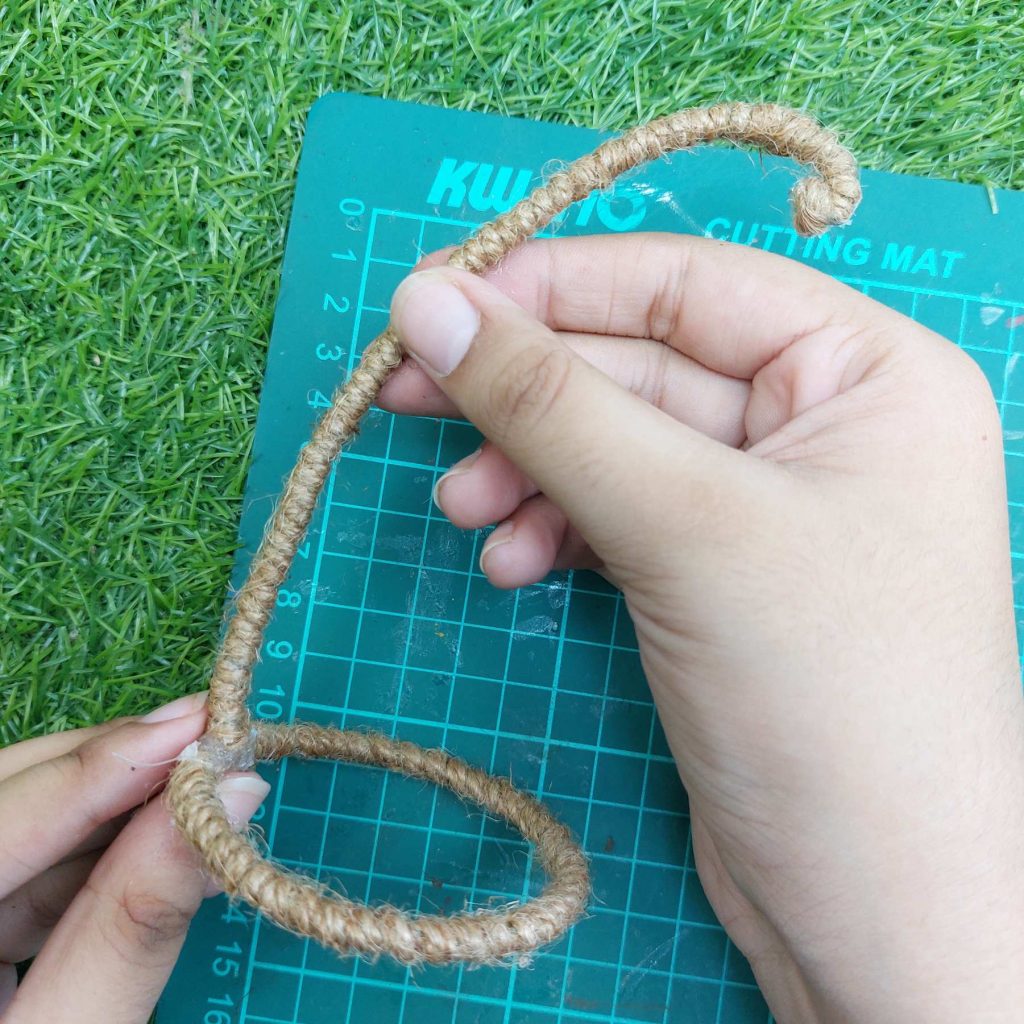
Step 2: Make the hanging stand
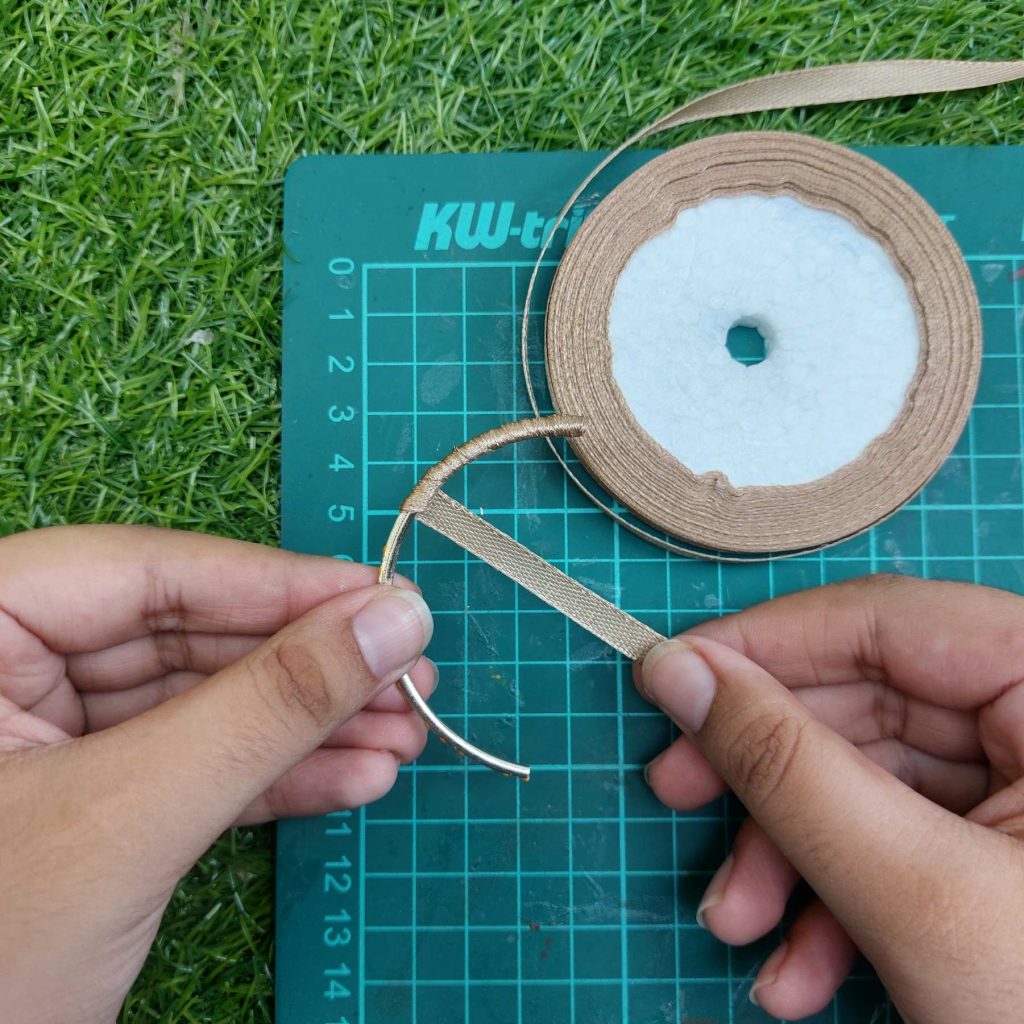
Take a second metal ring and cut it open using strong wire cutters or heavy-duty scissors.
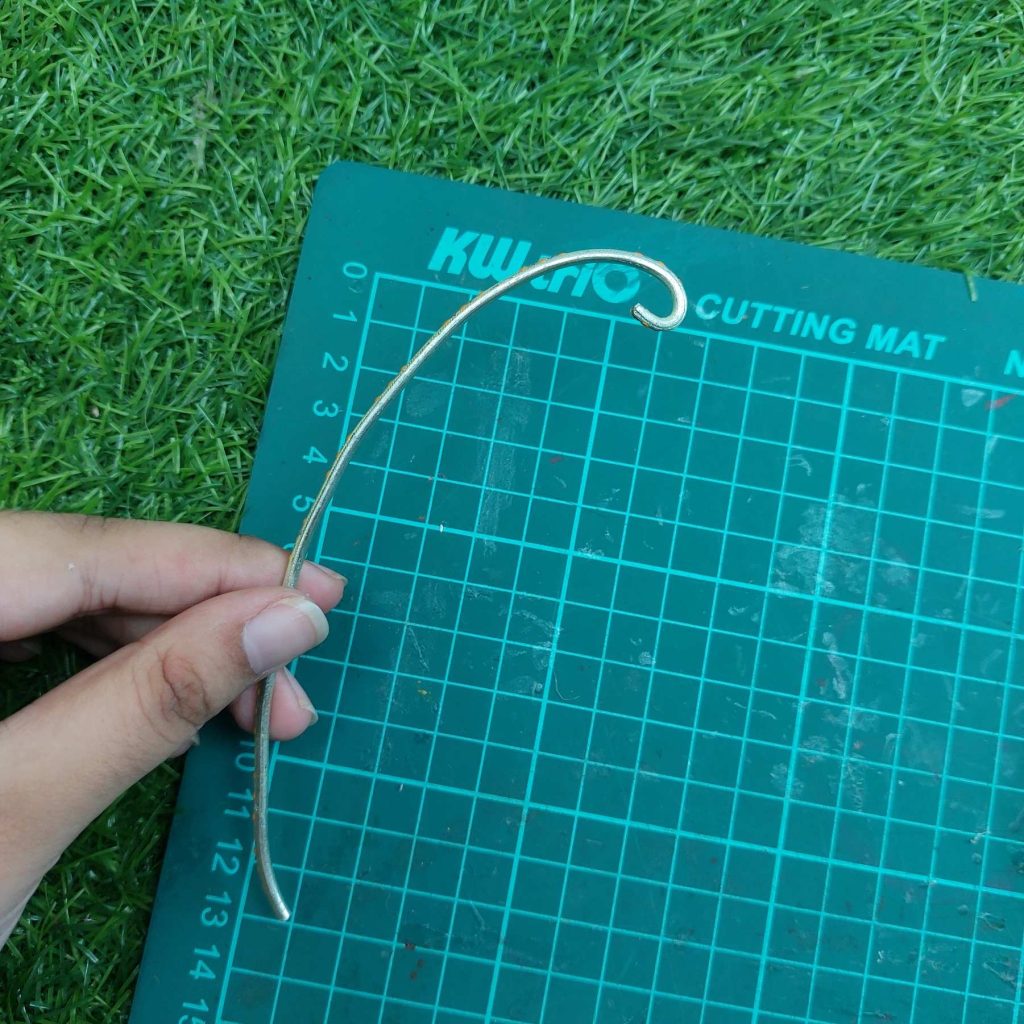
Carefully bend the ring into a long, smooth curve. At one end, curl the tip inward with needle-nose pliers to create a small hook. This is where the chair will eventually hang.
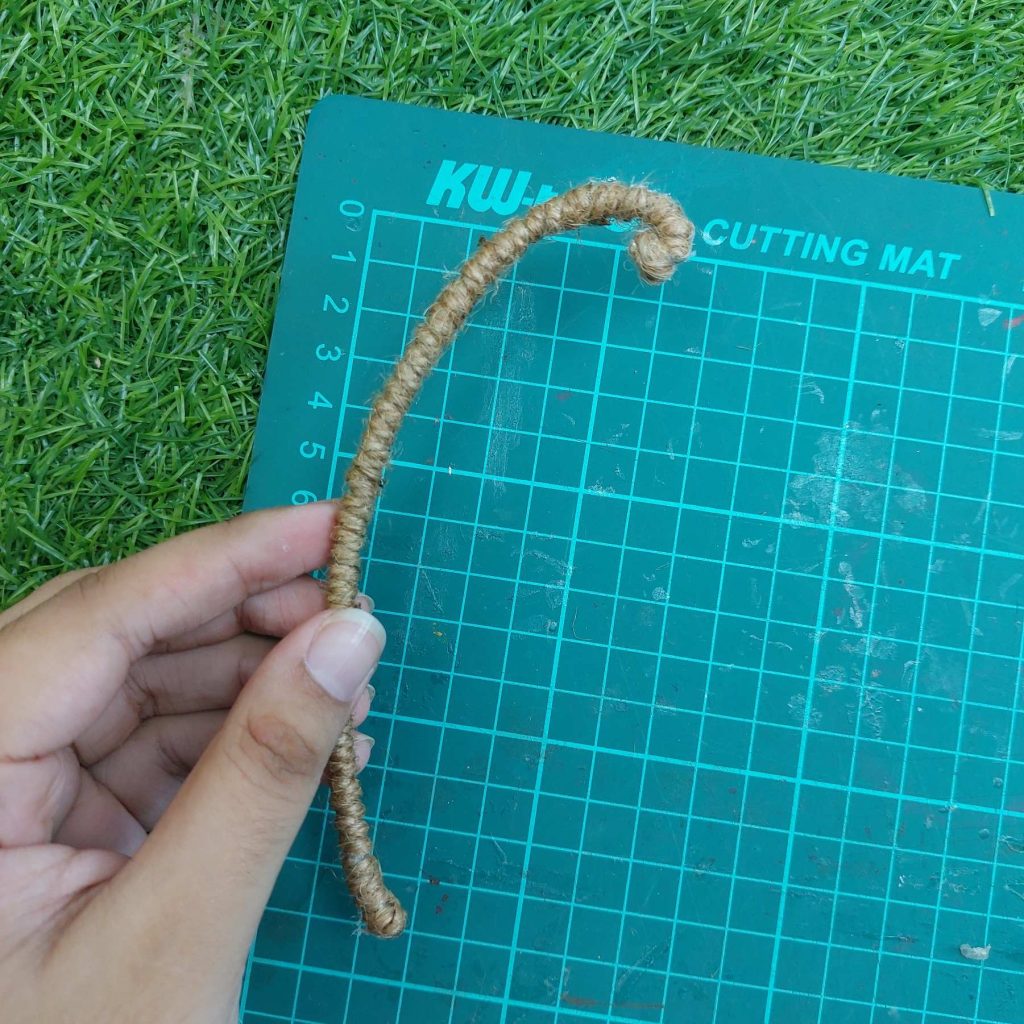
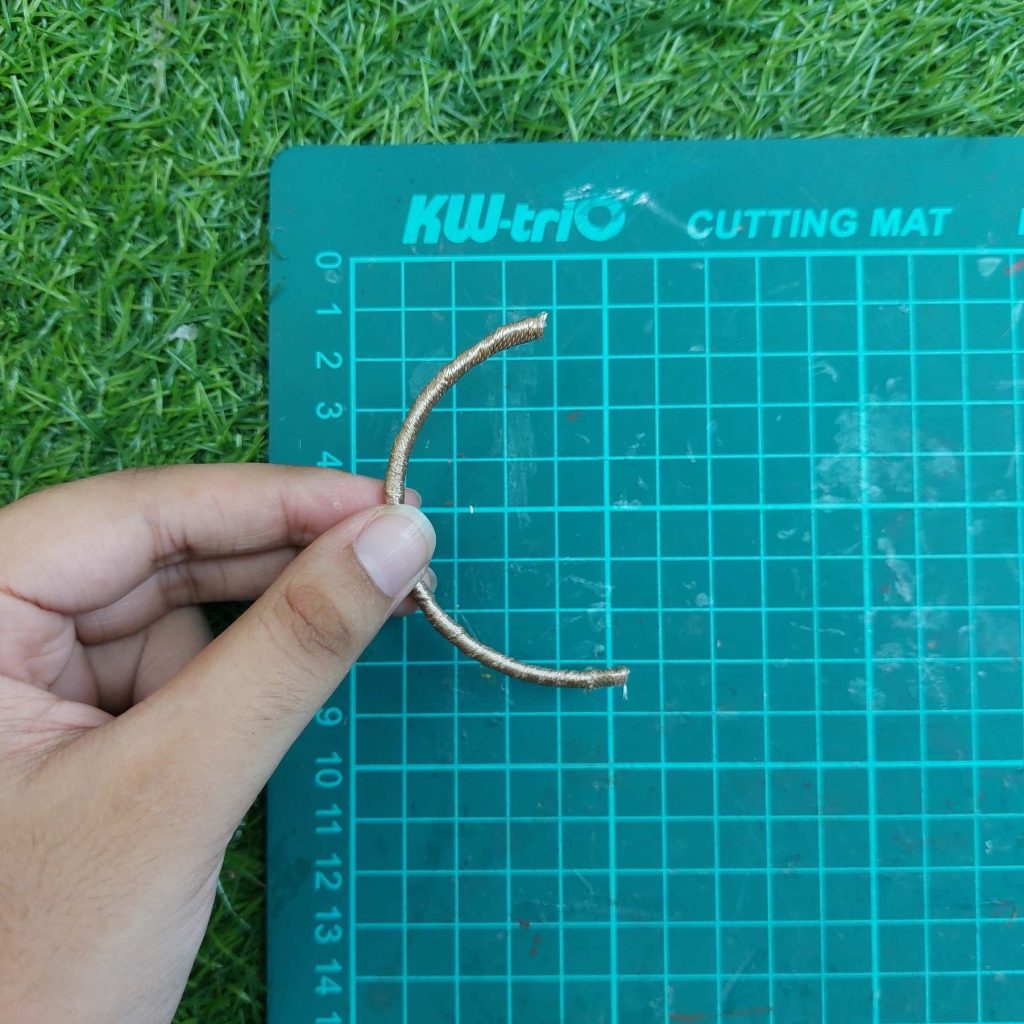
Once you’re happy with the shape, wrap the entire stand with the same jute twine. Secure the beginning and end with a small amount of hot glue, adding a little glue every few centimeters to keep the twine tight and even.
When finished, you should have a curved stand with a hook at the top, ready to support the hanging chair.
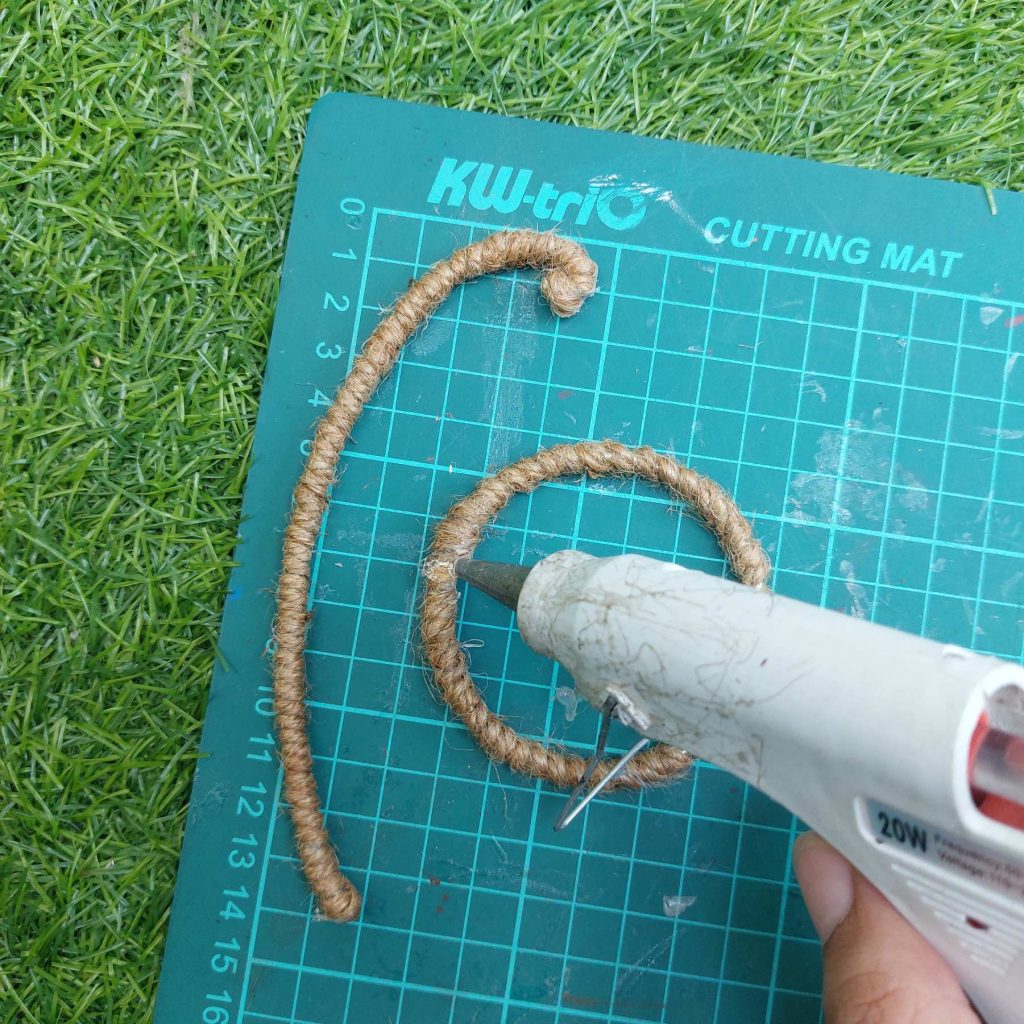
Step 3: Attach the stand to the base
Apply a generous amount of hot glue to one side of the wrapped ring. Position the straight end of the curved stand against the ring so it stands upright, creating the base of the chair.
Hold the stand firmly in place until the glue has cooled and hardened. Check that the stand is vertical and that the base sits flat on your work surface. If needed, add a little extra hot glue around the joint to strengthen it.
At this stage, you should have a sturdy freestanding support consisting of the circular base and the curved arm that will hold the hanging chair.
If you like, you could cover the glue residue from the glue gun and untwist (unravel) the rope into individual strands. Then use one of those thinner strands to wrap around the glued joint, but this time use some tacky glue.
Step 4: Make the chair frame
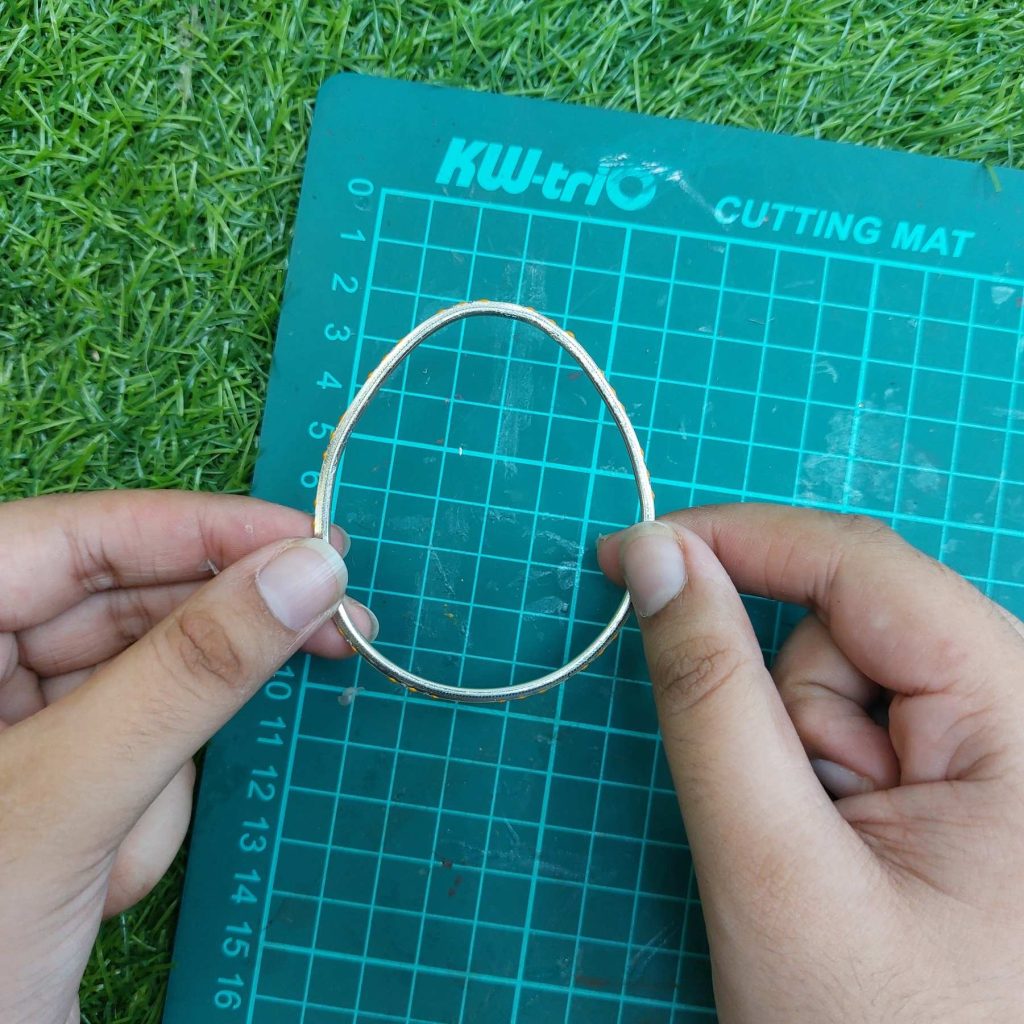
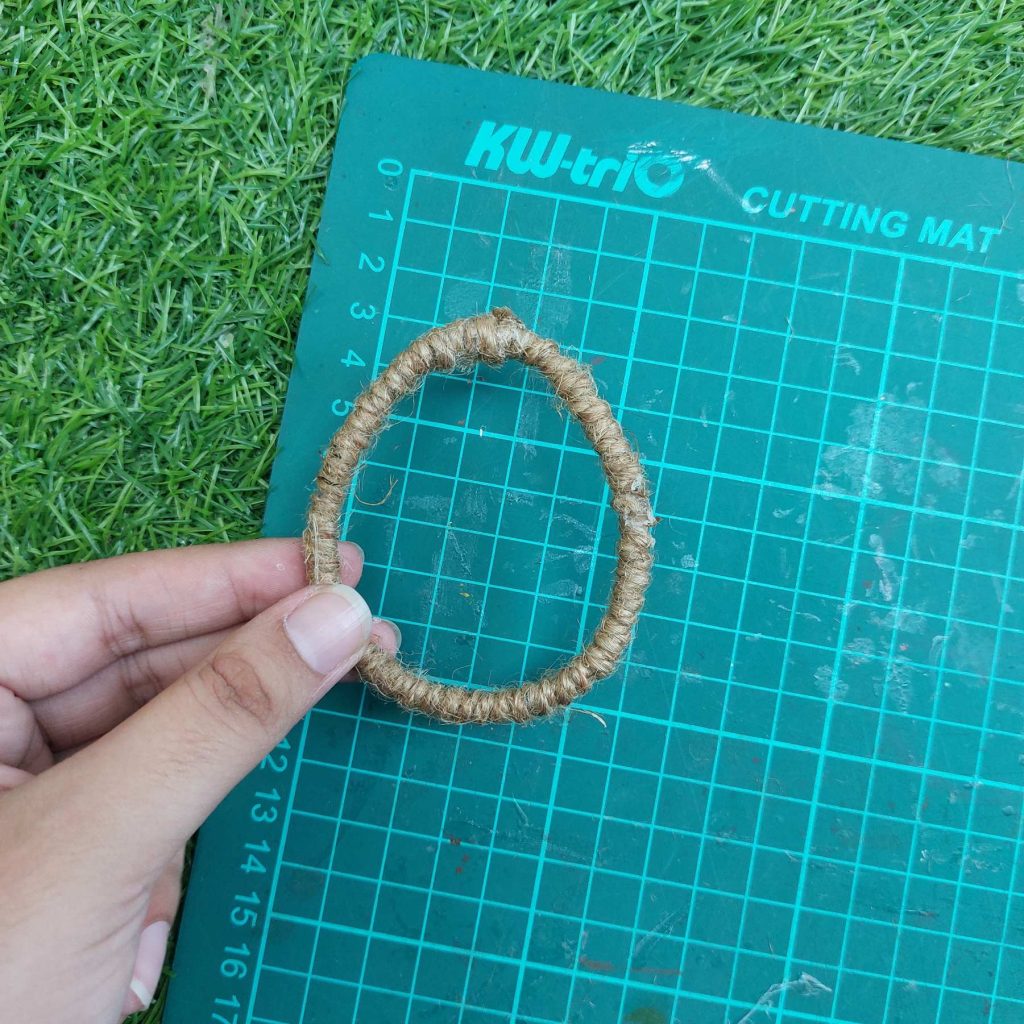
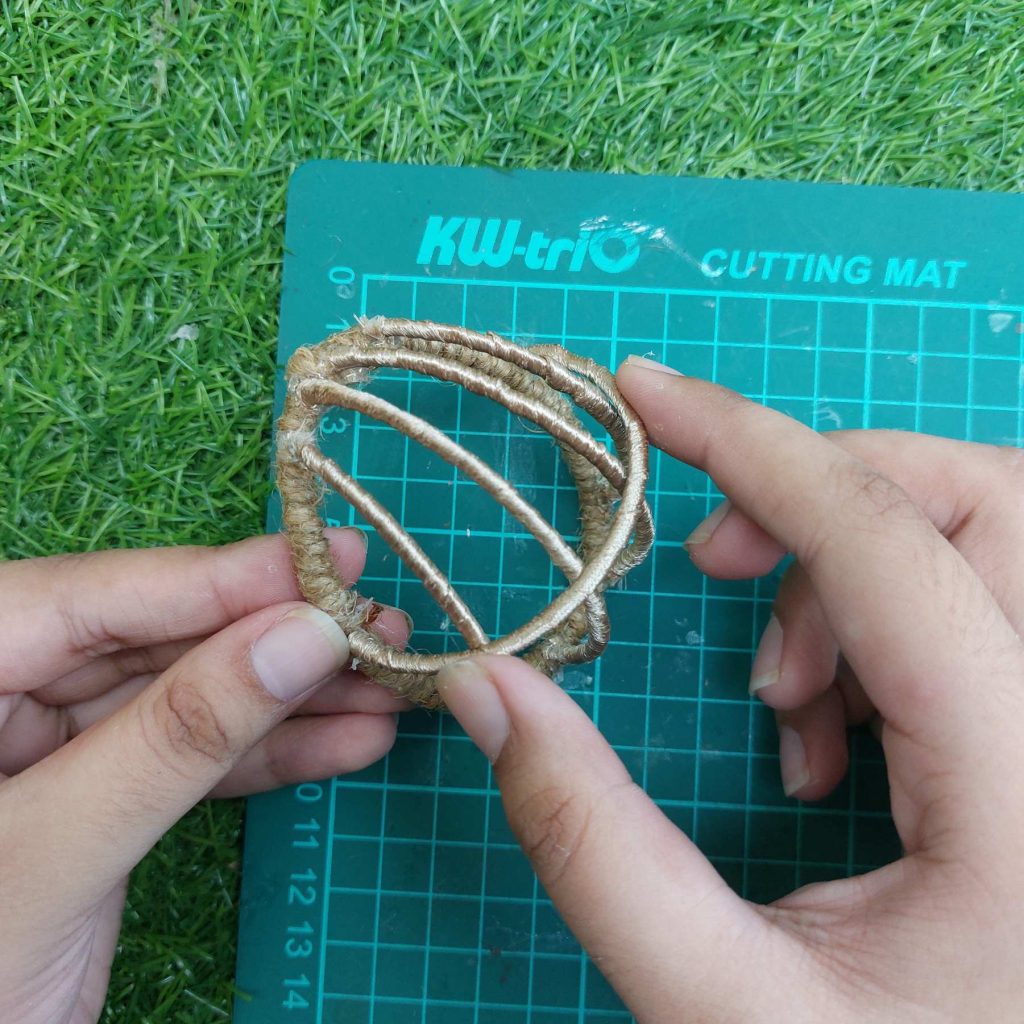
Take another metal ring and gently reshape it into a teardrop. Pinch the top together slightly while keeping the bottom rounded. Don’t worry about making it perfect yet—you can adjust the shape as you go.
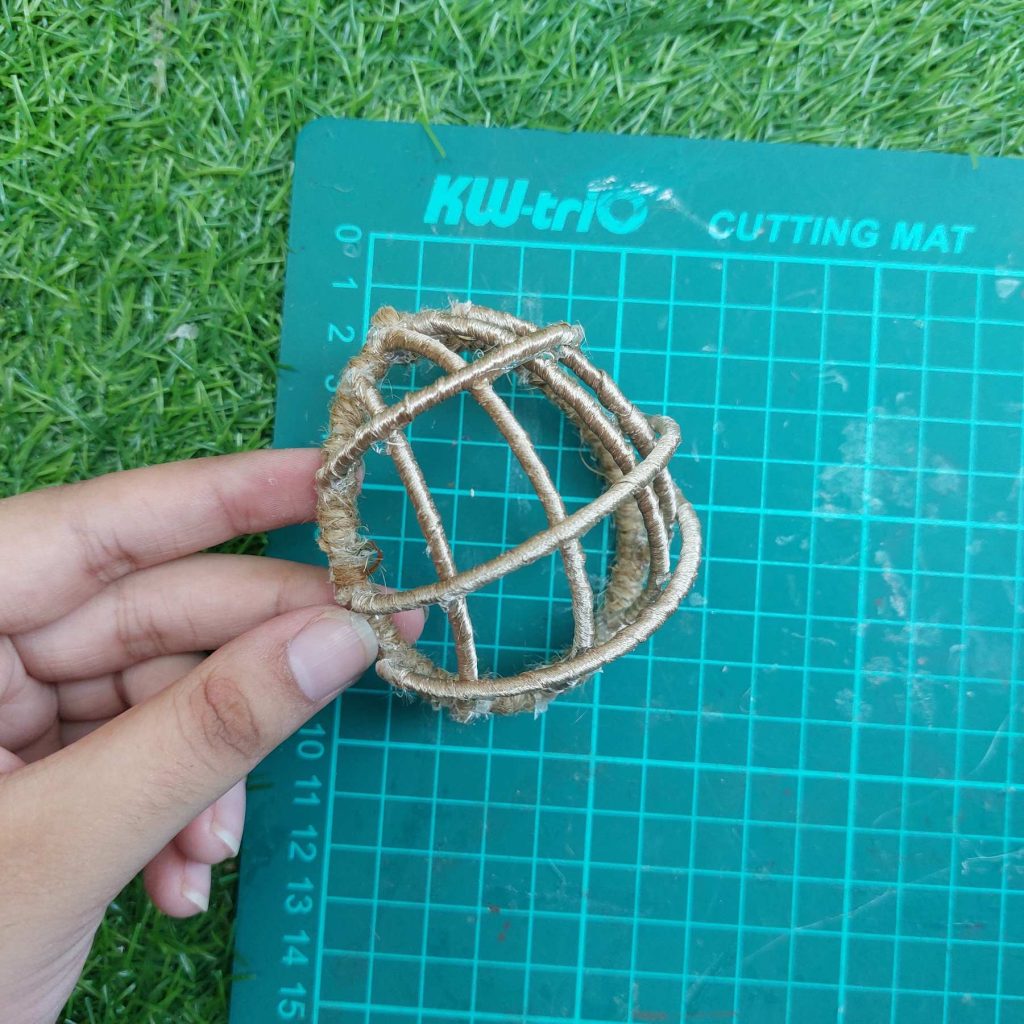
Once you’re happy with the shape, wrap the entire frame with the same jute twine. Keep each wrap close to the previous one so the metal is completely hidden.
When finished, you should have a neatly wrapped teardrop-shaped frame that will form the outer edge of your miniature hanging chair. This frame should be slightly smaller than the height of the curved stand, leaving enough room for the chair to hang freely.
Step 5: Add the inner support frame
To give the hanging chair its shape and provide a base for the woven seat, you’ll need a second, smaller frame.
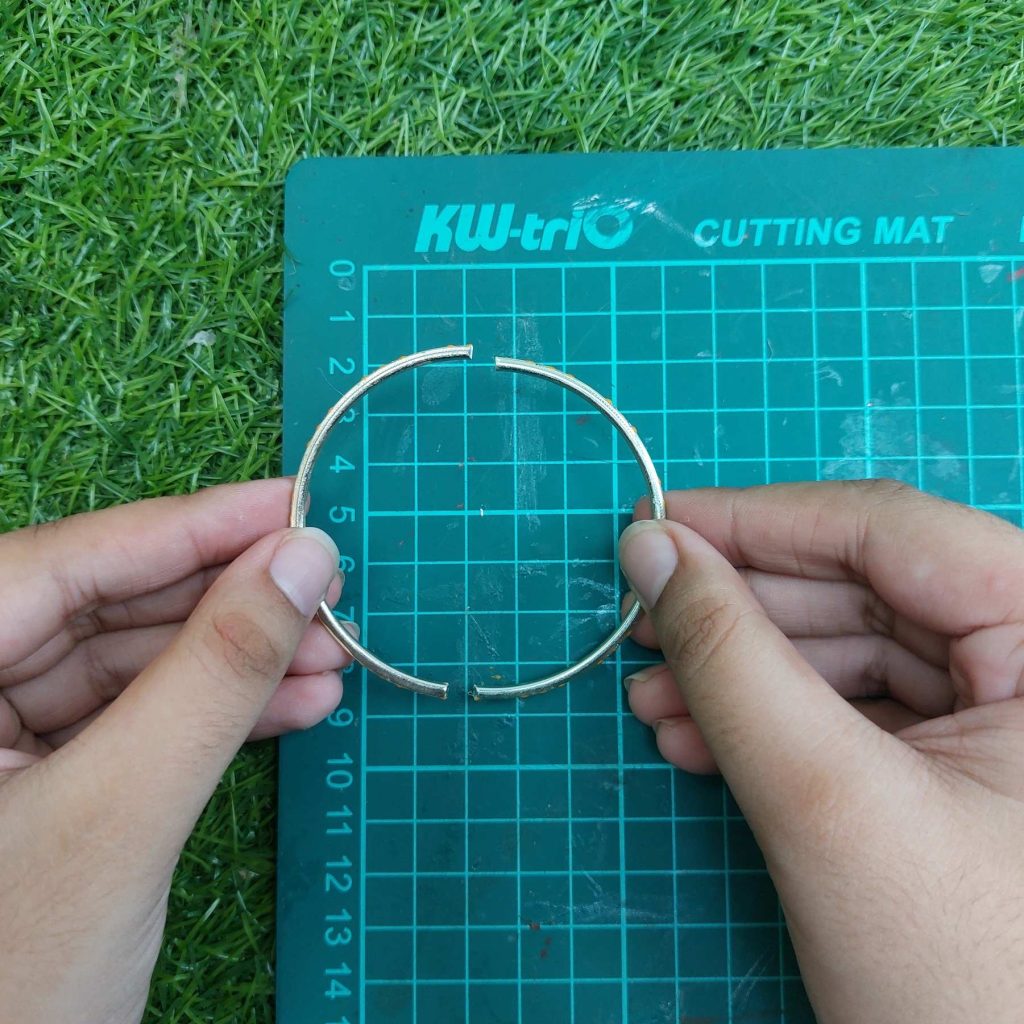
Take another metal ring and cut away two small sections, leaving two identical curved pieces. Cover one of these curved pieces with a narrow satin ribbon or fabric tape. Wrapping it instead of using jute creates a smoother finish and prevents extra bulk inside the chair.
Once wrapped, position the curved piece inside the teardrop frame. The ends should meet the frame near the top and bottom, following the same curve as the outside edge while sitting a short distance inward.
Secure both ends with hot glue. This inner support will hold the woven seat and help the miniature hanging chair keep its shape. Before the glue cools completely, make any small adjustments so the support sits evenly and follows the curve of the chair.
Try to remove excess glue once everything is dry.
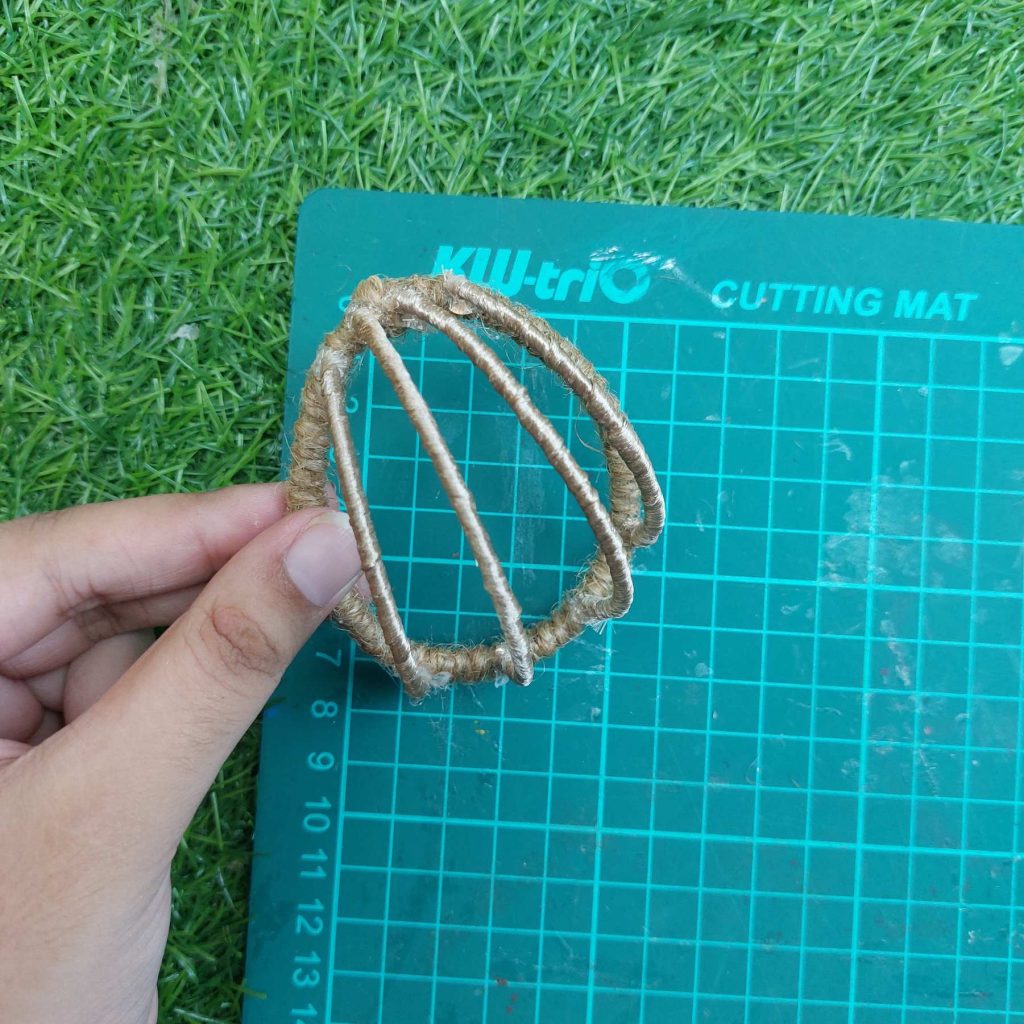
Step 6: Build the basket frame
Now it’s time to give your hanging chair its rounded basket shape by adding the side supports.
Take three more curved metal pieces and wrap each one with the same satin ribbon you used for the first support. This creates a neat finish and keeps the frame slim enough for weaving later.
Glue the first support from the top center of the chair to the opposite side at the bottom. Position the second and third supports evenly around the frame, spacing them equally so they create a rounded, dome-like structure.
Don’t worry if the shape isn’t perfect straight away. Before the glue sets, gently bend and adjust each support until the basket looks balanced from every angle.
Once the three supports are attached, add two more curved pieces that run across the sides of the chair. Instead of running from top to bottom, these supports connect the left and right sides of the frame, crossing over the existing ribs. This strengthens the structure and gives the chair its rounded, egg-shaped appearance.
Remove excessive glue residu.
Step 7: Add the hanging chain and outer support
It’s time to attach the chair to its stand.
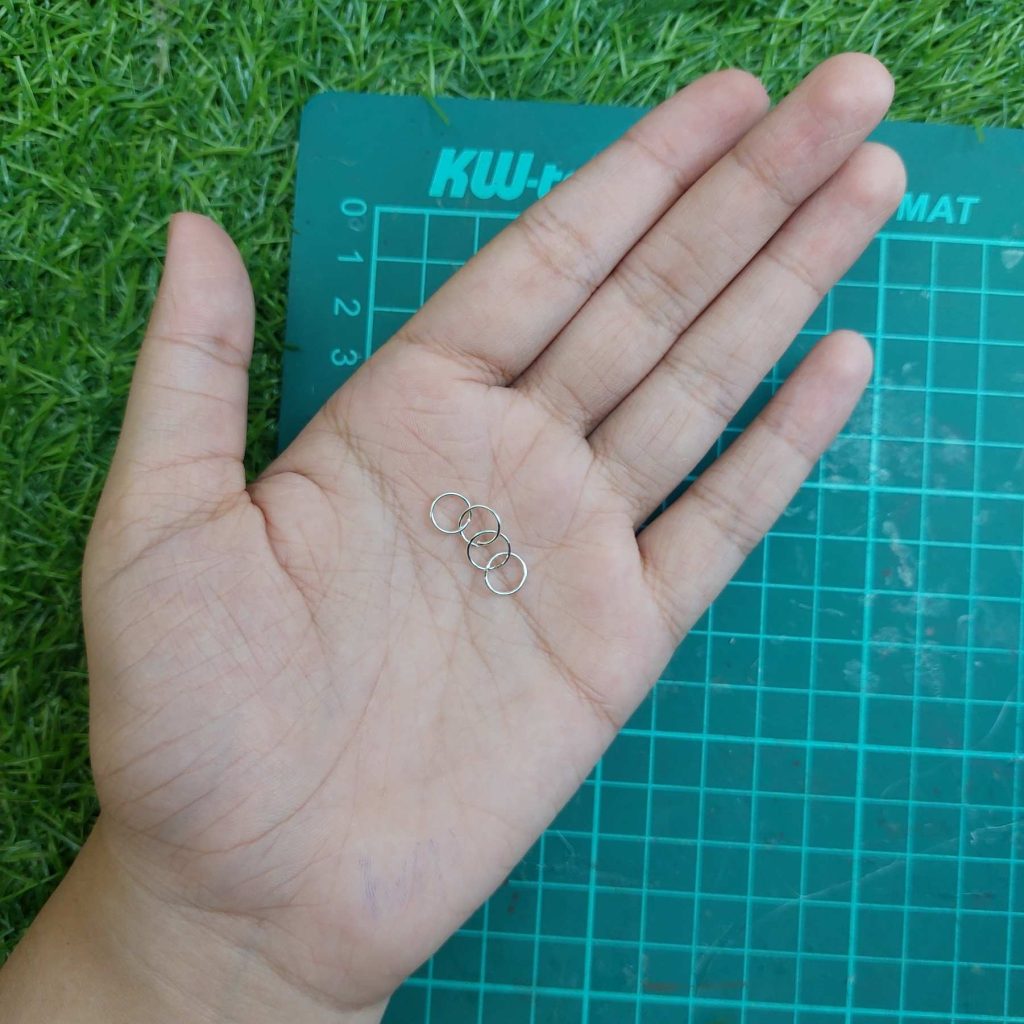
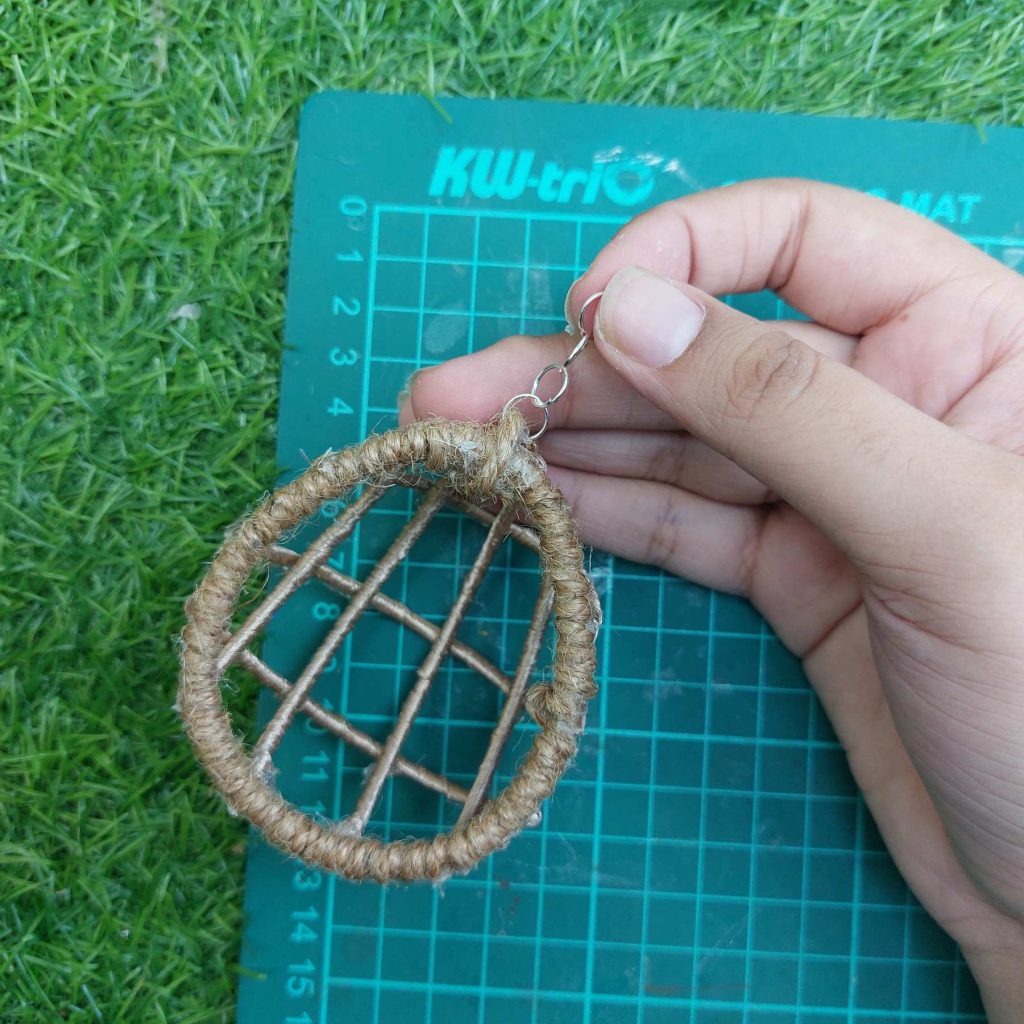
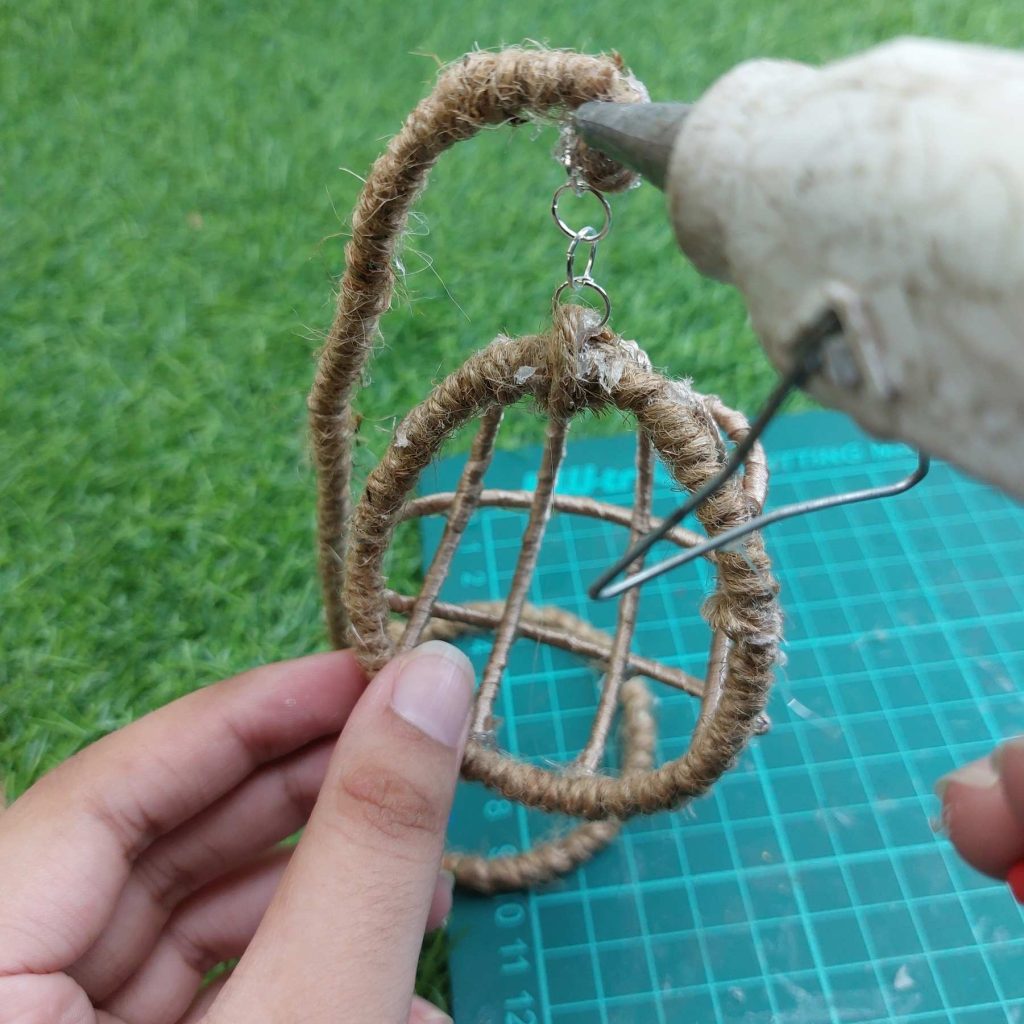
Connect four small jump rings together to create a short hanging chain. Attach one end of the chain securely to the top of the chair frame.
Next, position the large outer support around the chair and attach the other end of the chain to the top center of the support. This allows the chair to hang freely inside the frame.
Hang the chain and ‘egg’ to the top and reinforce it with glue. Make any small adjustments now to ensure it is balanced.
Once you’re happy with the position, apply a little extra hot glue over the top attachment point to strengthen the connection.
If any glue is visible, you can disguise it by gluing a few loose jute fibers over the area, giving it the same natural look as the rest of the frame.
Step 8: create some pillows.
For the purpose of this tutorial and its final look, I temporarely used some polymer clay and kitchen paper, but I will add real cushions later.
But for now, I’m done!
Wrapping It Up
Although it may look like a complicated project at first, it’s actually built from just a few simple materials and a little patience. Once the frame is finished, all that’s left is to add a soft cushion, a few tiny pillows, or even a miniature throw blanket to make it feel extra cozy.
If you enjoyed making this miniature hanging chair, I’d love to hear how yours turned out. Feel free to leave a comment below or share a photo in my Facebook group!