
Making miniatures doesn’t always mean buying expensive supplies or special tools. With a little imagination, everyday materials and even bits of “trash” can be turned into charming dollhouse accessories.
In this post, I’ll show you different step-by-step projects that are easy, affordable, and surprisingly realistic. Each project comes with photos and instructions so you can try them out yourself.
As an Amazon, Etsy and Anavrin associate, I earn a small commission from your purchase, with no extra charges for you.
How to Make Miniature DIY Glasses with Everyday Materials
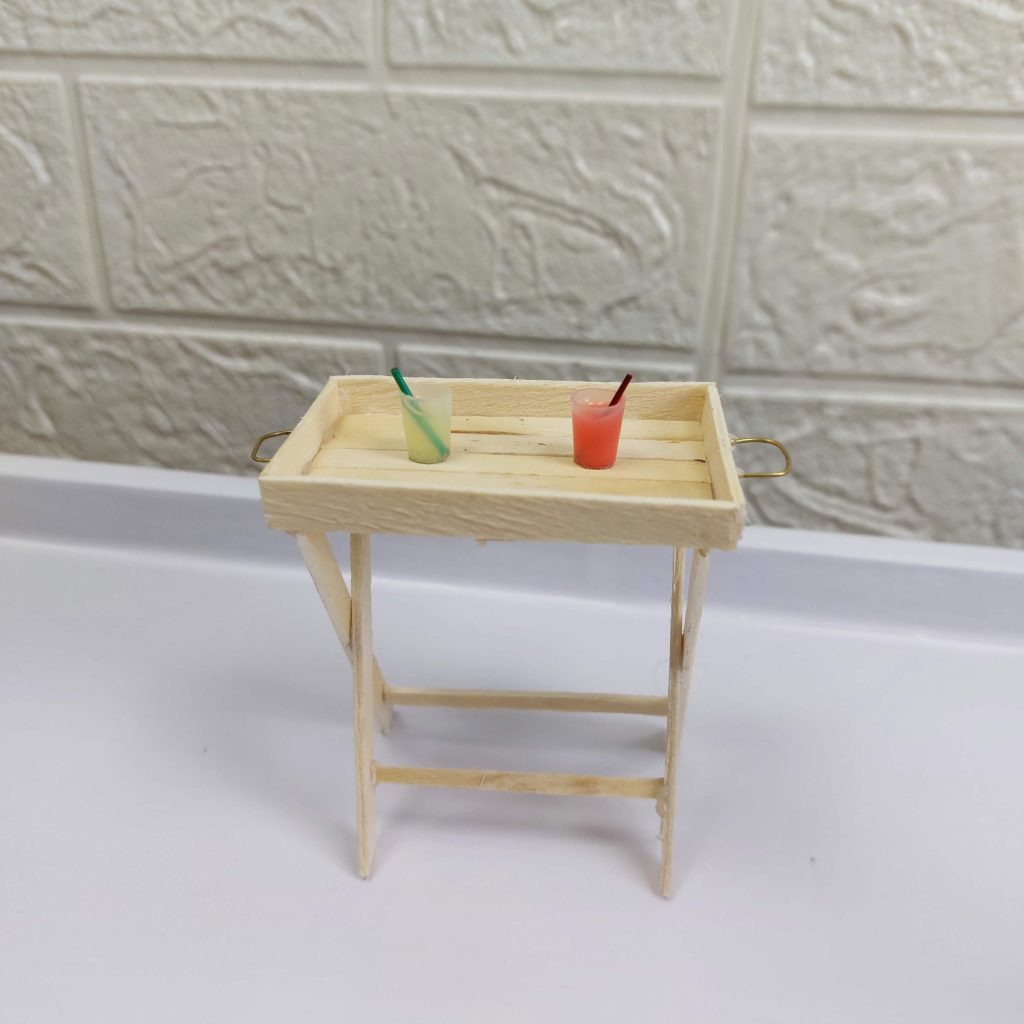
If you’re looking for an easy way to make realistic miniature glasses, this little project is perfect. With just a few scraps—a plastic tube, a paper clip, and a dab of paint—you can make tiny drinks for your dollhouse or mini scene. They look great on a summer table or in a dollhouse kitchen.
Materials Needed
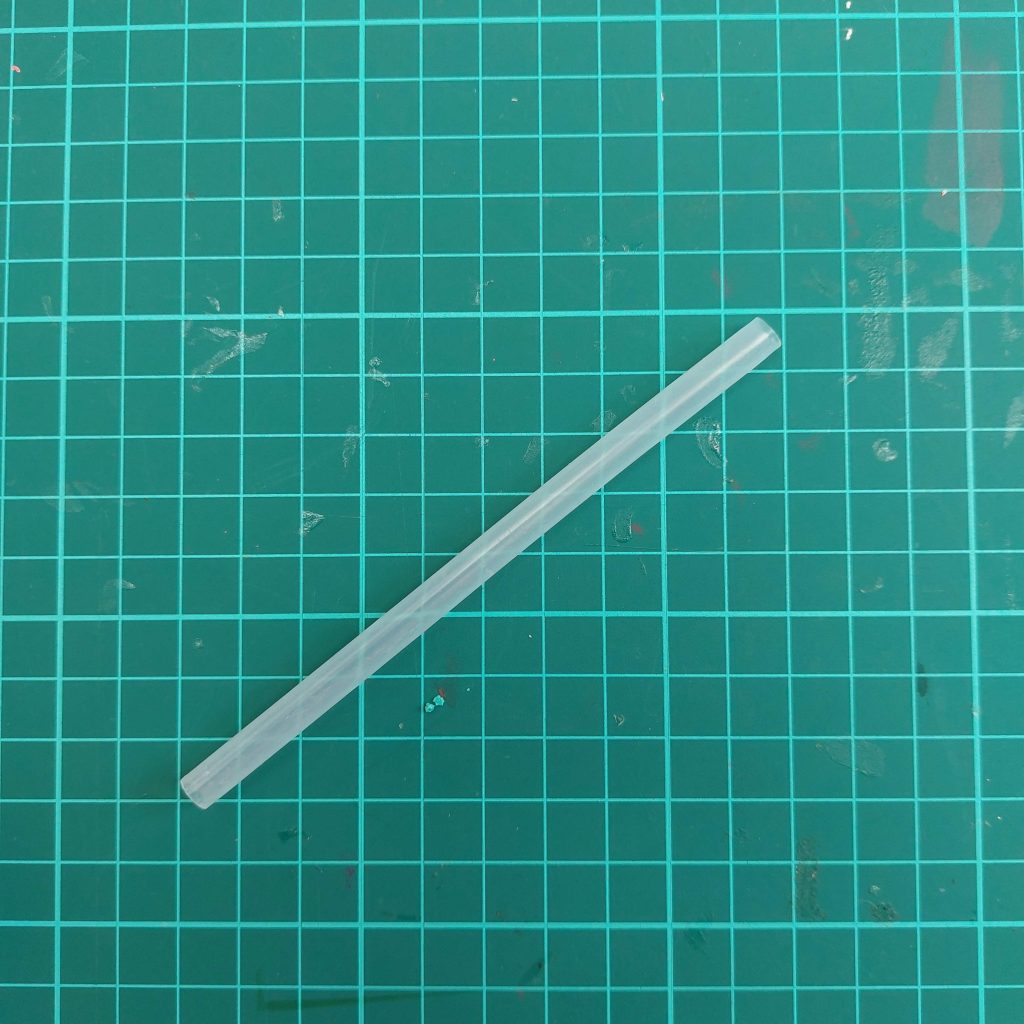
- 6 mm plastic “dib tube” ( the kind you find inside a cleaning spray bottle )
- Glue gun (to shape the plastic)
- Cutter
- Paper clip (for the straw)
- Thin acrylic paint (to mimic juice)
If you’re not sure what I mean with a dib tube, check out the picture below. If you have an empty spray bottle made from plastic, it should contain a tube like this.

Clear Spray Bottle tube plastic
Buy Now →Step-by-step tutorial:
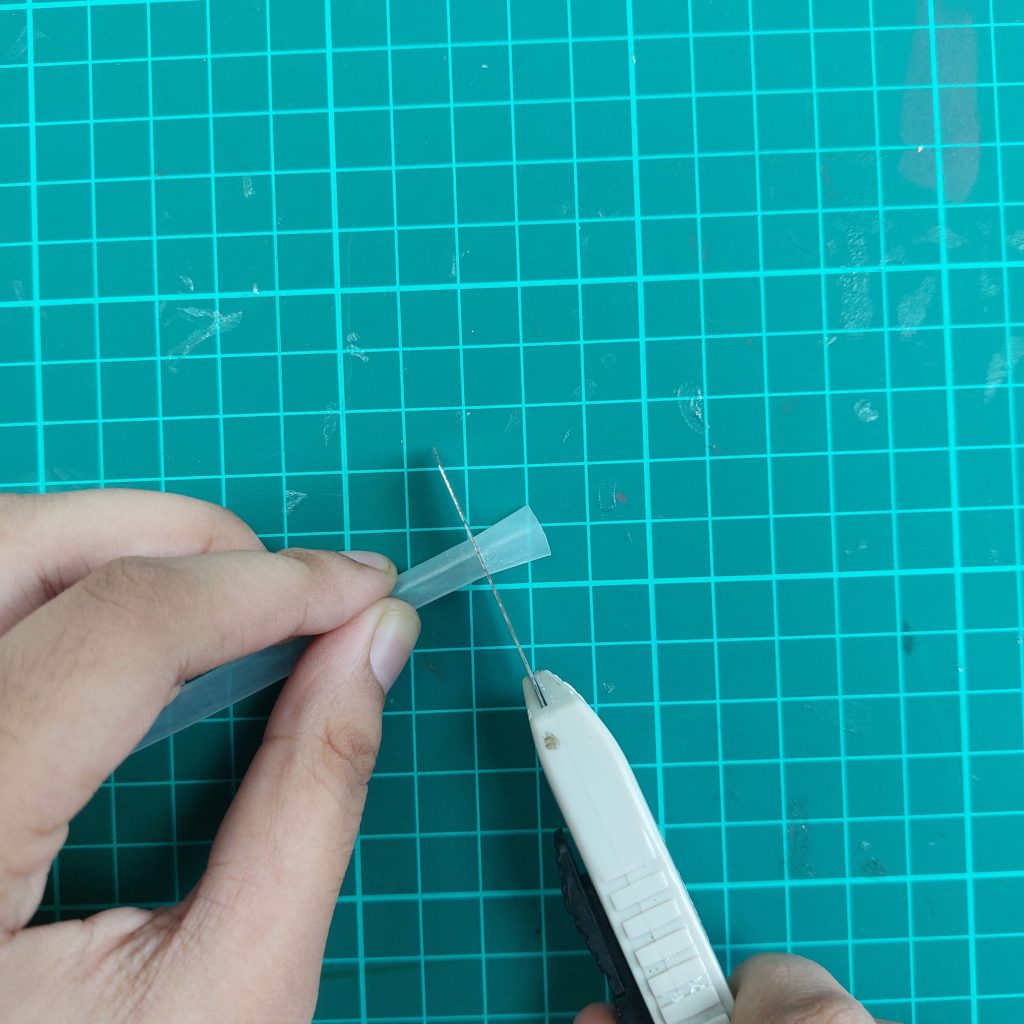
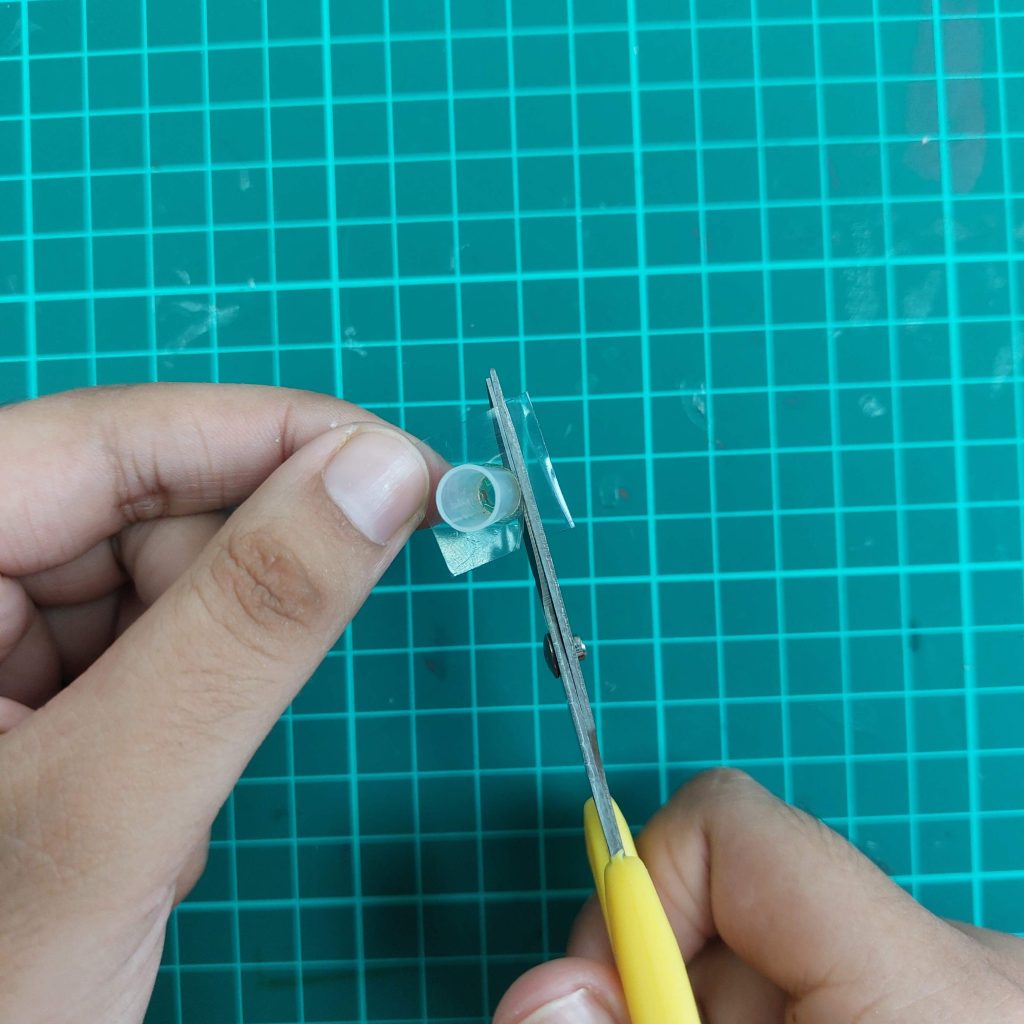
- Step 1: Cut the tube
Cut off the plastic tube from the spray using a cutter. This will form the base of your glass.
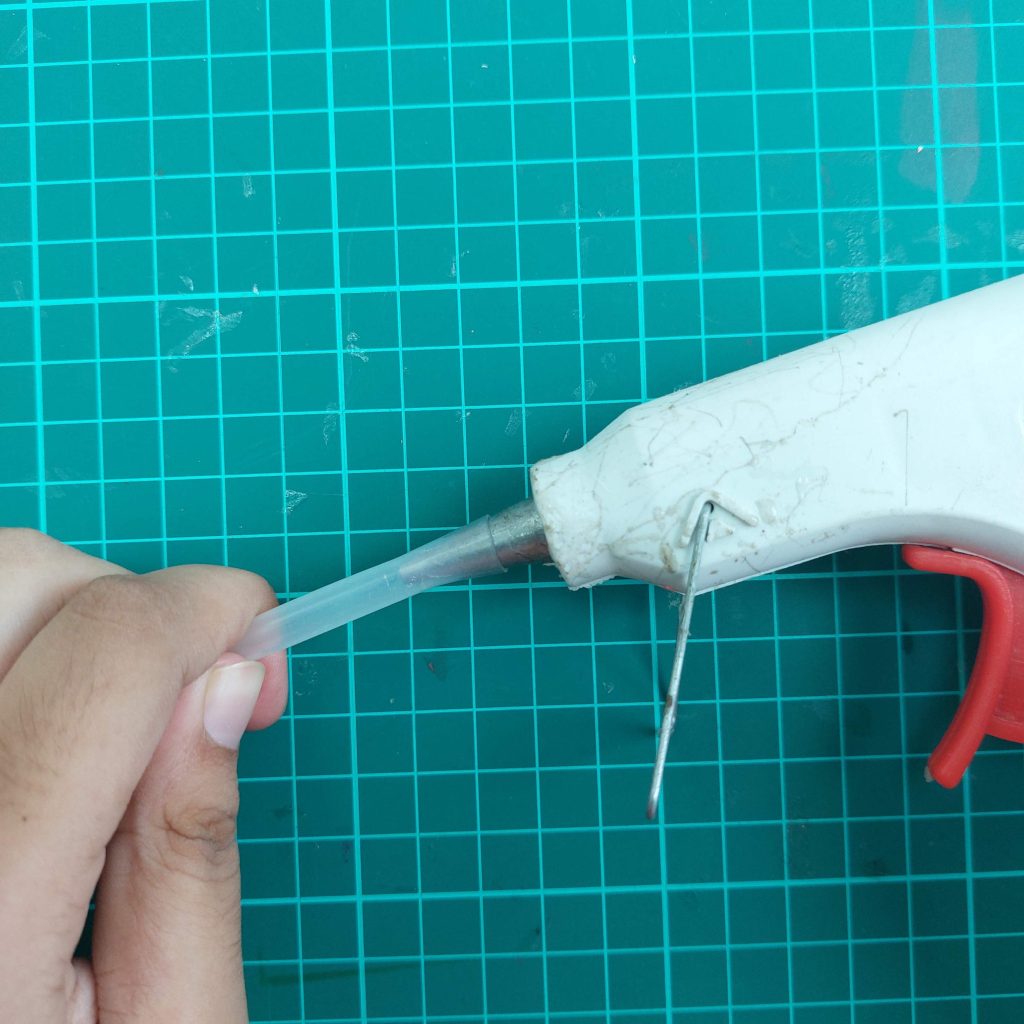
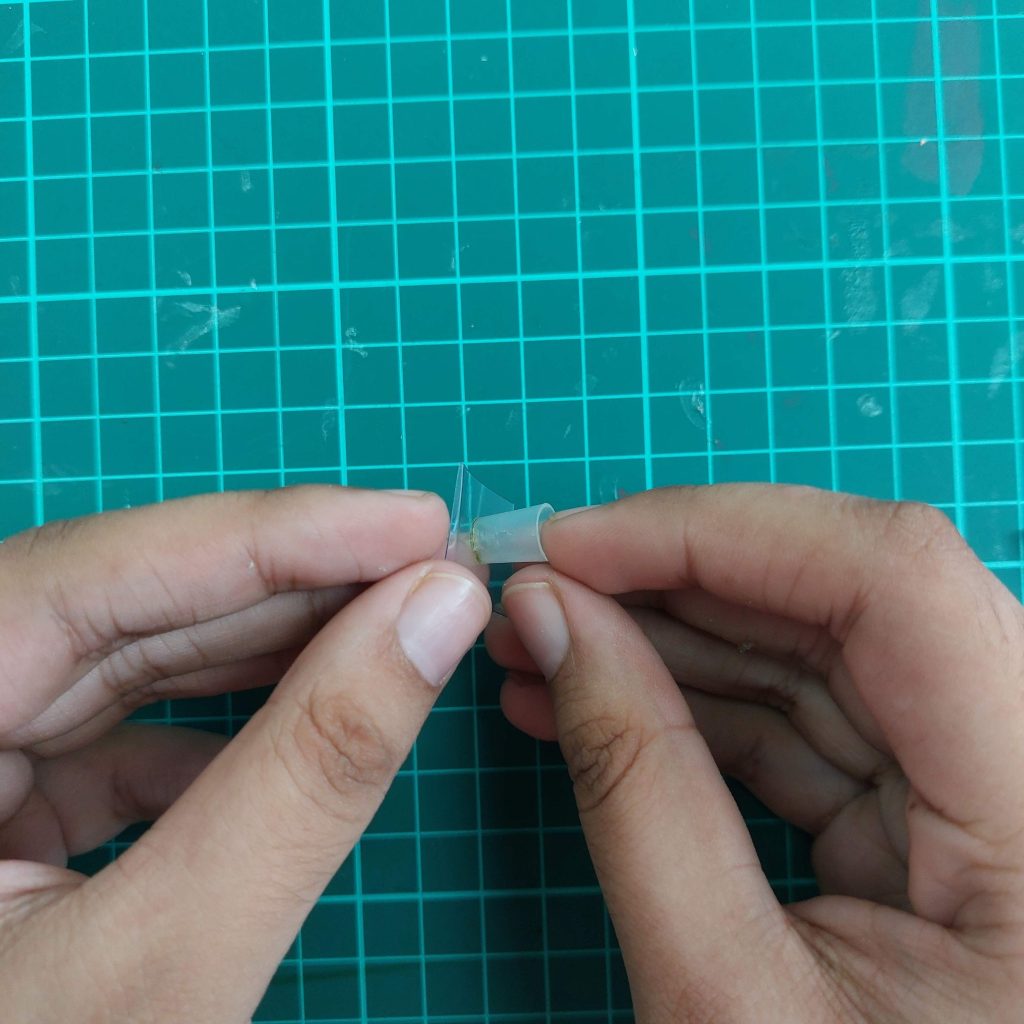
- Step 2: Shape the Rim
Lightly heat one end of the pipe with your glue gun nozzle. The heat will soften the plastic so you can round off the rim of your miniature glass.
- Step 3: Create the Bottom
When you formed the glass, cut it off at the bottom. You can now see your glass getting shaped.
After that, glue a sturdy piece of plastic to the bottom to make it waterproof.
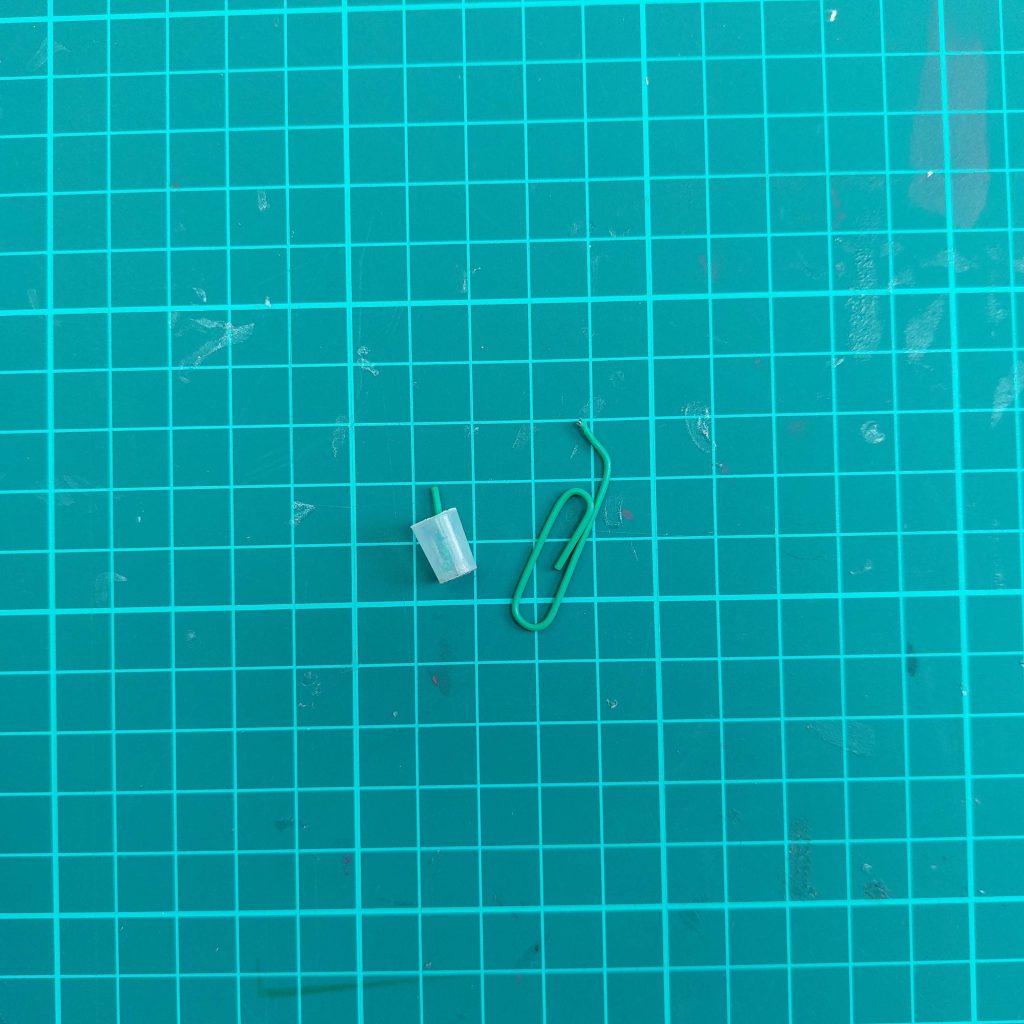
- Step 4: Add the Straw
Cut a piece of a paper clip and place it inside the glass to act as a straw. You can paint it beforehand or leave it as is for a metallic look.
- Step 5: Pour in the “Juice”
Mix a little thin acrylic paint with water (or use very watery paint) and carefully add it inside the glass. You can use different colors to make lemonade, orange juice, or even cocktails.
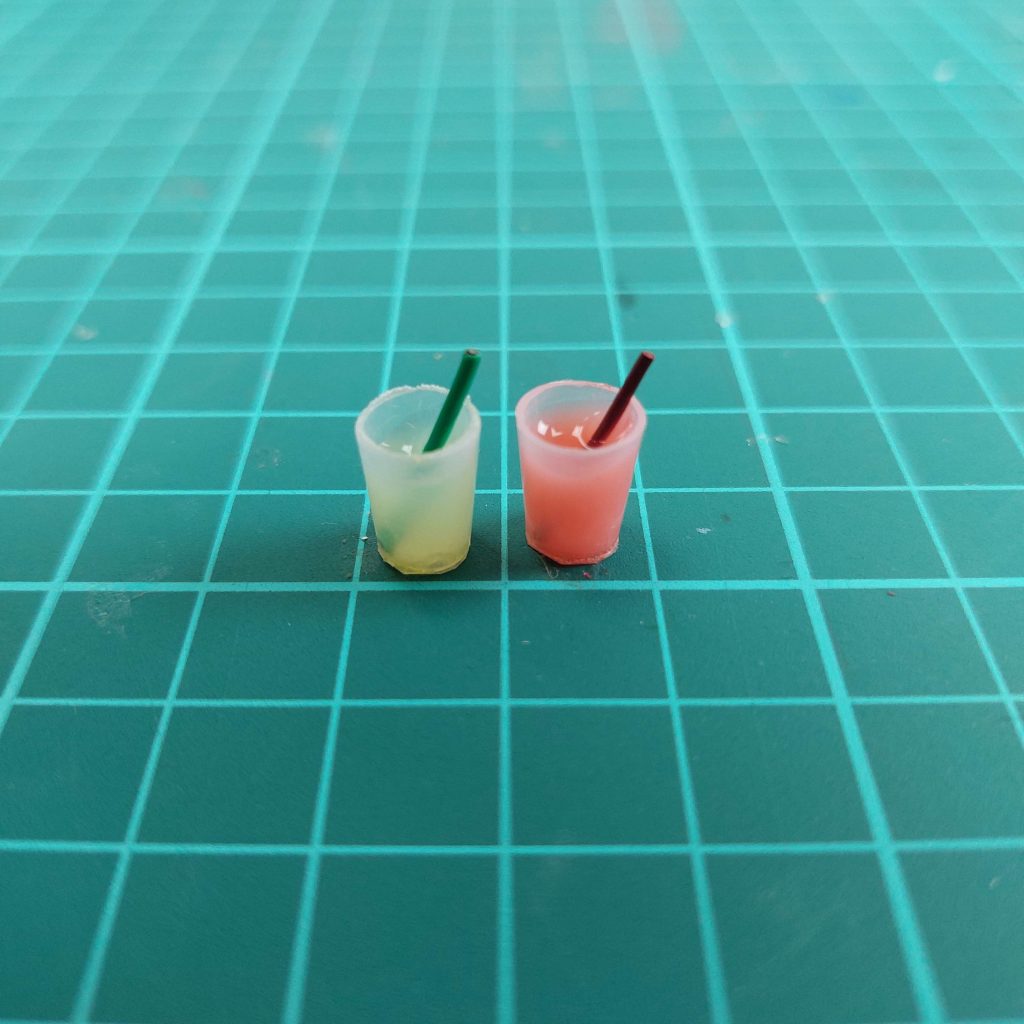
Once finished, you’ll have a realistic miniature drink ready to display.
DIY Miniature Ironing Board
This little ironing board is a fun accessory for your dollhouse laundry or sewing room. It’s simple to put together using popsicle sticks, skewers, and a bit of fabric.

Materials Required:
- Hot melt glue (optional)
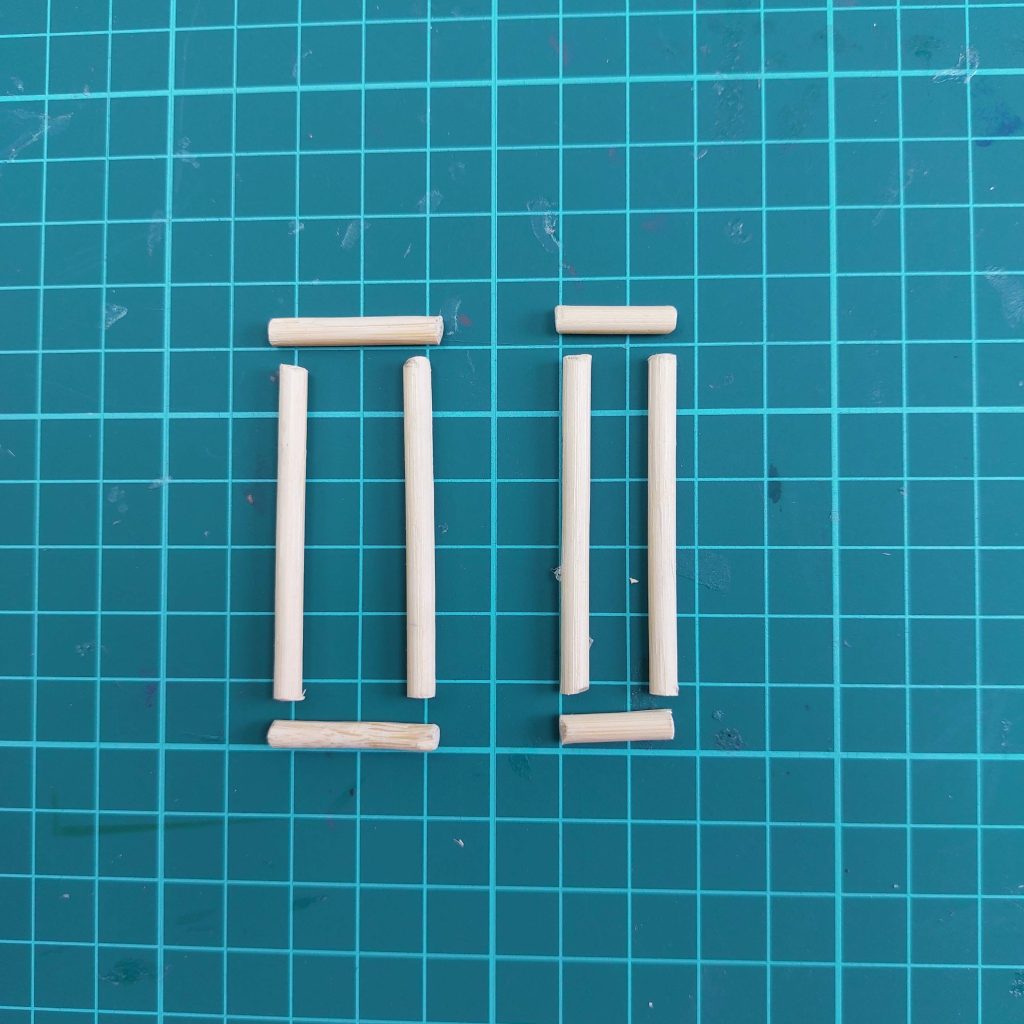
- Popsicle sticks (9.5 cm)
- Barbecue sticks (2.5 × 5 cm & 1.7 × 5 cm)
- Fabric scraps & tissue paper
- Glue (B-6000 recommended)
- Acrylic paint
Step-by-step tutorial
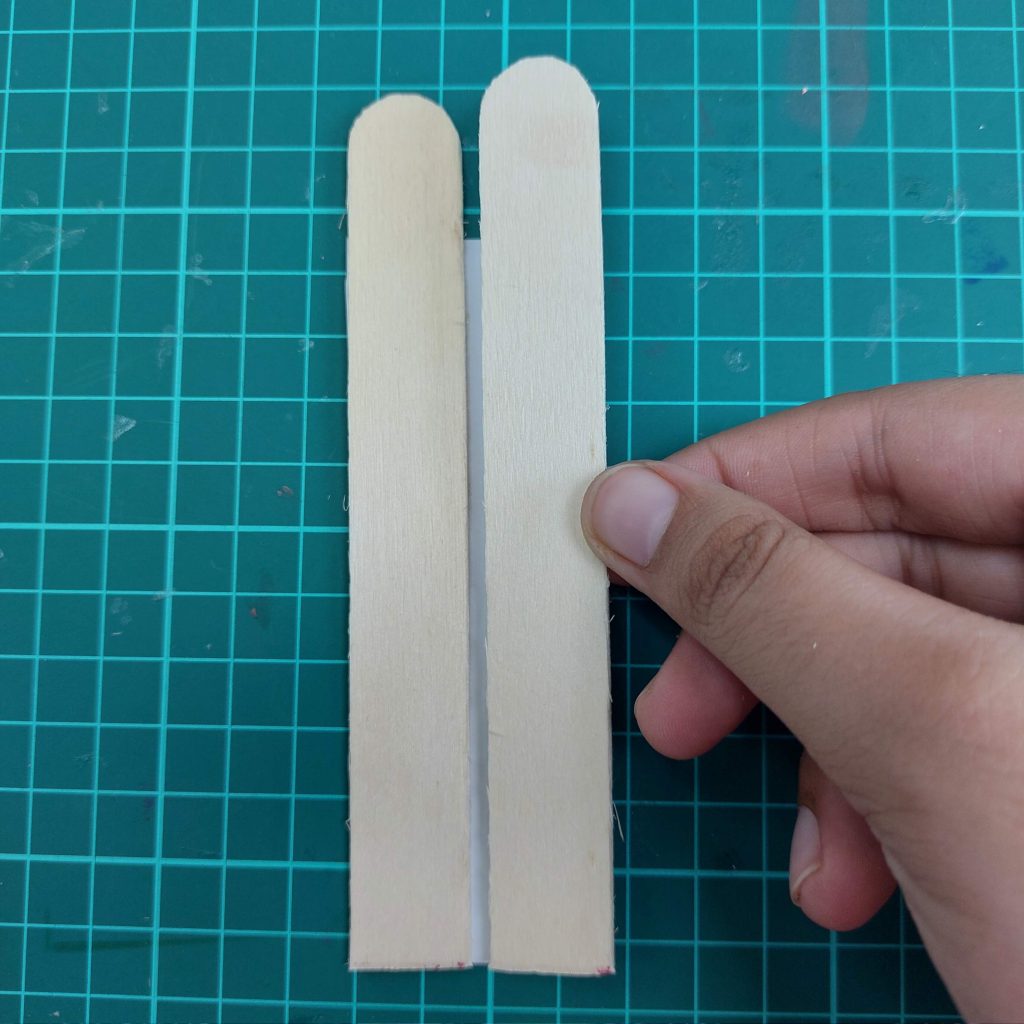
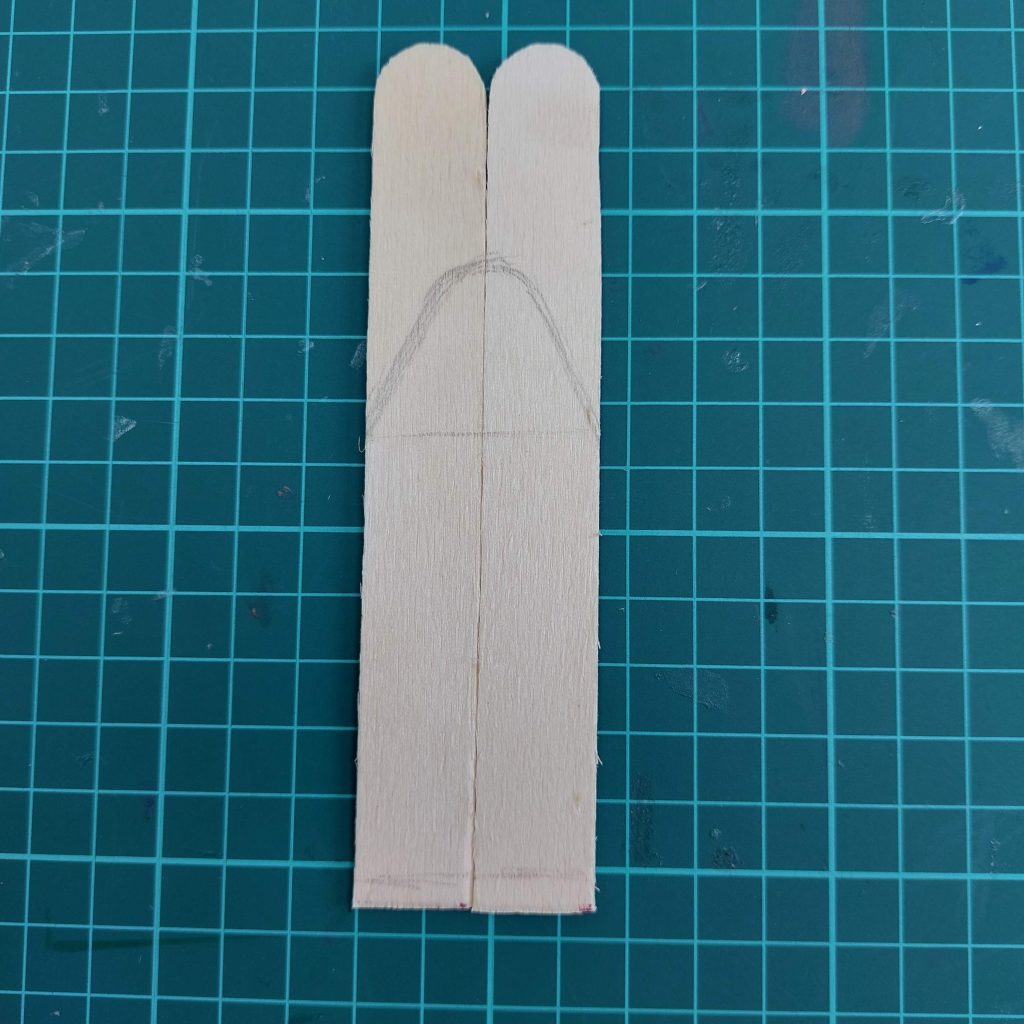
- Step 1: Shape the Board
Glue two popsicle sticks side by side. Sketch out the rounded end of the ironing board on them and cut along the line. This forms the base shape.

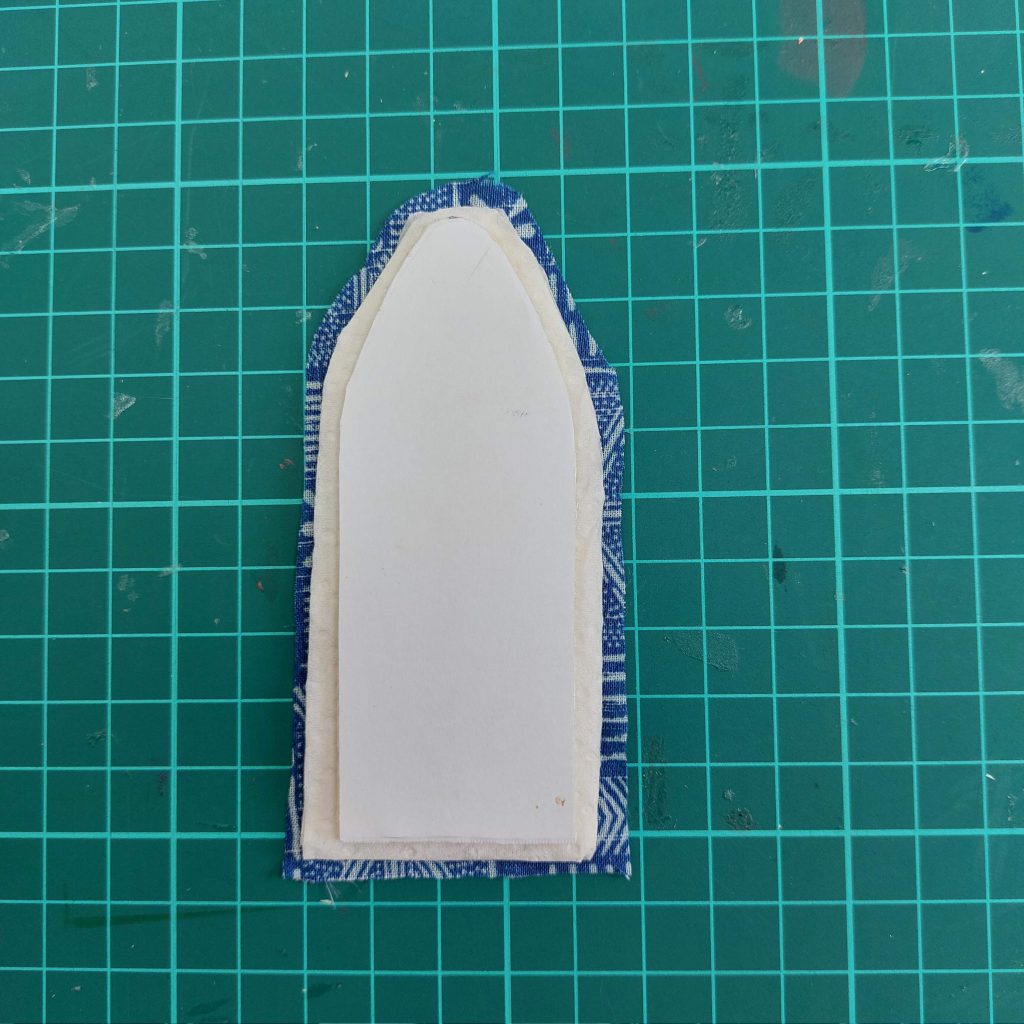
- Step 2: Add Padding
Glue a piece of tissue paper on top of the board to create padding. Trim it to fit.

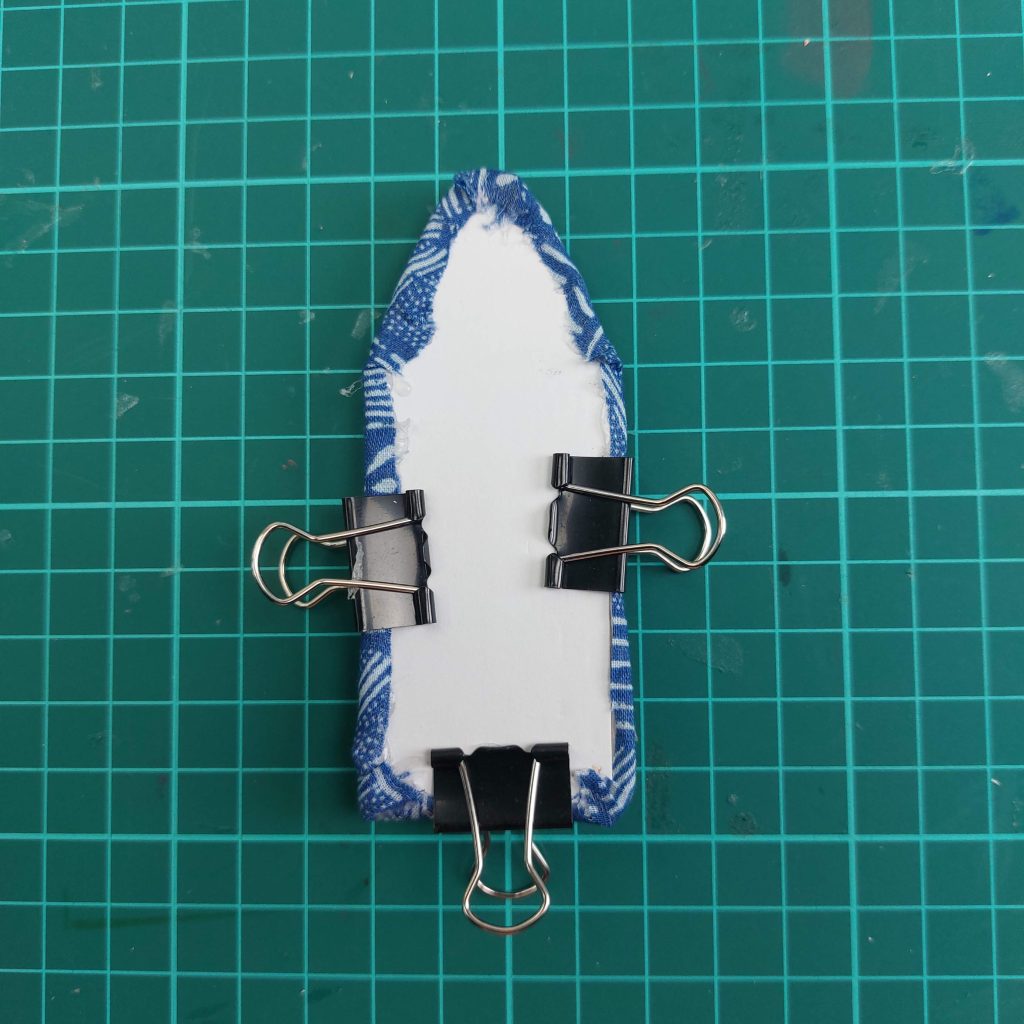
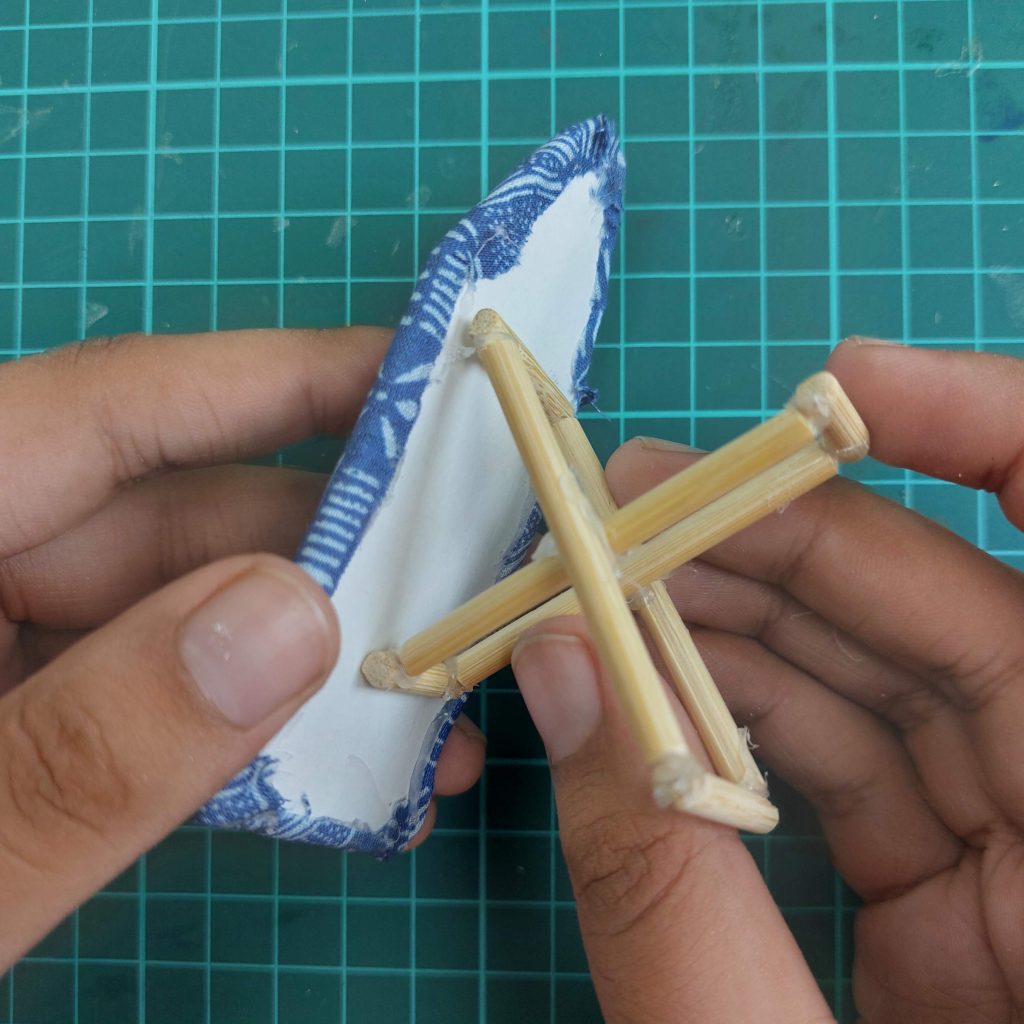
- Step 3: Cover with Fabric
Cut a piece of fabric slightly larger than the board. Wrap it neatly around the tissue-covered board, folding the edges underneath. Secure with glue and clips until dry.

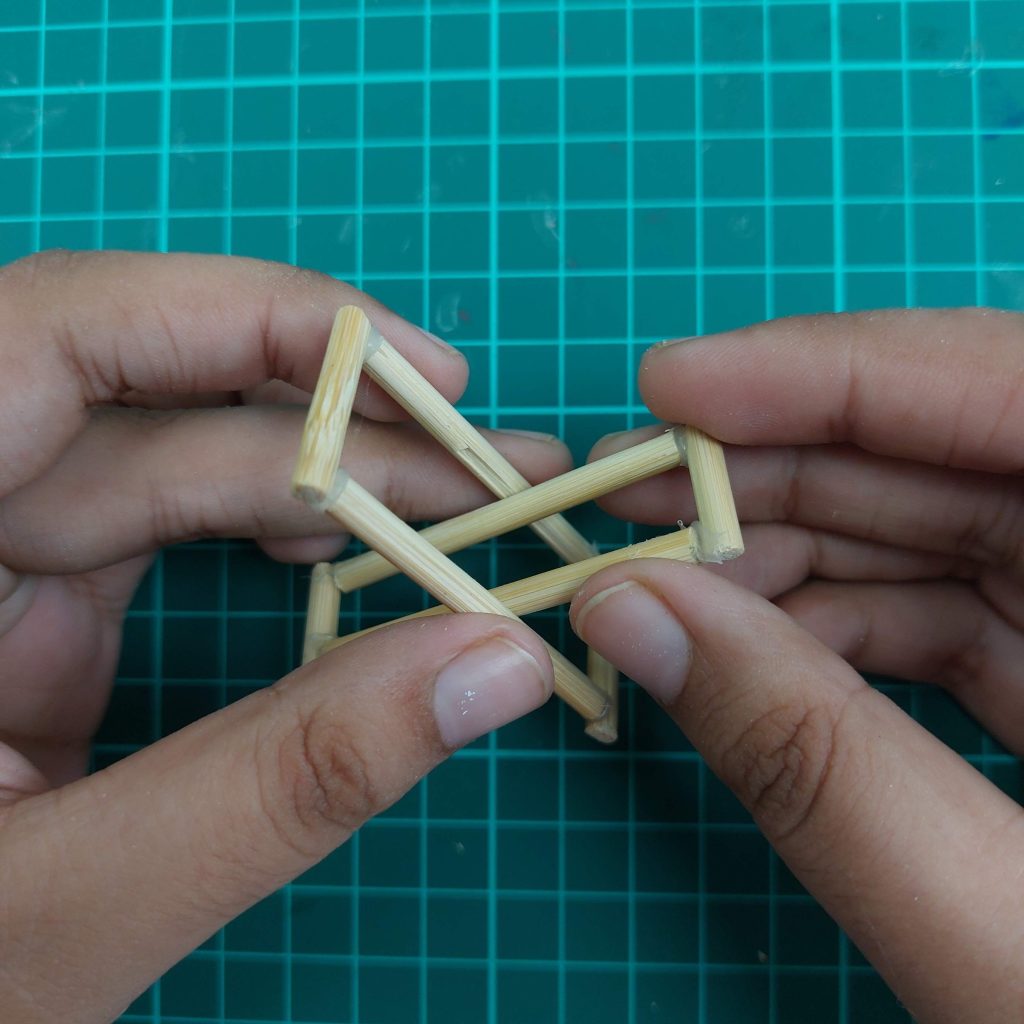
- Step 4: Build the Stand
Cut barbecue sticks to the given dimensions and form two X-shaped stands. Glue the pieces together firmly.
- Step 5: Attach the Stand
Glue the X-shaped base to the underside of the board. Make sure it sits securely and at the right angle.
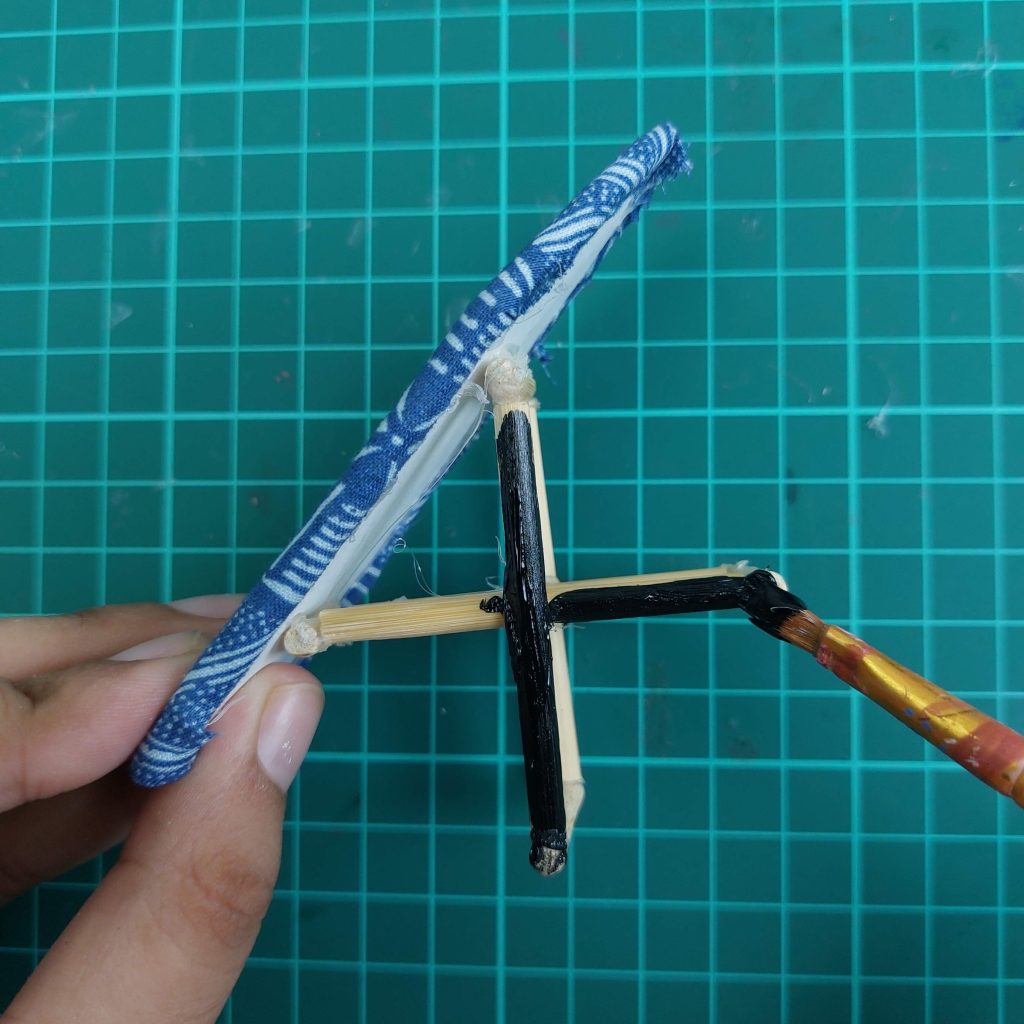
- Step 6: Paint the Base
Paint the barbecue stick base with black acrylic paint (or any color you prefer) to give it a finished look.
Your ironing board is ready for display!
Miniature Pan DIY (from Trash Materials)
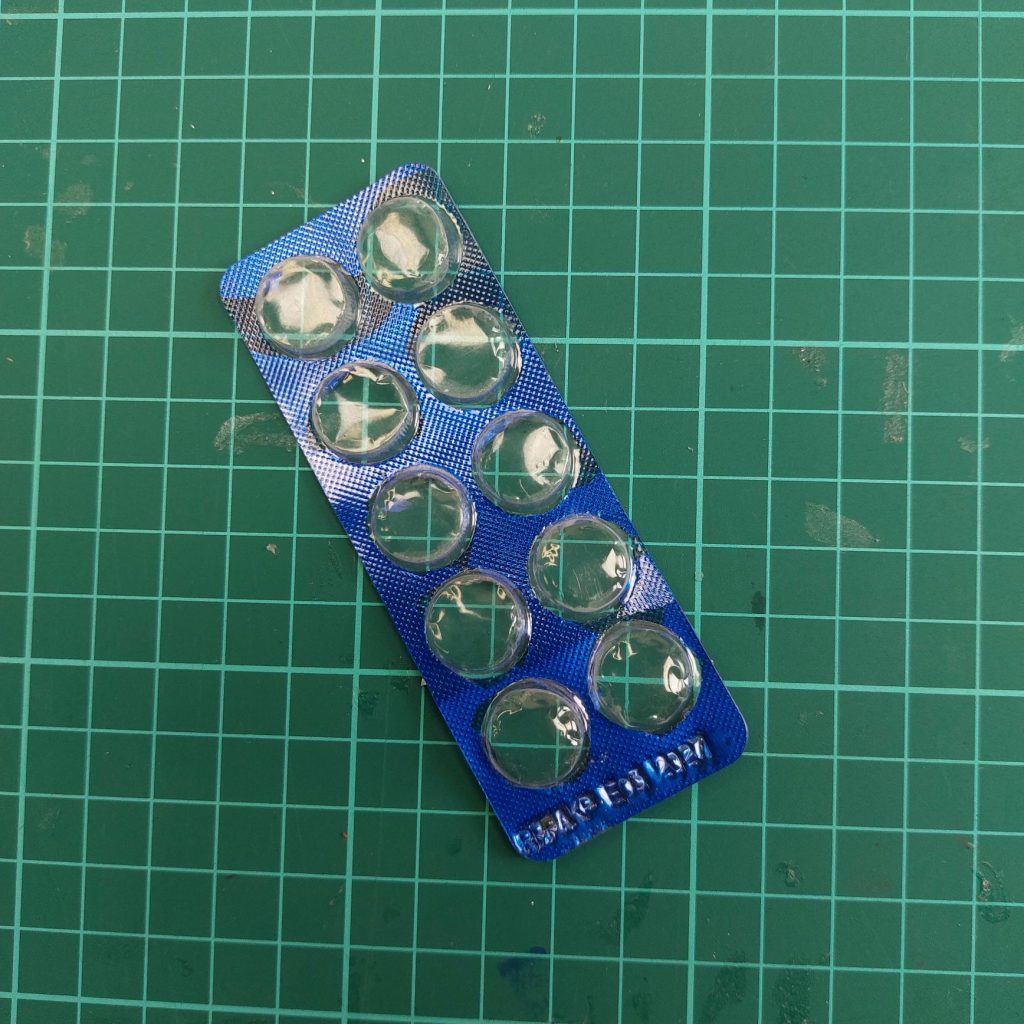
Here’s a fun way to turn an empty pill blister pack into a tiny frying pan for your dollhouse kitchen.
Materials Required:
- Strong glue
- Empty pill blister pack (transparent bubble part)
- Toothpick or wooden skewer (for the handle)
- Black acrylic paint
- Silver acrylic paint (or metallic marker)
Step-by-step tutorial:
1. Cut out a blister bubble.
Take an empty pill blister pack and carefully cut out one of the transparent bubbles. This will form the base of your miniature pan.
2. Trim neatly.
Use scissors to cut away any excess foil so you’re left with a clean round shape.

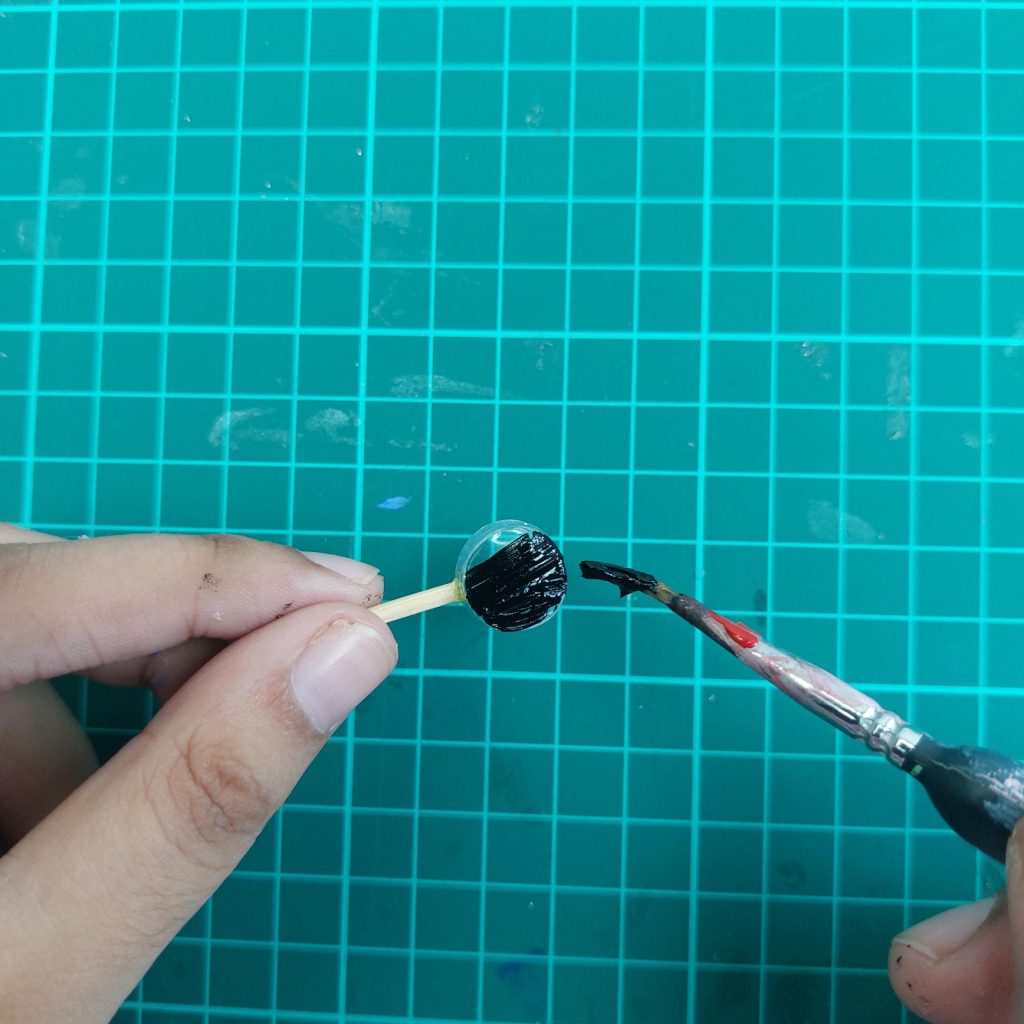
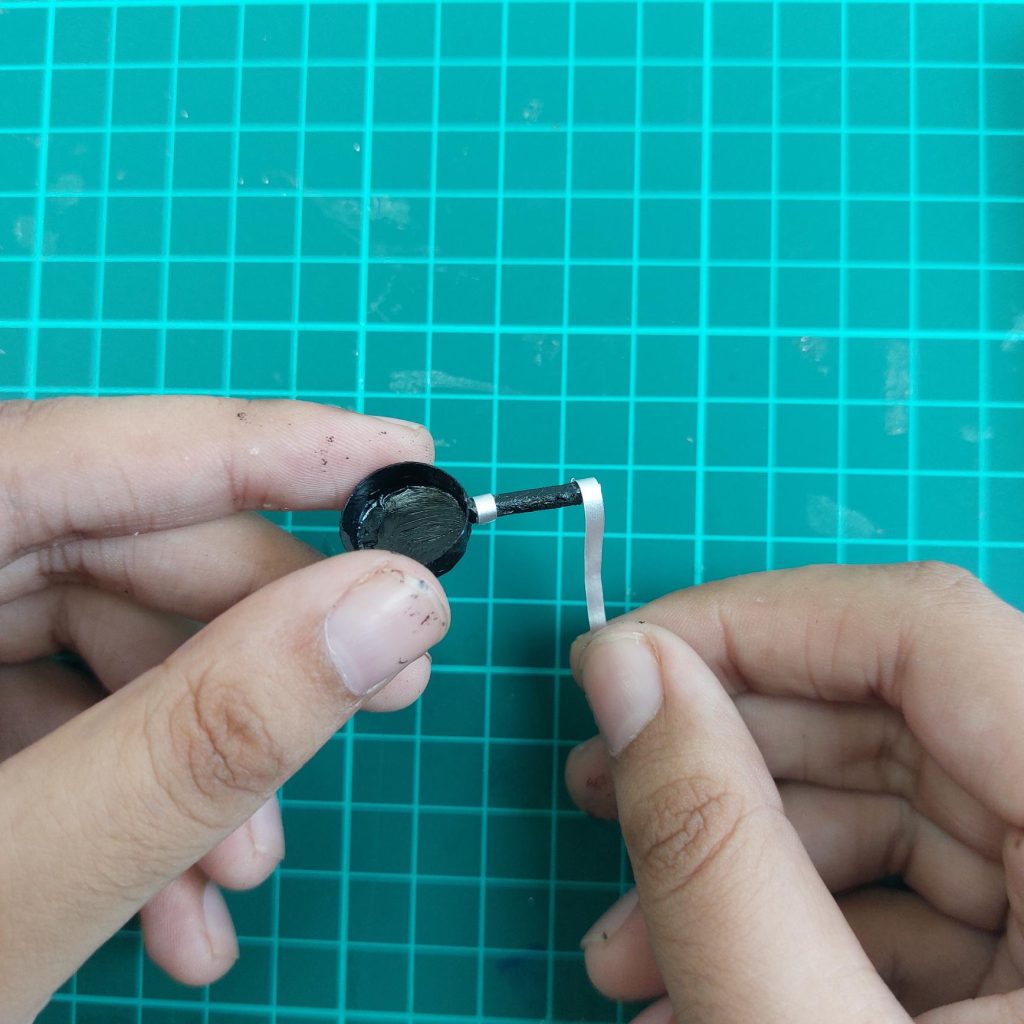
3. Add the handle.
Glue a toothpick or a small wooden stick to the side of the blister. This will serve as the pan handle.

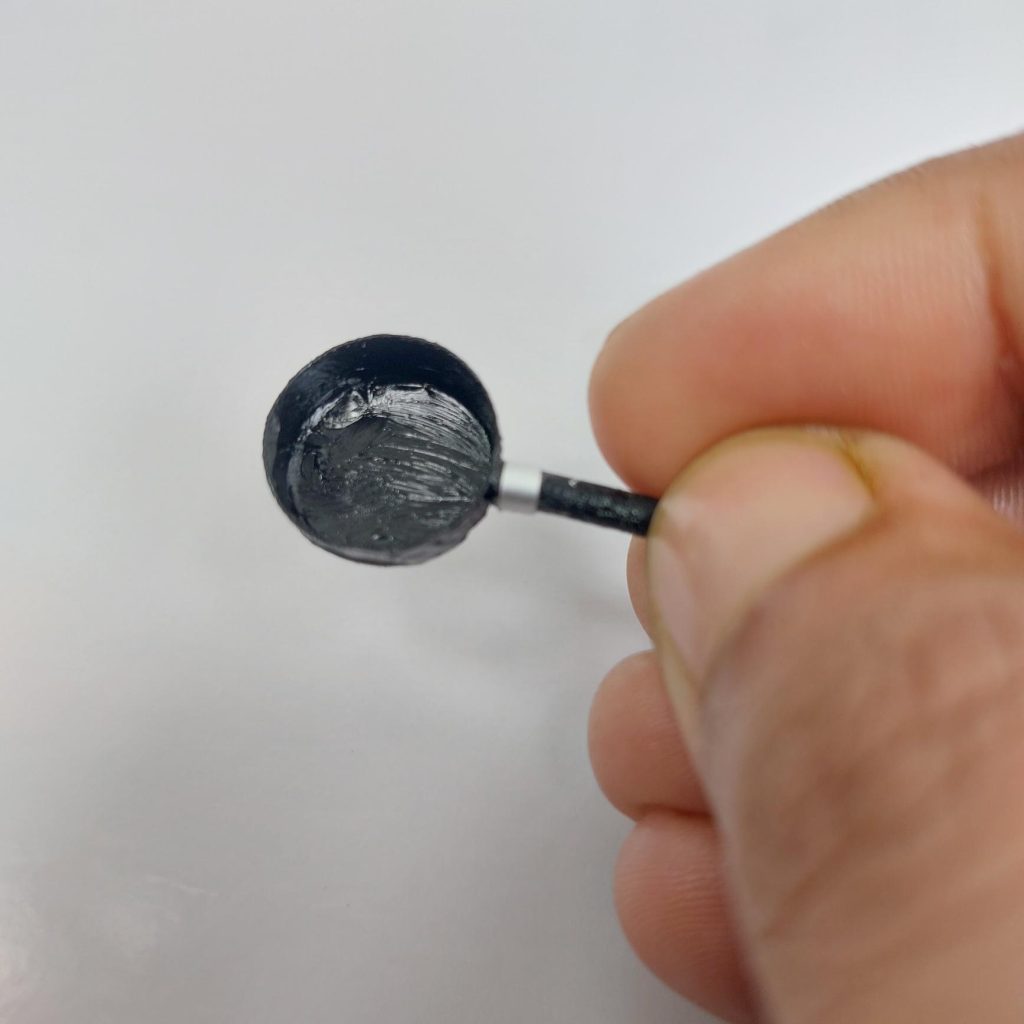
4. Paint the pan.
Cover the inside and outside of the blister with black acrylic paint. Also, paint the handle black to match.
5. Add metallic details.
Use silver paint or a metallic marker to add small accents on both ends of the handle to make it look realistic.
6. Let it dry.
Allow the paint to fully dry, and your miniature pan is ready to be placed in your dollhouse kitchen!
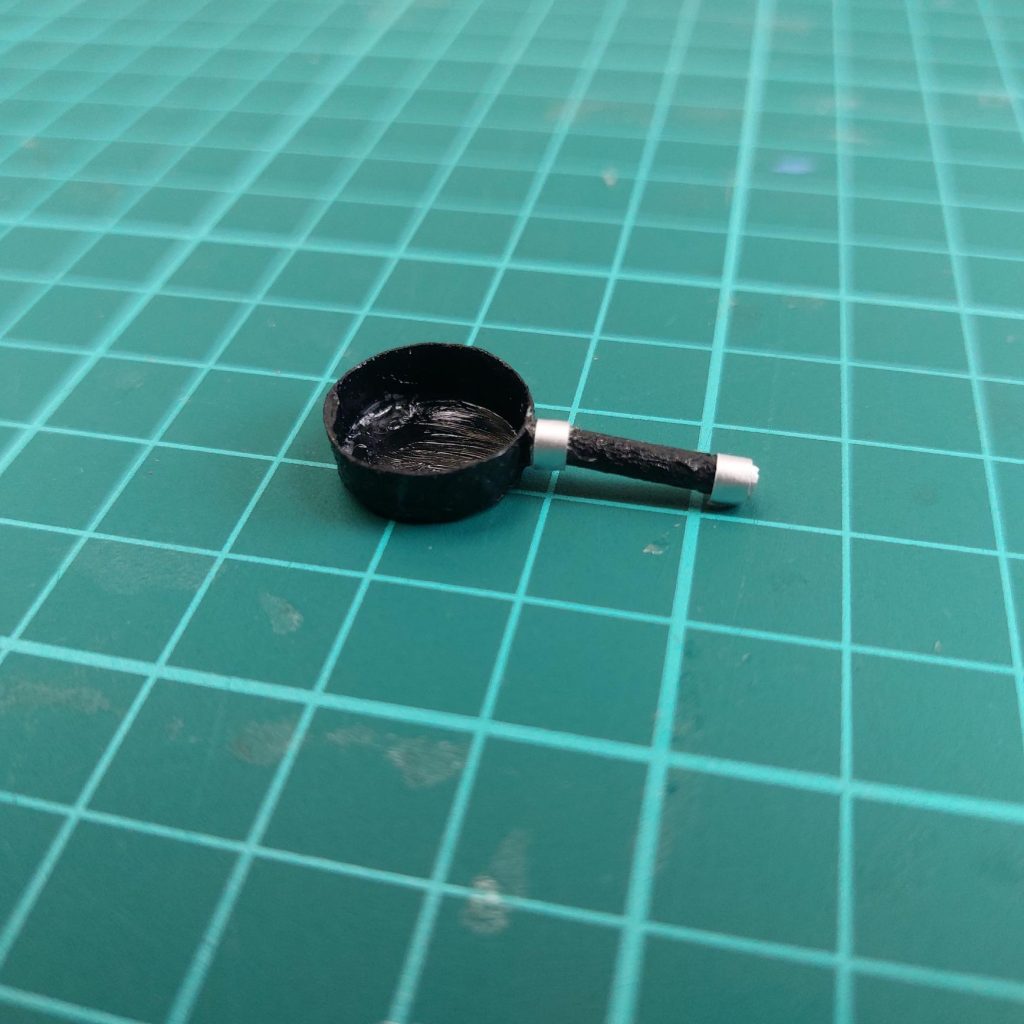
And that’s it: a simple little pan made from trash that looks perfect on a miniature stove!
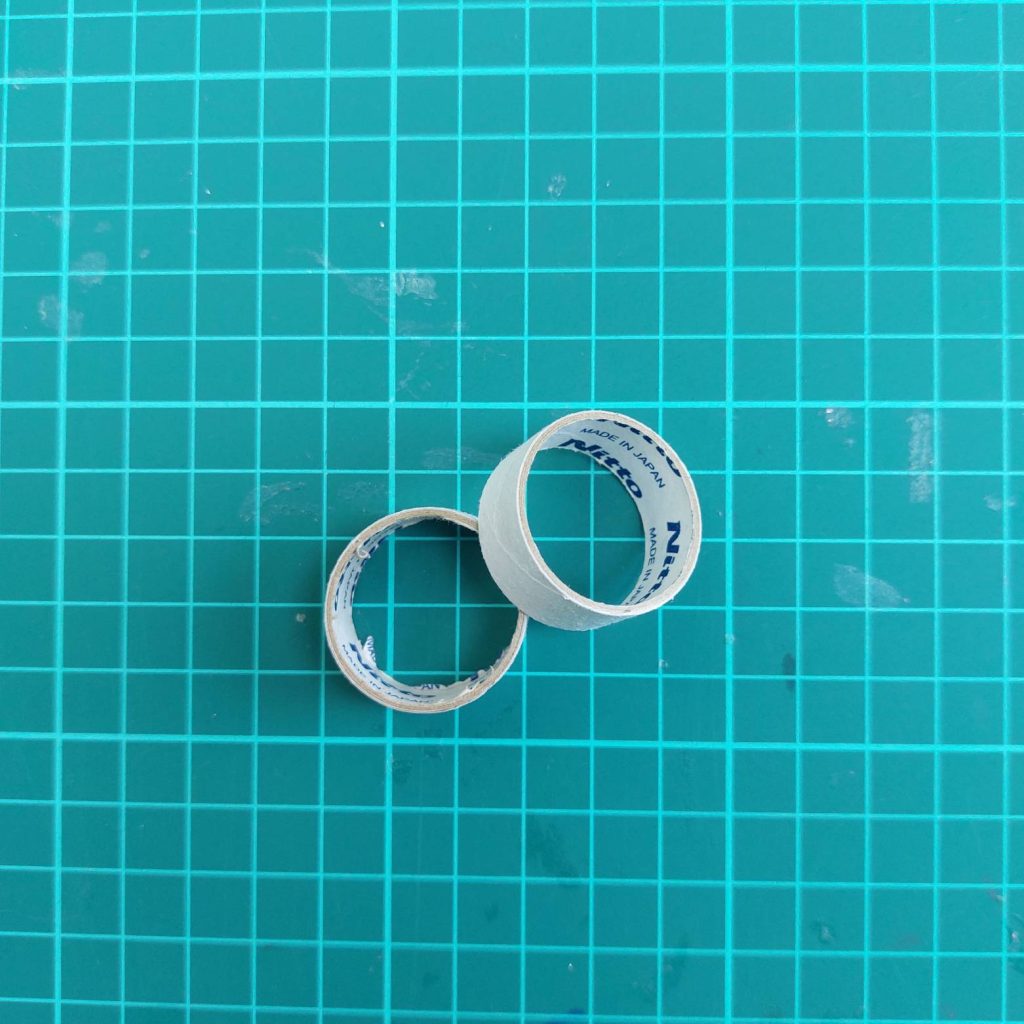
DIY Miniature Pots from Paper Roll
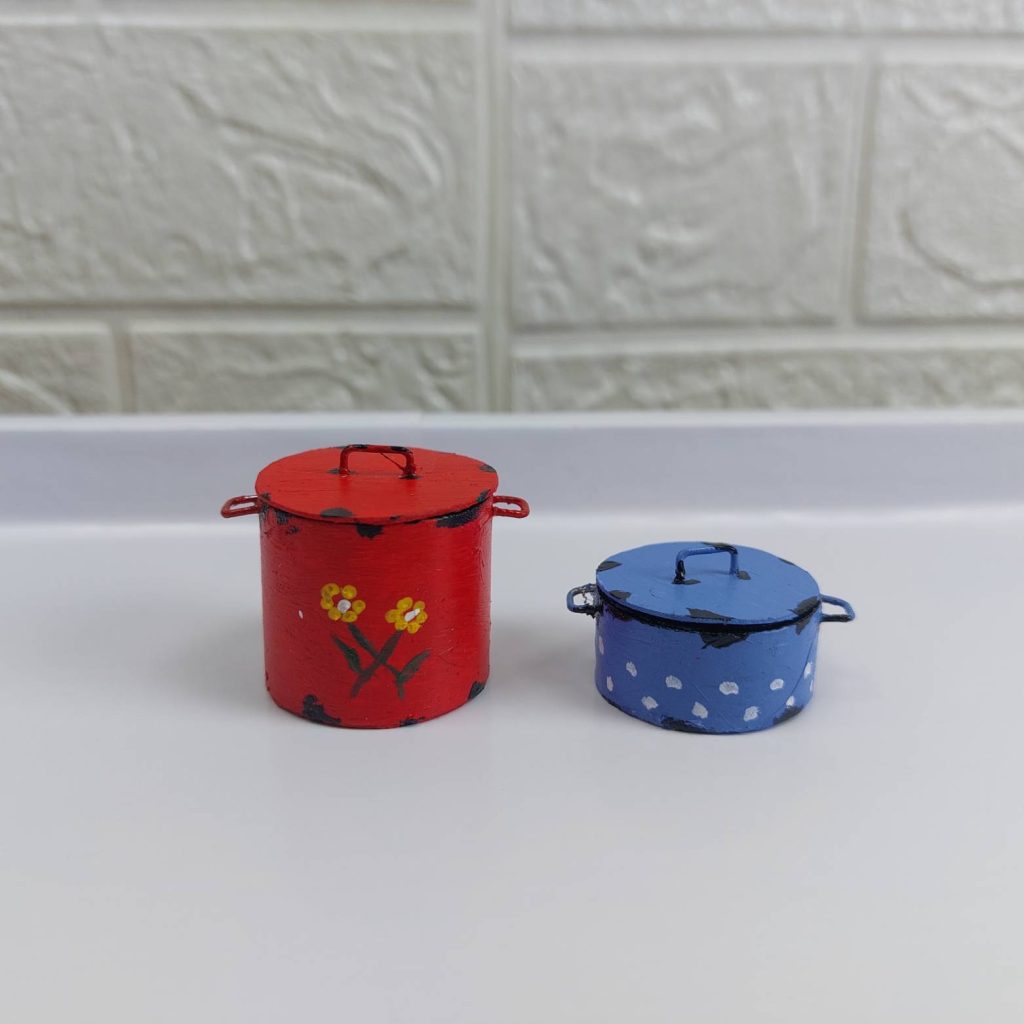
These little pots are made almost entirely from paper scraps: a fun and simple way to upcycle empty tape rolls into colorful dollhouse cookware.
Materials Required:
- Empty tape roll
- Card stock
- Scissors
- UHU (or similar strong glue)
- Paper clip
- Acrylic paint
Step-by-step:
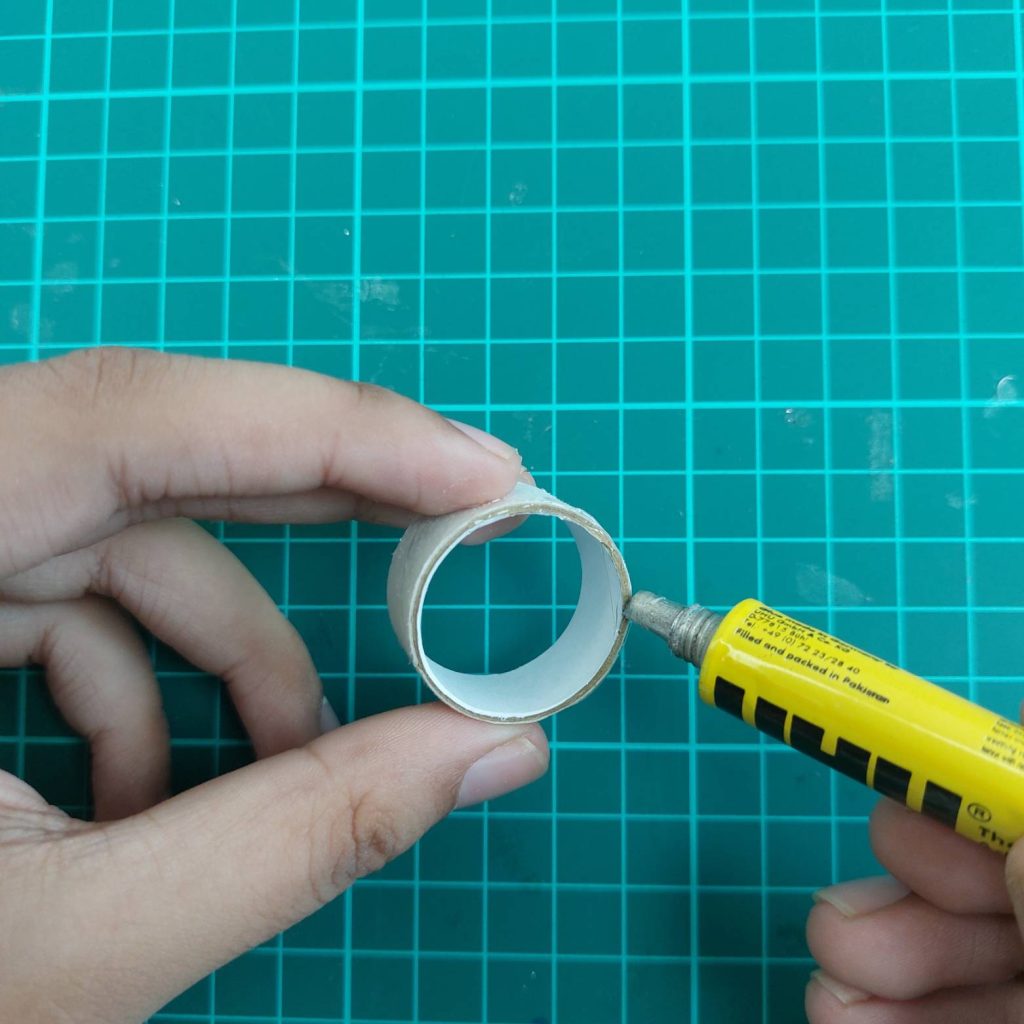
1. Cut the base ring.
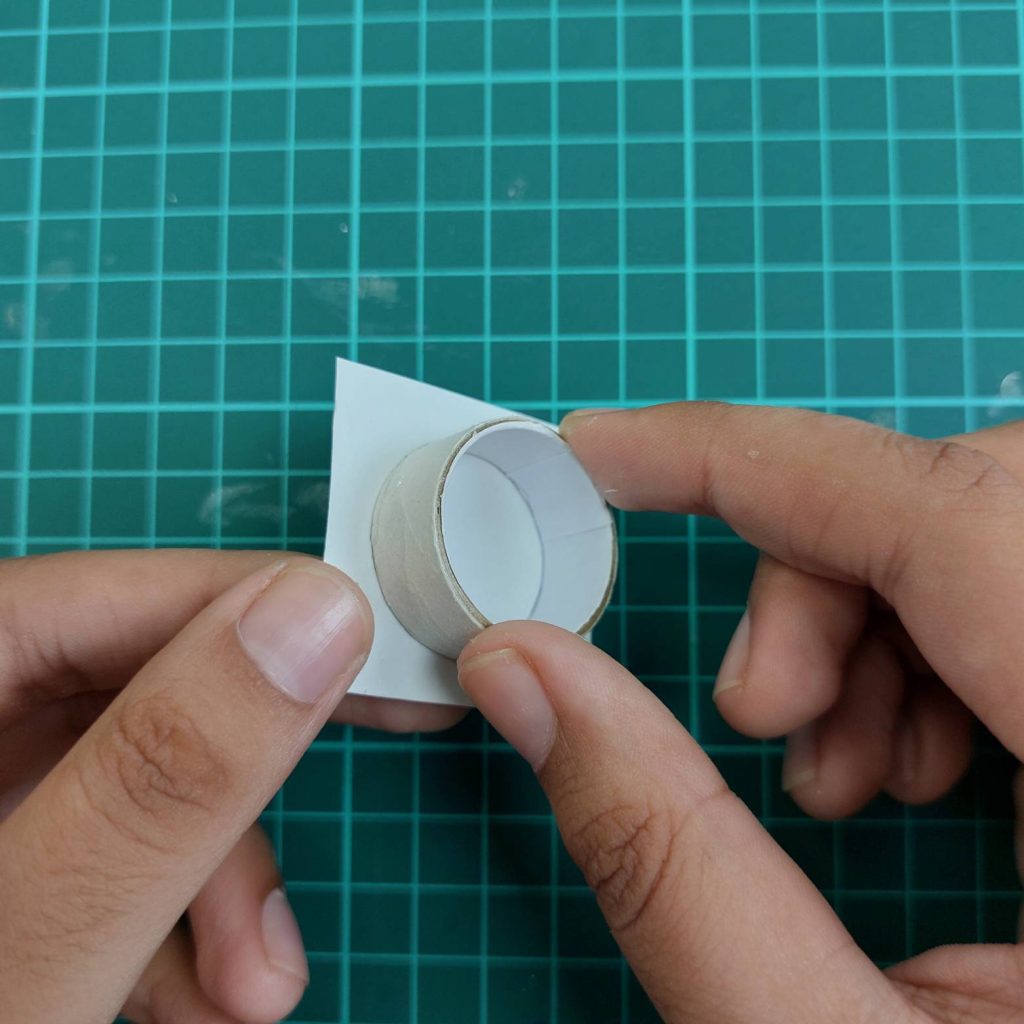
Take an empty tape roll (toilet paper, kitchen paper roll..) and cut it down to the desired height for your pot. This will form the body.
2. Glue a bottom.
Apply glue around one edge of the roll and press it onto cardstock. Let it dry and then trim off the excess to create a neat base.

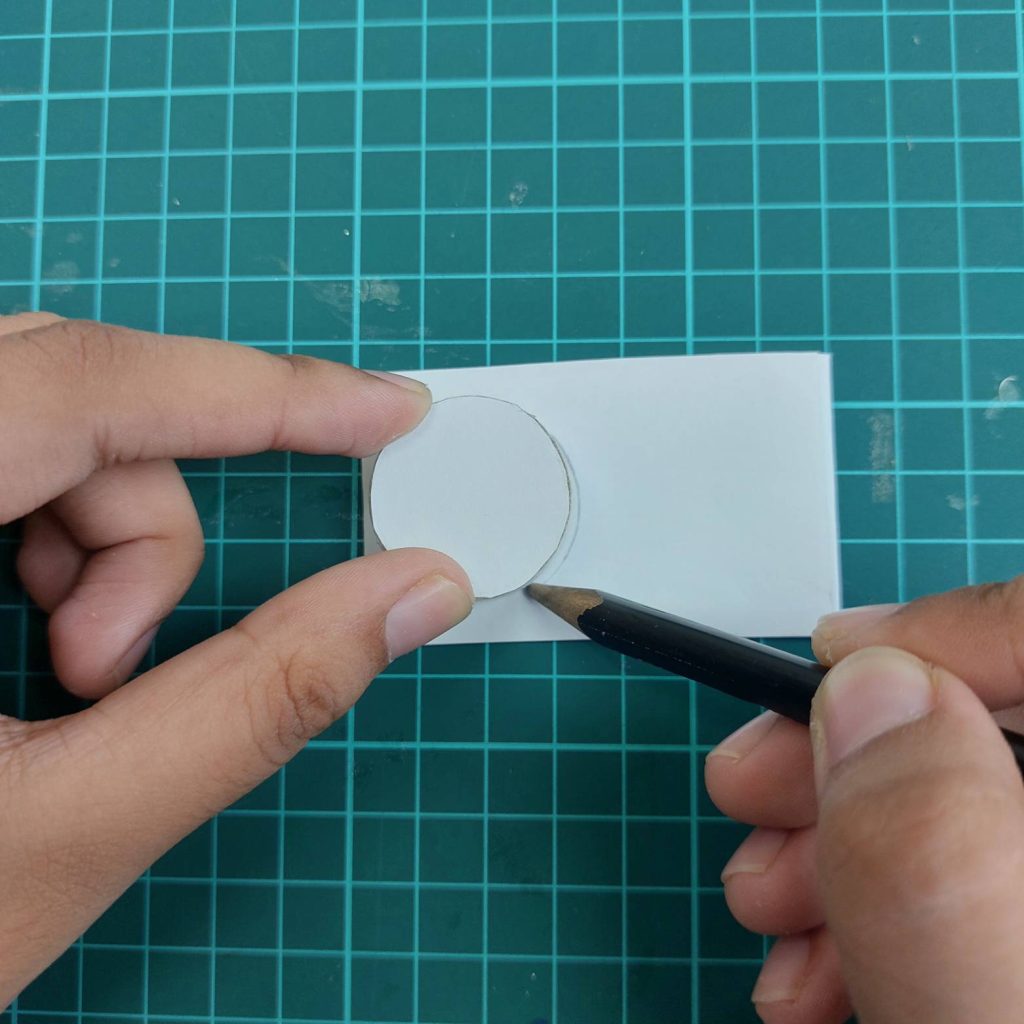
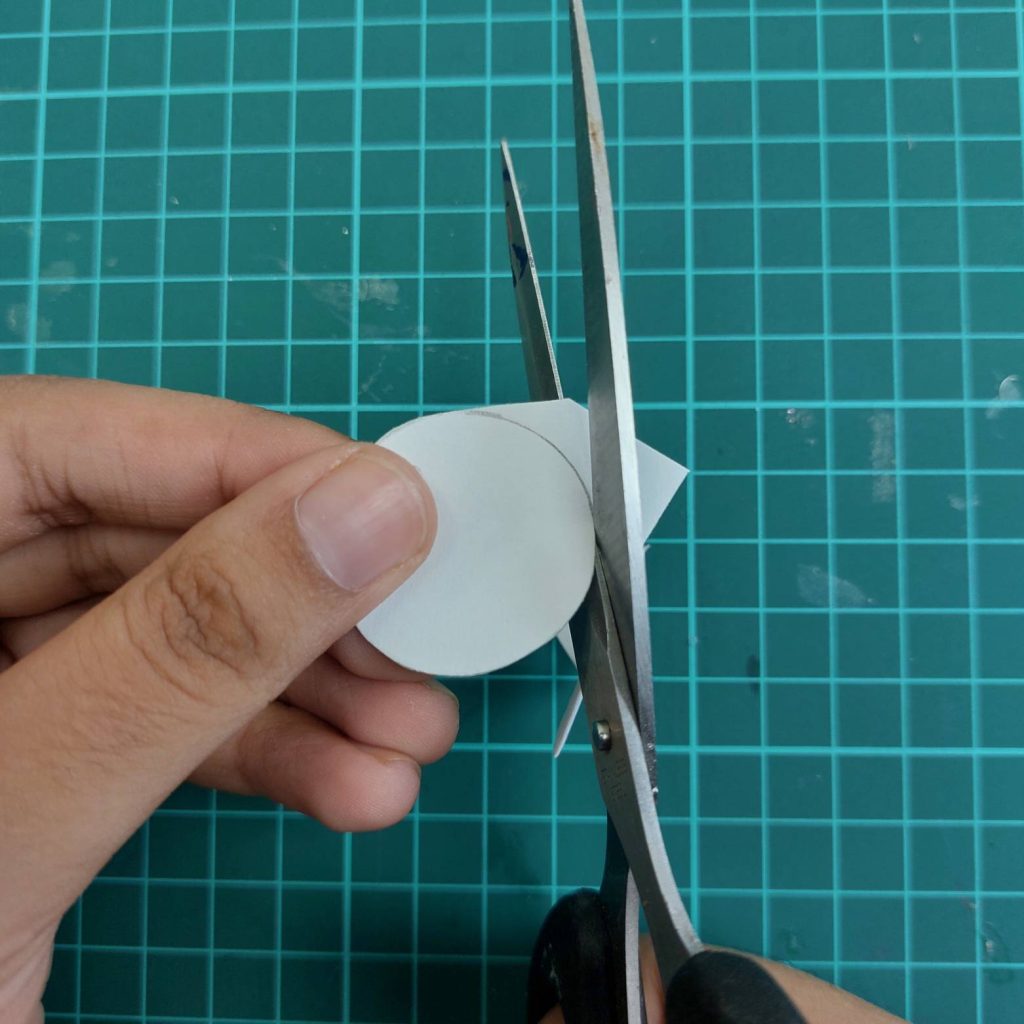
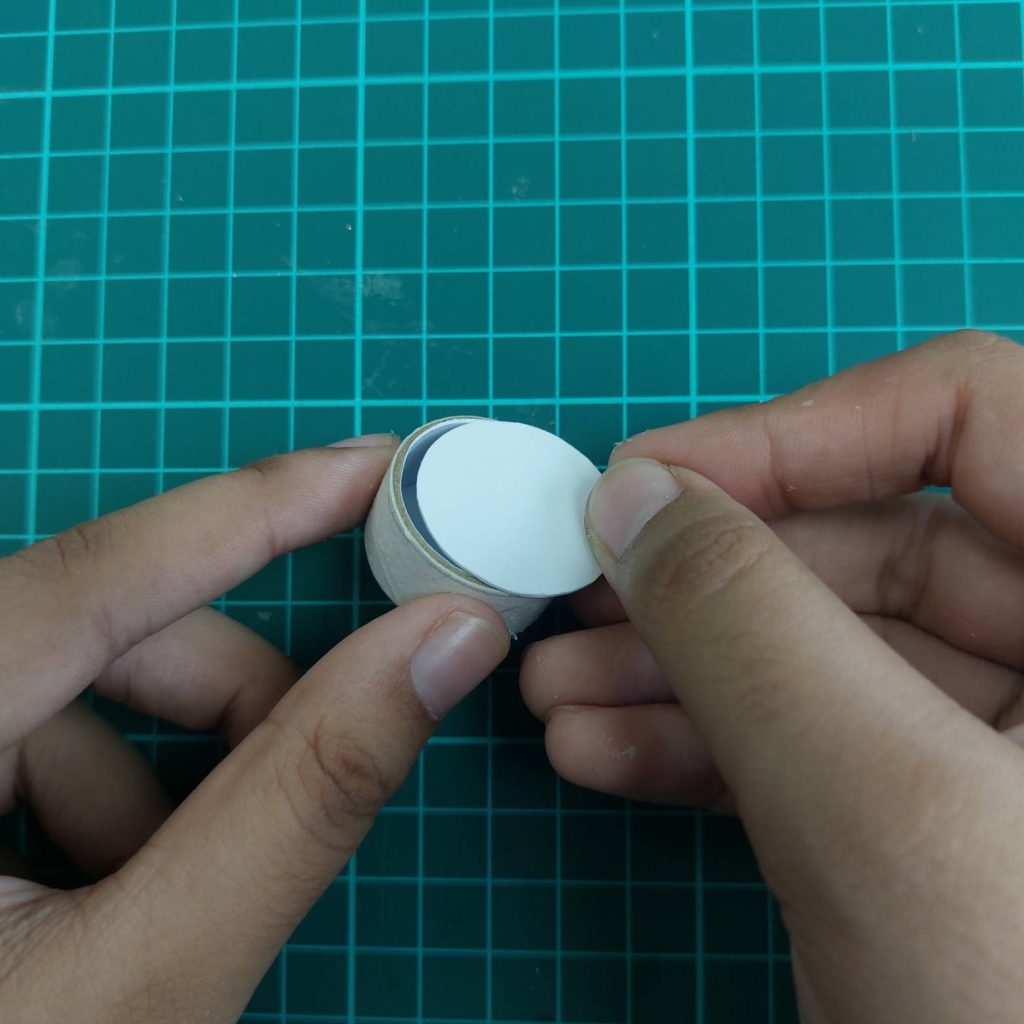
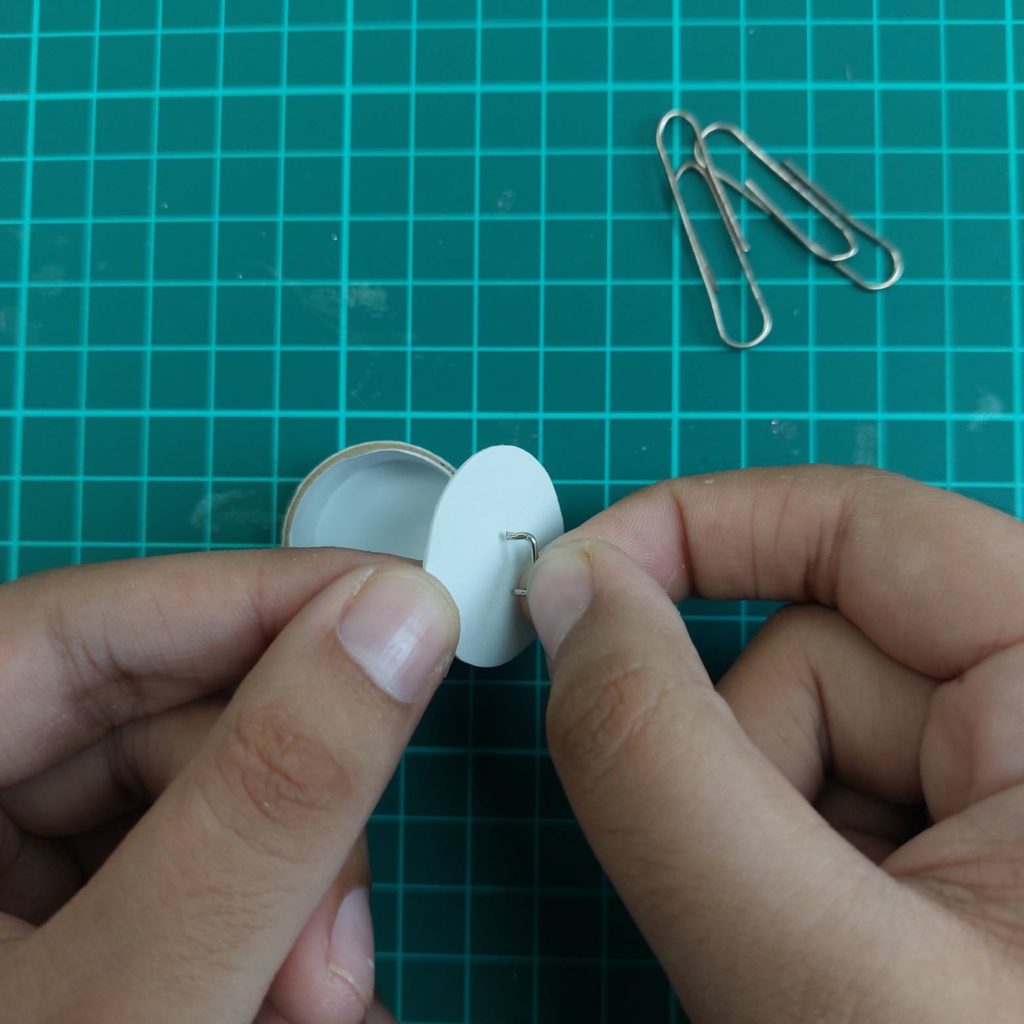
3. Make a lid.
Trace the roll onto card stock, cut out the circle, and set it aside as the lid.
4. Add a handle.
Bend a small piece of paper clip into a U-shape and poke it through the lid. Glue the ends in place from the underside.
5. Add side handles (optional).
Cut two tiny pieces of paper clip, bend them, and glue them to the sides of the pot.
6. Paint the pot and the lid.
Cover the outside with acrylic paint. Bright colors with polka dots or flowers make them look extra charming.
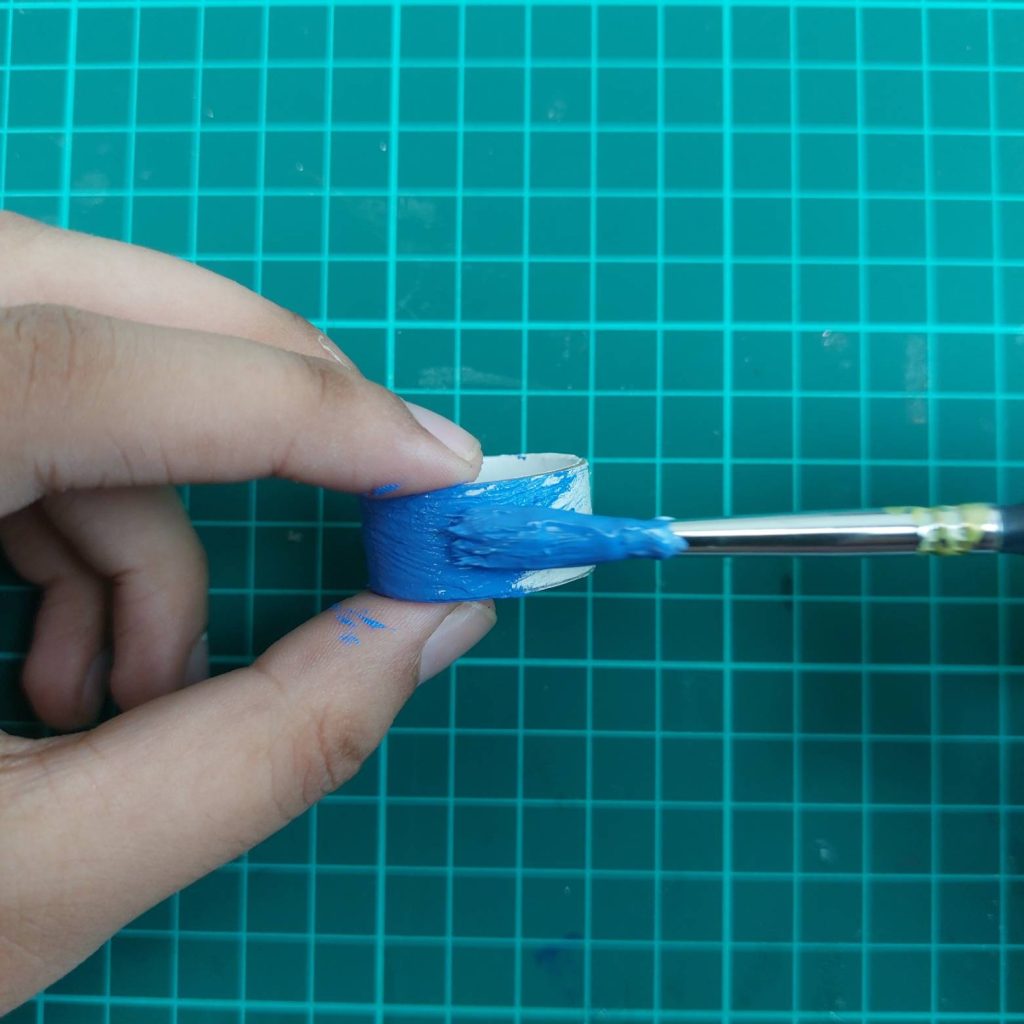


Match or contrast the lid with the pot body. Add final details like rim accents or tiny designs.
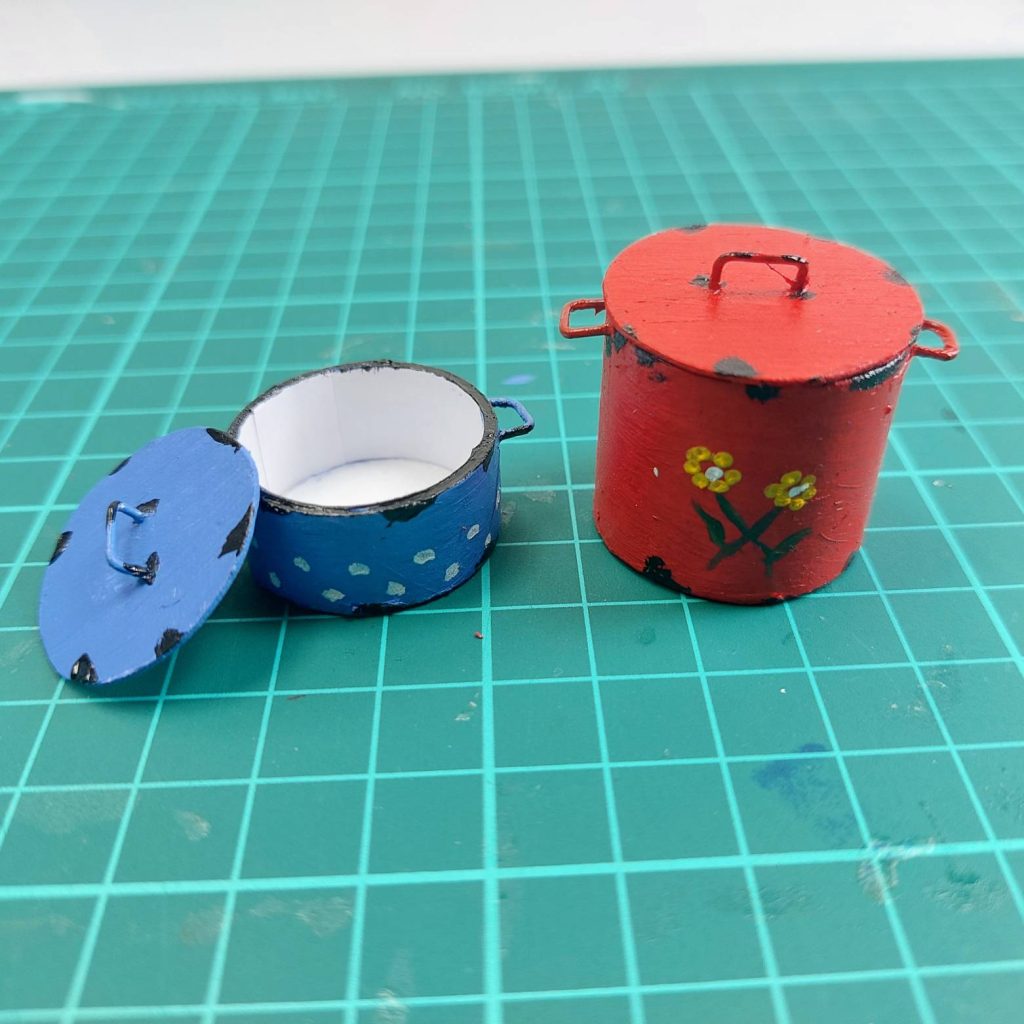
Done!
PS, I have created a video tutorial about this before, with a similar method. Instead, here, I used paper for the lid.
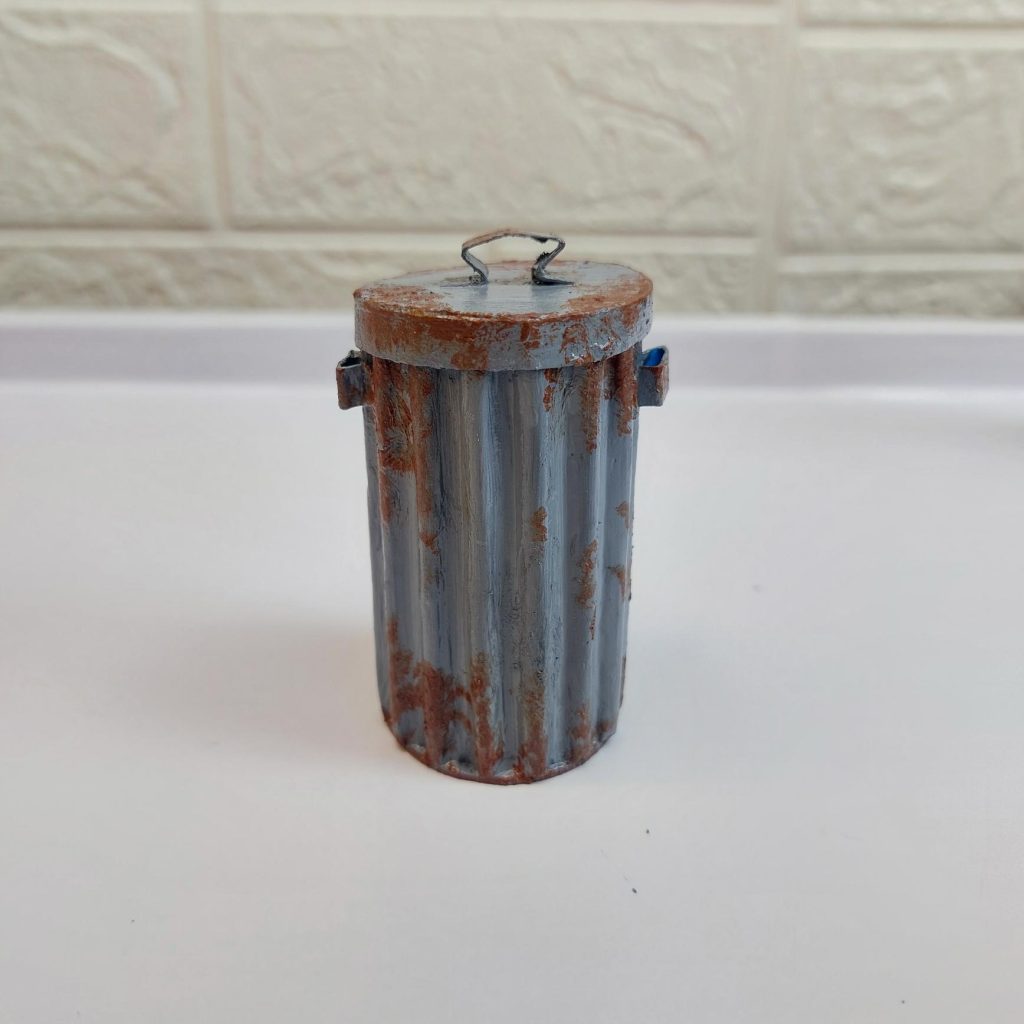
DIY Miniature Garbage Bin from Cardboard
Looking for a fun way to repurpose some leftover cardboard? This adorable miniature garbage bin is a great little project to add realism to your dollhouse scene: whether it’s an outdoor alleyway, garden corner, or miniature kitchen. The corrugated texture gives it a nice vintage metal look, and with a touch of paint, you can even create a realistic rusty finish.
This tutorial is simple and uses only basic materials:
Materials You’ll Need
- Corrugated cardboard
- Thin cardboard (from a cereal box, for example)
- Pencil and ruler
- Craft knife or scissors
- Glue (tacky glue or hot glue)
- Small piece of wire or sturdy string (for the handle)
- Gray and brown acrylic paint
- Paintbrush

Step-by-Step Tutorial
- Cut your cardboard pieces.
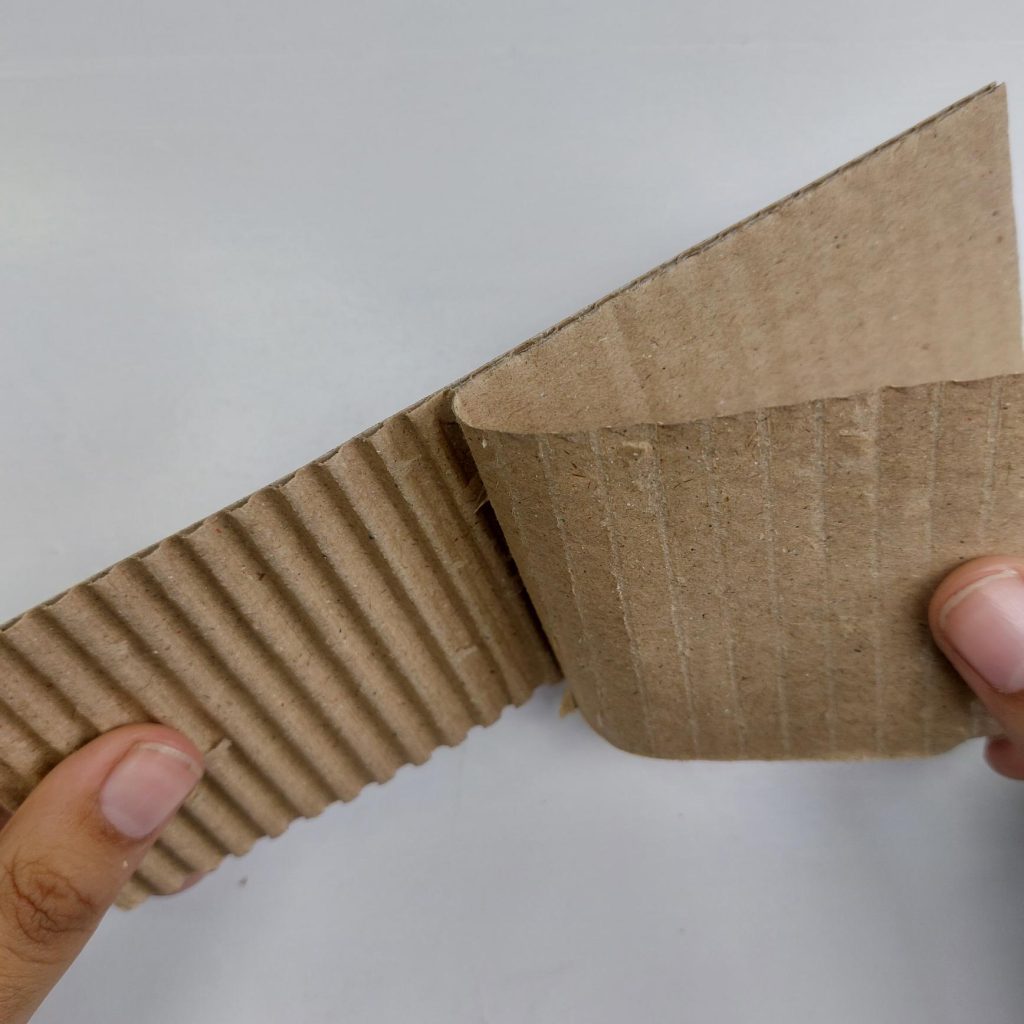
Start by cutting a rectangle of corrugated cardboard. This will be the body of your bin.
- Shape the bin body.
Gently roll the cardboard strip so the corrugated side faces outward. Glue the ends together to form a cylinder.
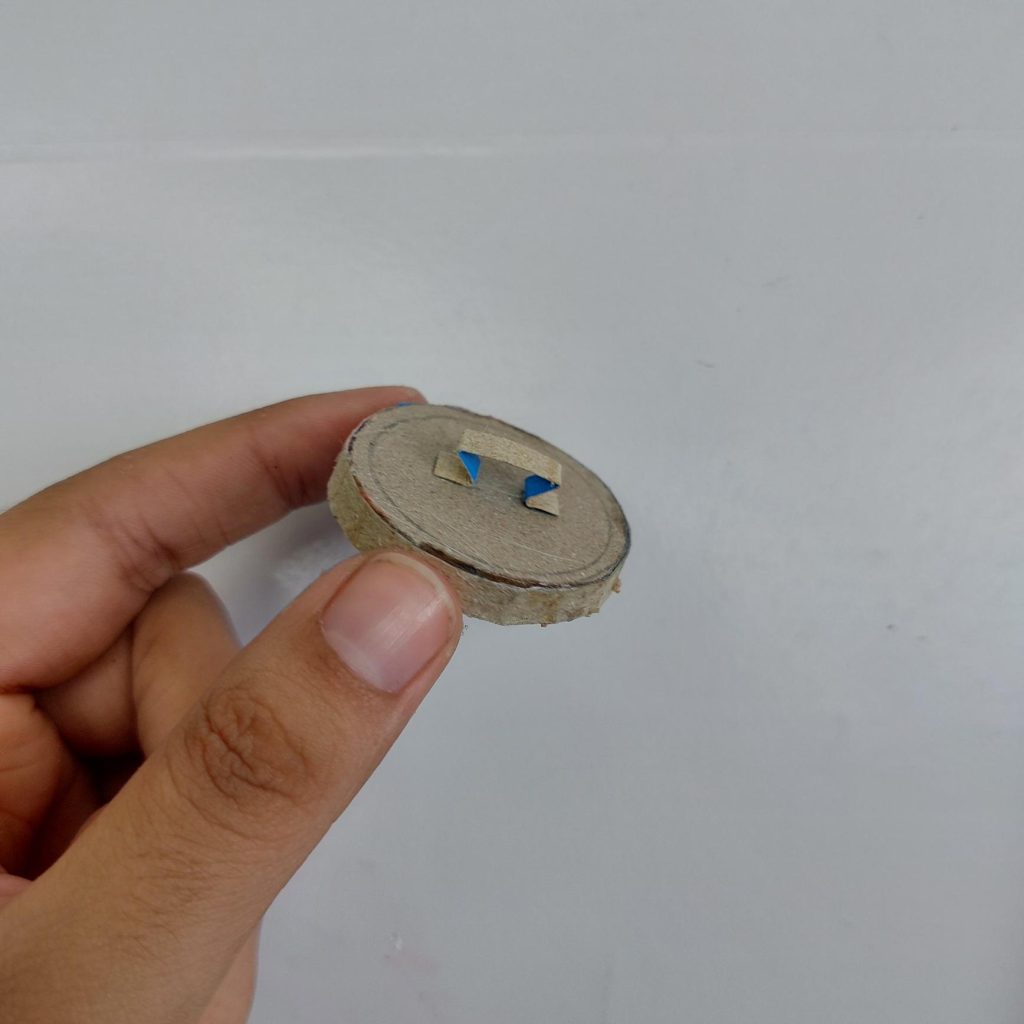
- Make the top and bottom circles.
On thin cardboard, draw two circles using your cylinder’s diameter. Inside one of them, draw another smaller ring — this will create a lid edge.

- Assemble the base.
Glue one of the circles to the bottom of the cylinder. Make sure it sits evenly.

- Build the lid.
Cut and wrap a thin strip of cardboard around the edge of the second circle to form the lid’s side. Glue it in place.

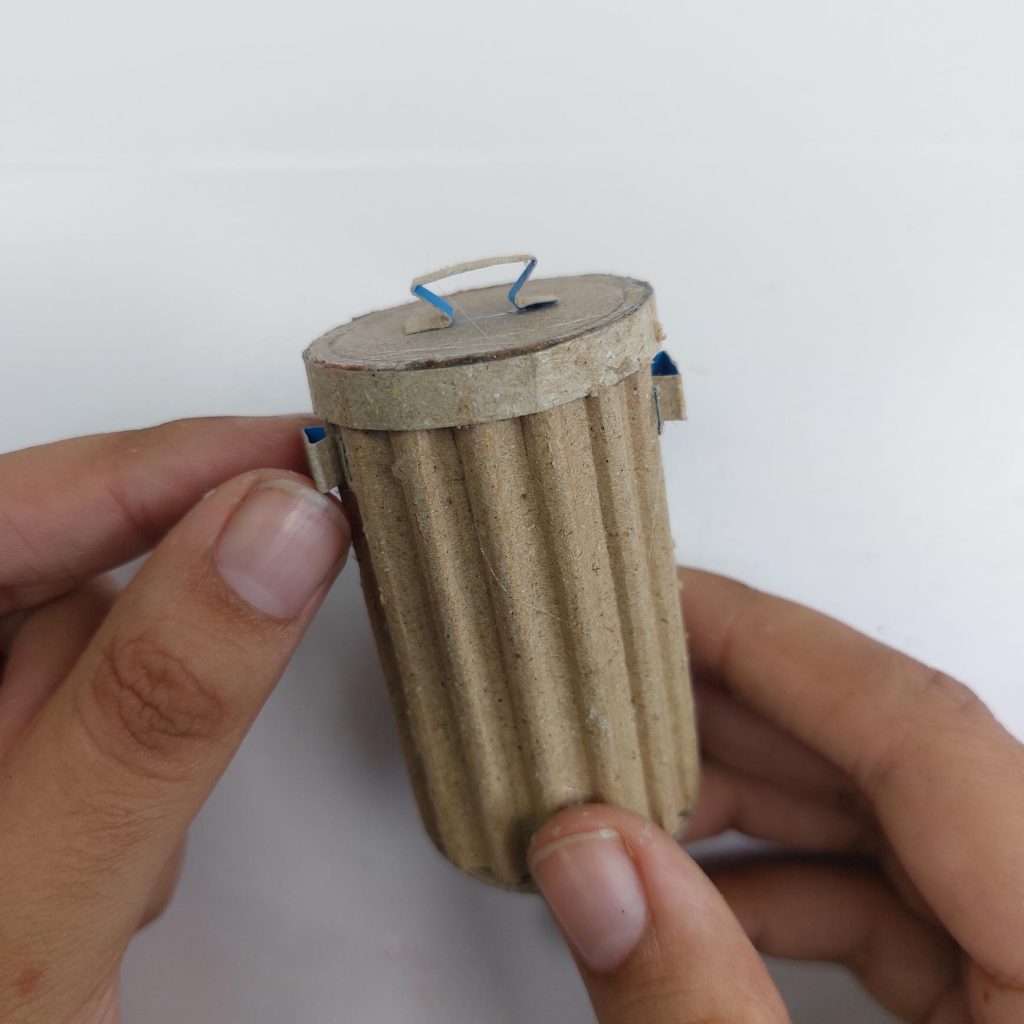
- Add the handle.
Bend a small piece of wire or thick paper into a U-shape and glue it to the top of the lid.

- Create side handles.
Cut two small strips of thin cardboard and glue them to the sides of the bin as handles.
- Paint the bin.
Paint the entire bin gray to mimic a metal look. Once dry, dab small patches of brown paint around the edges and ridges to give it a realistic rusty effect.

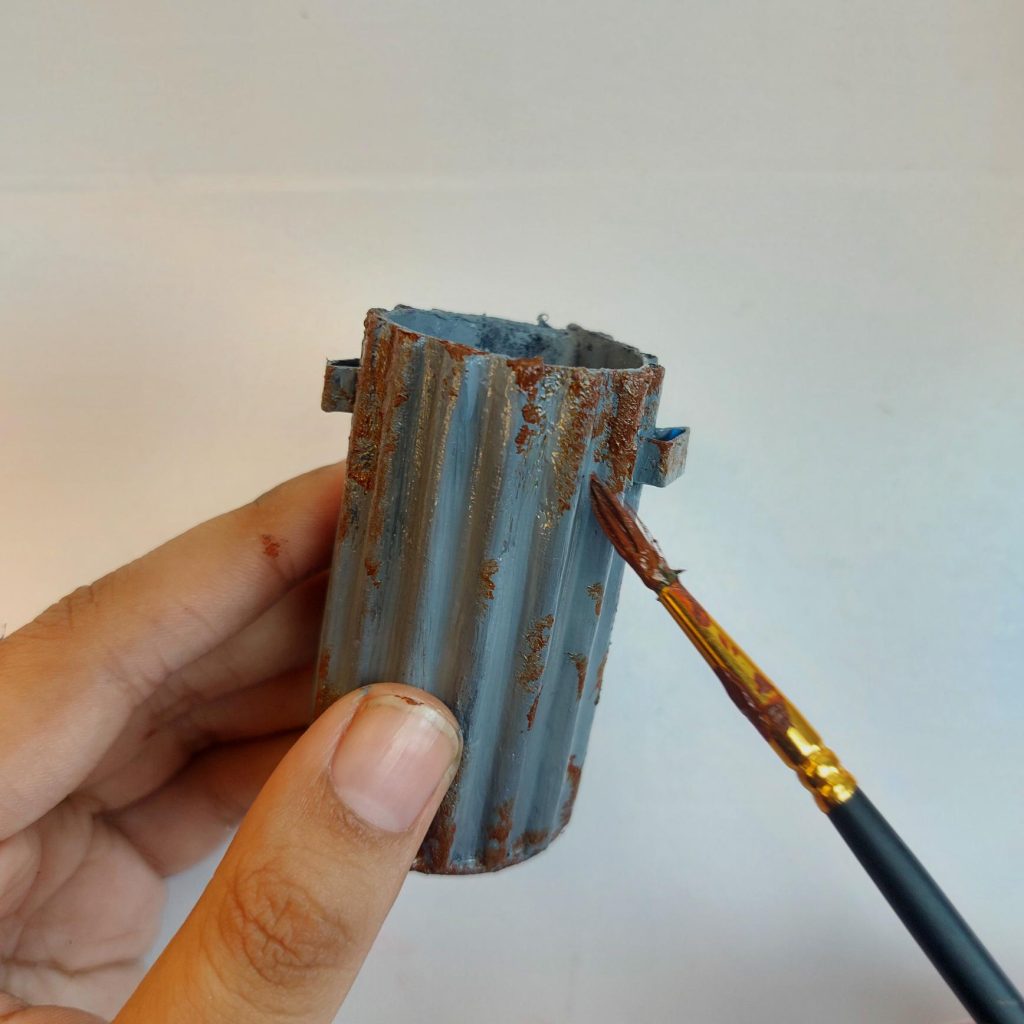
Let it dry completely before displaying.

My Final Conclusion
Turning everyday scraps into dollhouse treasures is one of the most satisfying parts of miniature making, in my opinion.
Why not give one of these ideas a try this week? And if you do, I’d love to see your creations!
Share your photos in our dollhouse forum or my small Facebook group: your take on these projects might just inspire the next mini maker!
I wish you happy crafting!
Kind regards,
Lizzy

Hi everyone!
My name is Lizzy, and I am an amateur miniaturist obsessed with everything in the dollhouse and miniature world, ever since I was a teenager.
So far, I have created 2 dollhouse projects, a backyard shed and a miniature treehouse, tons of DIY dollhouse kits, and “hacked” some.
I also created a fairy garden, and lots of small and simple miniature projects on my YouTube channel. (mostly made from trash or everyday items).
I love to write as well about all things happening in the miniature world, hence the reason why I created this blog!
I wish you happy reading and crafting!
Lizzy


