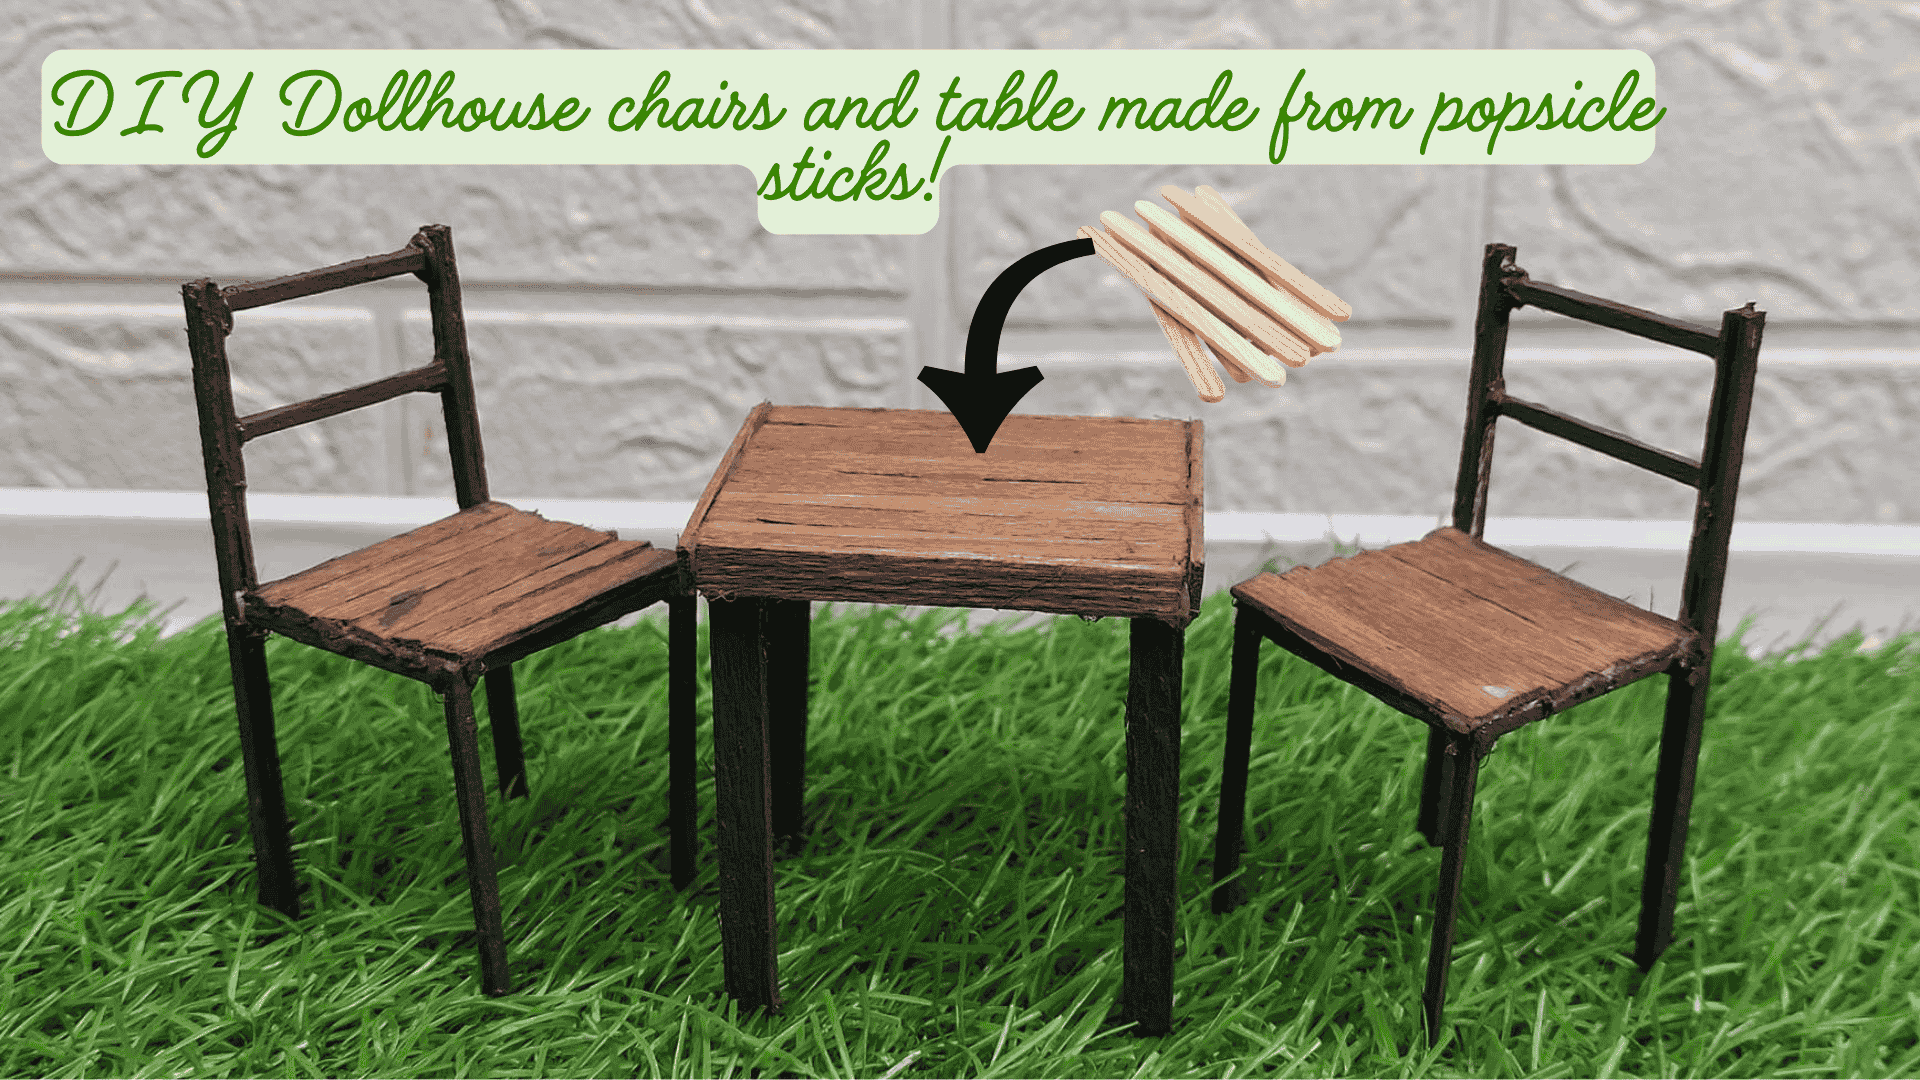
This is one of those projects that looks way more complicated than it actually is.
It’s mostly straight cuts, basic assembly, and a bit of patience while the glue dries. I made this little dollhouse table with two matching chairs using regular popsicle sticks and a craft knife, no fancy tools needed.
It’s perfect for a dollhouse kitchen, garden scene, café setup, or even an outdoor patio. Let’s jump straight in!

PS: I am doing my best to explain each step with words and as many pictures as possible, but it is sometimes harder for me to do than just show a one-time video only with instructions on my YouTube channel. Please understand.
List of Materials
What you need for this project:
- Popsicle sticks (regular size, thinnest ones you can find for the legs)
- Craft knife or hobby knife
- Metal ruler
- Cutting mat
- Wood glue or tacky glue
- Sandpaper or sanding sponge
- Acrylic paint (black or dark grey for the frames)
- Brown acrylic paint or wood stain for the tabletop and seats
- Small paintbrush
Dimensions / Parts
🎥 Watch this Short on YouTube
Table
- Tabletop slats (base): 0.5 × 5 cm
- Tabletop frame (sides): 0.5 × 4.7 cm
- Table legs: 0.5 × 4.6 cm
Chairs
- Chair frame / legs: 3 cm
- Seat slats: 3.5 × 0.5 cm
- Seat frame: 7 cm length × 3.5 cm depth
- Back support (horizontal): 3.3 cm
Step-by-step tutorial.
Just follow the instructions step by step, and if you have any more questions, feel free to ask down below in the comments section!
First, we’ll do the miniature table.
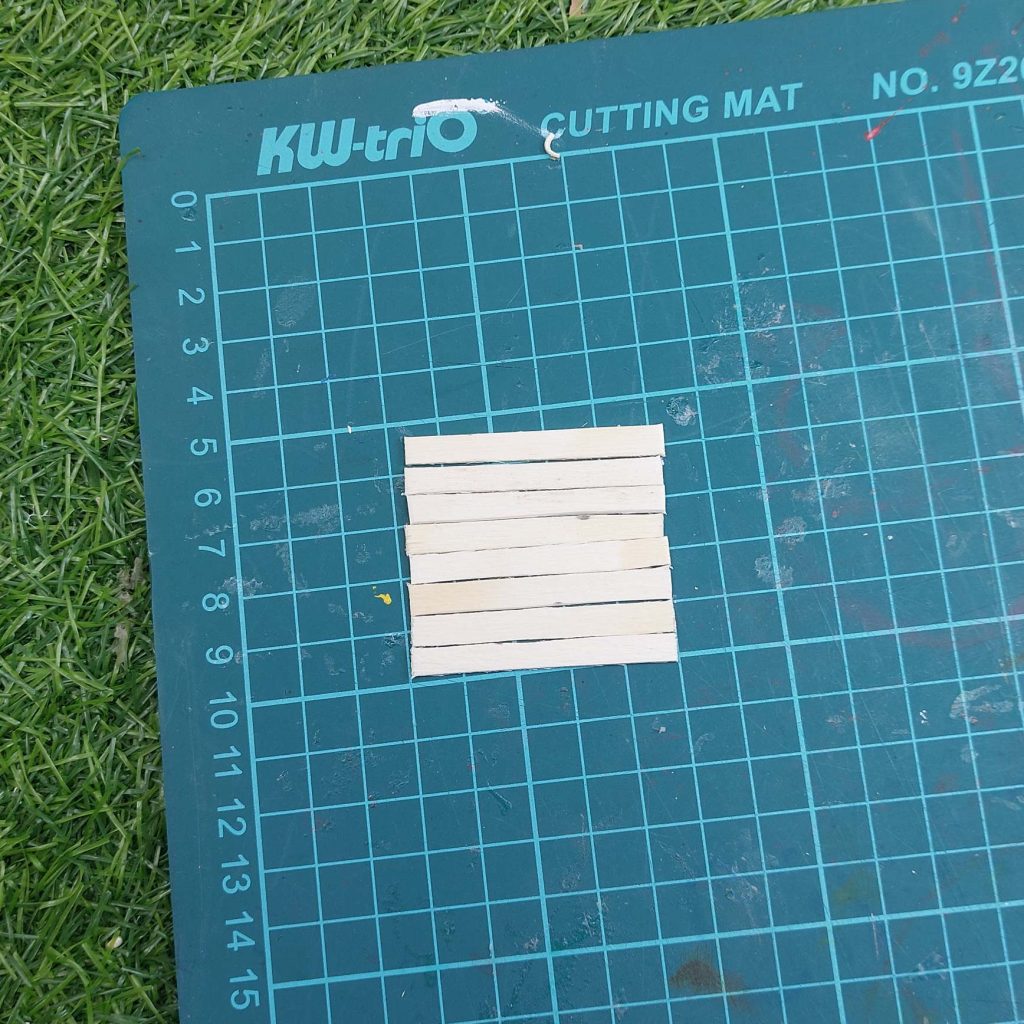
- Step 1: Cut All Your Pieces First
Start by cutting your popsicle sticks into strips using a ruler and craft knife or box cutter (depending on the thickness of your sticks).
Take your time here; straight, consistent cuts make everything else easier later.


Once everything is cut, lightly sand the edges. This removes splinters and helps the pieces sit flush when glued.


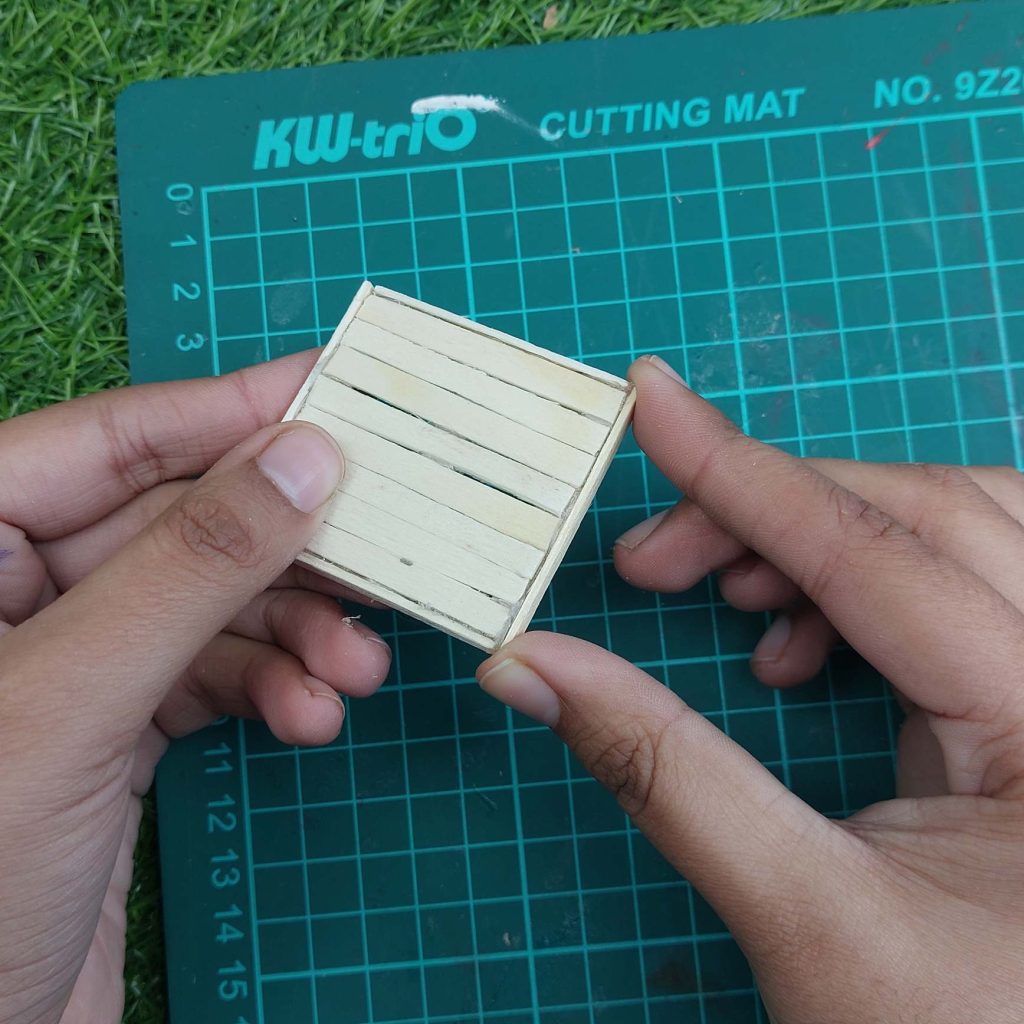
- Step 2: Build the Tabletop
Lay the tabletop slats (0.5 × 5 cm) next to each other until you have the width you like. Glue them together side by side and let this dry completely.
Once dry, glue the side frame pieces (0.5 × 4.7 cm) along the left and right edges of the tabletop to give it a framed look and extra strength.
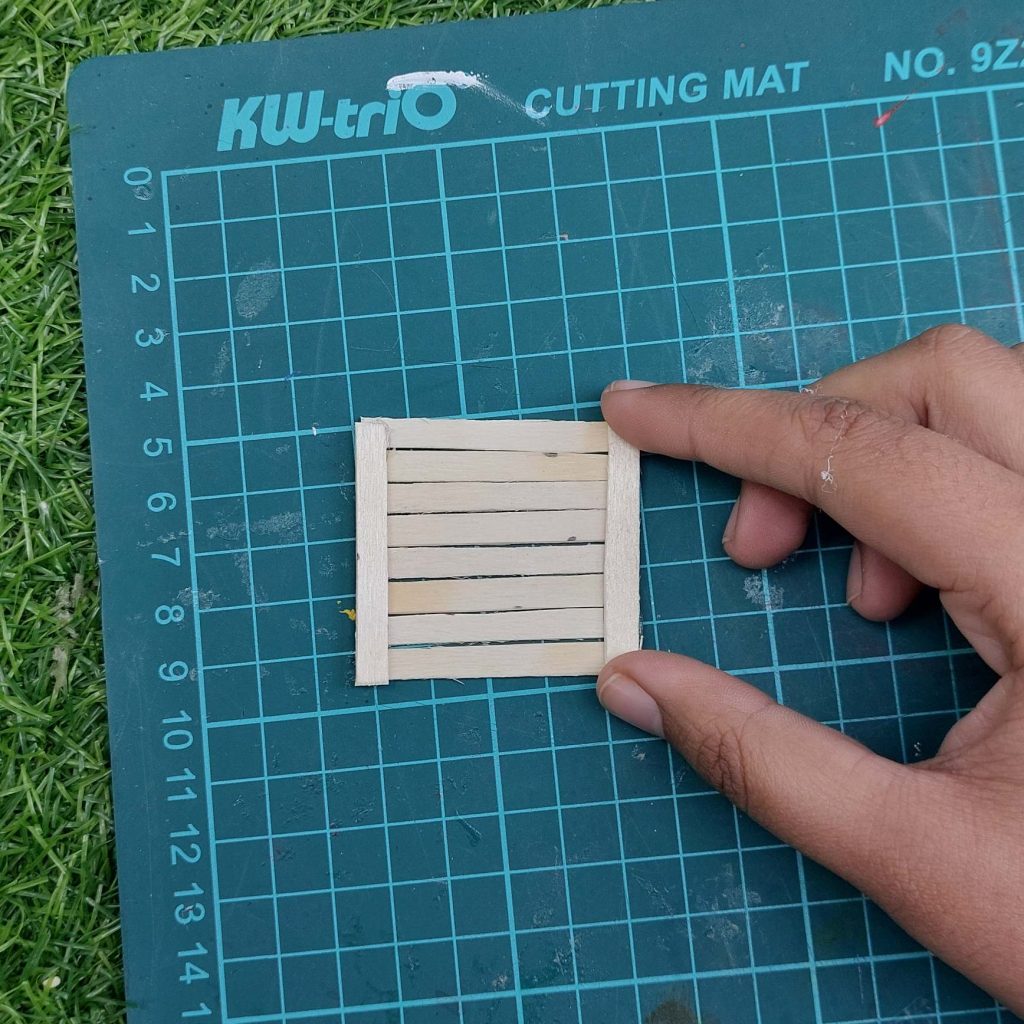
I also glued a short reinforcing strip underneath the tabletop, centered and running across the slats. This piece is about 3.5–4 cm long and stays hidden, but it adds extra strength.
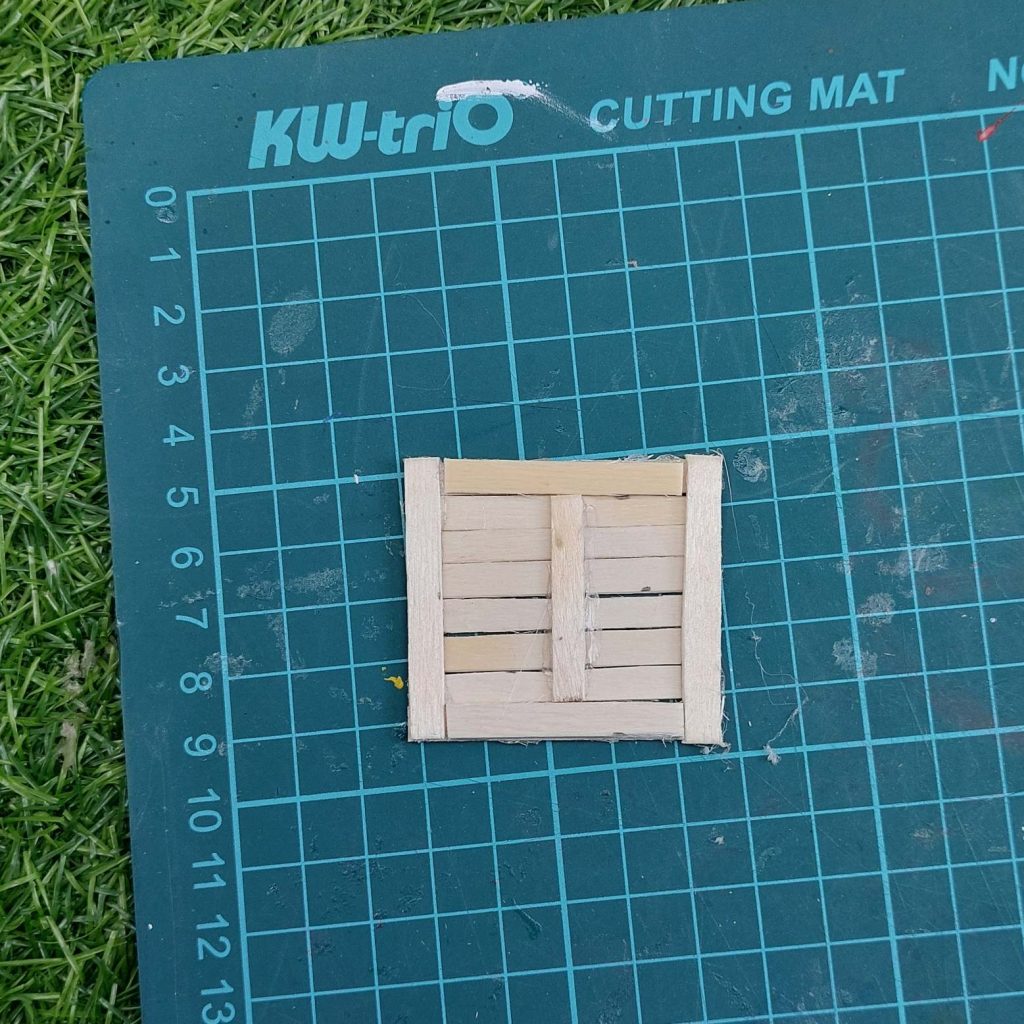
- Step 3: Add the vertical side supports
Before attaching the legs, glue four short wooden pieces upright along the edges of the tabletop, one on each side. These small vertical supports give you a solid surface to glue the legs against and help keep everything straight and sturdy.
- Step 4: Add the Table Legs
Each table leg is made by gluing multiple wooden sticks together to form a thicker, square-shaped leg.
Start by gluing two sticks together, then add one (or two) more sticks to the side until the leg looks square, or the way you prefer. Let the legs dry completely before attaching them to the table
Turn the tabletop upside down. Glue the table legs into each corner, keeping them straight and aligned.
Tip: Let two opposite legs dry first before adding the others—this helps prevent wobbling.
Here comes the most difficult part, the chairs:
Creating the matching miniature chairs
These were a bit more difficult to explain, so I changed the strategy to create a more in-depth tutorial (and I hope the pictures explain it well):
- Step 1 — Split your craft sticks lengthwise
This is the step that makes the whole chair work and makes it possible for you keep using popsicle sticks, and nothing else.
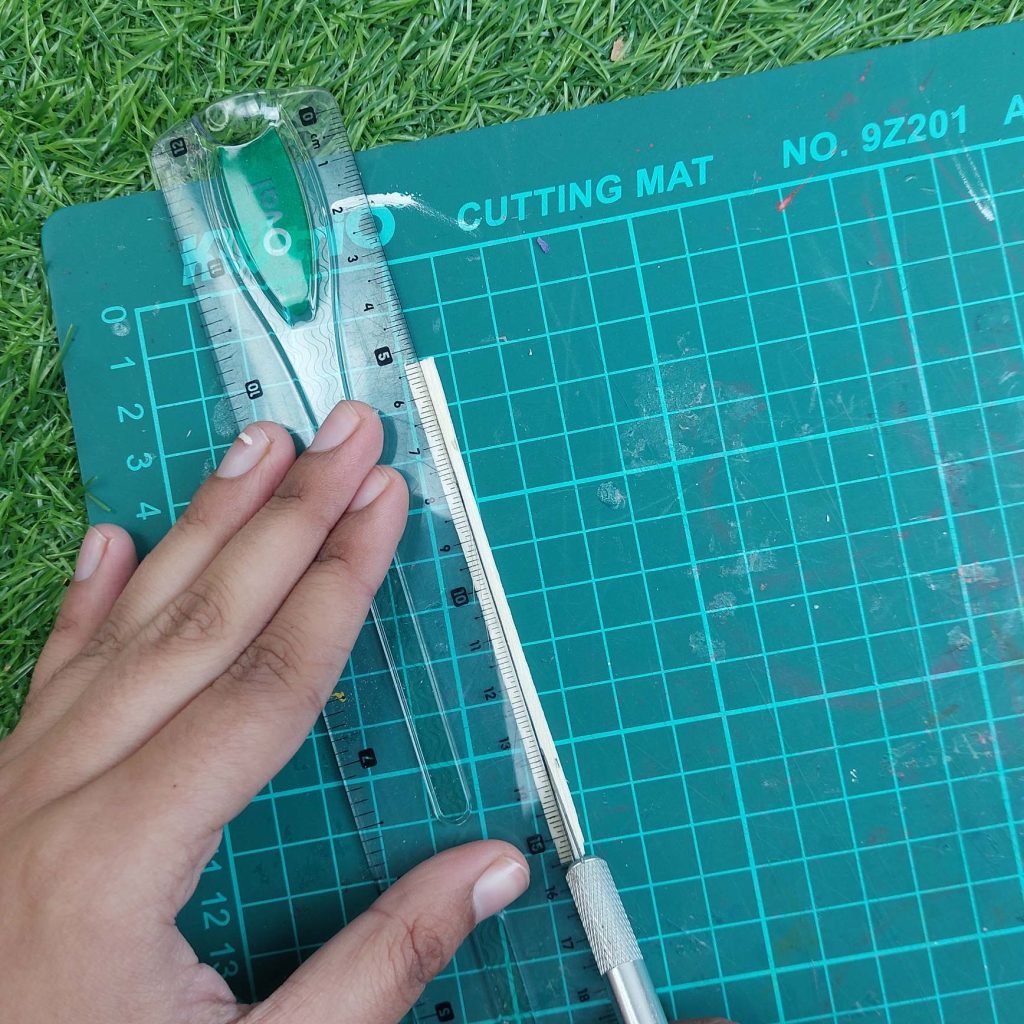
Place the craft stick on your cutting mat, hold a ruler firmly on top of it, and with your craft knife or box cutter, score along the length of the stick (don’t try to cut through in one pass).
Repeat the scoring a few times until the stick splits into two long halves.
You’ll be using these half-sticks for nearly every part of the chair.
- Step 2 — Cut the frame pieces to size
From your half-sticks, cut these pieces:
- 2 long side rails: 7 cm each
- 2 front legs: 3 cm each
- 2 seat rails: 3 cm each
- Seat slats: 3.5 × 0.5 cm (cut several; the number depends on how tight you place them)
Tip: Cut a couple of extra pieces. These small parts love to ping off the cutting mat.
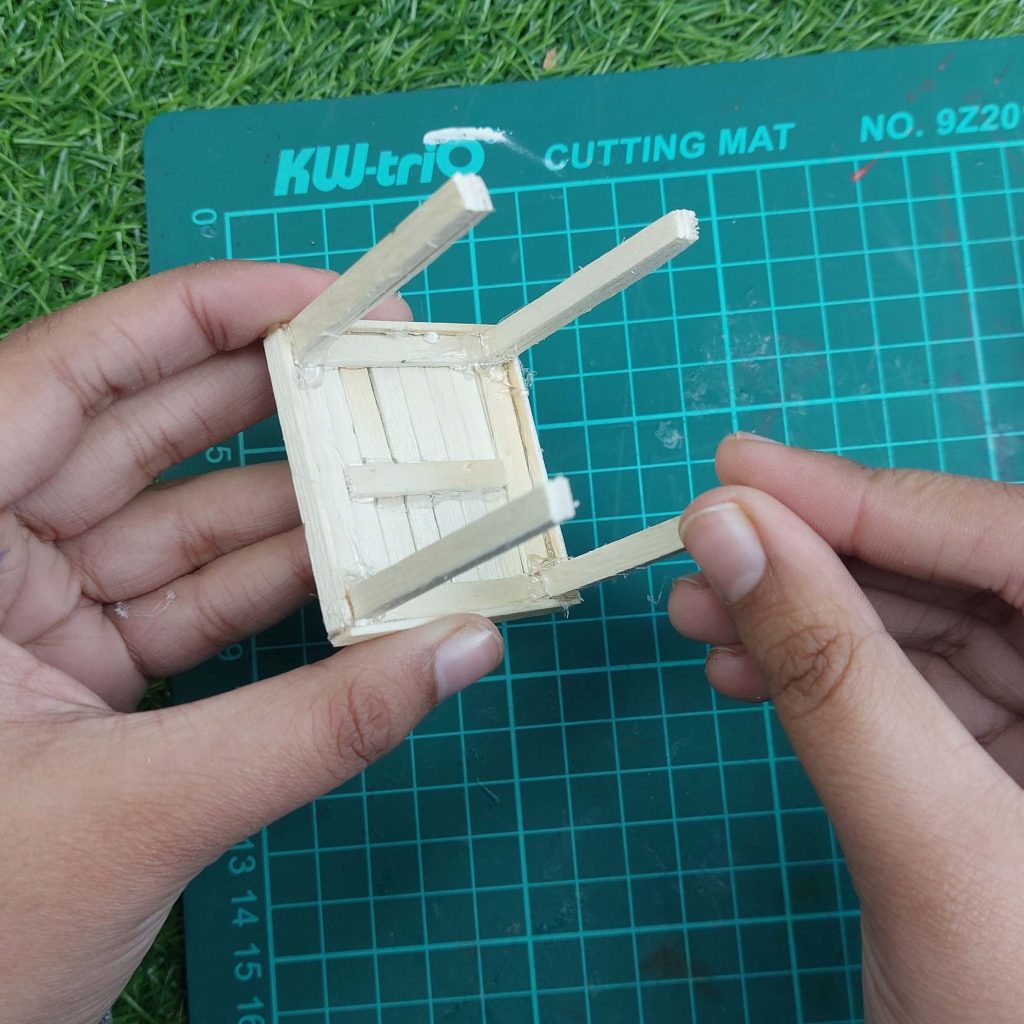
- Step 3 — Build the first chair side frame
One chair side frame is basically: back leg + seat rail + front leg.
- Glue the 2 parts of each piece of the chairs together; this gives it that particular look.
- Glue the assembled 3 cm seat rail to the backrest leg
- Glue the front leg to the seat rail
Don’t worry if the back leg is too long right now — it’s easier to trim later once both sides are built.


- Step 4 — Build the second side frame (match it to the first)
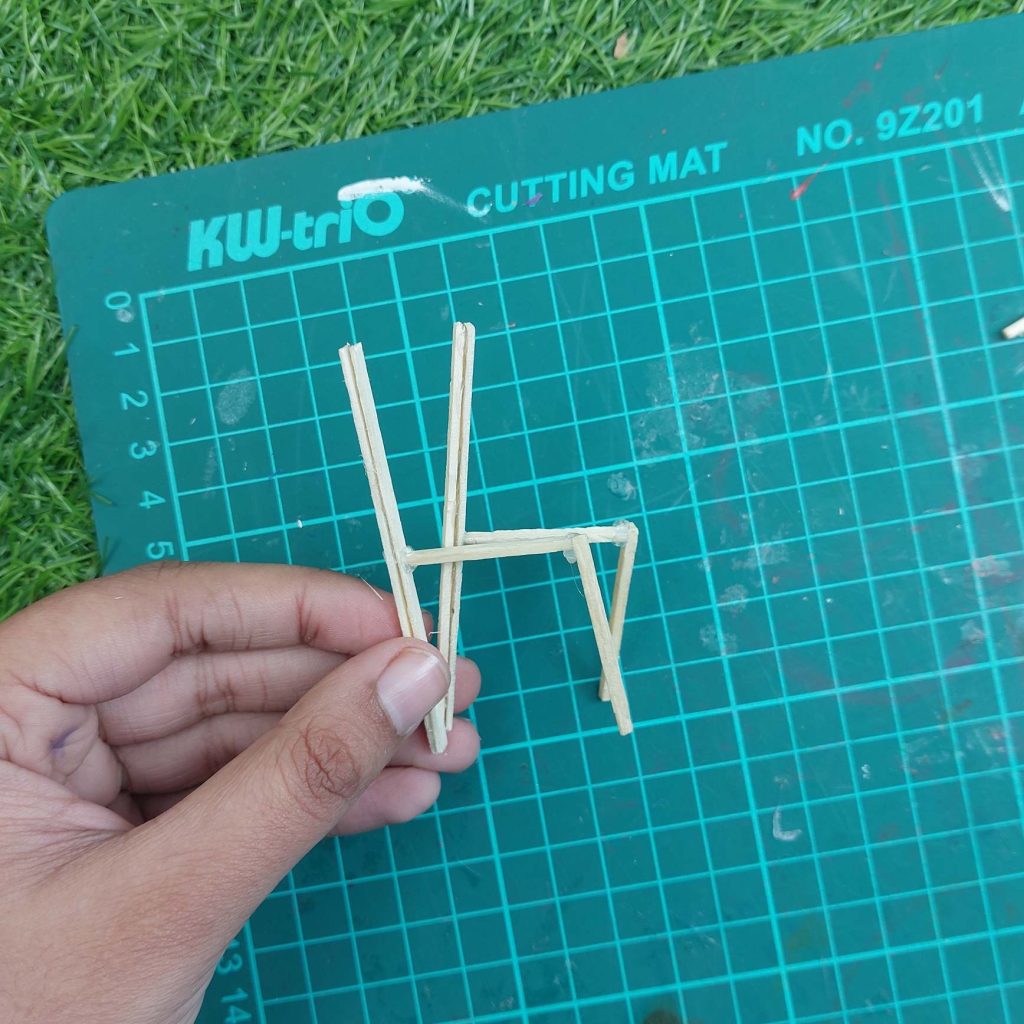
Make a second side frame the same way.
Best trick for symmetry: Lay the first side frame on the mat and build the second one directly on top of it as a template.
- Step 5 — Connect both side frames

Now you turn your two side frames into an actual chair.
Glue in the two 3.3 cm crossbars between the side frames.
Let this dry for a moment so nothing shifts.
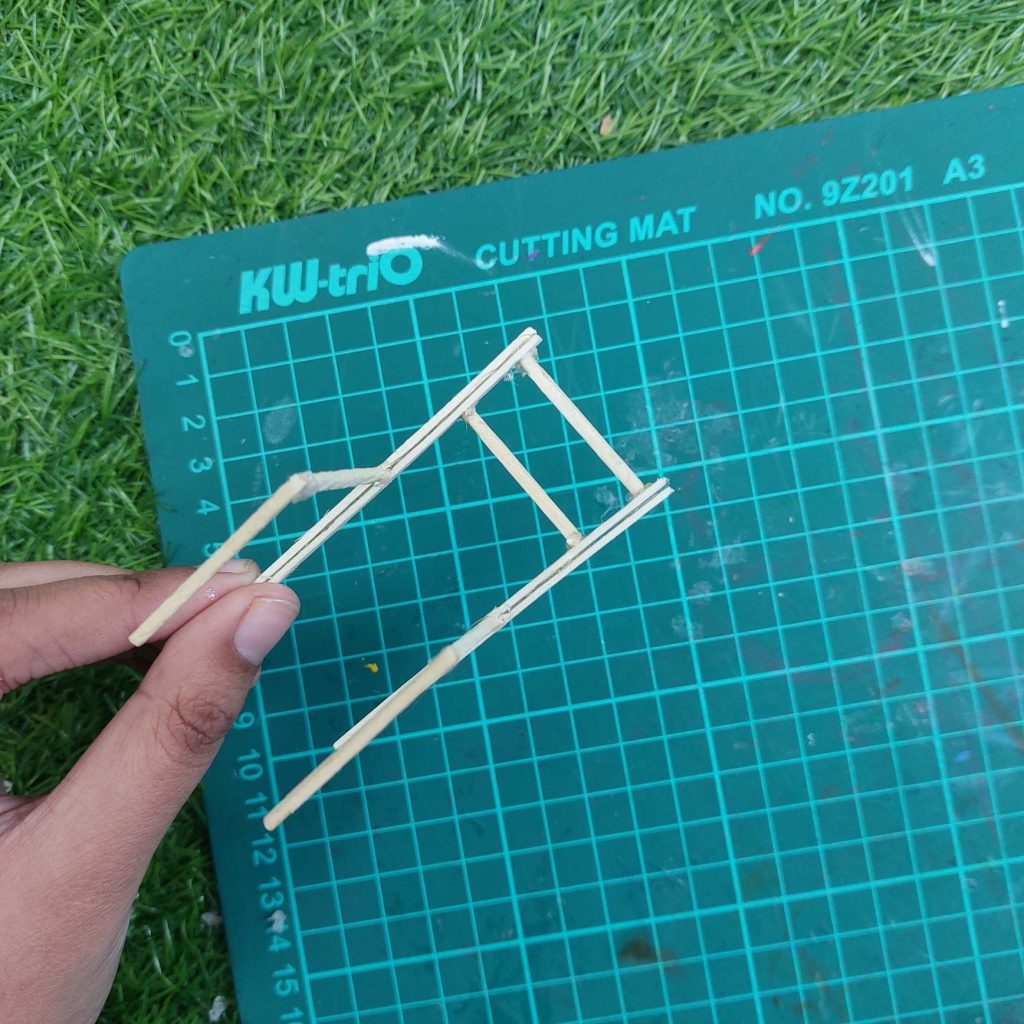
- Step 7 — Add the seat slats
Once the frame feels stable:
- Cut your seat slats to 3.5 × 0.5 cm.
- Glue them across the seat area, side-by-side.
- If any slats stick out, lightly sand the edges once everything is dry.

- Step 8 — Final trim and clean-up
Trim the back legs so both sides are the same height. Scrape off any dried glue strings and lightly sand rough corners if needed.
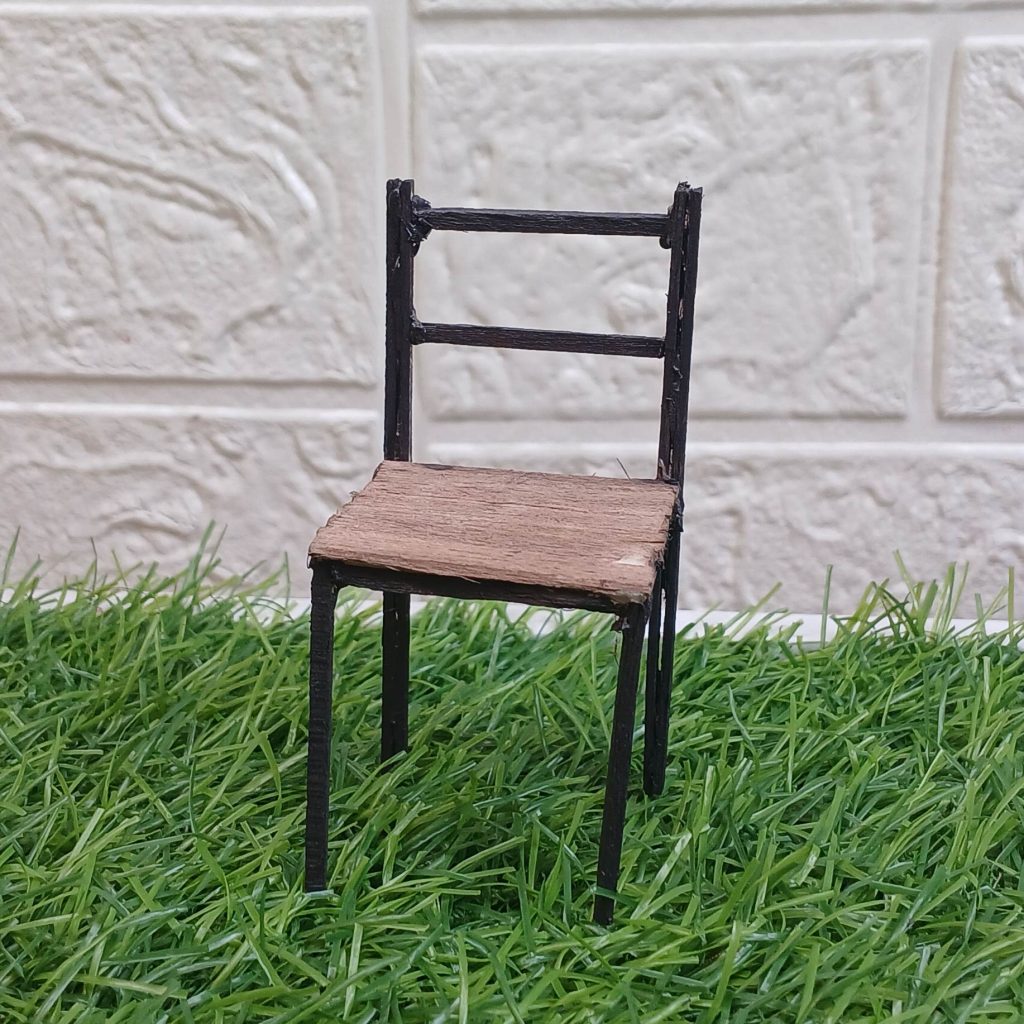
At this stage your chair is ready to paint, stain, or weather, depending on the look you’re going for.
Repeat the same steps for the second chair.
- Step 9: Paint and Finish
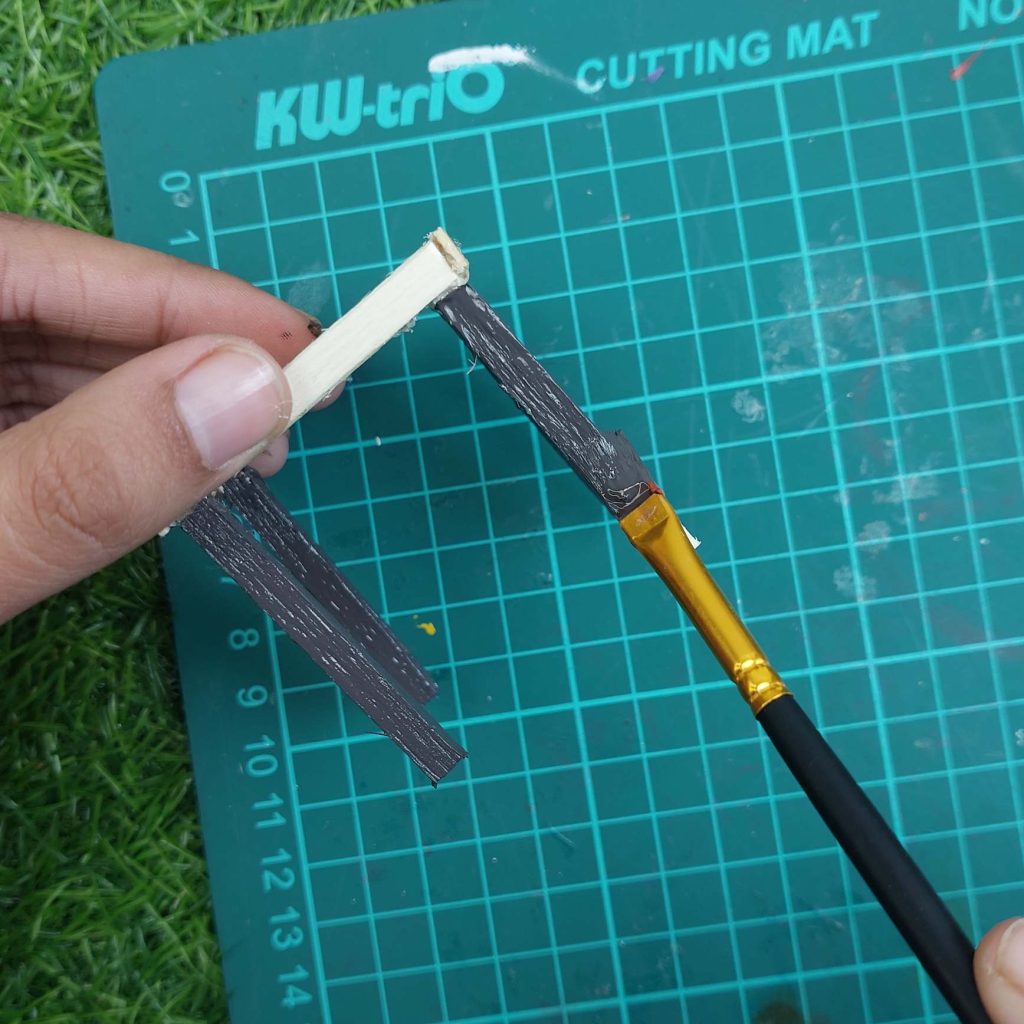
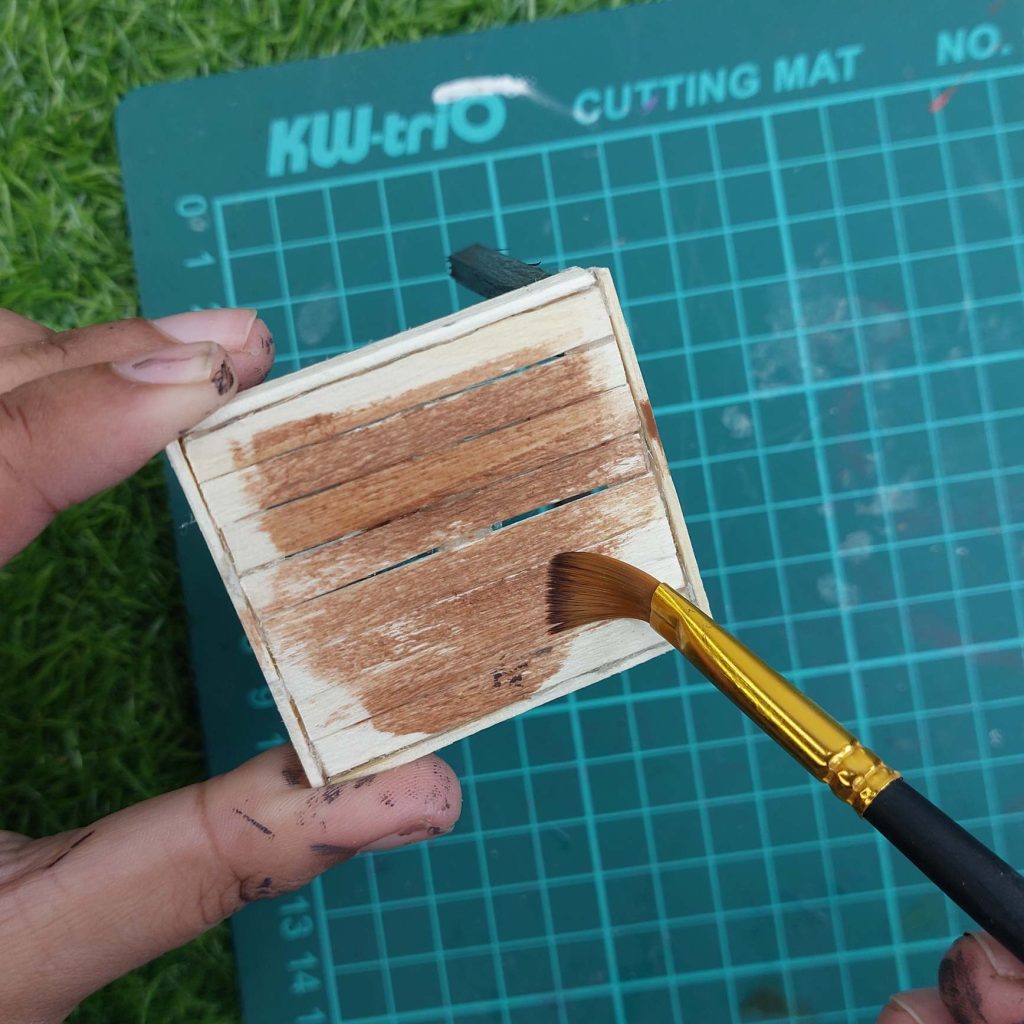
Paint the legs and frames black or dark grey. For the tabletop and chair seats, use brown paint or diluted acrylic paint to mimic stained wood.
Don’t worry about perfection here—slight brush marks actually make it look more realistic at this scale.
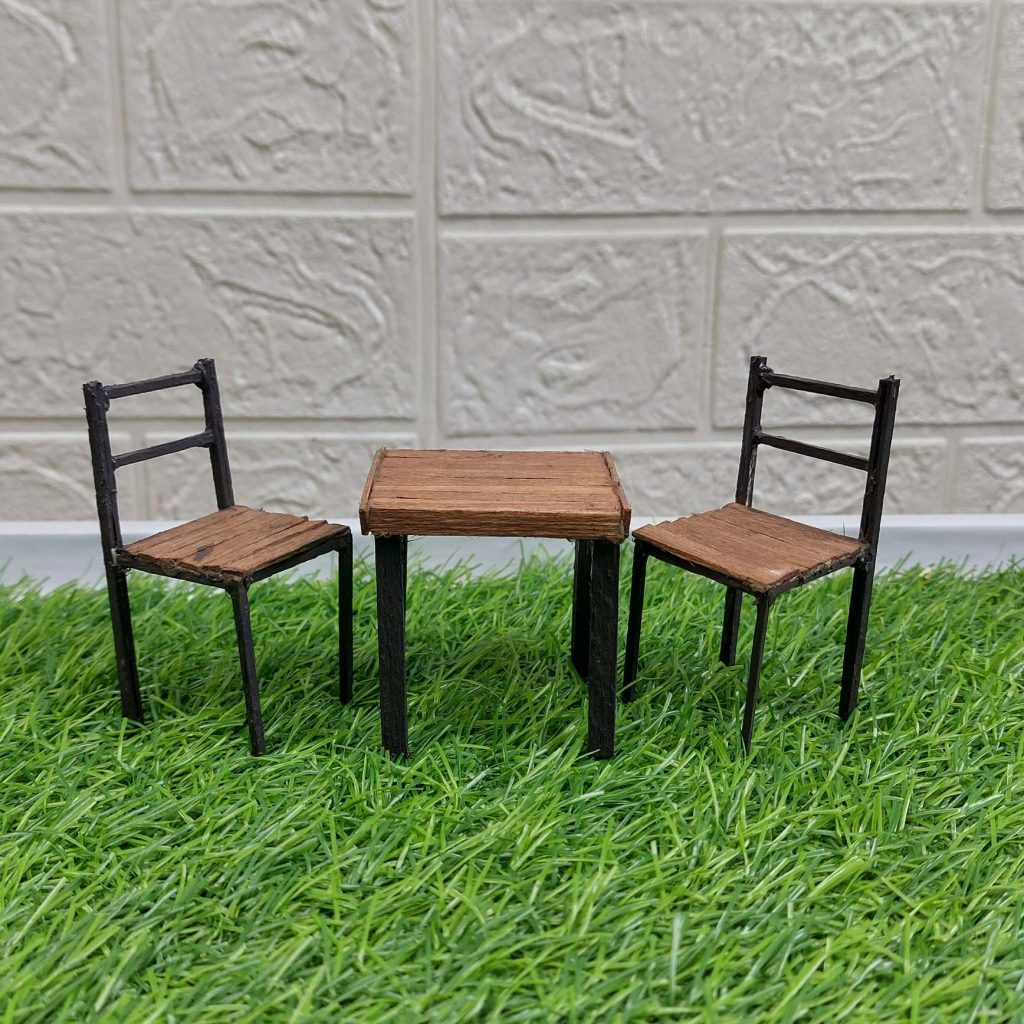
Final Result
You’ll end up with a simple, rustic miniature table and two matching chairs that work in almost any setting—kitchen, café, terrace, or garden scene.
If you have any questions, leave them down below in the comment section as usual, or show your results in my Facebook group!
I wish you happy crafting!
Kind regards,
Lizzy

Hi everyone!
My name is Lizzy, and I am an amateur miniaturist obsessed with everything in the dollhouse and miniature world, ever since I was a teenager.
So far, I have created 2 dollhouse projects, a backyard shed and a miniature treehouse, tons of DIY dollhouse kits, and “hacked” some.
I also created a fairy garden, and lots of small and simple miniature projects on my YouTube channel. (mostly made from trash or everyday items).
I love to write as well about all things happening in the miniature world, hence the reason why I created this blog!
I wish you happy reading and crafting!
Lizzy


")

