
Hobby laser cutting machines might sound a bit intimidating at first, but they’re becoming a real game-changer in the miniature world and the hobby world in general, especially for making dollhouse furniture and wooden kits with super clean detail.
I don’t actually own one myself (yet!), but I’ve had the chance to try a few thanks to a friend who’s totally hooked. She’s got two machines and has helped me with several of my projects, including one of my fairy houses. Seeing her create precise parts and intricate designs so easily kind of sold me on the idea.
So in this post, I’m sharing everything I’ve learned from borrowing her machines, doing some serious research, and of course, her point of view and enthusiasm. If you’re curious about what hobby laser cutters can do, especially for dollhouse and miniature making, this guide is for you.
You might also remember my roundup review on laser cutters that don’t have an enclosed box, but are more affordable.
As an Amazon, Etsy and Anavrin associate, I earn a small commission from your purchase, with no extra charges for you.
Understanding Hobby Laser Cutting Machines in the World of Miniatures
If you’ve never used one before, a hobby laser cutting machine is a device that uses a high-powered beam of light (a laser) to cut or engrave materials like wood, acrylic, or paper. It’s all controlled by a computer, so you can cut out very precise shapes; even tiny, detailed ones.
In the dollhouse world, that’s a game-changer. Laser cutters are often used to create miniature furniture, wall panels, window frames, or even full DIY house kits. You’ll also find them behind the scenes in those beautiful, intricate book nooks.
Now, if you’re planning to use one at home, one thing to consider is whether the machine is open or enclosed.
Enclosed laser cutters come with a protective cover that helps trap fumes, smoke, and debris. That makes them much cleaner and safer to use indoors, especially if you’re working from your living room or a shared craft space.
I personally prefer the idea of enclosed machines. So my friend owns 2 of them, and after testing them out for a few projects, I was really impressed by how neat and efficient it felt. It definitely gave me more confidence to try one myself one day.
And here’s why these are considered hobby machines rather than industrial ones: hobby laser cutters are typically smaller, more affordable, and easier to set up and use.
They’re designed with the home crafter or small business owner in mind.
Industrial machines, on the other hand, are much larger, often require special ventilation systems, and are made for cutting through very thick materials for high-volume production.
Hobby cutters focus more on precision at a small scale, which is perfect for miniature makers like us!
The Journey from Raw Material to Miniature Masterpiece wih a wood laser cutter
Choosing your materials for the laser cutter.
Before the laser even starts cutting, the first big decision is what kind of wood to use. If you’re crafting dollhouse furniture or even full kits, you want something that’s both sturdy and easy to cut cleanly.
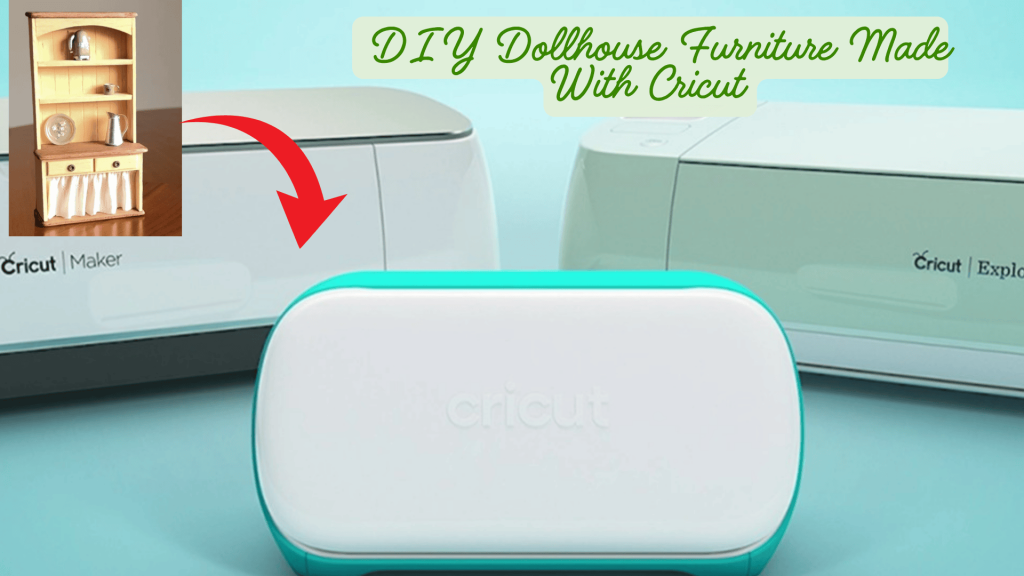
When I started looking into this myself, I noticed that a lot of beginner crafters start with balsa or basswood, and those are great for small, delicate pieces or machines like the Cricut.
However, when it comes to laser cutting, especially for things like walls, floors, or structural parts, Baltic birch plywood is the go-to material.
Most miniaturists I know prefer 1/8 inch (3mm) or 1/4 inch (6mm) thickness. It’s strong enough to hold its shape, but still thin enough to get beautiful, detailed cuts.
The quality of Baltic birch also means fewer splinters, fewer burn marks, and an overall smoother result.
That said, different dollhouse kit brands might use different types of wood depending on cost or their design. If you’re planning to cut your own designs, start with small test pieces to get a feel for how your machine handles it.

Setting up your laser cutter- the process.
Now that you’ve chosen your material, it’s time to get the laser cutter ready to go. This part might feel intimidating at first (it definitely did to me!), but once you’ve done it a few times, it becomes second nature.
The first step is making sure your laser is properly calibrated and focused. That just means adjusting the laser’s height so it cuts cleanly, and making sure the cutting bed is completely flat, especially important for our detailed miniature pieces!
Next, you’ll need to set the power and speed levels depending on your material. For example, cutting thin plywood requires different settings than engraving cardstock. Don’t stress if you don’t get it right on the first try!
The video below shows how to get everything set up properly and safely, definitely worth watching if you’re just starting out.
Design your miniature kits with software
Before you can start cutting, you’ll need a digital design—and for that, you’ll use laser-compatible software. Most laser cutters come with their own software, but you can also try a few popular programs that many miniaturists (and even I) explore:
- Inkscape – It’s free, beginner-friendly, and works great for SVG files. Perfect if you’re just getting started.
- Adobe Illustrator – More advanced, but it gives you full control over detailed vector designs.
- CorelDRAW – Similar to Illustrator, also great for exporting cut-ready files.
- TinkerCAD – Super easy to use and web-based. Great for simple 3D shapes and layouts.
- AutoCAD – More for engineering-style precision (I personally wouldn’t start here unless you already know it).
- Built-in software – Many machines have their own apps like “LaserCut,” that simplify everything for you.
⚠️ Just make sure to save your files in a format your laser cutter supports—most often SVG, DXF, or AI. And always double-check your material settings in the software before hitting “go.”
With your designs ready, it’s just a matter of sending them to the laser cutter and watching as it meticulously slices through the material.
Post-cutting, you’ll carefully remove the pieces from the cutting bed, do some light clean-up of any residue or burs, and then assemble them using glue designed for fine woodwork. Just like I did with several DIY book nook kits that I purchased.

Sakura Densya, a Book Nook kit by Robotime
Cost Analysis: Investing in a Hobby Laser Cutter
So, how much does it actually cost to get started with a hobby laser cutter?
Prices can vary quite a bit depending on size, power, and features. For hobby use, entry-level machines usually start around $300 to $500. If you’re looking for something sturdier or enclosed (which I personally prefer for indoor use), mid-range models typically sit between $1,000 and $3,500.
Then there are the high-end machines that go well over $8,000—but those are usually meant for professional makers, schools, or small businesses with constant, heavy-duty use. Most miniature hobbyists don’t need anything nearly that powerful.
Of course, the machine itself isn’t the only cost. You’ll also need to consider:
- Cutting materials like Baltic birch plywood
- Replacement parts and occasional maintenance
- Possible upgrades (like air assist or honeycomb beds)
If you’re thinking long-term or even considering turning your hobby into a side business, it can be worth spending a bit more upfront. I don’t own my own machine yet, but I’ve borrowed my friend’s setup many times, and I’ve definitely caught the laser bug.
Choose what fits your space, your goals, and your budget.
Kickstarting Your Hobby: Best Enclosed Hobyy Laser Engravers for Beginners
A Quick Comparison Table: WECREAT Vision M1 vs. Creality Falcon2 40W
Feature | WECREAT Vision M1 | Creality Falcon2 40W |
|---|---|---|
Cutting Power | Moderate – great for tasks like cutting 3 mm plywood or cardstock | High cuts through thicker materials (6 mm wood, acrylic) easily |
Ease of Use | Beginner-friendly; proprietary software needs some learning | More feature-rich; ideal for users with experience using LightBurn or similar |
Enclosure & Fume Control | Fully enclosed; decent built-in exhaust; still benefits from external ventilation | Enclosed with integrated exhaust, air assist; very effective when properly vented |
Auto-Focus / Lift Bed | Yes: auto-adjusting focus mechanism simplifies handling different thickness | Manual focus adjustment required using provided gauge |
Precision | Good, clean cuts and engraving for small-scale wood projects | Excellent, sharp engraving, detailed line work, consistent repeatability |
Size & Portability | Compact and relatively lightweight; easy to fit on a craft desk | Larger and heavier machine; recommended for dedicated workspace |
Noise Level | Moderate | Louder due to air assist and high-speed fans |
Ideal For | Casual home hobbyists crafting small dollhouse frames and furniture | Advanced hobbyists and small businesses working with thicker wood and custom kits |
Estimated Price | Around 1000$ | Around $1,899 USD |
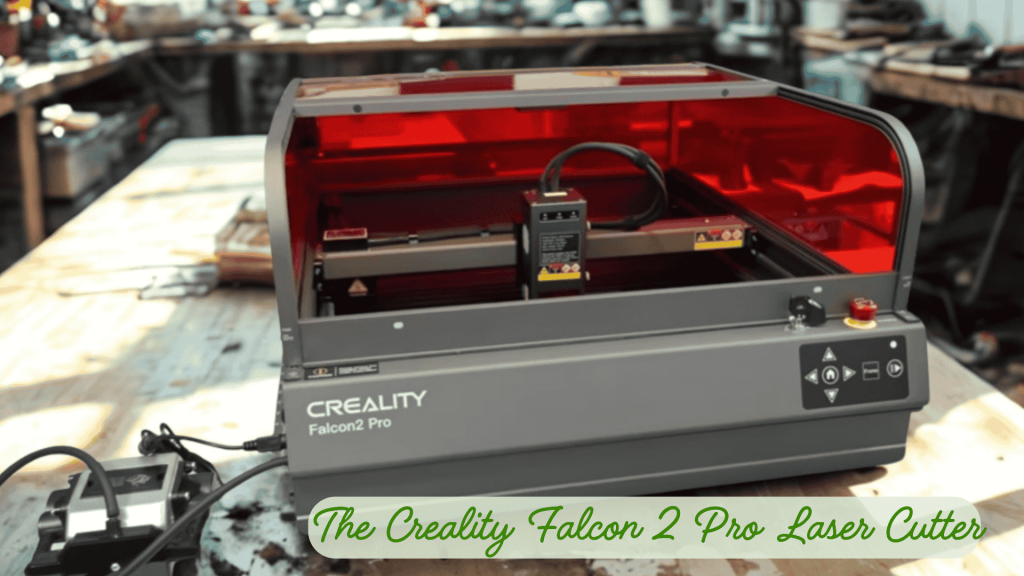
Creality Falcon2 40W: A Step Up in Power for Bigger Builds

Creality Falcon2 Pro 40W Laser Engraver-Desktop Diode 240W Output
Buy Now →The Creality Falcon2 40W is more of a powerhouse. It’s not the type of machine you casually place on a bookshelf and forget: it demands some space and planning.
But if you’re looking to cut thicker wood or work on bigger, more detailed miniature kits, this one’s up for the job.
My friend showed me some detailed facades and window frames she cut with this machine, and the results were sharp and super clean.
Thanks to its higher wattage, it cuts faster and deeper than many budget models, which makes it great for people who want to go beyond the occasional project.
The built-in air assist helps keep edges clean and reduces scorching. It’s also enclosed, which I really like, and has multiple safety features
But because of the power, I’d still only recommend using it in a well-ventilated space or with an extra air purifier.
Worth knowing:
- Cuts cleanly through thicker woods (like 6mm ply)
- Faster output, better for small-batch production
- Software is more advanced—good if you have a bit of experience already
- Louder and heavier, so definitely more of a stationary machine
If I ever decide to invest in my own laser cutter, this one’s on my radar for sure.
WECREAT Vision M1: A Cleaner Laser Cutter for Indoor Miniature Work

WECREAT Vision 20W Laser Engraver, Auto-Lifting for 5.5″ Material
Buy Now →
According to my friend, who lets me tag along when she’s working, the WECREAT Vision M1 is a surprisingly solid option for beginners; especially if you’re crafting in a shared or indoor space.
One of its biggest strengths is the built-in enclosure, which helps contain fumes and dust while cutting. She mentioned that even though it’s a smaller desktop model, it’s been more than capable of handling 3mm Baltic birch for dollhouse kits.
From what I saw, the auto-lifting feature makes it easier to handle thicker materials without fiddling around too much, and the included exhaust system definitely helps with keeping the air cleaner.
Of course, it’s not silent, and the software it comes with takes a little time to get used to. But overall, it seems like a reliable, cleaner option for home use.
Things to consider:
- Works well with common materials for miniatures like plywood and cardboard
- The auto-focus helps avoid alignment errors
- The software is functional, though not the most beginner-friendly
- A bit limited in size, so better for small-scale projects
If you’re looking for a relatively safe way to start working with laser cutters at home—without converting your garage into a workshop—this is one my friend would recommend.
Answering FAQs on the laser cutter.
In this section, we always go over certain questions that people might still have on the topic, so let’s just go!
Is laser cutting cheaper than CNC?
The initial investment and operating costs for laser cutting and CNC machining equipment can vary. Laser-cutting machines may have lower initial costs for entry-level models, but high-power and precision models can be expensive.
CNC machines can range from less expensive routers to more costly milling machines.
CNC machining involves the use of physical cutting tools, which may wear out over time and require replacement. Laser cutting machines typically use non-contact methods and may have lower maintenance costs in terms of tooling.
So, if it is cheaper, it’s kind of hard to say straight up
Are there any disadvantages of the laser cutter?
Right of the bat, you could say that laser cutting can have a few disadvantages, like:
- Material Limitations:
- Laser cutters may have limitations on the types of materials they can effectively cut. Some materials, especially highly reflective or transparent ones, may not be suitable for laser cutting.
- Initial Cost:
- High-quality laser cutting machines, especially those with advanced features and higher power, can be expensive to purchase and install. This initial investment cost may be a disadvantage for small businesses or hobbyists.
- Maintenance and Safety Concerns:
- Laser cutters require regular maintenance to ensure optimal performance. Additionally, safety precautions, such as proper ventilation and laser shielding, are crucial to protect users from potential hazards associated with laser cutting, adding to the overall operational considerations.
Which materials should never be used in a laser cutter?
Materials that should never be used in a laser cutter include PVC, vinyl, and other chlorinated plastics, as they release harmful gases.
Polycarbonate, HDPE, fiberglass, and coated materials can also produce toxic fumes when laser cut.
Certain metals are not suitable for standard CO2 laser cutters. It’s crucial to prioritize safety and follow the manufacturer’s guidelines to avoid health risks, machine damage, and potential fires.
Related article: the 8 benefits of laser cutting dollhouses and miniatures.
My Final Conclusion
I hope that I could help you on your way to considering making your own DIY dollhouse kits with hobby laser cutting machines, and maybe even set up your own business.
Who knows I might even interview you for my blog shortly? 🙂
If you have any more questions about this topic, please feel free to leave a comment down below in the comment section or join me on one of my social media pages below, especially my YouTube channel!
I wish you happy crafting!
Kind regards,
Lizzy
Related articles

Hi everyone!
My name is Lizzy, and I am an amateur miniaturist obsessed with everything in the dollhouse and miniature world, ever since I was a teenager.
So far, I have created 2 dollhouse projects, a backyard shed and a miniature treehouse, tons of DIY dollhouse kits, and “hacked” some.
I also created a fairy garden, and lots of small and simple miniature projects on my YouTube channel. (mostly made from trash or everyday items).
I love to write as well about all things happening in the miniature world, hence the reason why I created this blog!
I wish you happy reading and crafting!
Lizzy


Lizzy, your guide on hobby laser cutting machines is thorough and insightful! The breakdown of the journey from raw material to miniature masterpiece, along with detailed steps on choosing materials and setting up the laser cutter, is incredibly helpful. The software recommendations provide a valuable resource for designing miniature kits. Thanks for sharing your expertise in this beginner-friendly tutorial!
thanks so much Thabo and happy crafting/lasering! 😉
Lizzy
This is a fascinating article on hobby laser-cutting machines. A beginner has all the details needed to get started in this most interesting hobby. The information is presented in a step-by-step fashion which makes it easy to learn and apply. Thanks so much for the education.
Hi Joseph!
Thank you as well for your wonderful comment and you are welcome, I hope you can now get started on your new hobby!
Lizzy
Hi Lizzy just got my xtool m1 and I really like it as I have the air purifier system so I don’t need a window open , I also got the air assist to help with fire flare ups , however looking at your post I like the look of the machine that resembles the cricut the one with the blue mat and the dollhouse ?, what kind of machine is that one looks nice and compact great information as always thank you !
Hi Rosemary!
Thank you for that information and for your nice comment ;-). I’m sorry but I don’t know what type the one in the picture is, as it is a non-copyrighted stock photo with no name on that I got on Canva. I use those as to not break any copyrights from other peoples pictures, sorry!
Happy crafting!
Lizzy
What would be the best option for making model ships , i.e. cargo ships, cruise liners , with lengths of up to 6 feet.
Hello! That seems like a big project ahead, nice!
So I needed to do some research and here are my thoughts:
For building larger model ships like cargo ships or cruise liners up to 6 feet long, you’ll want a laser cutter that has enough power and a big enough cutting area. Here’s what I’d recommend:
– Laser Power: You’ll need something with a bit of muscle to handle thicker materials like plywood or MDF. A CO2 laser cutter with at least 60W, preferably closer to 100W, would be a good fit. That way, you can cut through thicker wood without a struggle.
– Work Area: Since your ships are pretty big, look for a laser cutter with a larger cutting bed—something around 24×36 inches (610×914 mm) or bigger. This way, you can cut larger sections at once. A couple of solid options here are the OMTech 100W or the Boss Laser LS-1630.
– Pass-Through Slot: If you’re dealing with extra-long parts, a laser cutter with a pass-through slot can be super handy. It lets you slide longer pieces through the machine and cut them in sections.
Some specific models that might work well for you:
OMTech 100W CO2 Laser Cutter: This one’s got a nice balance of power and price, plus a good-sized work area. It should handle thicker wood well, making it a great option for model ship parts.
Glowforge Pro: This one’s a bit more user-friendly and has a pass-through slot, which is nice for longer pieces, but it is pricier and has a smaller cutting bed.
Just make sure your workspace is well-ventilated—cutting wood and MDF can produce quite a bit of fumes! Hope this helps, and good luck with your model ship building!
Kind regards,
Lizzy