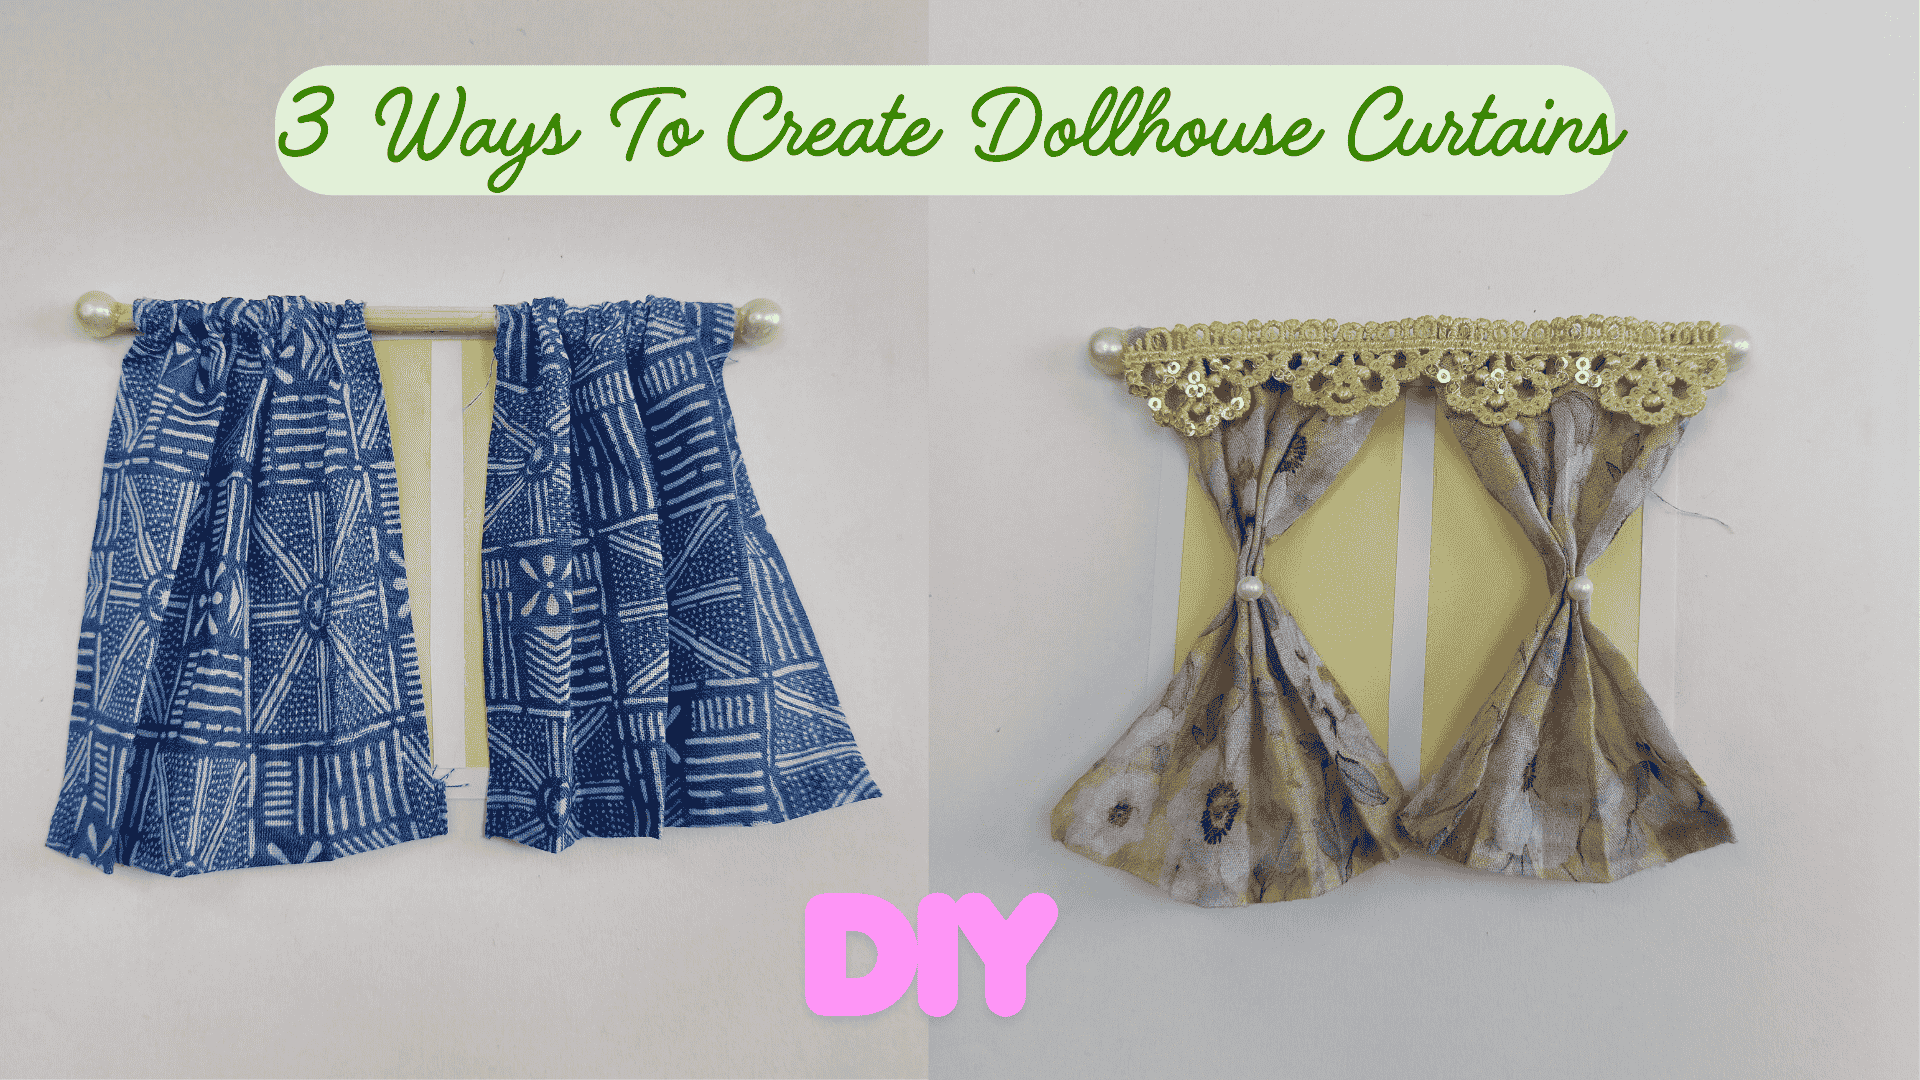
In this tutorial, I’ll walk you through three different dollhouse curtain styles, each using a slightly different method. The first two are no-sew projects, where we’ll use glue to shape the fabric and add decorative details like pearls and lace. Then, in the final method, we’ll step it up a notch by introducing a needle and thread to the procedure.
Each method gives a different result so you can pick the one that best fits your dollhouse’s style.
Of course, you can adapt all curtains to the measurements that you need for your dollhouse.
Tip: How to Measure Fabric for Dollhouse Curtains
To figure out how much fabric you’ll need for your miniature curtains, start by measuring the width and height of your dollhouse window. Then, use this simple rule of thumb:
Width: Multiply the window width by 1.5 to 2, depending on how full or gathered you want your curtains to look.
Example: if your window is 10 cm wide, cut your fabric between 15–20 cm wide.
Height: Add 1 cm at the top and bottom for hems or rod loops.
If you’re unsure, it’s always safer to cut your fabric a little larger — you can trim it later.
DIY Dollhouse Curtains – Method 1 (No-Sew Curtain with Rod)
These mini curtains are simple, quick to make, and don’t require any sewing. Perfect if you just want an easy way to dress up your dollhouse windows with fabric you already have at home.
Materials You’ll Need
Small piece of fabric. Look for fabric that hangs softly without looking stiff
Scissors
Glue (fabric glue or white craft glue)
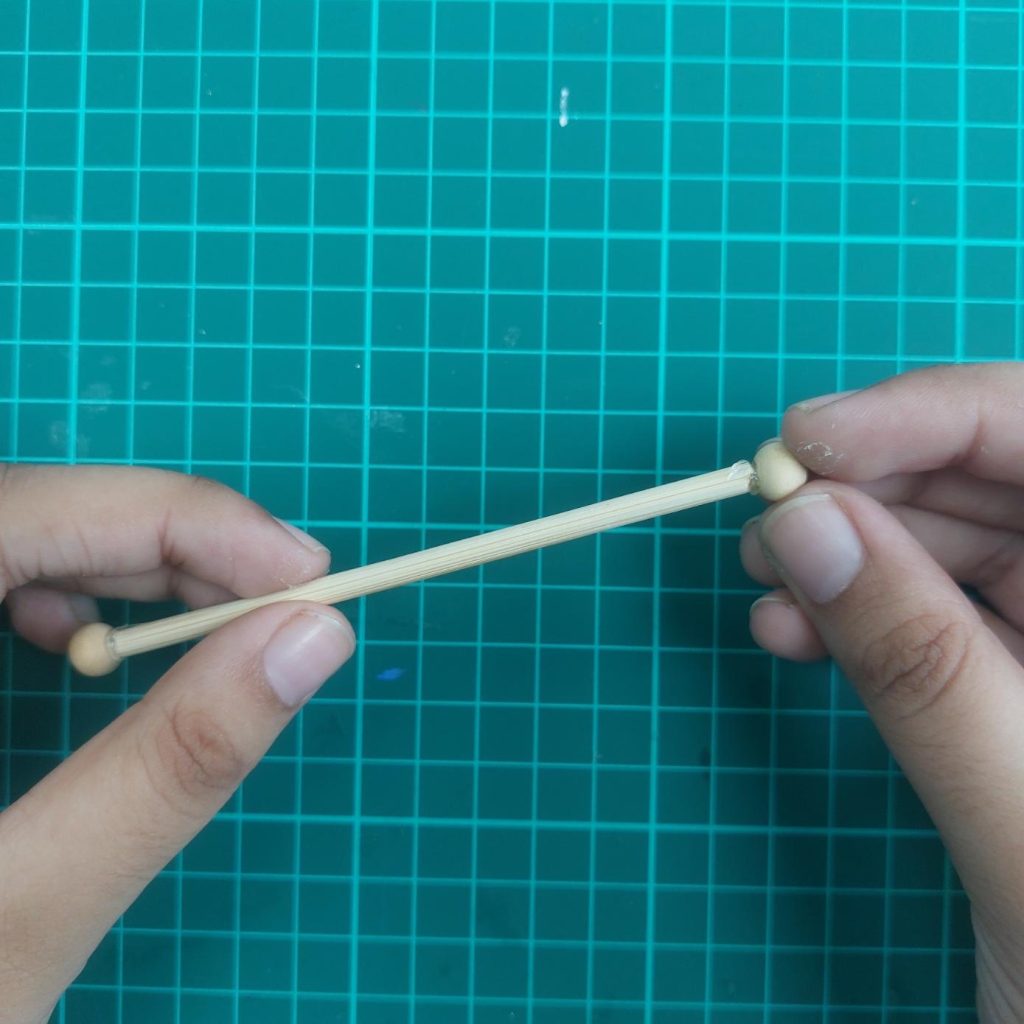
Wooden skewer or thin dowel (for the curtain rod)
Two beads (for decorative ends of the rod)
Ruler and pencil
Step-by-step tutorial.
Step 1 – Cut Your Fabric
Cut your fabric into a rectangle that’s slightly larger than your window opening. Remember to leave extra space for folding and gluing the edges.
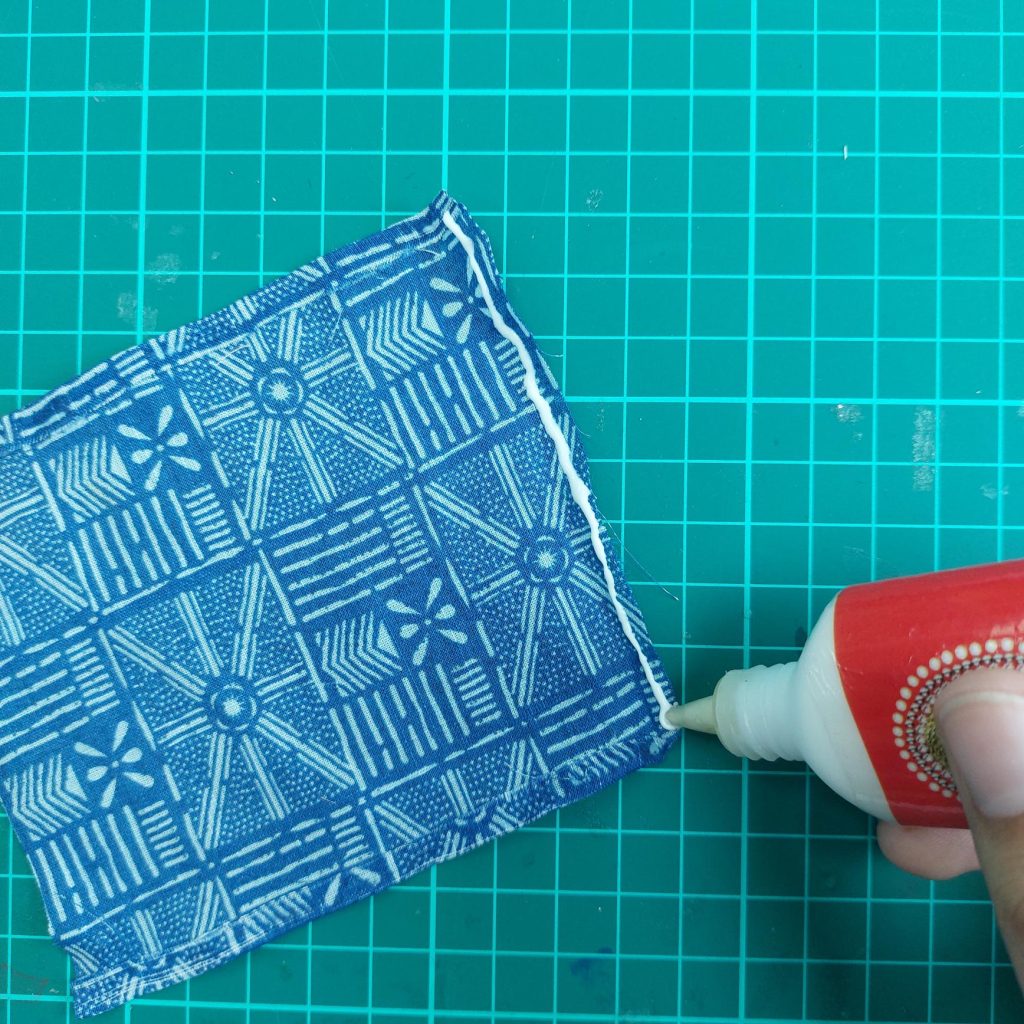
Step 2 – Seal the Edges with Glue
Fold the fabric edges inwards slightly and run a thin line of glue along the fold. This will give your curtain a neat finish and stop the fabric from fraying.
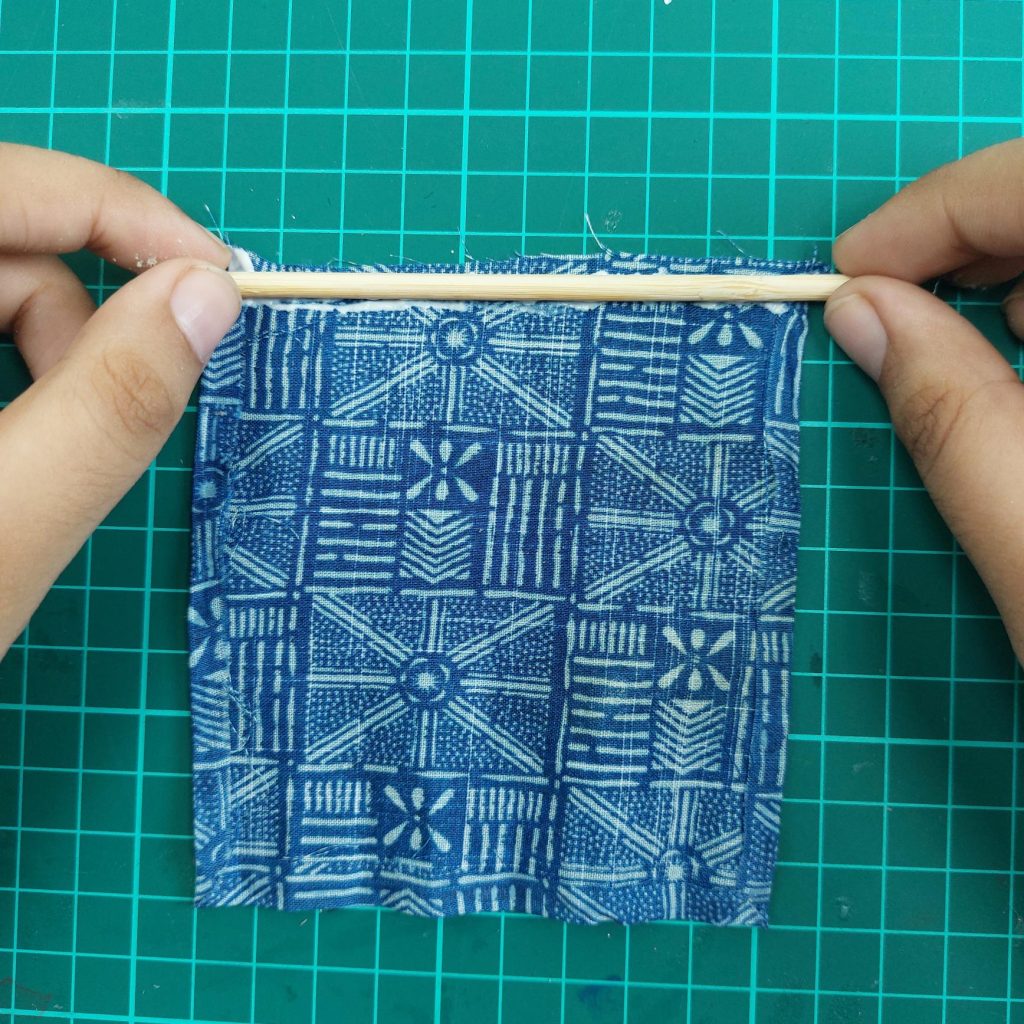
Step 3 – Make the Top Rod Pocket
Apply glue along the top edge of the fabric and fold it over to create a pocket. This is where your curtain rod will slide through. Let it dry before continuing.
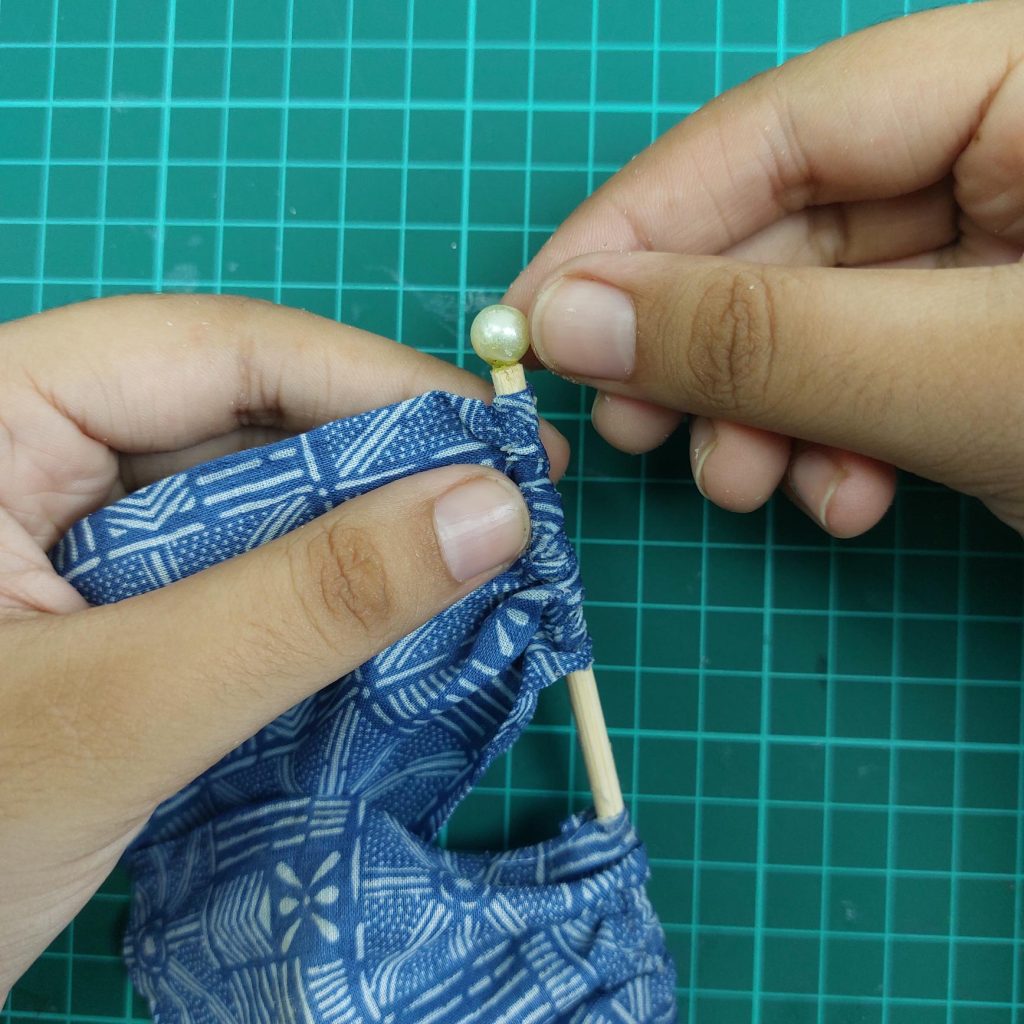
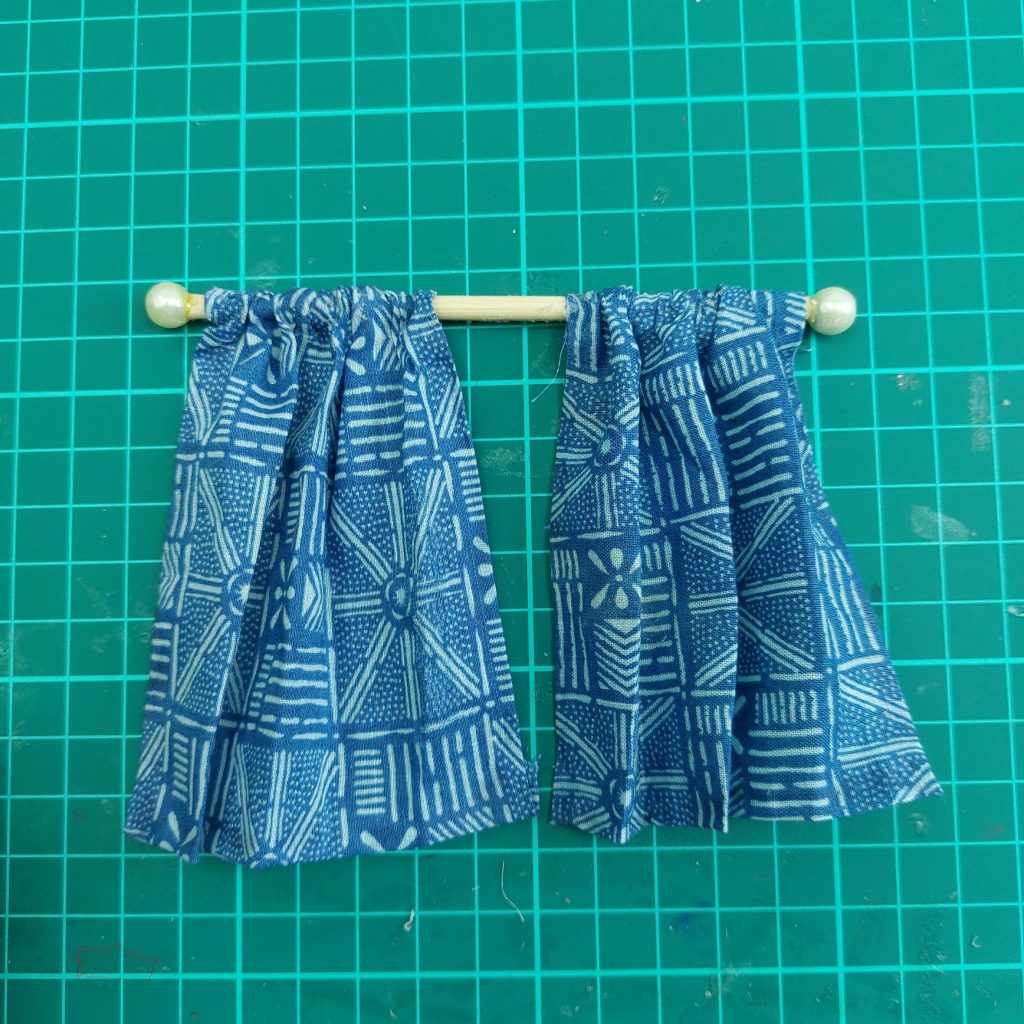
Step 4 – Insert the Curtain Rod
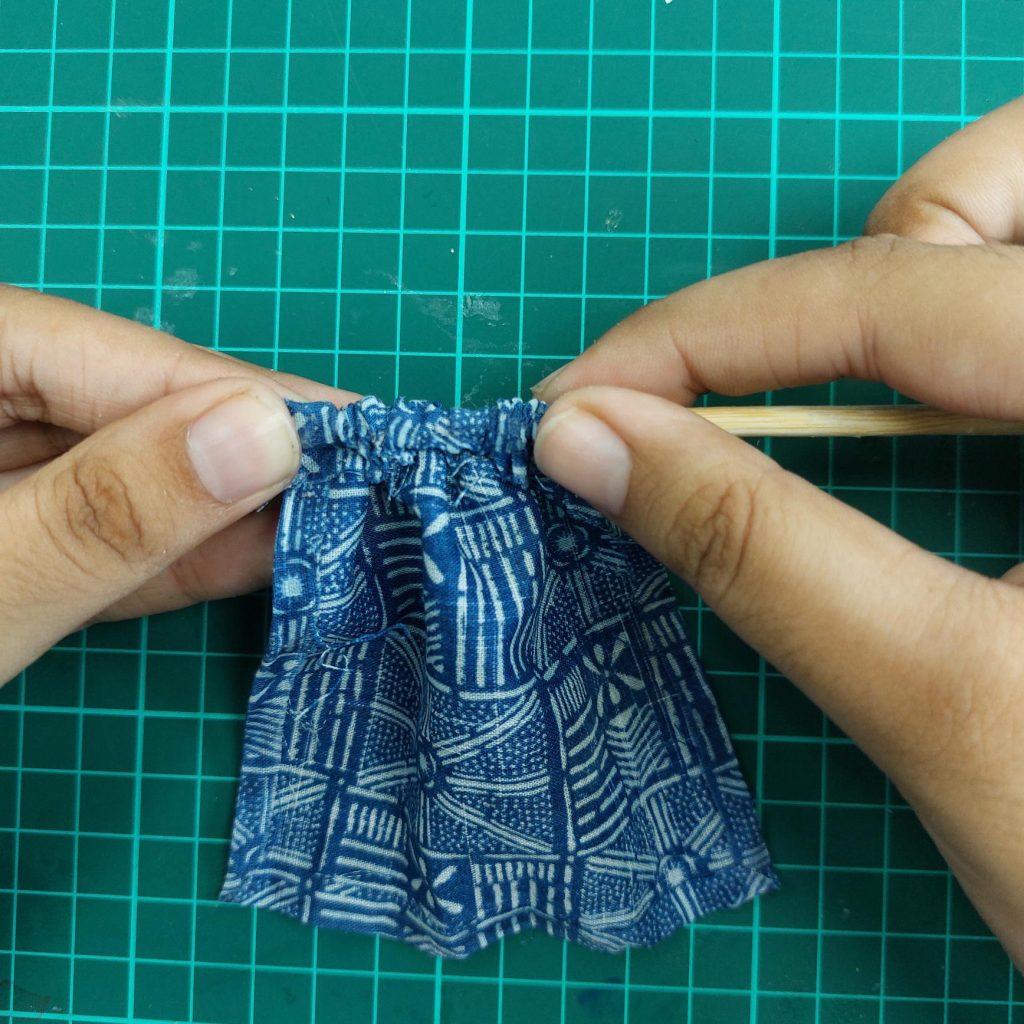
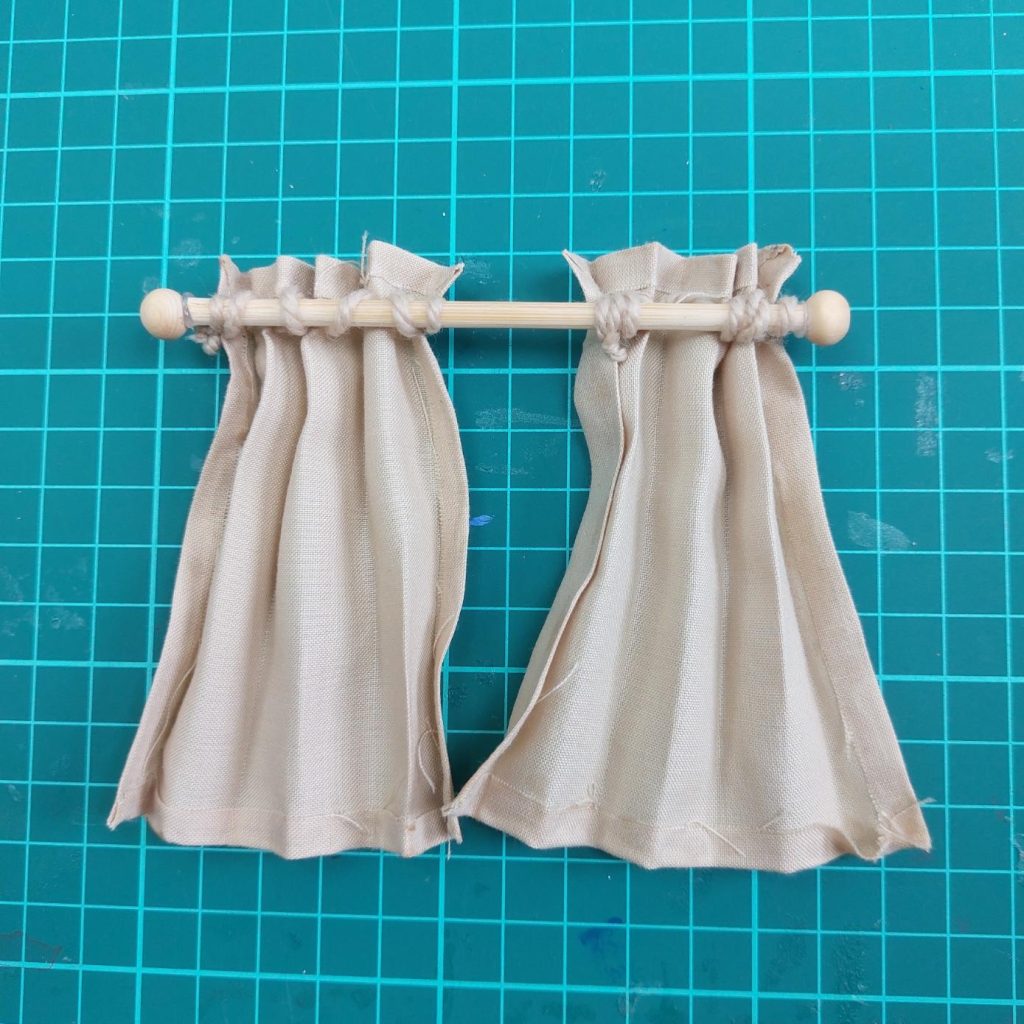
Slide a wooden skewer or thin dowel through the top pocket you created. Push the fabric together to create nice folds and pleats.
Step 5 – Add Decorative Ends
Glue one bead to each end of the rod to keep the curtain in place and give it a finished look.
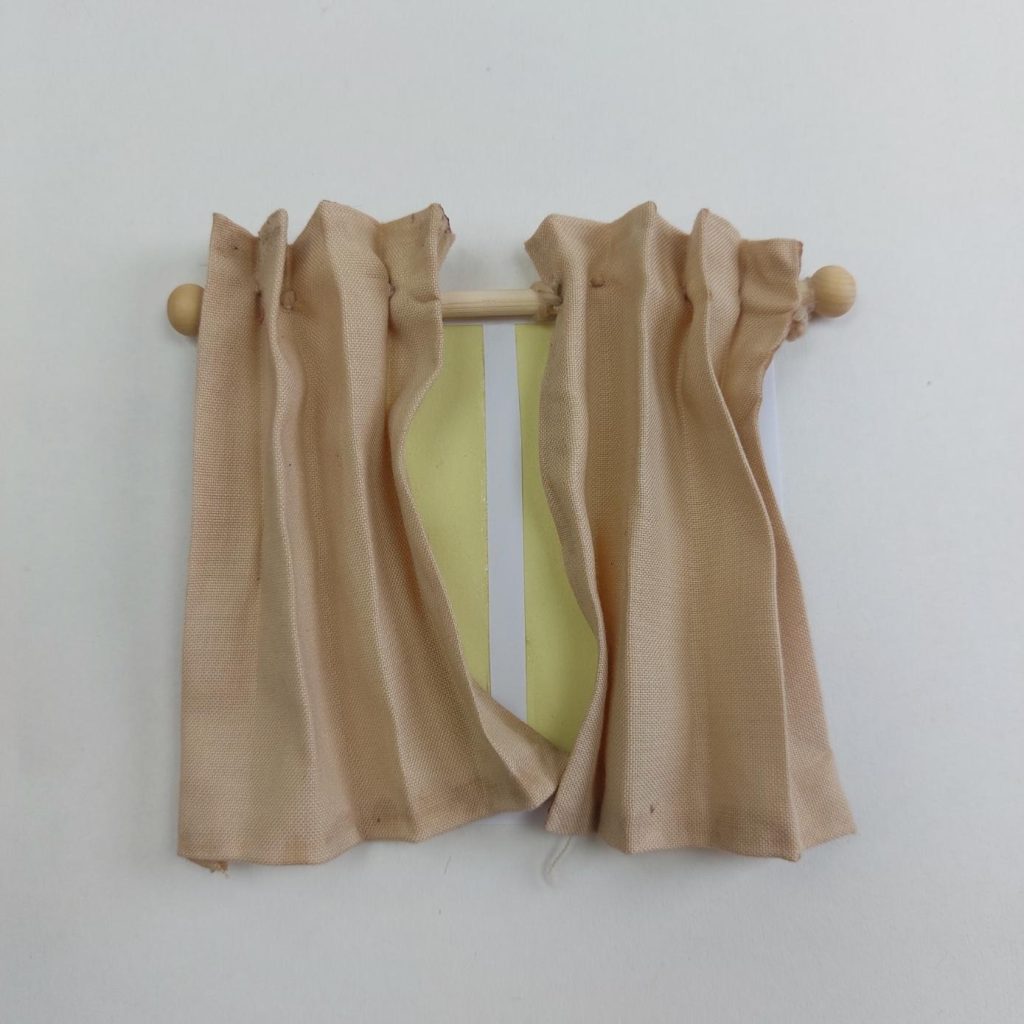
Your dollhouse curtain is ready! You can hang it directly in your miniature window or glue it onto the wall for a fixed effect.
✅ Tip: You can make these curtains in different fabrics for each dollhouse room—lace for a vintage look, patterned cotton for a cozy kitchen, or even satin scraps for a fancy parlor.
DIY Miniature Curtains with Pearls and Lace
These little curtains are simple to make but add a touch of elegance to your dollhouse windows. Here’s how you can do it.
Materials Needed
Pencil
Lightweight fabric (choose one that drapes smoothly, like cotton or polyester blend)
Craft glue or fabric glue
Wooden skewer or thin dowel
Small pearl beads
Decorative lace trim
Scissors
Ruler
Step-by-Step Tutorial
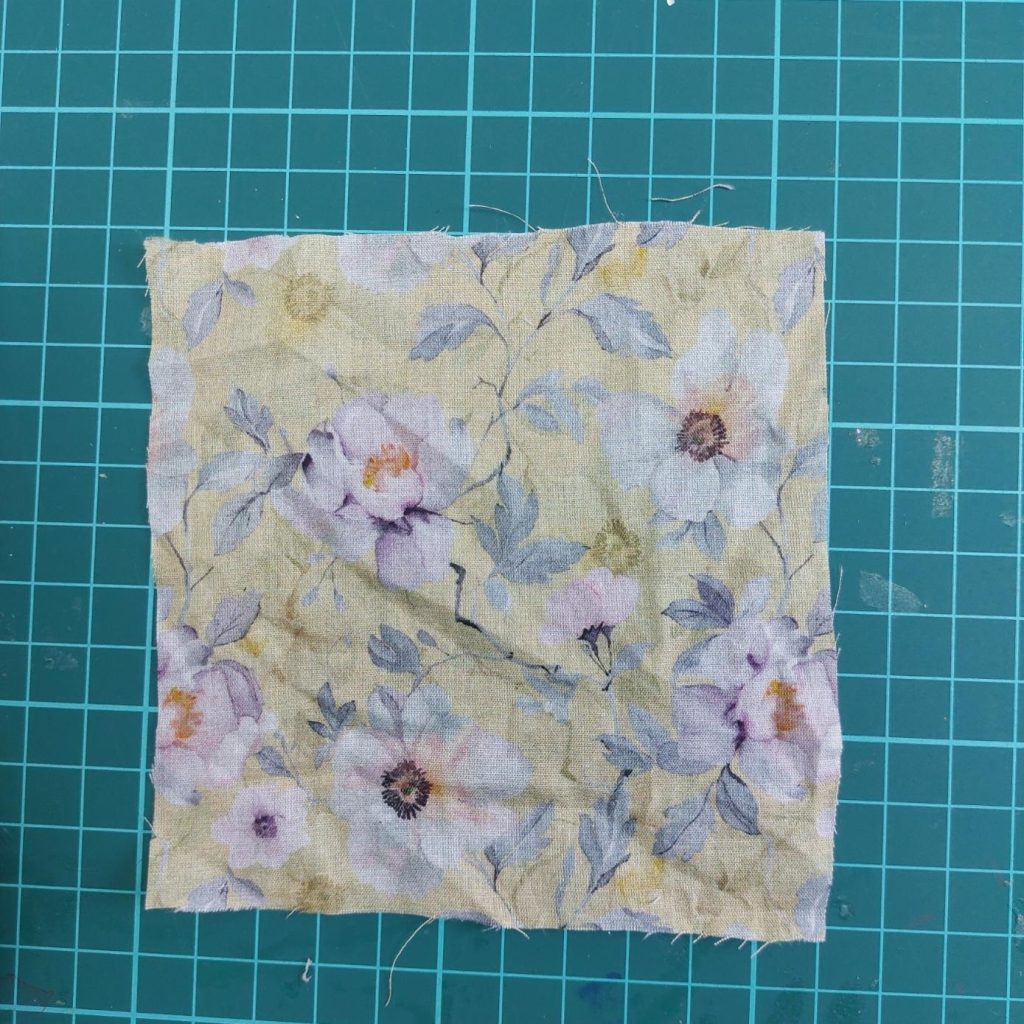
Step 1: Cut and Prepare the Fabric Cut a rectangular piece of fabric to the size you’d like your curtains. Light, flowy fabric works best, so it hangs nicely.
Step 2: Hem the Edges Fold over the edges slightly and secure with glue to create neat hems. Let dry.
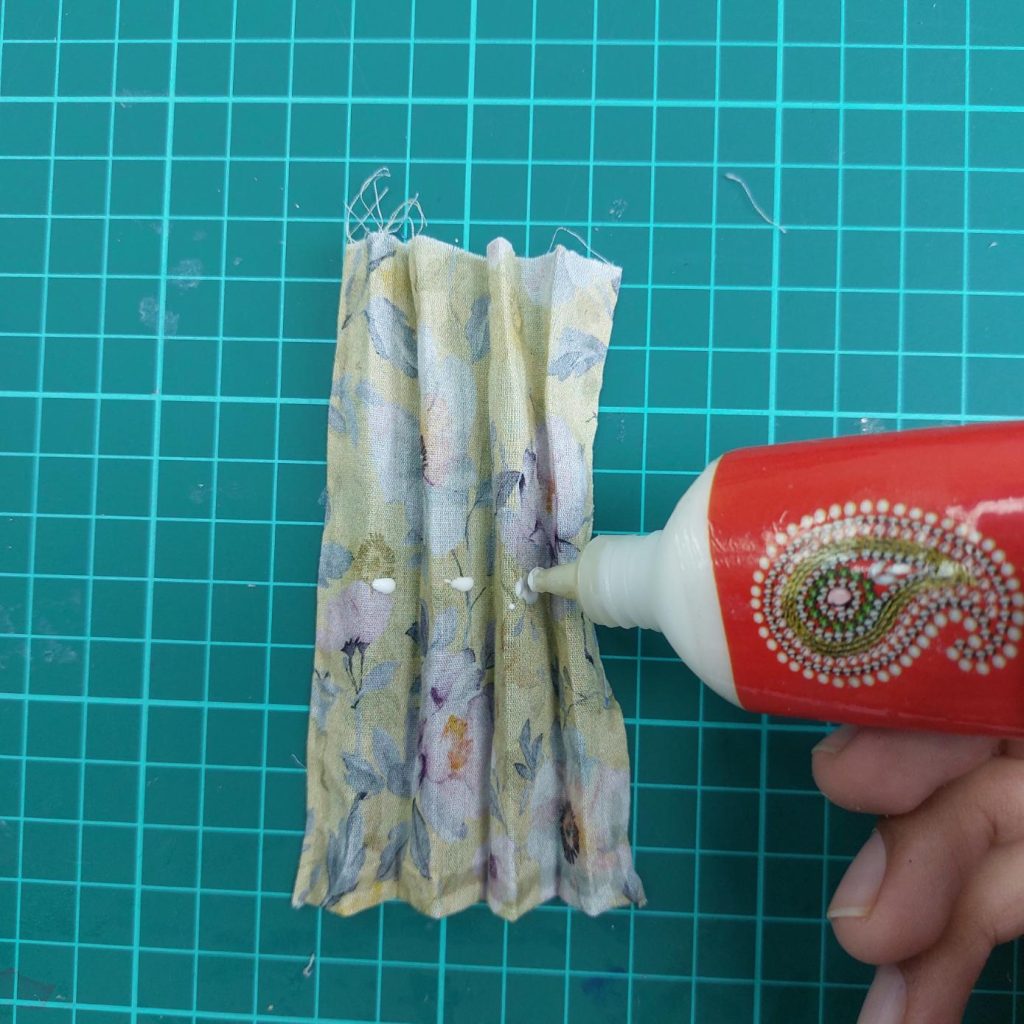
Step 3: Make Pleats Fold the fabric back and forth into neat pleats, then press with your fingers to hold the folds in place.
Step 4: Secure the Pleats Add small dots of glue to the back of the folds so the pleats stay in place.
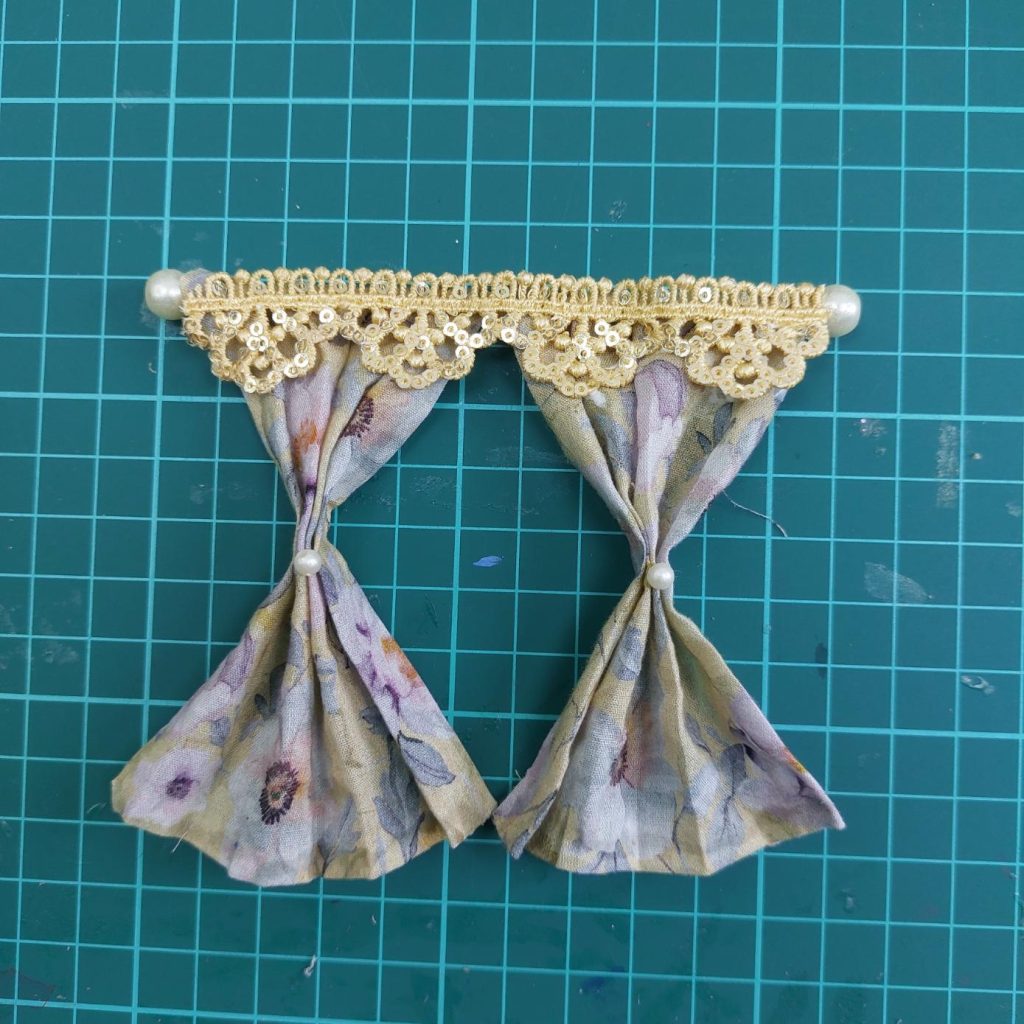
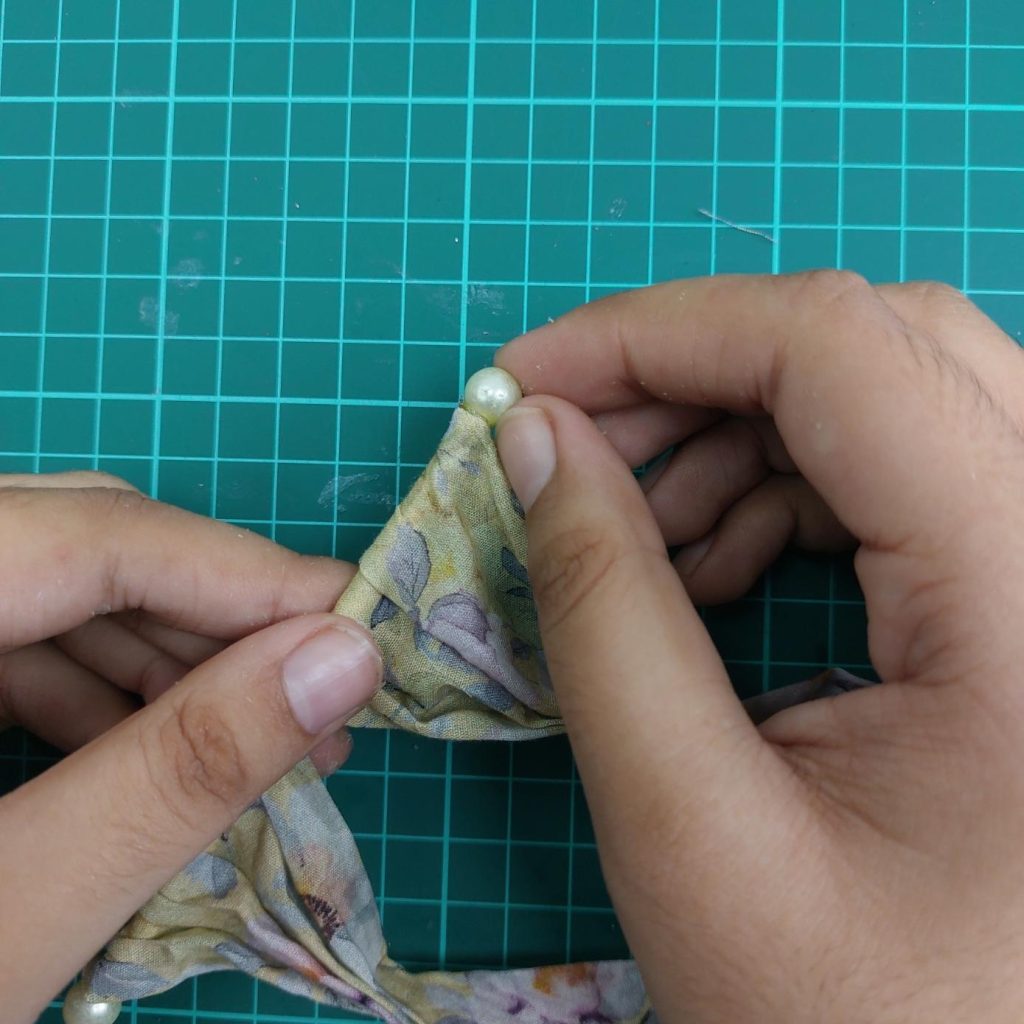
Step 5: Pinch the Middle Gather the curtain in the middle and press gently to form the classic tied-back curtain look.
Step 6: Add Beads Glue a pearl bead where the curtain is pinched to hold the folds. Repeat for both sides.
Step 7: Attach to the Rod Glue the top of the curtain to your skewer or dowel. Decorate the top edge with lace trim for a finished look.
Step 8: Finishing Touches Add pearl beads to the ends of the rod, let everything dry, and your curtains are ready to hang in your dollhouse!
In this third method, we will use a needle and thread this time, so it is slightly different again from the first 2 methods, although you might not notice right away. Let me show you what I mean!
Materials Needed
Light cotton fabric (choose one that drapes softly)
Fabric glue
Wooden dowel or skewer
Two small wooden beads
Needle and thread or thin cord
Iron (for pressing pleats)
Ribbon or thin strip of fabric for tiebacks (optional)
Scissors
Step-by-Step Tutorial
Prepare the fabric Cut out two equal squares or rectangles of fabric. Apply fabric glue along the edges and fold them in to prevent fraying. Let dry completely.
Create the pleats Fold the fabric accordion-style to form neat pleats. Press with an iron to set them in place. This will give your curtains a realistic drape.
Make the curtain rod Take a wooden dowel or skewer and glue a bead on each end to create decorative finials.
Attach the fabric Using a needle and thread or thin cord, stitch loops along the top edge of the curtain fabric. Slide the loops onto the dowel.
Shape the curtains Arrange the curtains evenly along the rod. For an open look, tie the curtains back in the middle with a ribbon or thin strip of fabric.
My Final Conclusion
Whether you go for no-sew simplicity, fabric glued in soft folds, or hand-stitched detail, each of these curtain styles adds its own charm to your dollhouse.
If you try one of these methods (or even come up with your own!), I’d love to hear how it went. 💬 Share your results or ideas in the comment section below — let’s keep inspiring each other with creative ways to dress up our miniature homes!