
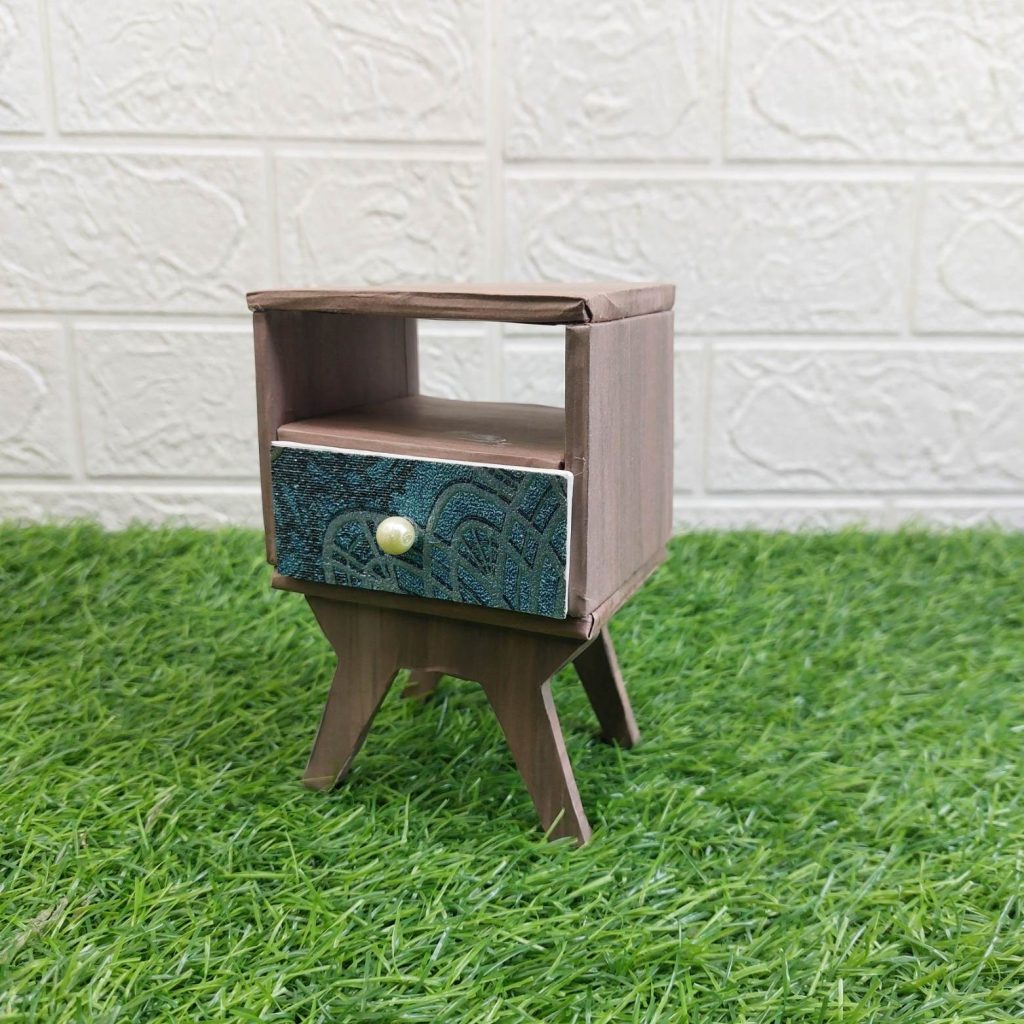
This little dollhouse wardrobe is made entirely from cardboard, with no paint involved at all. Instead, I wrapped every visible surface in wood-print decorative paper, which instantly gives it that realistic wooden look without the mess, drying time, or brush marks.
As long as you take your time wrapping the paper neatly, the end result looks far more polished than you’d expect from something that started as packaging cardboard.
In this tutorial, I’ll walk you through the process step by step: from cutting the cardboard pieces to assembling the cabinet, building the legs, and finishing the drawer.
Materials Used
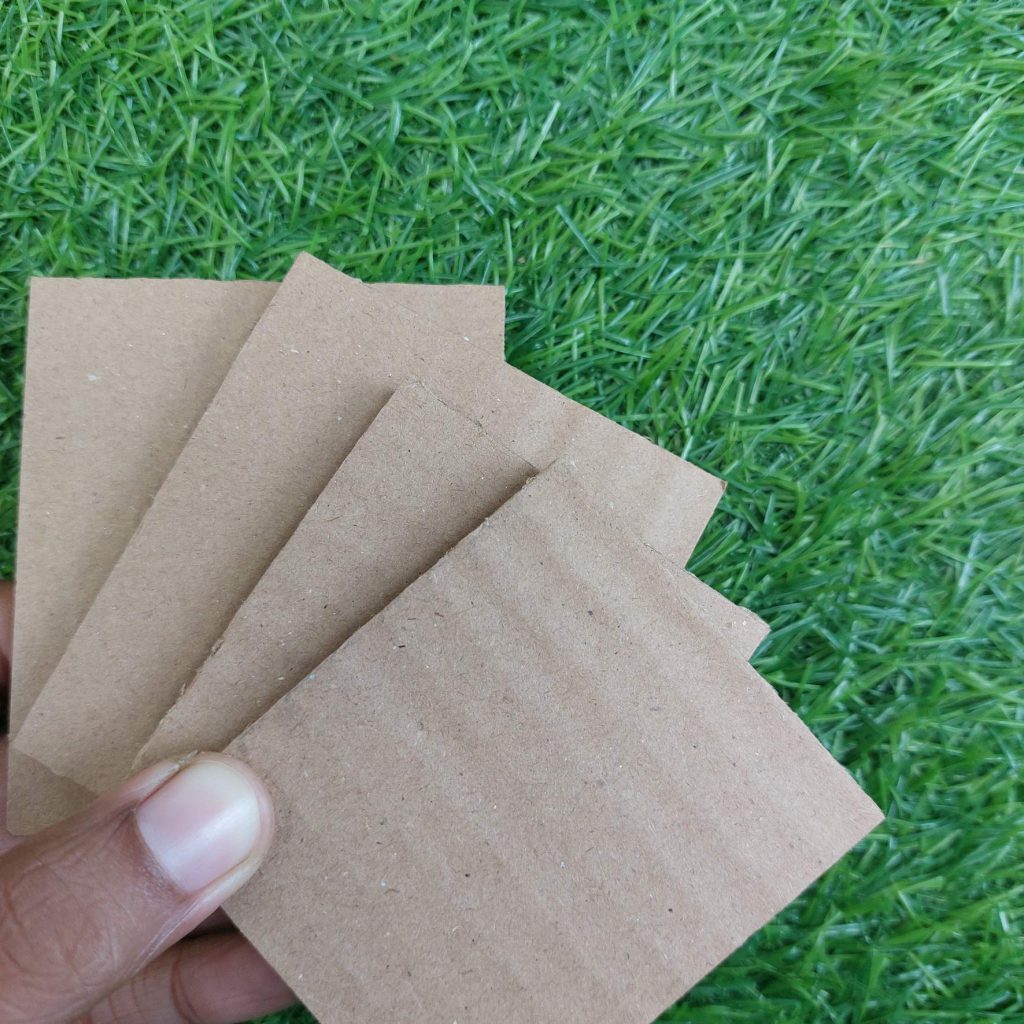
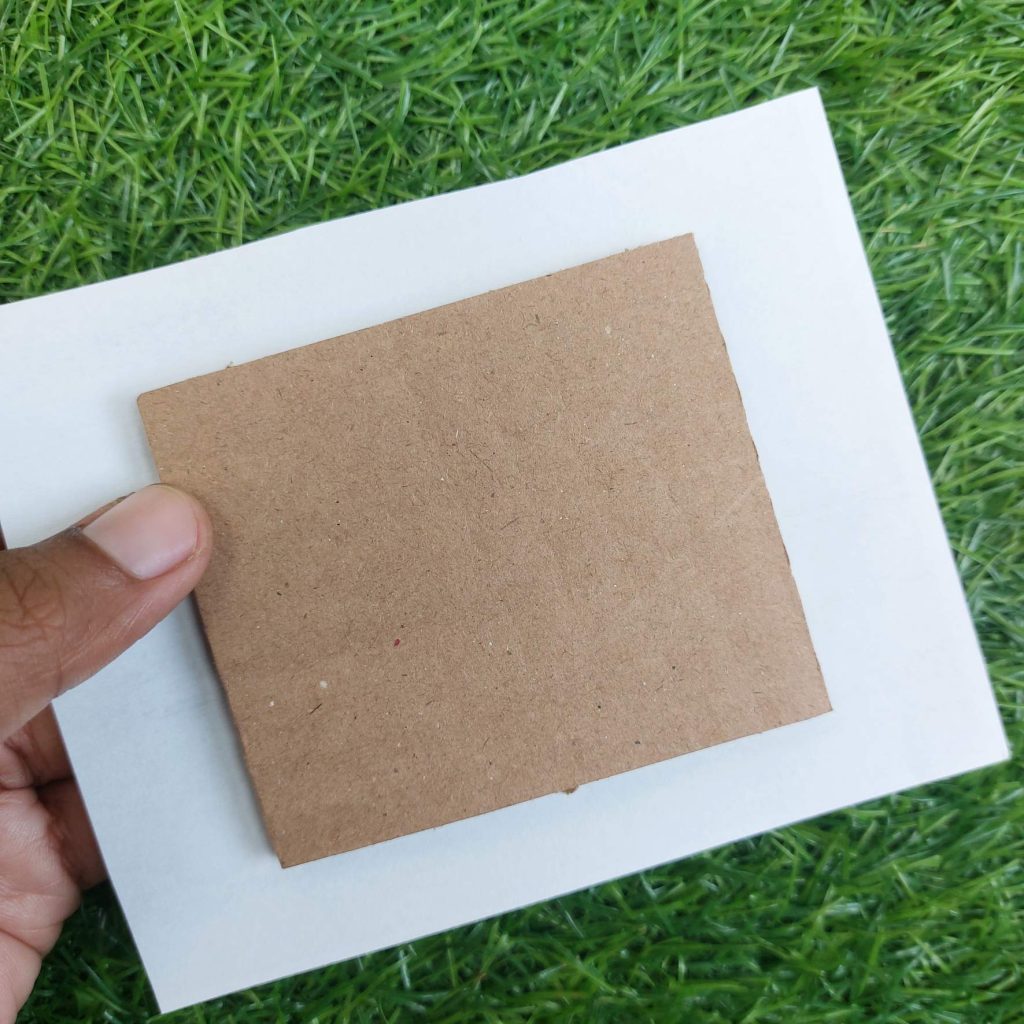
- Sturdy currogated Cardboard
- Craft knife + metal ruler
- Pencil
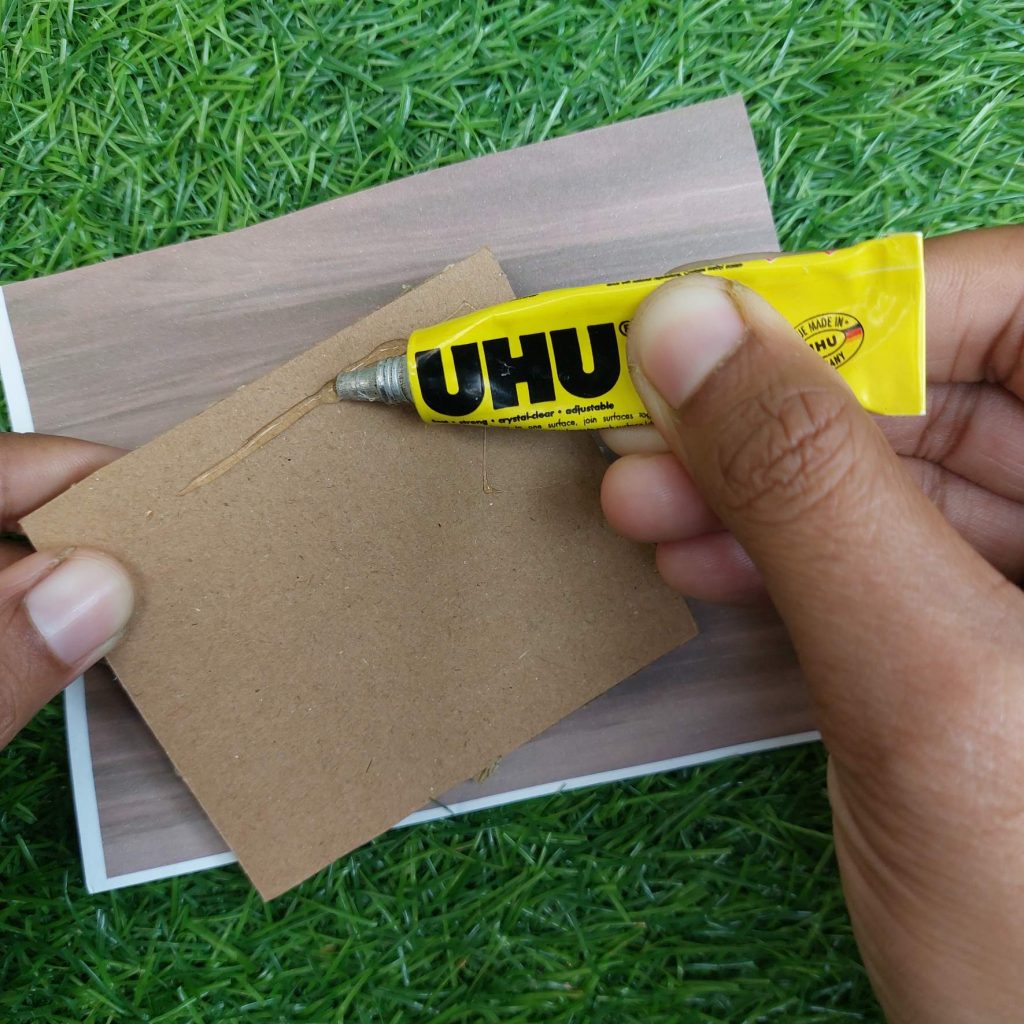
- Strong craft glue or all-purpose glue
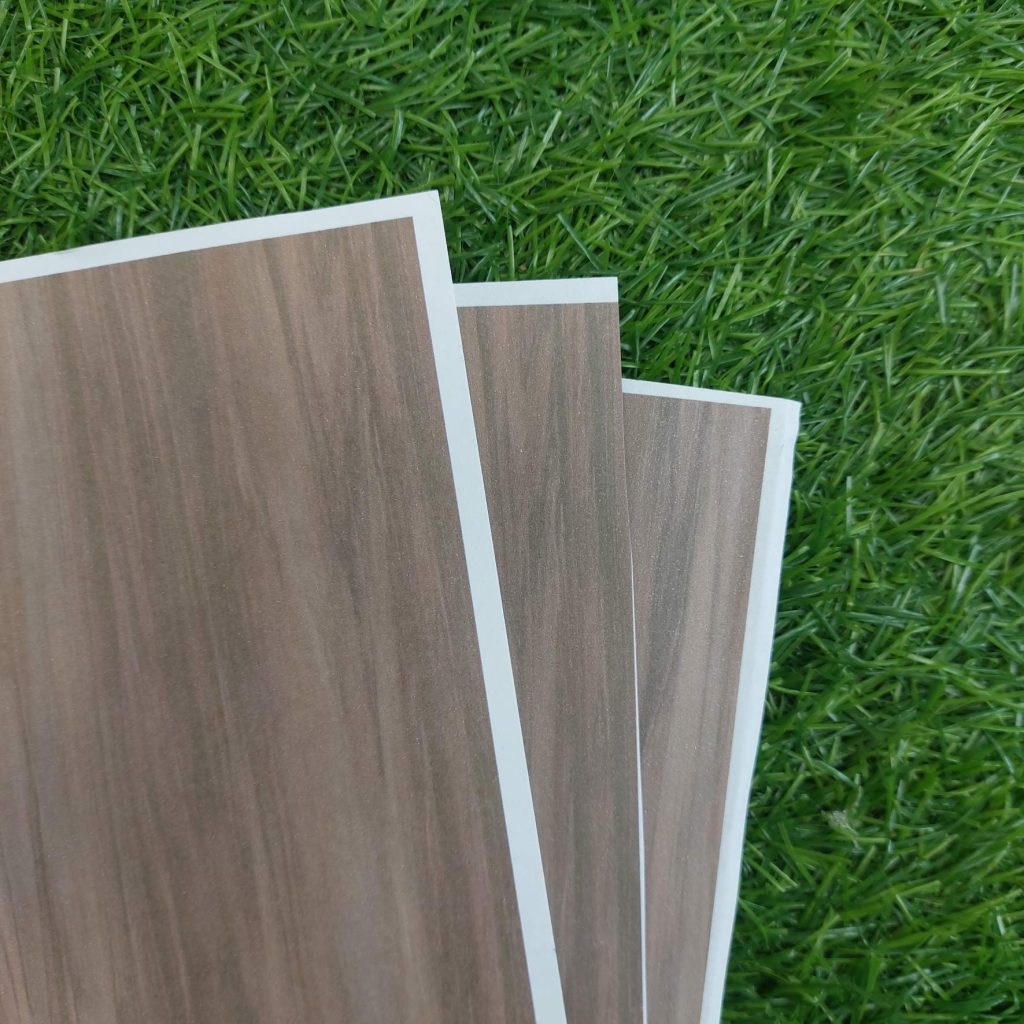
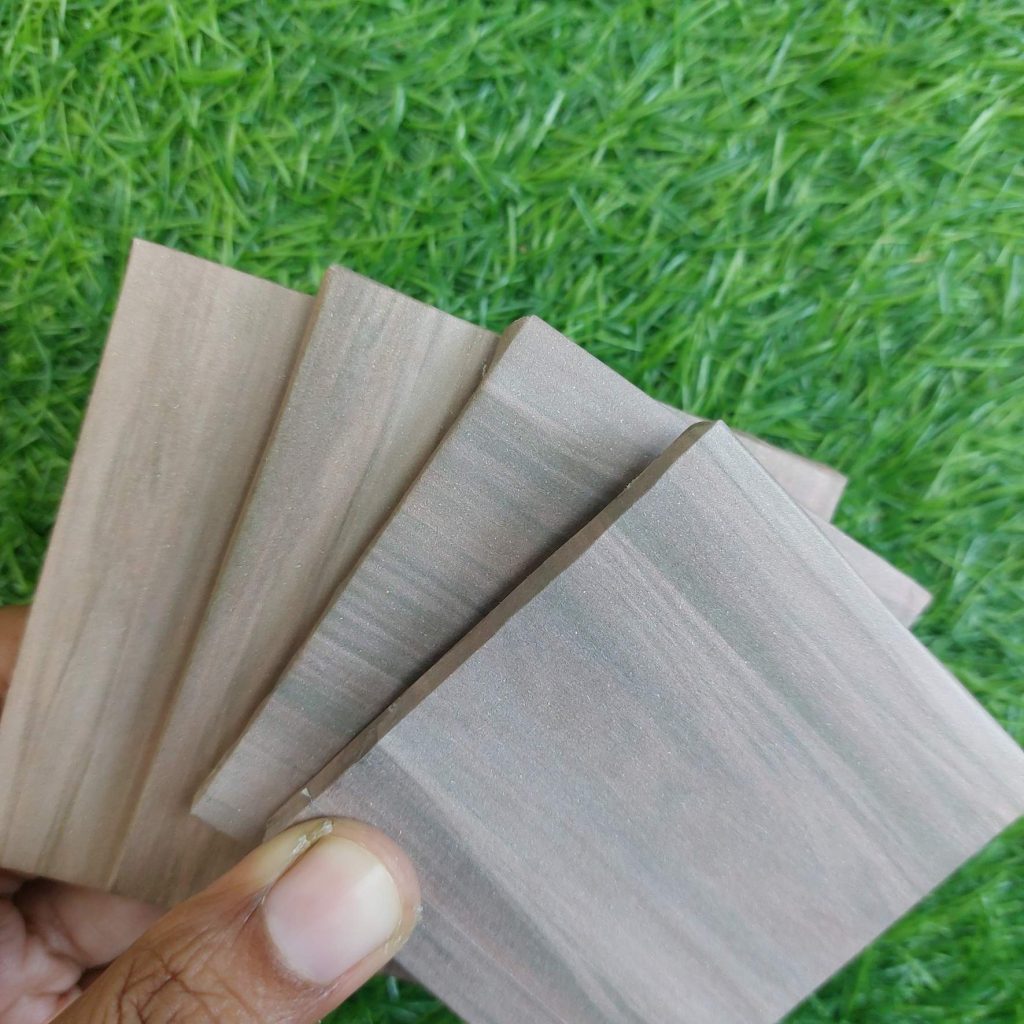
- Wood-print decorative paper (scrapbook or dollhouse prints)
- White cardstock
- Decorative paper or fabric (drawer front)
- Small bead (drawer knob)
Measurements
Before we start the tutorial, here are the measurements for the cardboard pieces:
Main Structure
- Upper base (top): 7 × 8 cm
- Side panels (2x): 6 × 7 cm
- Center shelf: 7 × 7 cm
- Lower base (under cabinet): 4.5 × 6 cm
Legs
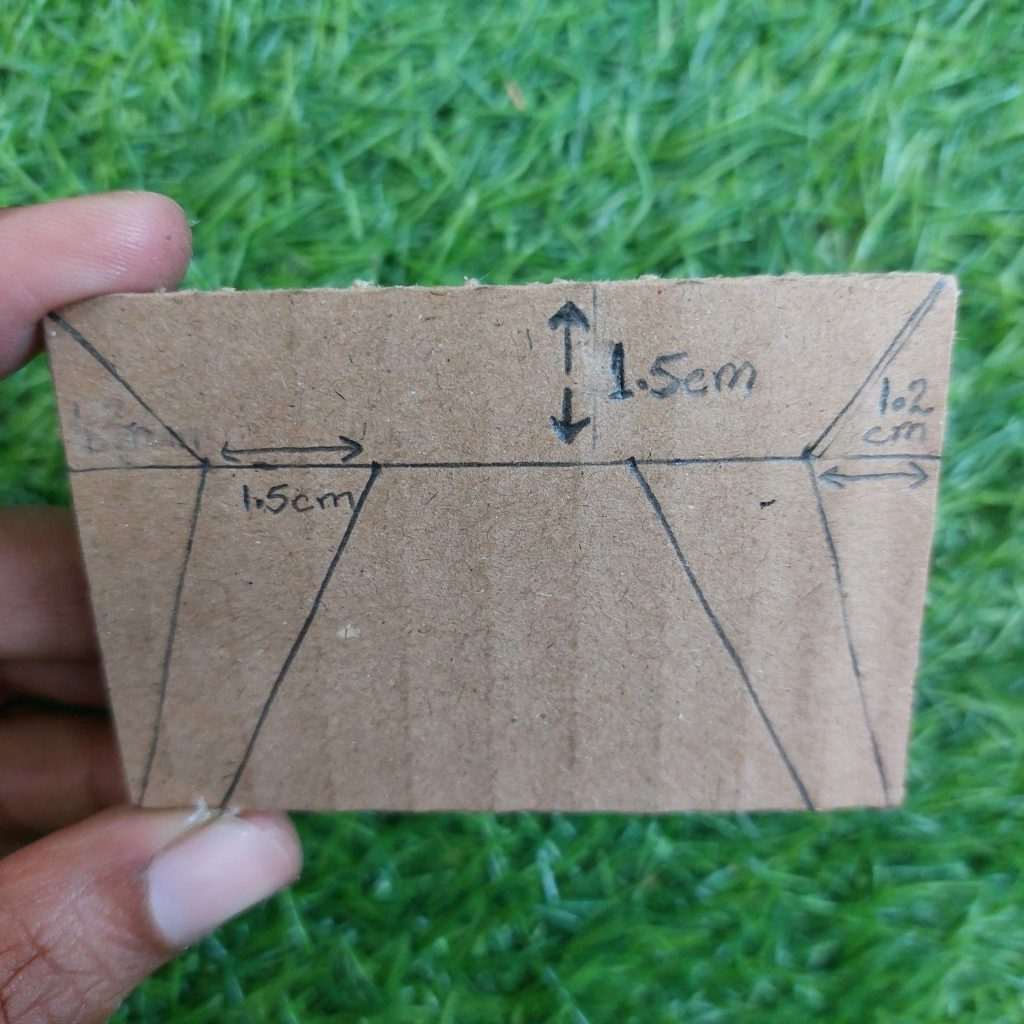
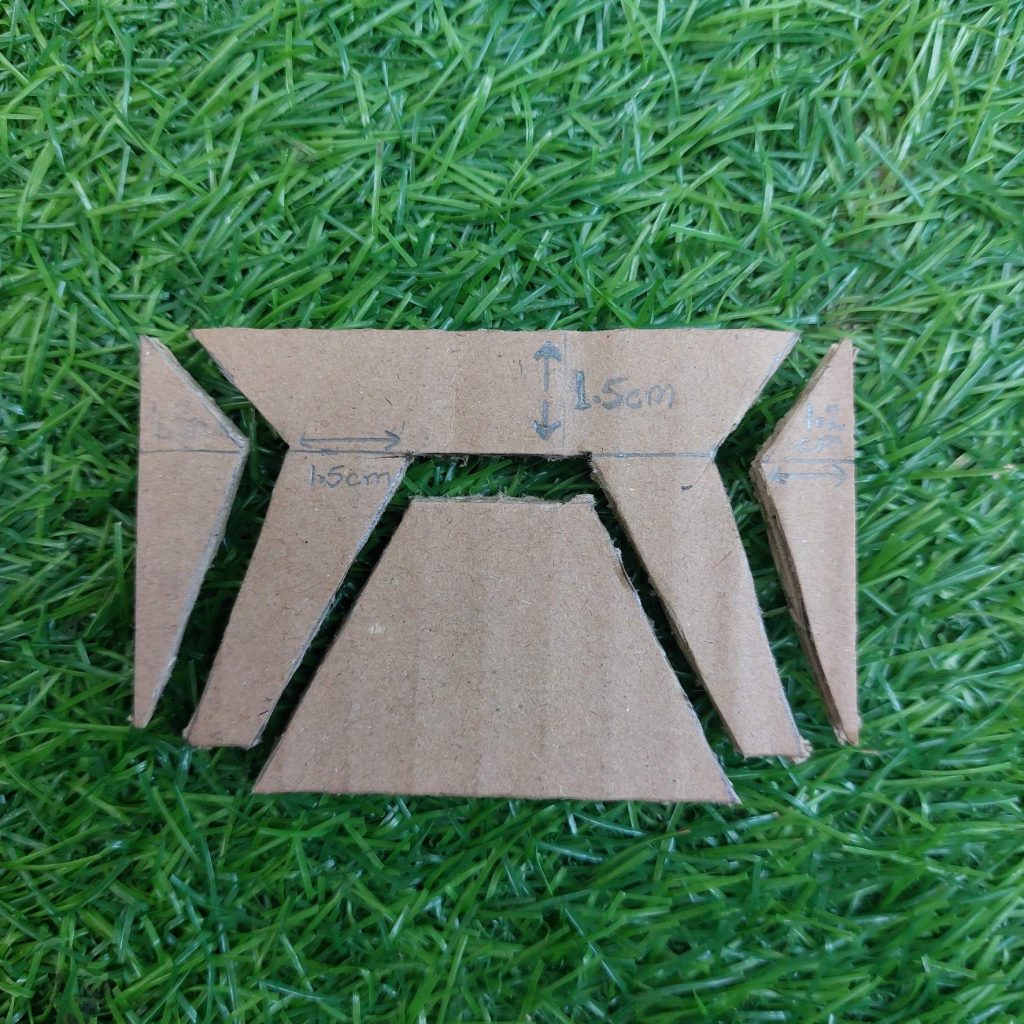
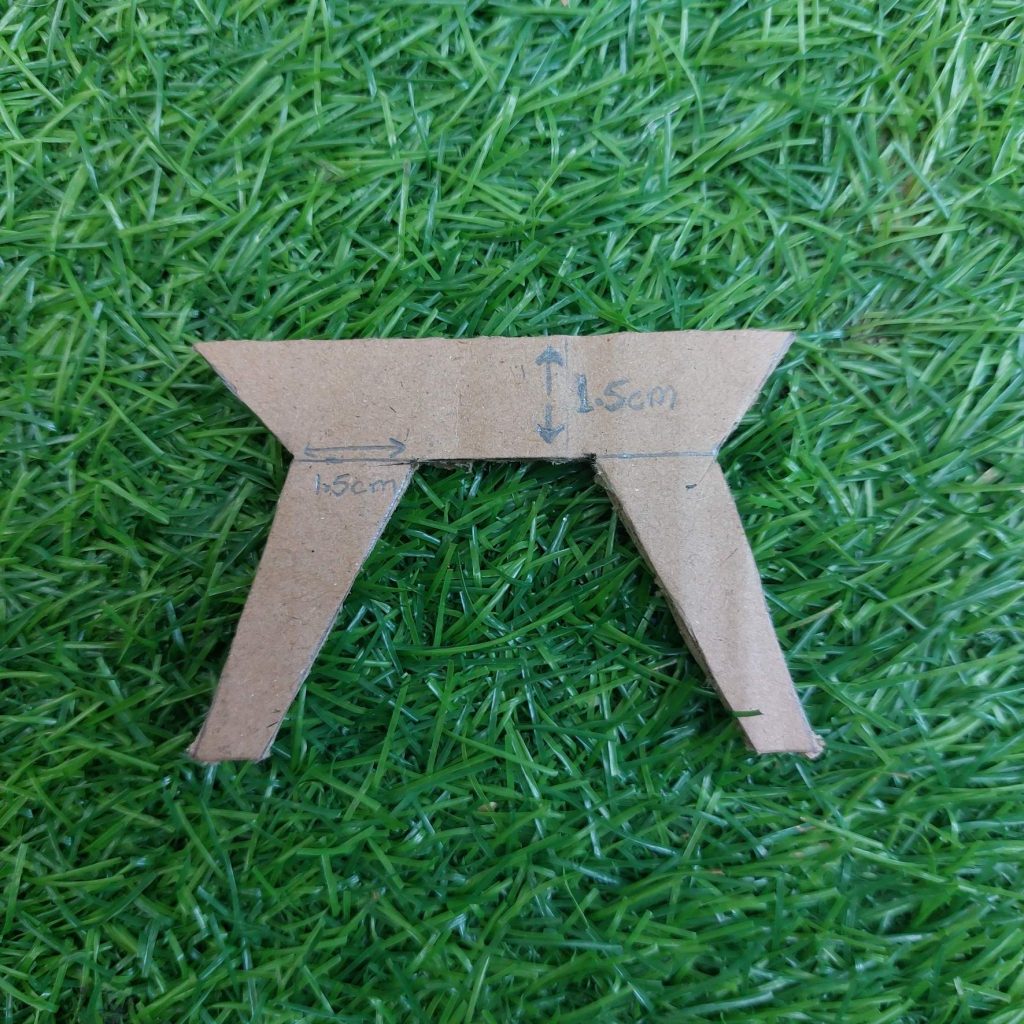
- Leg piece (cut 4x): 7.5 × 5 cm
Drawer
- Drawer base: 7 × 7 cm
- Drawer sides (2x): 2.5 × 6.5 cm
- Drawer back: 2.5 × 7 cm
- Drawer front: 3 × 7.2 cm
Step-by-step tutorial for a dollhouse wardrobe from cardboard
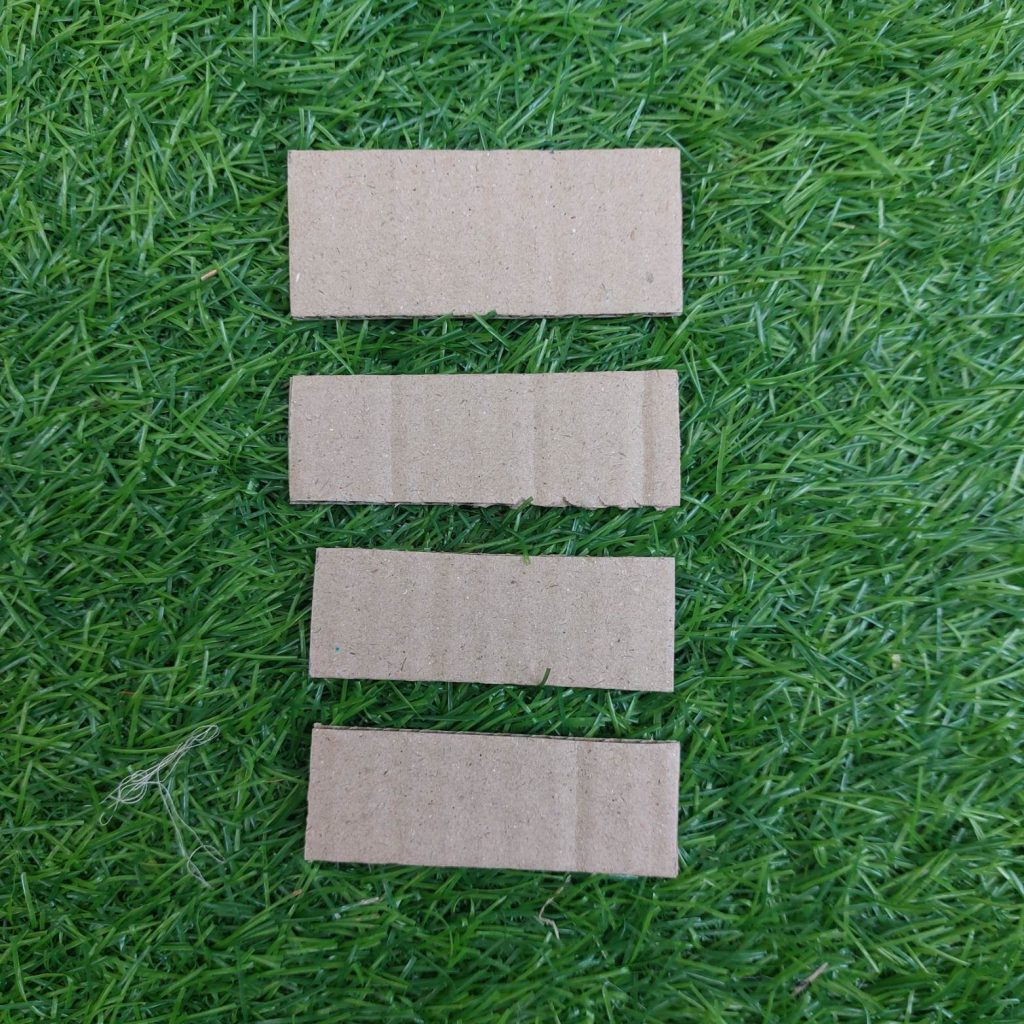
Step 1: Cut All Cardboard Pieces
Cut all pieces according to the measurements above.
For the legs, cut all four pieces as evenly as possible to keep the furniture stable.
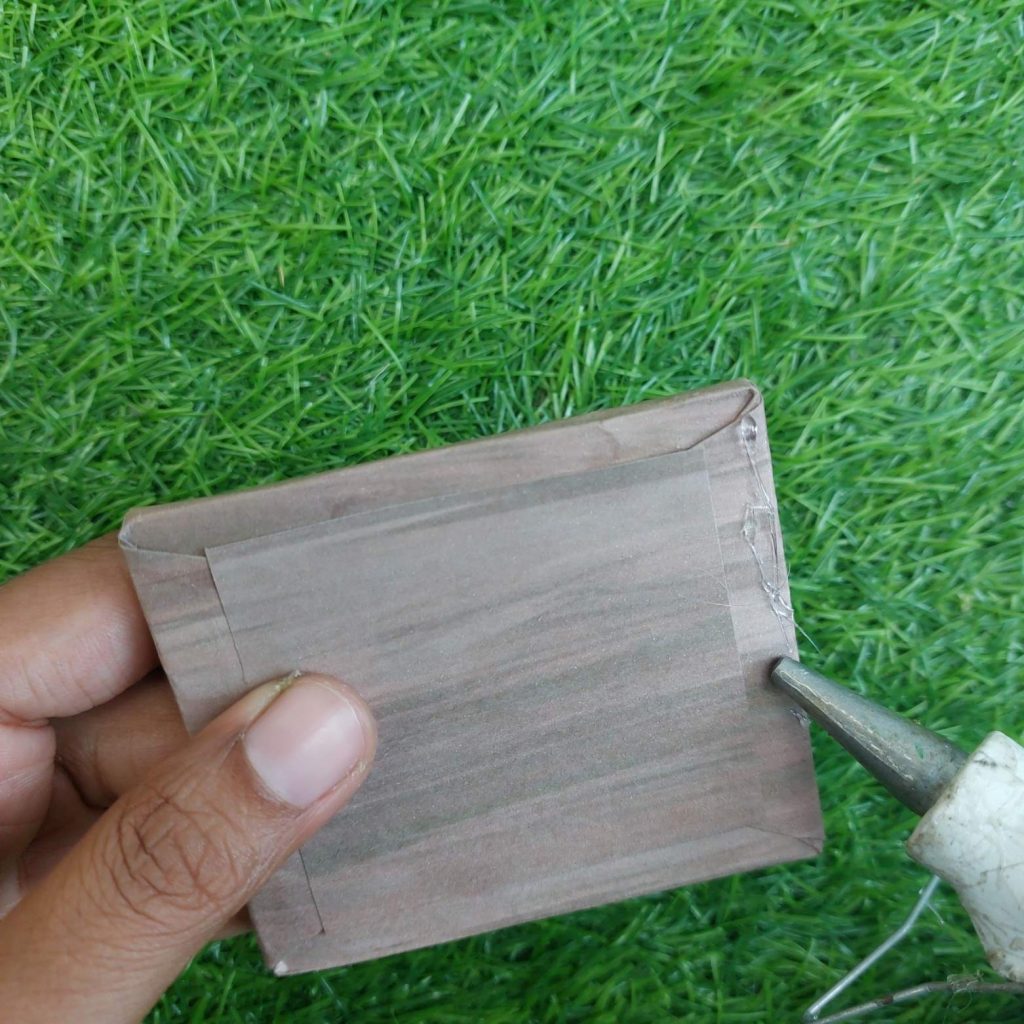
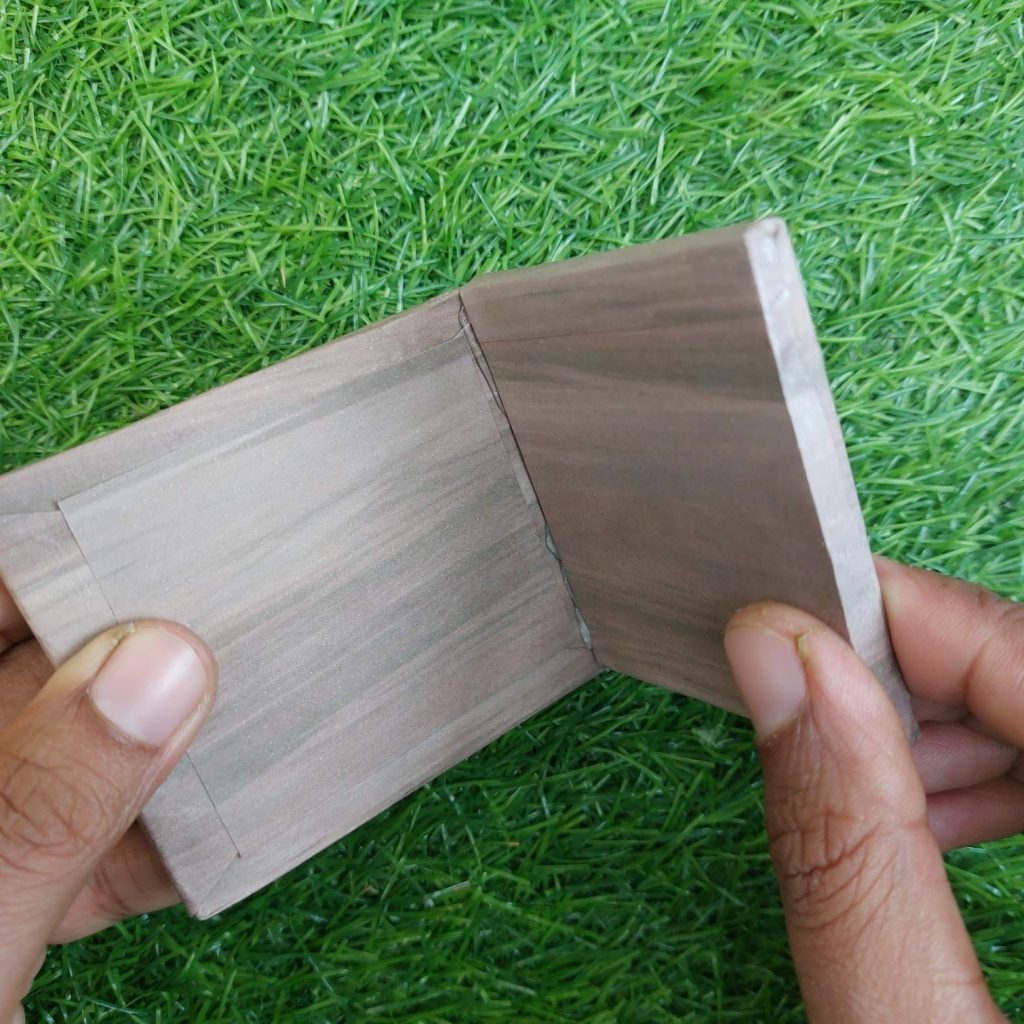
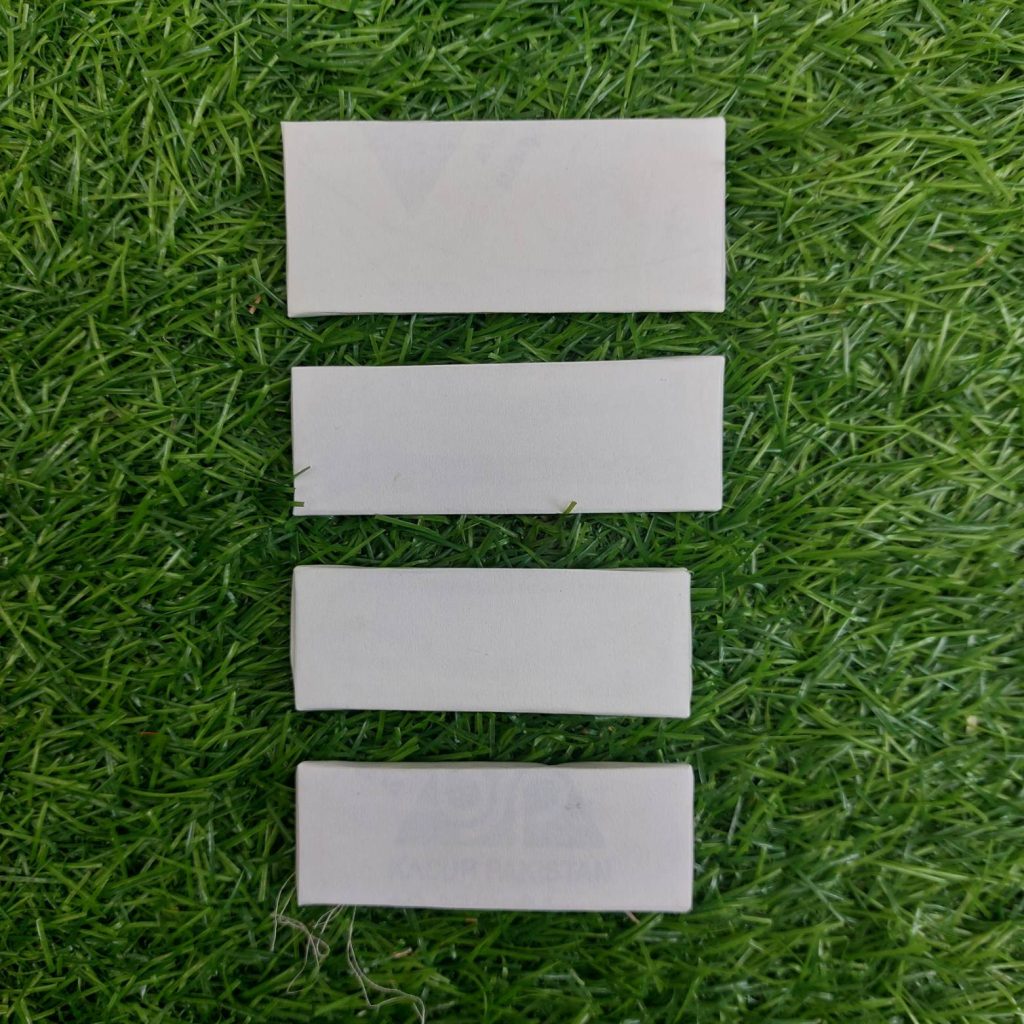
Step 2: Wrap All Visible Pieces With Wood-Print Paper
Before assembling anything, wrap all visible cardboard parts with wood-print decorative paper:
- Side panels
- Top panel
- Center shelf
- Lower base
Fold the paper tightly around edges and corners and glue it flat.
Trim excess paper carefully so seams stay neat.
Step 3: Cut out the legs like this:
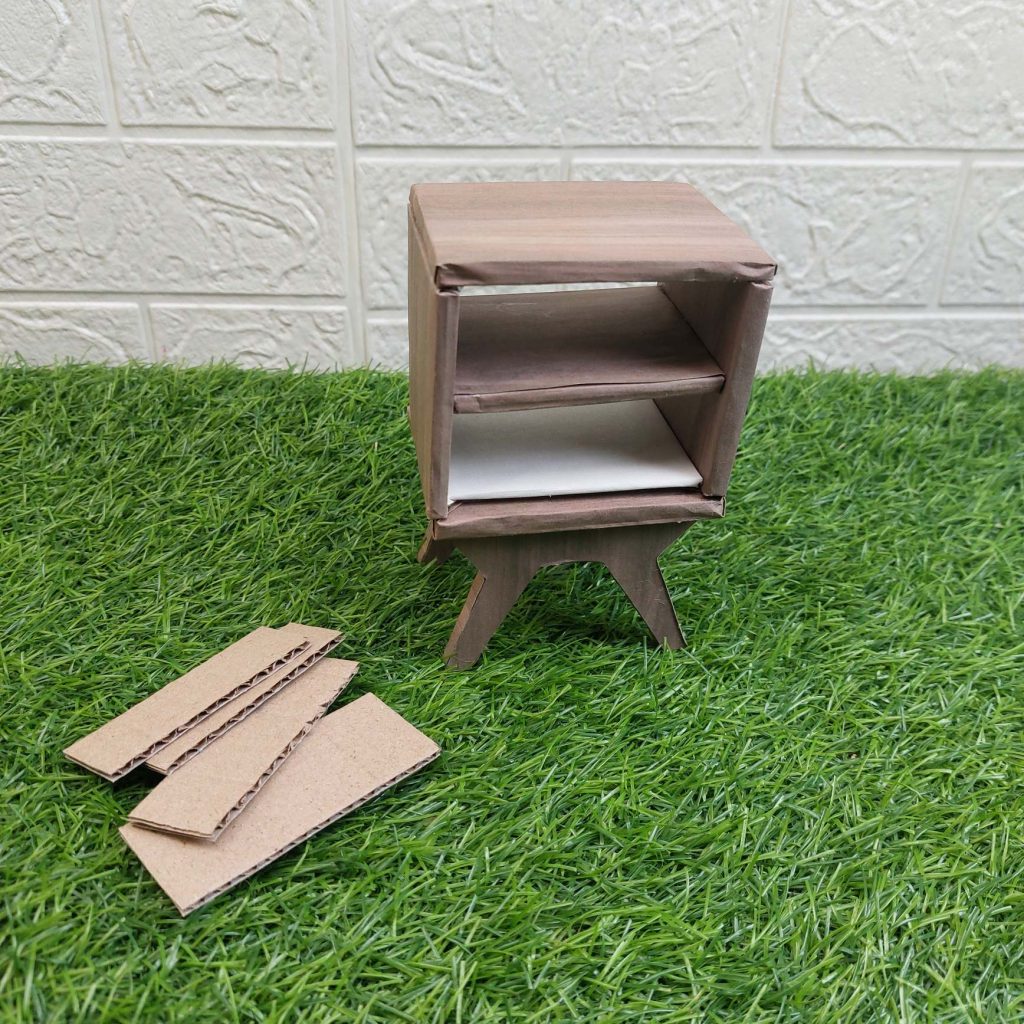
Step 4: Assemble the Cabinet Body
- Glue the two side panels onto the edges of the 7 × 7 cm center shelf.
- Attach the top panel (7 × 8 cm).
- Check alignment before the glue sets.
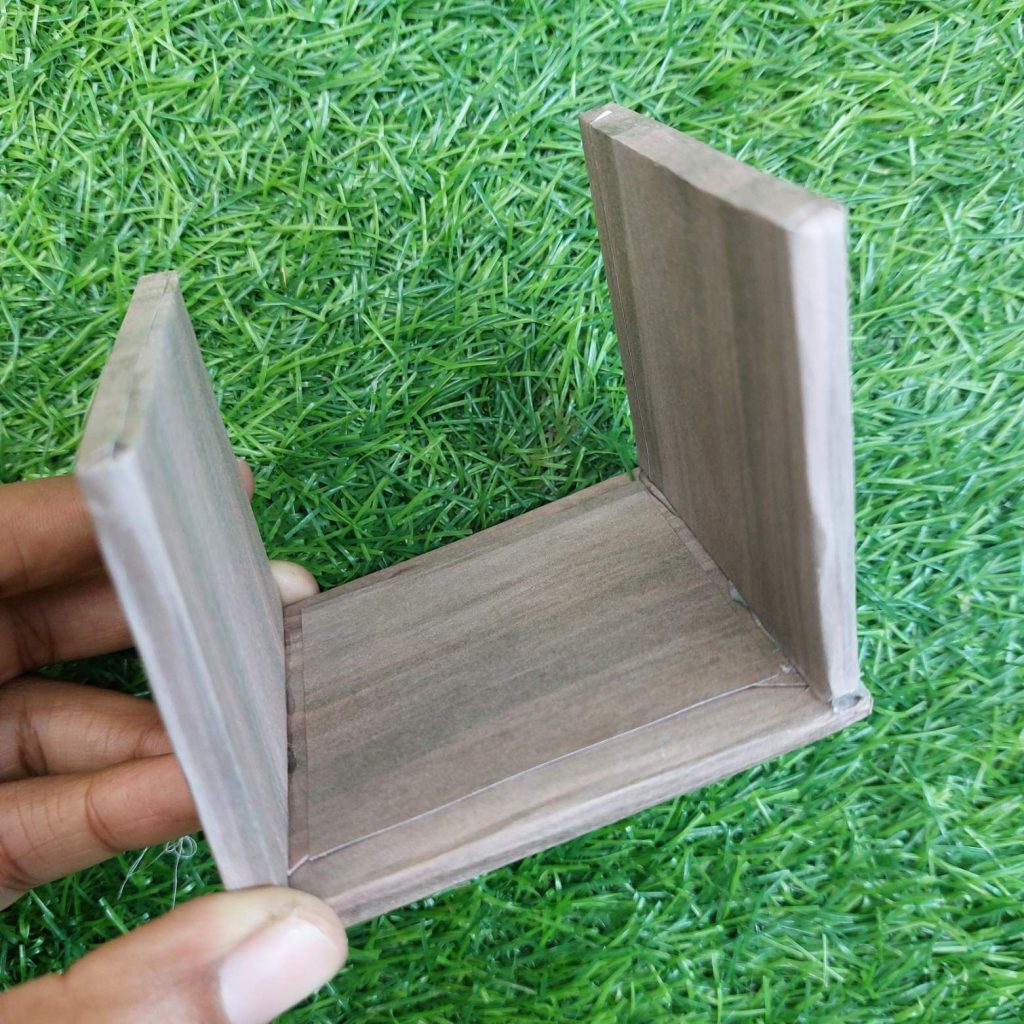
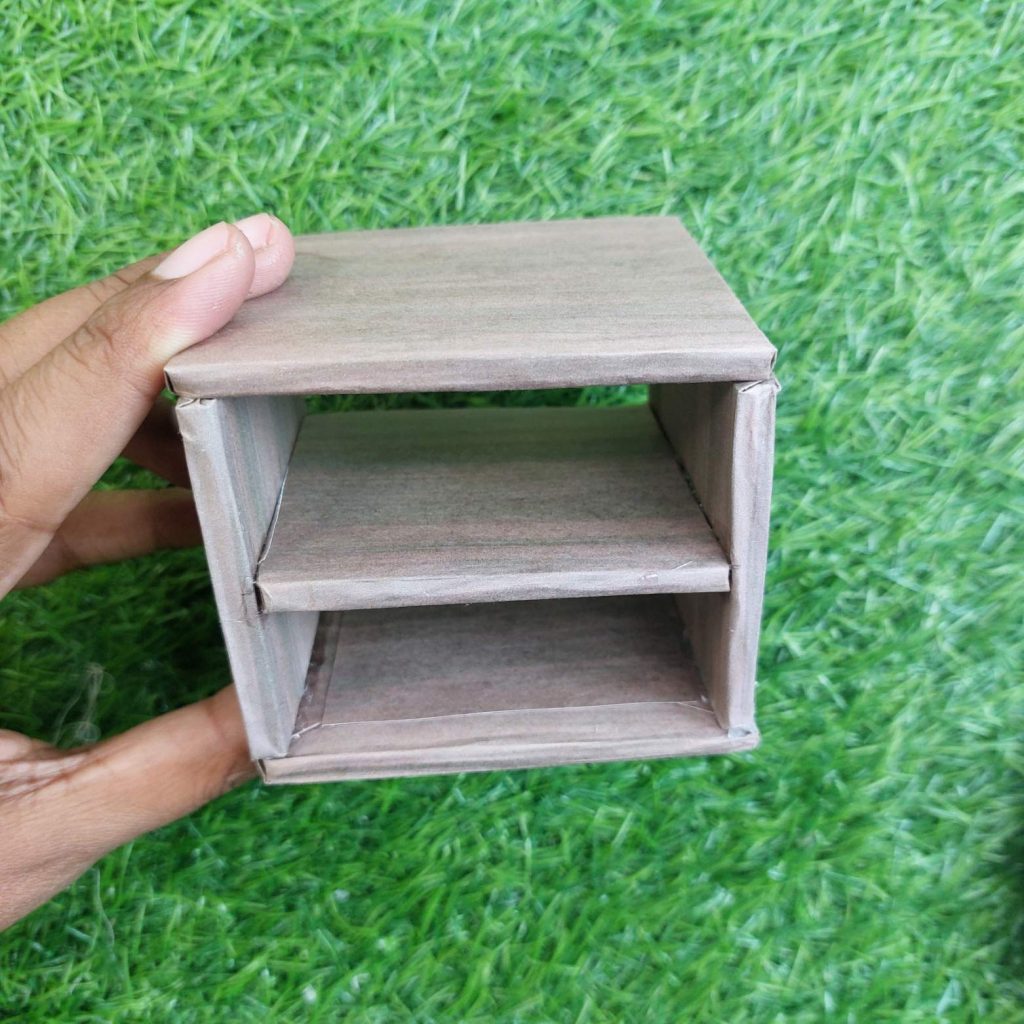
You now have the basic cabinet shape.
Step 5: Attach the Lower Part
Glue the 4.5 × 6 cm lower base underneath the cabinet.
This piece creates a visual break between the cabinet and the legs and helps with stability.
Allow this to dry fully before moving on.
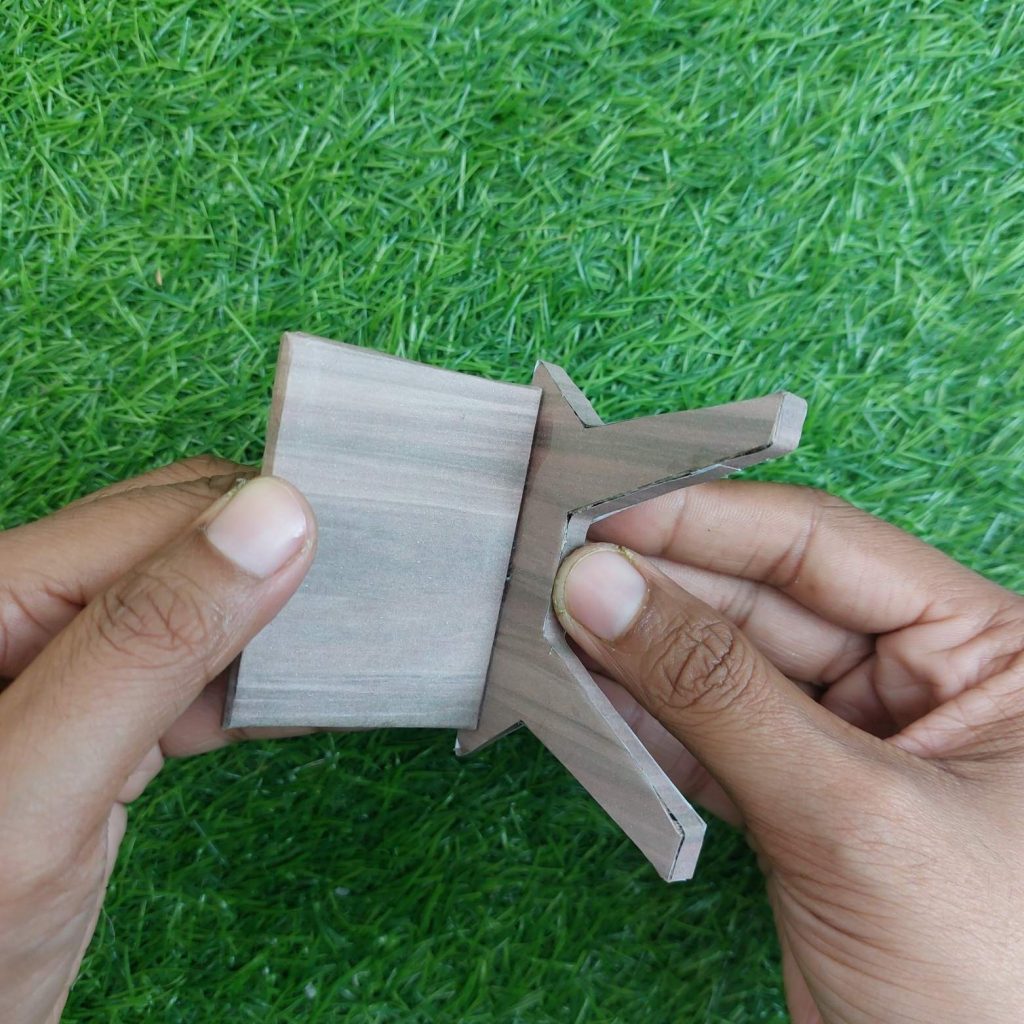
Step 6: Build and Attach the Legs
- Each leg is made by layering cardboard for extra strength.
- Glue two identical leg shapes together for each leg.
- Attach one leg to each corner underneath the base.

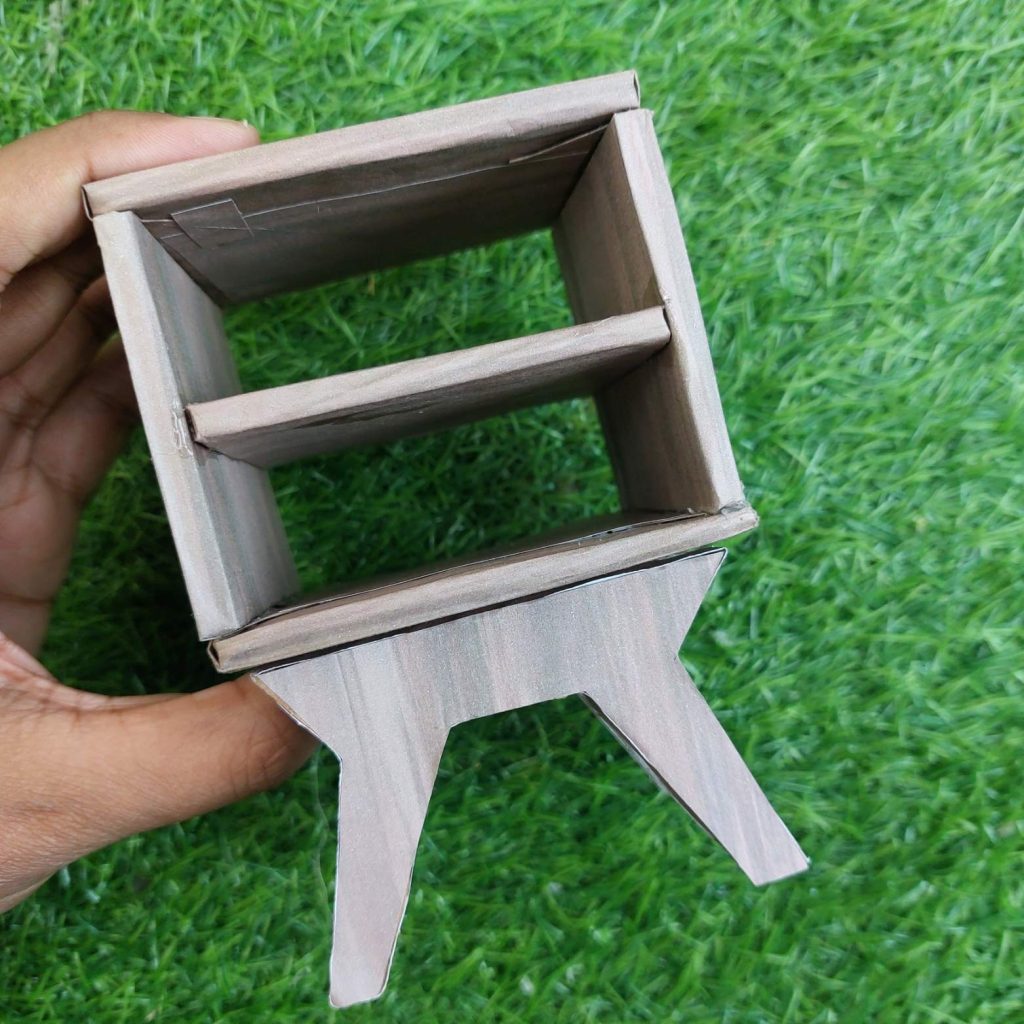
Place the wardrobe on a flat surface while drying to make sure all legs sit evenly.
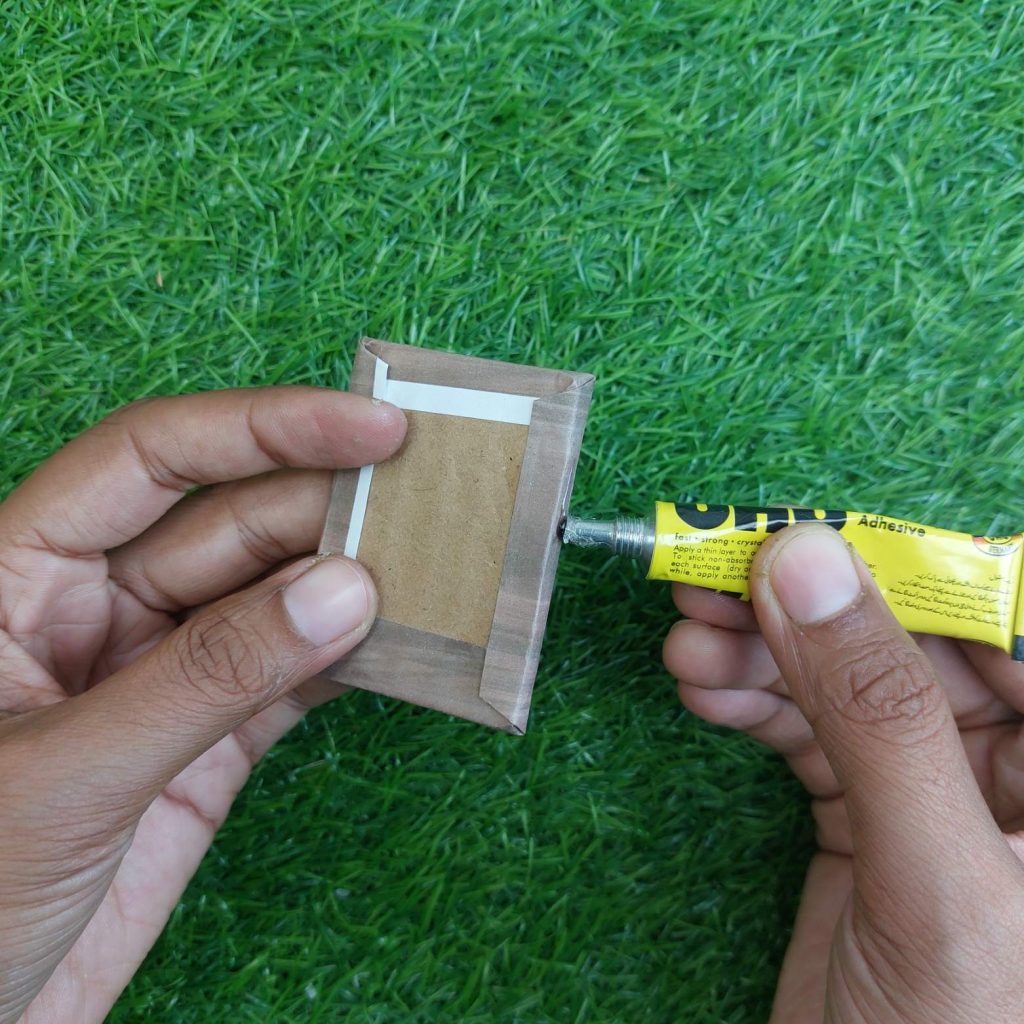
Step 7: Build the Drawer Box
- Glue the drawer sides onto the 7 × 7 cm drawer base.
- Add the drawer back.
- Line the inside with white cardstock for a clean finish.
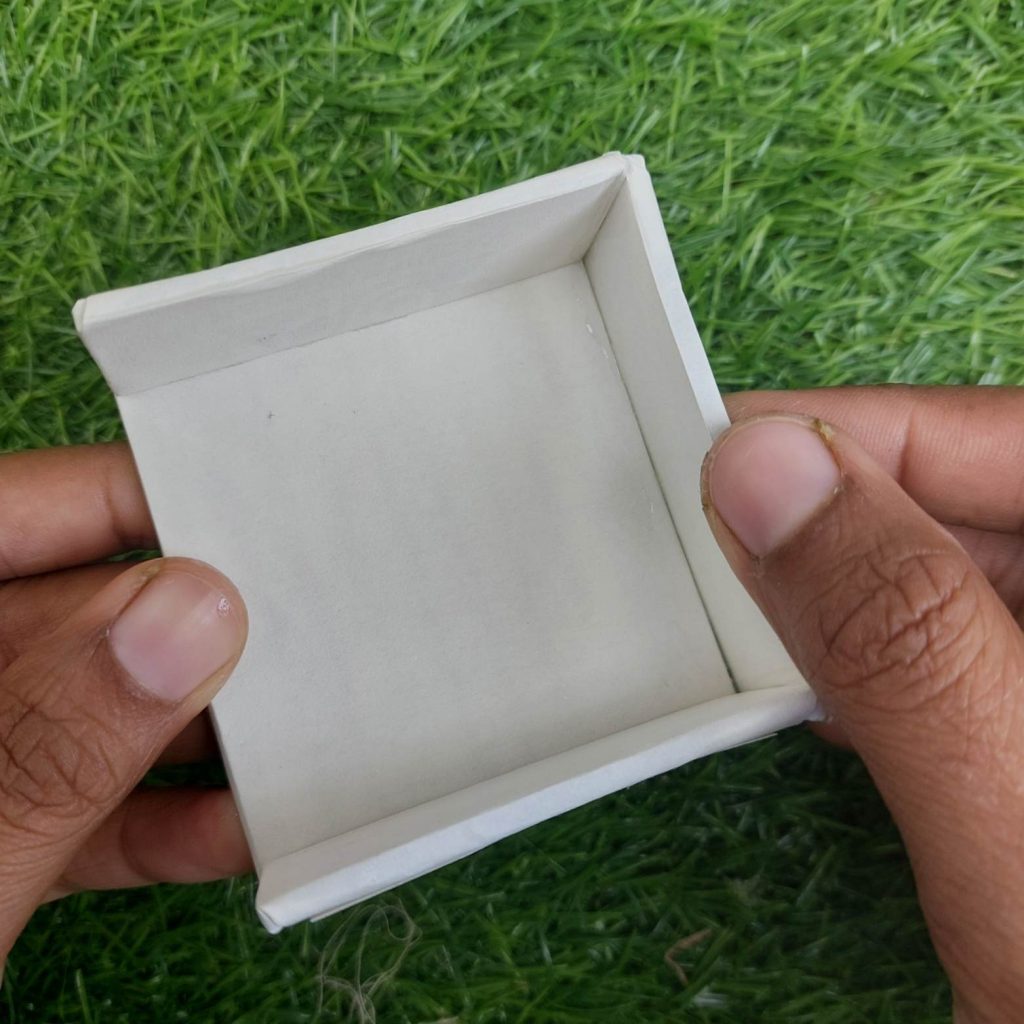
Test-fit the drawer inside the cabinet opening.
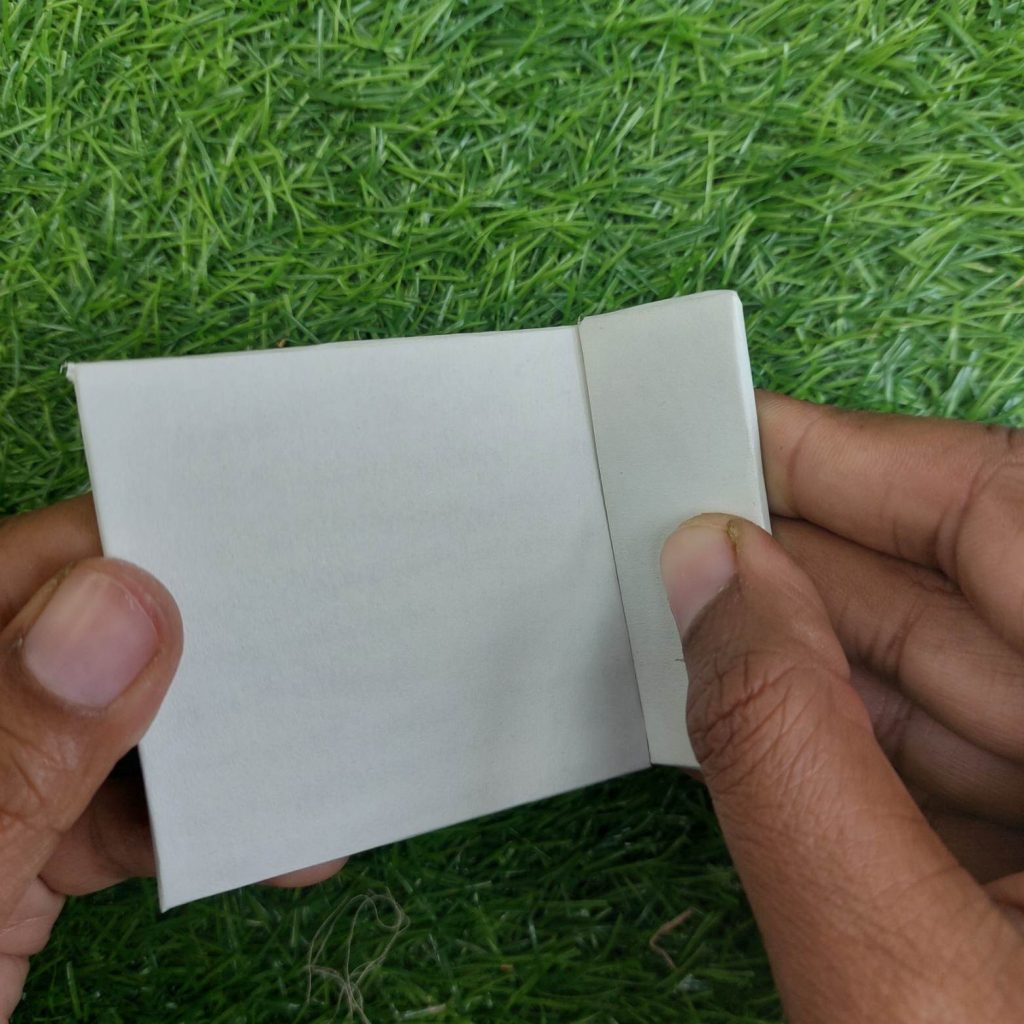
Step 8: Decorate the Drawer Front
- Cover the drawer front with a different decorative paper or fabric (this is the only contrasting color).
- Glue it onto the drawer box.
- Add a small bead in the center as a knob.

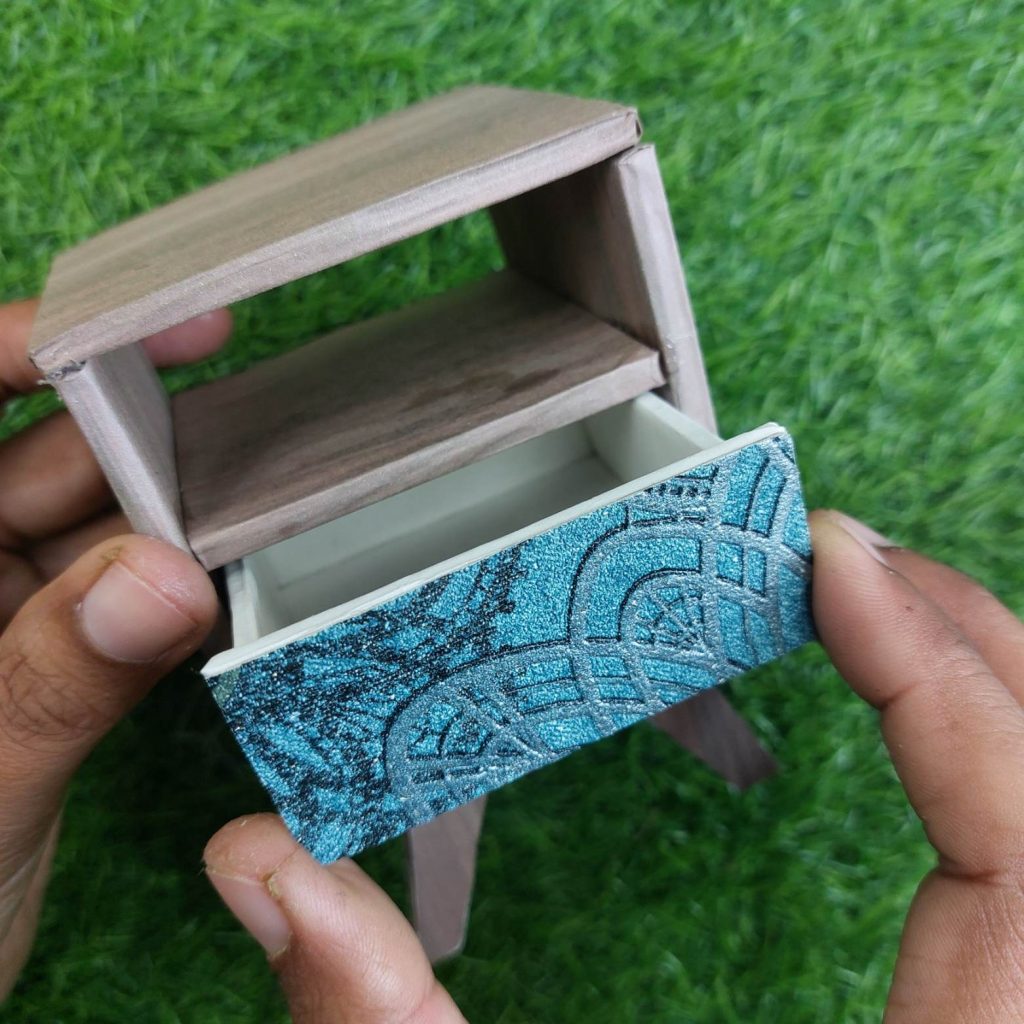
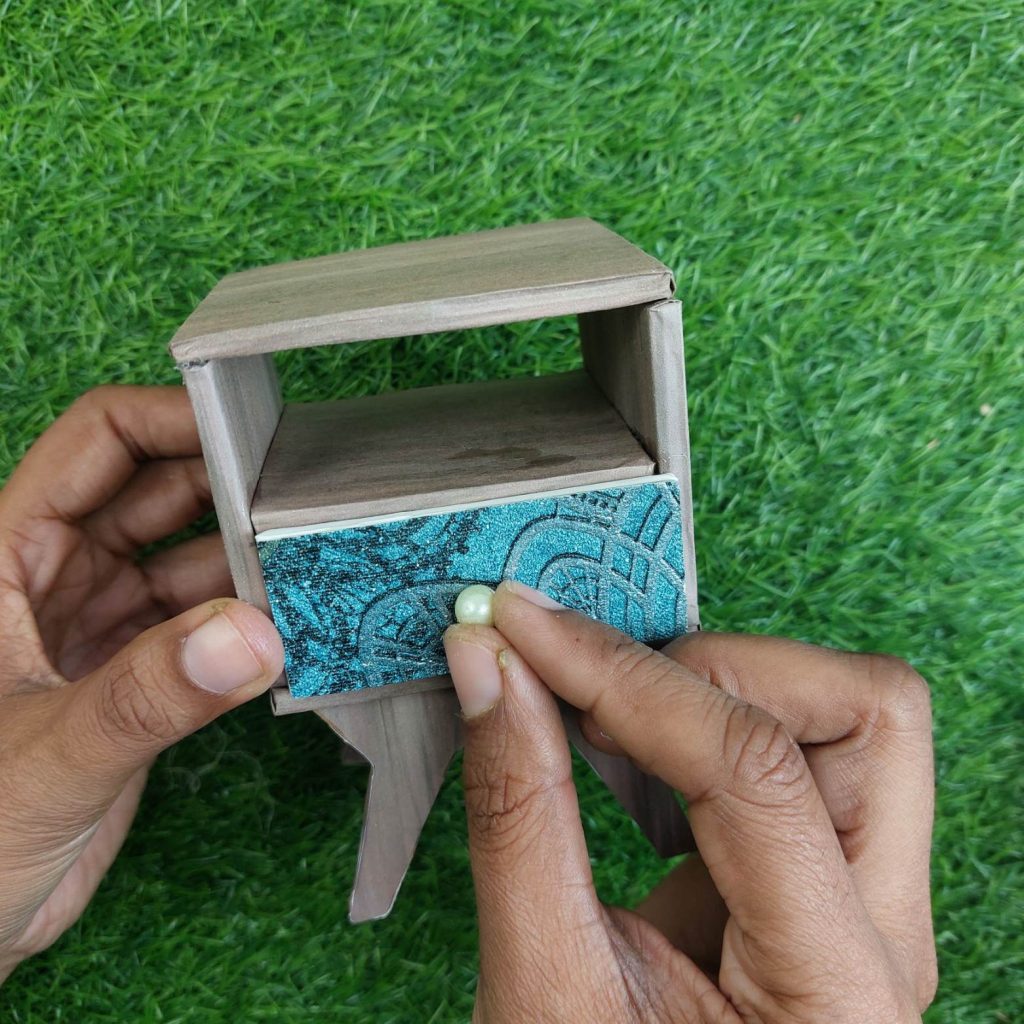
Let everything dry completely.
Slide the drawer into place.
If needed, lightly trim the drawer edges so it moves smoothly.
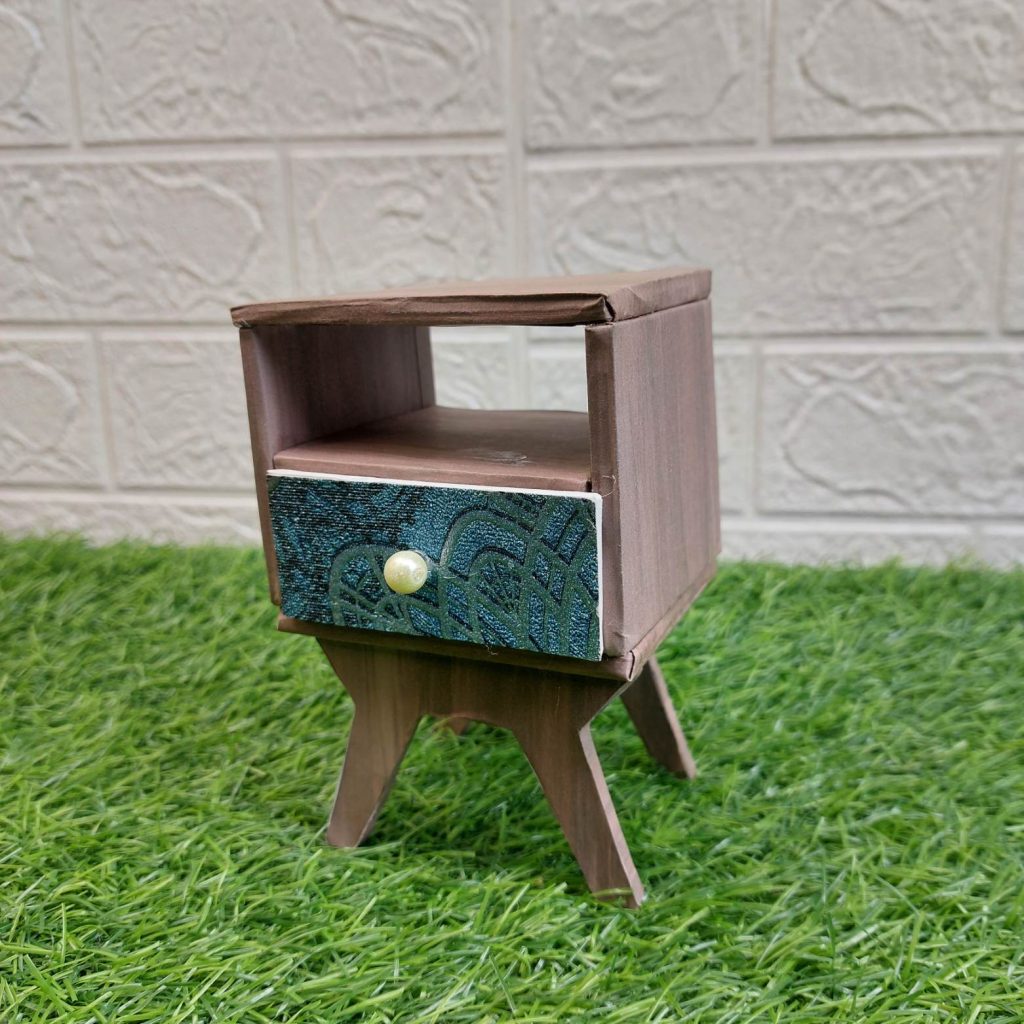
Your cardboard dollhouse wardrobe is now finished
My Final Conclusion
Next up will be another cardboard dollhouse furniture set from cardboard. I’ll let you know what it is in my next newsletter!
I wish you happy crafting!
Kind regards,
Lizzy

Hi everyone!
My name is Lizzy, and I am an amateur miniaturist obsessed with everything in the dollhouse and miniature world, ever since I was a teenager.
So far, I have created 2 dollhouse projects, a backyard shed and a miniature treehouse, tons of DIY dollhouse kits, and “hacked” some.
I also created a fairy garden, and lots of small and simple miniature projects on my YouTube channel. (mostly made from trash or everyday items).
I love to write as well about all things happening in the miniature world, hence the reason why I created this blog!
I wish you happy reading and crafting!
Lizzy


")
