If you’ve ever fantasized about stepping into the enchanting world of Harry Potter, roaming the cobbled streets of Diagon Alley, and experiencing the magical Harry Potter book nooks firsthand, you’re in for a treat!
In this article, I’ll be your personal guide through the joy of creating your own Harry Potter-themed book nooks.
As an Amazon, Etsy and Anavrin associate, I earn a small commission from your purchase, with no extra charges for you.
updated 26/04/26
But first, what are Harry Potter book nooks?
Harry Potter book nook DIY kits are created for fans of the beloved wizarding series to bring the enchanting world of Harry Potter into their own homes and bookshelves, and they are also known as bookshelf inserts.
These book nook kits typically consist of laser-cut pieces that, when assembled, form a miniaturized version of a book nook Diagon Alley.
Besides Diagon Alley, there are also magical stores and other Harry Potter-themed book nooks, but you will see these in the reviews below.
My Magical Book Nook Kit by Katnook.de
Which materials do you need for Diagon Alley Book nooks?
Some kits may come with everything you need, while others may require a few extra supplies.
Always check the product description and instructions provided by the kit’s manufacturer to ensure you have everything available.
But most of the time, you only need:
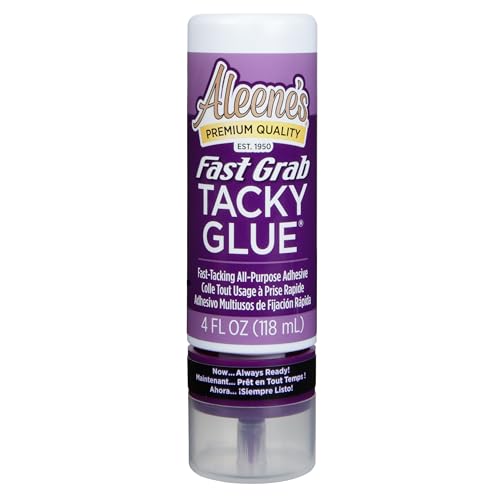
Glue: Depending on the kit, you might need glue. I tend to use Grab Fast Tacky Glue for about everything these days.
Paint and Brushes: Some kits may require painting and detailing the components to add color and bring out the magical charm of Diagon Alley. Or you could just leave them blank, which can have its charm!
Craft Knife or Scissors: These tools can be helpful for trimming any excess material or for making minor adjustments during the assembly process.
Tweezers: A handy tool for handling small and delicate components, especially when placing them in tight spaces.
The finished book nook size is: 7.4 x 3.9 x 10.2 in, and no batteries or paint are included.
Check out more info and the pros and cons below.
Brand
Suruim
Scale
1:
Pro’s
– A laser-cut and sturdy kit that aligns the parts well and thus easily fits together – great for added customization like painting and adding your own cobblestone path, if you like – Easy to assemble, apart from some light issues where you need to be careful – lovely design
Contra’s
– Some people have issues with the LED lights, you need to go to the video on Amazon with the instructions on the wirework to find out how to do these, as the manual isn’t clear enough! – study the instructions closely before assembling
This magic castle book nook immediately caught my eye. It has that familiar enchanted atmosphere—think hidden corridors, glowing lights, and tiny details that feel like they belong in a magical world.
What I like about this kit is how it mixes a castle setting with that cozy, mysterious vibe you’d expect from a wizarding world.
Brand
MiniverseStudioLLC
Scale
1:24
Pro’s
– unique piece – lovely design, with all-in on atmosphere: gothic details, glowing windows, tiny props, etc. – The lights are honestly what sells it: they give that “alive” feeling once it’s done
Contra’s
– on the expensive side – Small wires + tight spaces = slightly frustrating setup
The next book nook kit is also laser-cut and left blank. Although a little bit simpler than the previous one, it is still adorable and there are several ways that you can go with this one.
You can buy it assembled or non-assembled, painted or not treated at all.
Depth: 6 inches, Height: 9.5 inches, and Width: 4 inches
Brand
3D Printing by Chris
Scale
1: 24
Pro’s
– I love the simple design with the balcony sticking out – the possibility of custom-designed signs is a nice touch – great quality laser-cut wood
Contra’s
– Returns and exchanges not accepted
Our Ratings
4,5/5
Hours to Make
I estimate about 12-14 hours, as there are not so many details
Take a good look at this special book nook kit which includes a large magical clock, just imagine the wizard sitting there and writing out his magic potions!
This book nook has dimensions of 9 x 6 x 4 inches and is from China.
– very affordable book nook kit – made from sturdy and durable wood – very original design – complete kit without having to paint it or buying extra decorations and accesories
Contra’s
– very affordable book nook kit – made from sturdy and durable wood – very original design – complete kit without having to paint it or buying extra decorations and accessories
Our Ratings
4/5
Hours to Make
– Not a unique book nook kit or from a small store – It looks new, so not many people have assembled and reviewed it
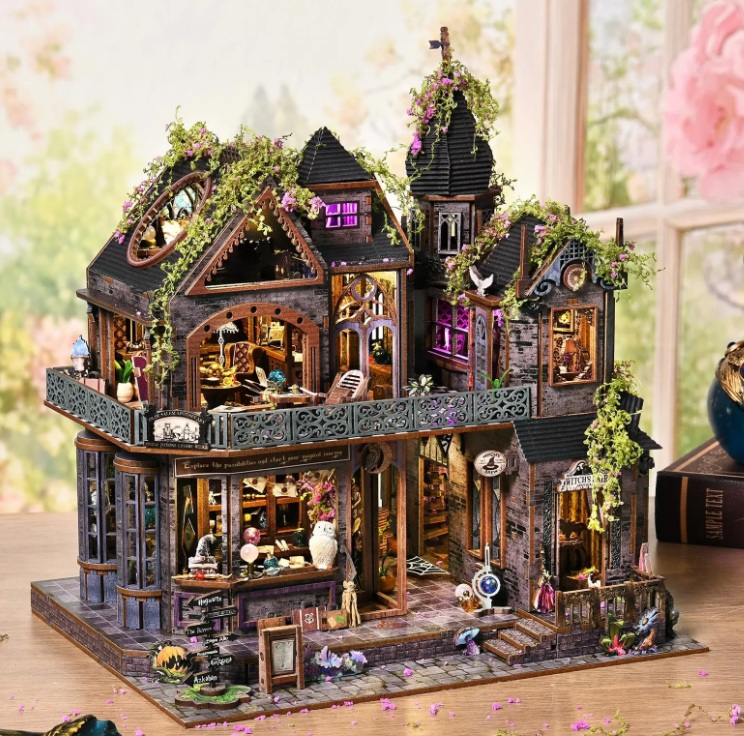
We are not done yet with our Magical book nooks, cause let’s talk about this literal magic house!
It is a colorful 3D wooden puzzle book nook kit and all the necessary magical materials and tools you can find in the little magic store, look up close!
Batteries are not included in this kit and the measurements are: 4.3 x 9.5 x 7.1 inches.
– A very “magical” design, with every magical object included, like a witch hat and a flying broomstick – another very affordable book nook kit – easy instructions and easy to assemble -can be built rather quickly
Contra’s
– there is a bit of painting to do – there can be some issues with the lights
Our Ratings
– A very “magical” design, with every magical object included, like a witch hat and a flying broomstick – another very affordable book nook kit – easy instructions and easy to assemble -can be built rather quickly
I hope that you have found your perfect kit among all the Harry Potter book nooks in this article.
If you have any more questions, please feel free to ask them down below in the comment section or join me on (one of) my social media channels or my cozy Facebook group.
5 thoughts on “Breathtaking Diagon Alleys In Book Nooks: The 5 Ultimate DIY Harry Potter Book Nook Reviews!”
What a fantastic creation for Harry Potter fans! This is the perfect gift and I can just see this lighting up faces! Thanks for writing this article and breaking the details down to the necessities; very helpful. I really like that you can get these as kits (even unpainted) so that they can be a project and half of the fun is building them, or they can be ready to goo for those of us who are lazy and just want to enjoy the finished product.
Hmmm, this is a geek hobby, so I’m totally in as a geek myself! The reviews of Harry Potter Book nooks are very interesting. It will help your readers to make the best choice, especially if they are deeply involved in creative arts and building. I’d enjoy it and I know that it sends me back to my childhood because we used to have such things on BArbie as well!
The LED temperature point is one that most kit reviews skip entirely. At miniature scale, cool white LEDs flatten the scene in a way that doesn’t happen in full-size rooms. The contrast ratios just read differently when your entire space is 15cm wide. Warm amber makes a disproportionate difference. Which of the five ended up being the most satisfying to actually build, not just the best-looking finished?


What a fantastic creation for Harry Potter fans! This is the perfect gift and I can just see this lighting up faces! Thanks for writing this article and breaking the details down to the necessities; very helpful. I really like that you can get these as kits (even unpainted) so that they can be a project and half of the fun is building them, or they can be ready to goo for those of us who are lazy and just want to enjoy the finished product.
Hello Michelle!
They are fantastic to assemble and to watch, yes indeed I agree 😉
I wish you happy crafting!
Kind regards,
Lizzy
Hmmm, this is a geek hobby, so I’m totally in as a geek myself! The reviews of Harry Potter Book nooks are very interesting. It will help your readers to make the best choice, especially if they are deeply involved in creative arts and building. I’d enjoy it and I know that it sends me back to my childhood because we used to have such things on BArbie as well!
Haha Angel, a Geek! Oh yes, we can be for sure lol!
Thank you for your comment and I wish you happy crafting/geeking! 😉
Lizzy
The LED temperature point is one that most kit reviews skip entirely. At miniature scale, cool white LEDs flatten the scene in a way that doesn’t happen in full-size rooms. The contrast ratios just read differently when your entire space is 15cm wide. Warm amber makes a disproportionate difference. Which of the five ended up being the most satisfying to actually build, not just the best-looking finished?