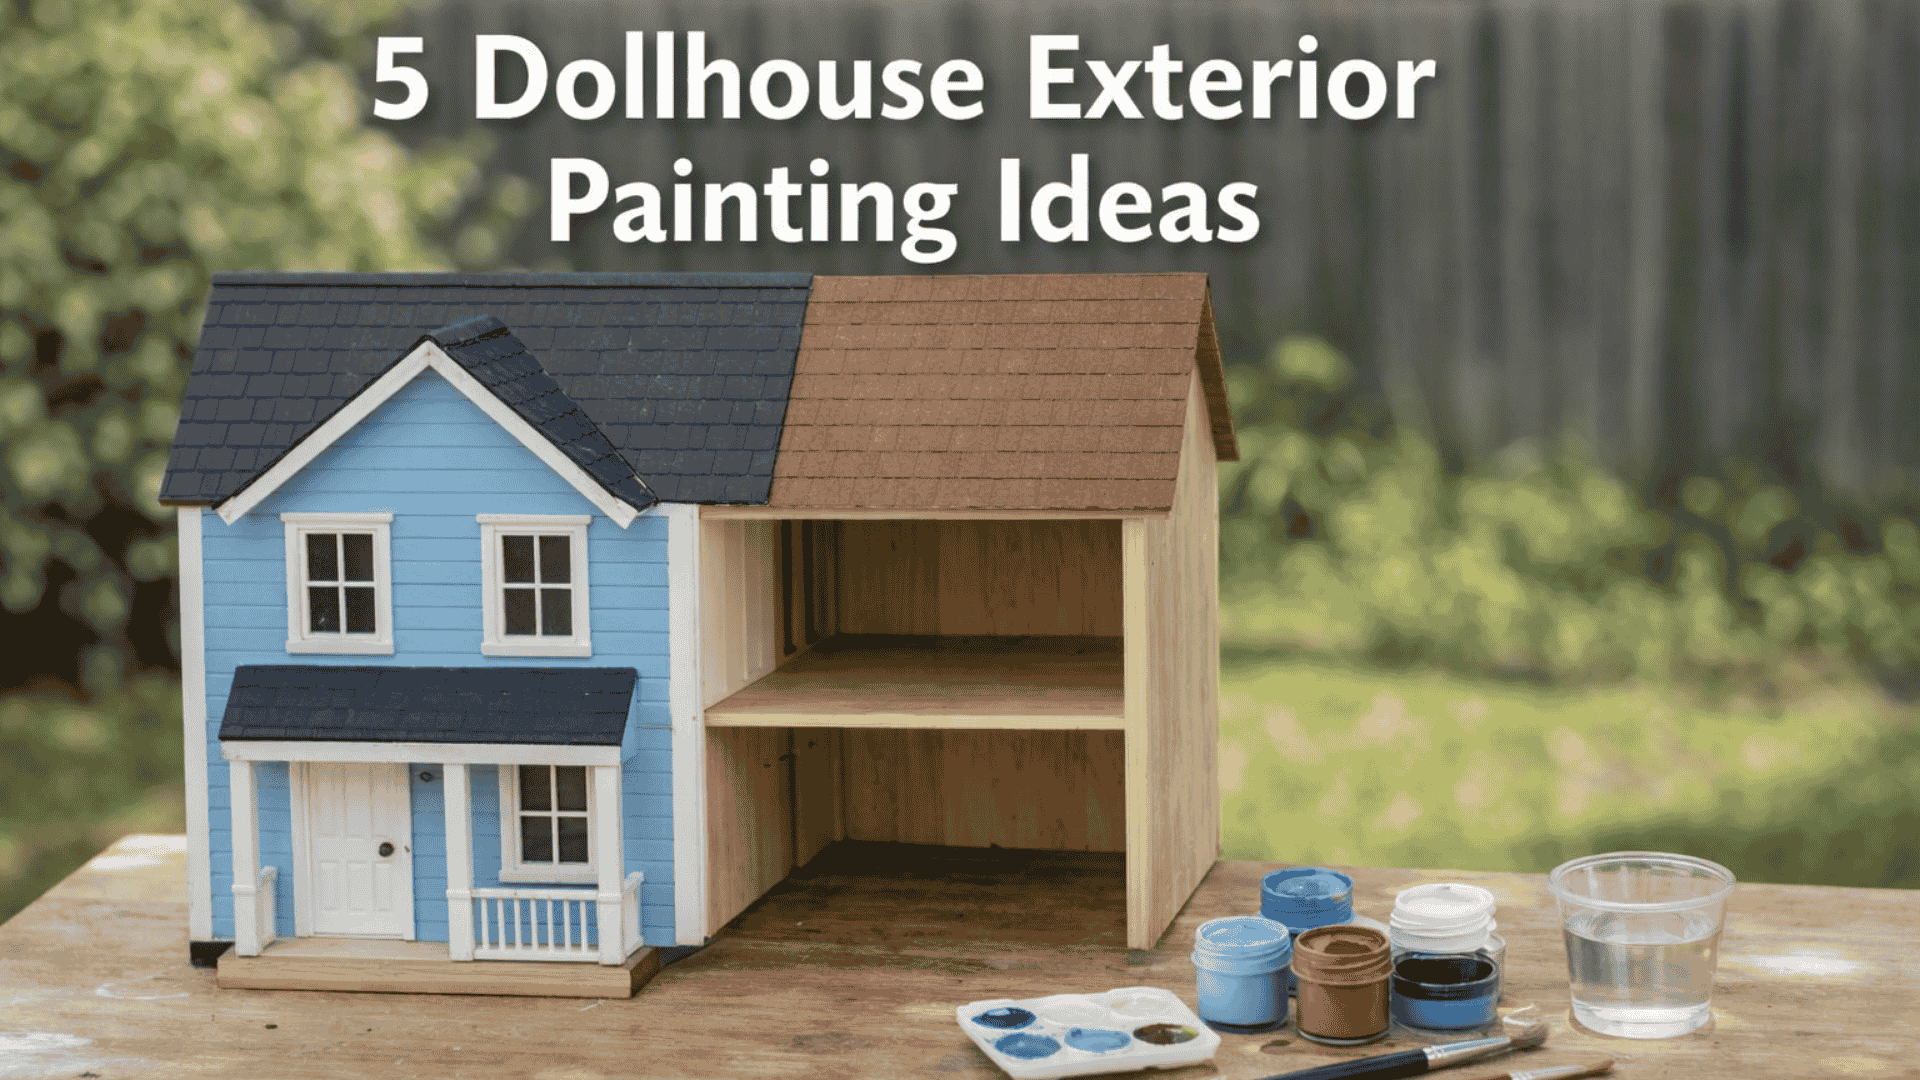
But the exterior paint of a dollhouse can completely change its personality before anyone even looks inside.
I’ve seen the exact same dollhouse kit look like a Victorian mansion, a countryside cottage, or a modern designer home—simply because the exterior colors were different.
If you’re looking for inspiration, here are five exterior painting ideas that work especially well for dollhouses.
Updated 15/03/26
As an Amazon, Etsy and Anavrin associate, I earn a small commission from your purchase, with no extra charges for you.
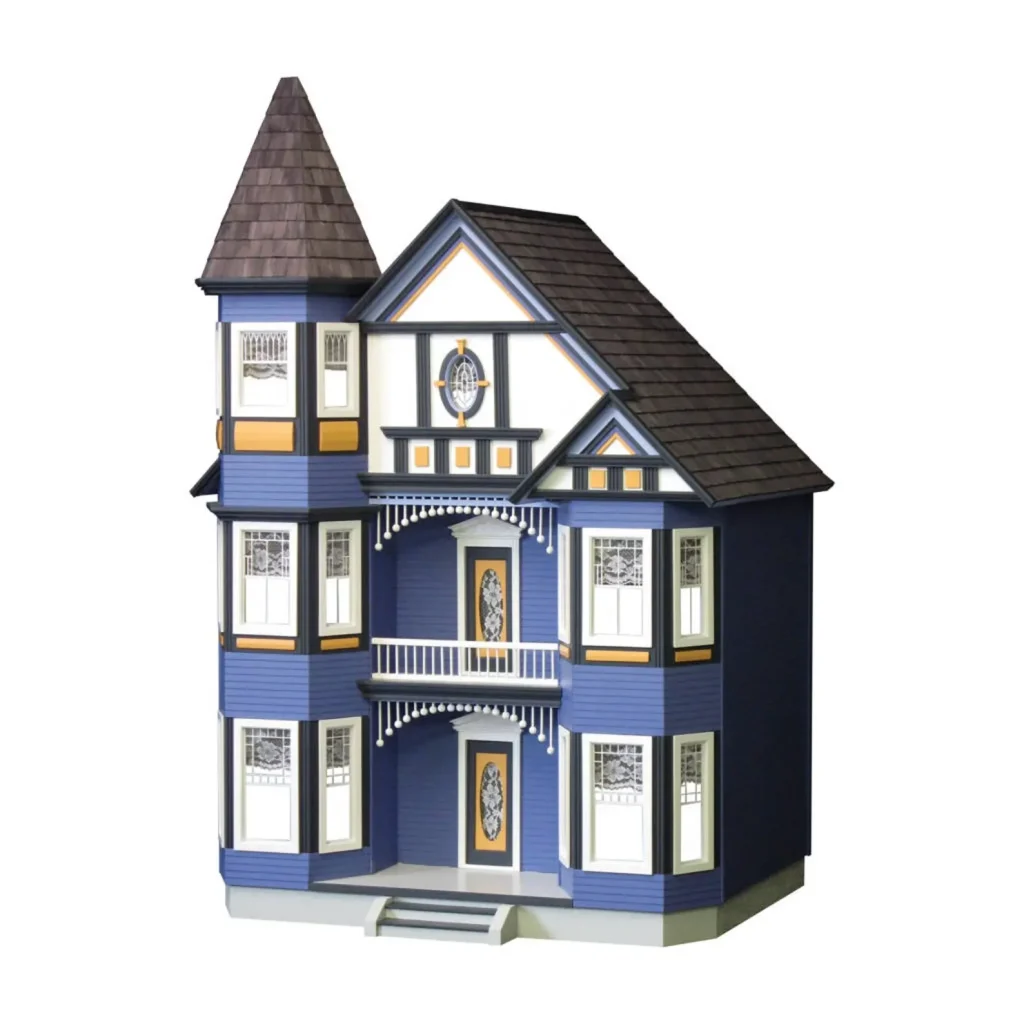
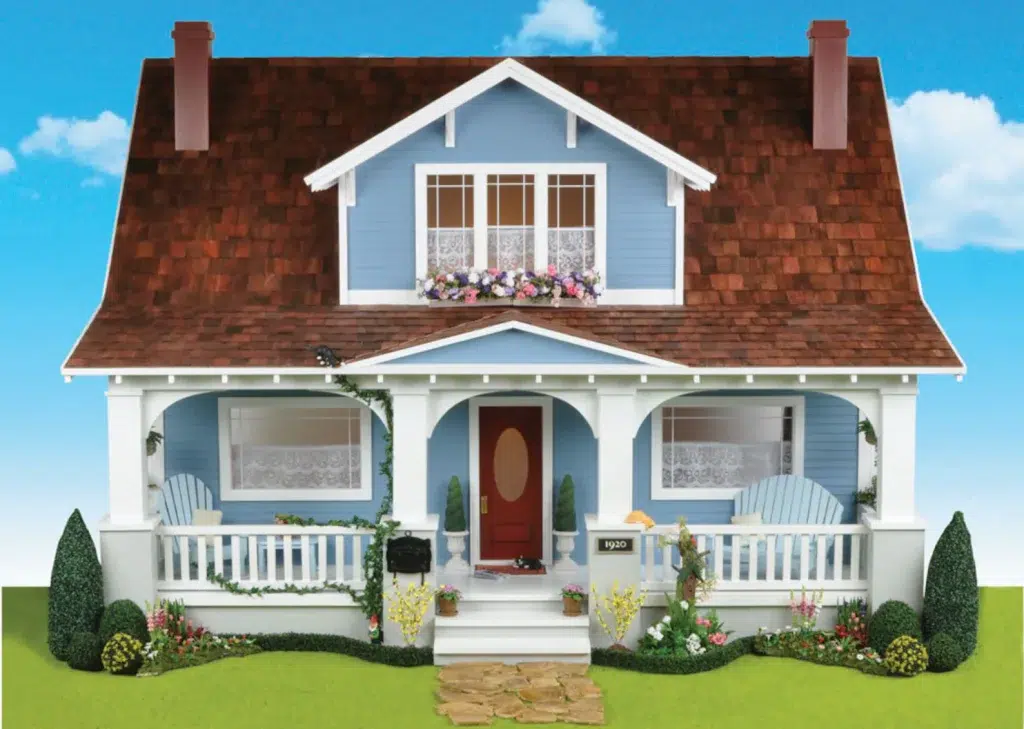
1. Classic Victorian Color Scheme
Victorian-style dollhouses are probably the most recognizable miniature houses. They often have lots of trim, decorative woodwork, and small architectural details.
That makes them perfect for using multiple colors.
A common combination is:
Soft pastel base color (mint green, pale yellow, or light blue)
White or cream trim
Dark accents such as burgundy or forest green
Painting the trim in a contrasting color helps highlight all those little details around the windows, roof edges, and porch.
If your dollhouse has a lot of decorative elements, this type of color scheme really lets them stand out.
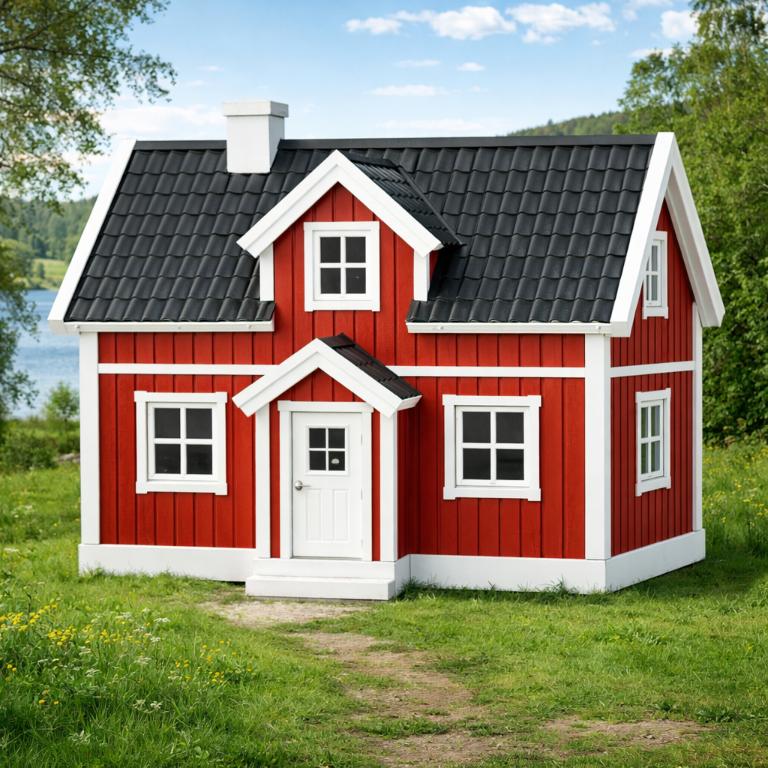
One of the simplest exterior painting styles is the classic red house with white trim.
This look is inspired by traditional Scandinavian houses and old barns. It’s surprisingly effective on dollhouses because the contrast is strong and very recognizable.
The basic palette is simple:
Deep red walls
Bright white window frames and trim
Dark gray or black roof
Even a very simple dollhouse suddenly looks charming with this combination.
If you like clean and traditional designs, this is one of the easiest painting styles to try.
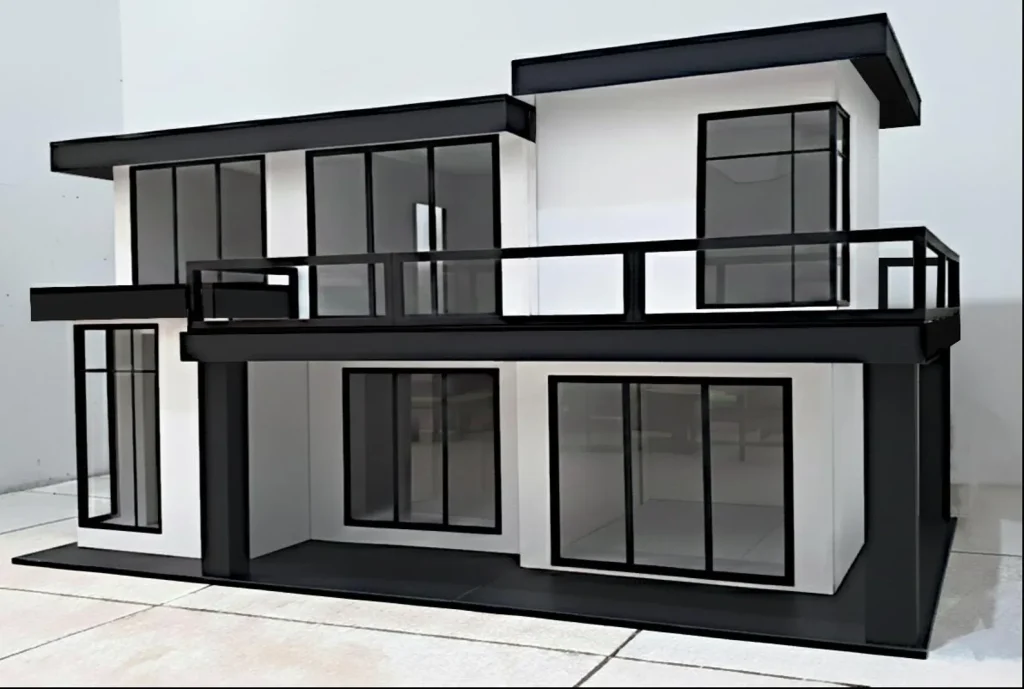
4. Modern Minimalist Dollhouse
Not every dollhouse has to look historic or traditional.
A modern minimalist paint scheme can turn a dollhouse into something that looks like a contemporary architectural model.
Typical colors include:
White or light gray walls
Black window frames
Natural wood accents
Sometimes one wall is painted darker, such as charcoal or slate gray, to create contrast.
This style works especially well for modern dollhouses or simple wooden kits without a lot of decorative trim.
Make sure that your dollhouse is clean and free from dust. If necessary, you can also sand everything for a smooth surface.
Removing any windows or doors before painting any walls and such is your decision to take, but if you don’t, make sure to cover these components with painter’s tape.
Prime the dollhouse first.
Priming your dollhouse is essential because it helps to paint it better and creates a smooth base for your colors, whether it’s wood, plastic, or another type of surface.
Start with the Exterior:
Begin by painting the exterior walls of your dollhouse. Use a broad brush for larger areas and a smaller brush for small details. Apply thin, even coats of paint, allowing each layer to dry completely before adding another. Experiment with different techniques, such as dry brushing or layering, to add texture and depth if desired.
Tackle the Interior:
Move on to painting the interior of your dollhouse. Start with one room at a time, carefully applying paint to the walls, ceilings, and floors.
Consider using different colors to define distinct spaces within your dollhouse. Take extra care when painting smaller details like trim, windows, and doors, using a smaller brush or even a toothpick for precision.
Finally, seal your painted surfaces with a clear sealant to protect the finish and provide longevity.
To learn more in detail, check out the fantastic video below!
My Final Conclusion
As always, if you have any questions, please feel free to ask them down below in the comment section or join me on my social media channels or my cozy Facebook group.
4 thoughts on “5 Dollhouse Exterior Painting Ideas That Instantly Change the Look of Your Mini House”
Wow, you were very thorough in your article. I was surprised at how many steps there are to painting a dollhouse. I have never thought about getting into painting dollhouses myself, but it does seem like it could be a very interesting project to get into. You would have to have a lot of patience considering there are many little parts that could be time consuming to paint.
There seems to be a lot to consider before you can actually start any painting. You have to make sure you have a selection of different paint brushes. Then there’s the different paints and colors that you might need. Different sand papers are a must too to make sure the paint doesn’t have any bubbles or uneven areas. Lots of little tools to make sure you have so you can achieve the exact look you are going for.
Your article is very informational and covers lots of area when it comes to painting dollhouses. You even included videos for people that needed more after reading what you had wrote. The videos are definitely a good idea since some people can learn from reading while others are visual learners. Great job on making sure what you were saying is readable and easy to understand.
I really enjoyed reading your article on dollhouse painting. I’m a big fan of miniatures, and I’ve always wanted to try my hand at painting a dollhouse. Your article is very informative and well-written, and it’s given me a lot of great ideas.
I especially like your tips on choosing the right tools and materials. I think it’s important to use high-quality supplies when painting a dollhouse, because even the smallest details can make a big difference.


Wow, you were very thorough in your article. I was surprised at how many steps there are to painting a dollhouse. I have never thought about getting into painting dollhouses myself, but it does seem like it could be a very interesting project to get into. You would have to have a lot of patience considering there are many little parts that could be time consuming to paint.
There seems to be a lot to consider before you can actually start any painting. You have to make sure you have a selection of different paint brushes. Then there’s the different paints and colors that you might need. Different sand papers are a must too to make sure the paint doesn’t have any bubbles or uneven areas. Lots of little tools to make sure you have so you can achieve the exact look you are going for.
Your article is very informational and covers lots of area when it comes to painting dollhouses. You even included videos for people that needed more after reading what you had wrote. The videos are definitely a good idea since some people can learn from reading while others are visual learners. Great job on making sure what you were saying is readable and easy to understand.
Hi Liz! (same name, I love it haha),
Thank you for your wonderful reaction and I wish you happy painting 😉
Kind regards,
Lizzy
Hi Lizzy,
I really enjoyed reading your article on dollhouse painting. I’m a big fan of miniatures, and I’ve always wanted to try my hand at painting a dollhouse. Your article is very informative and well-written, and it’s given me a lot of great ideas.
I especially like your tips on choosing the right tools and materials. I think it’s important to use high-quality supplies when painting a dollhouse, because even the smallest details can make a big difference.
Hi Jeffrey
thank you for your positive comment and if you have any more questions, please feel free to ask!
Kind regards,
Lizzy