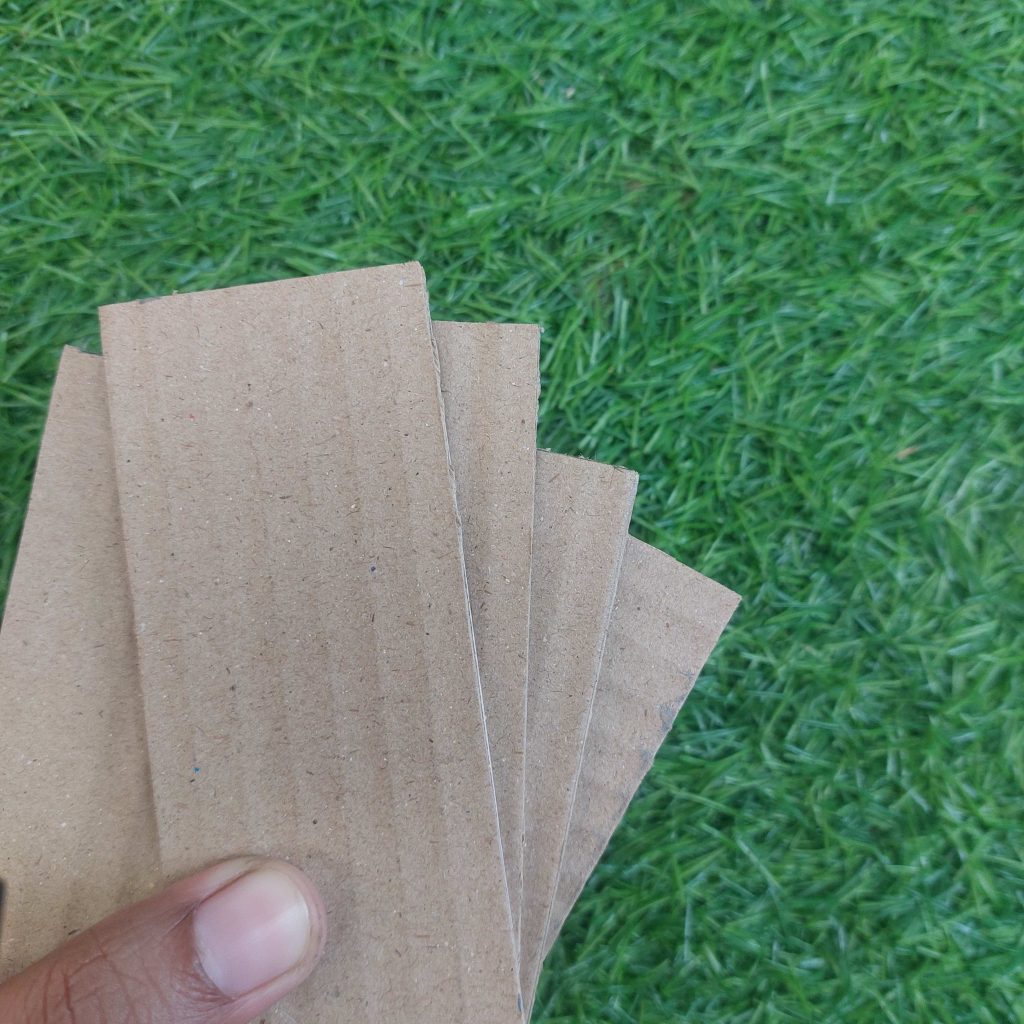
Corrugated cardboard is one of those materials that doesn’t look very promising at first for DIY miniature crafting, but once you start working with it, it turns out to be surprisingly useful for dollhouse furniture.
In this project, I’m making many small, sturdy pieces that work perfectly for your dollhouse, and they are really solid and smooth.
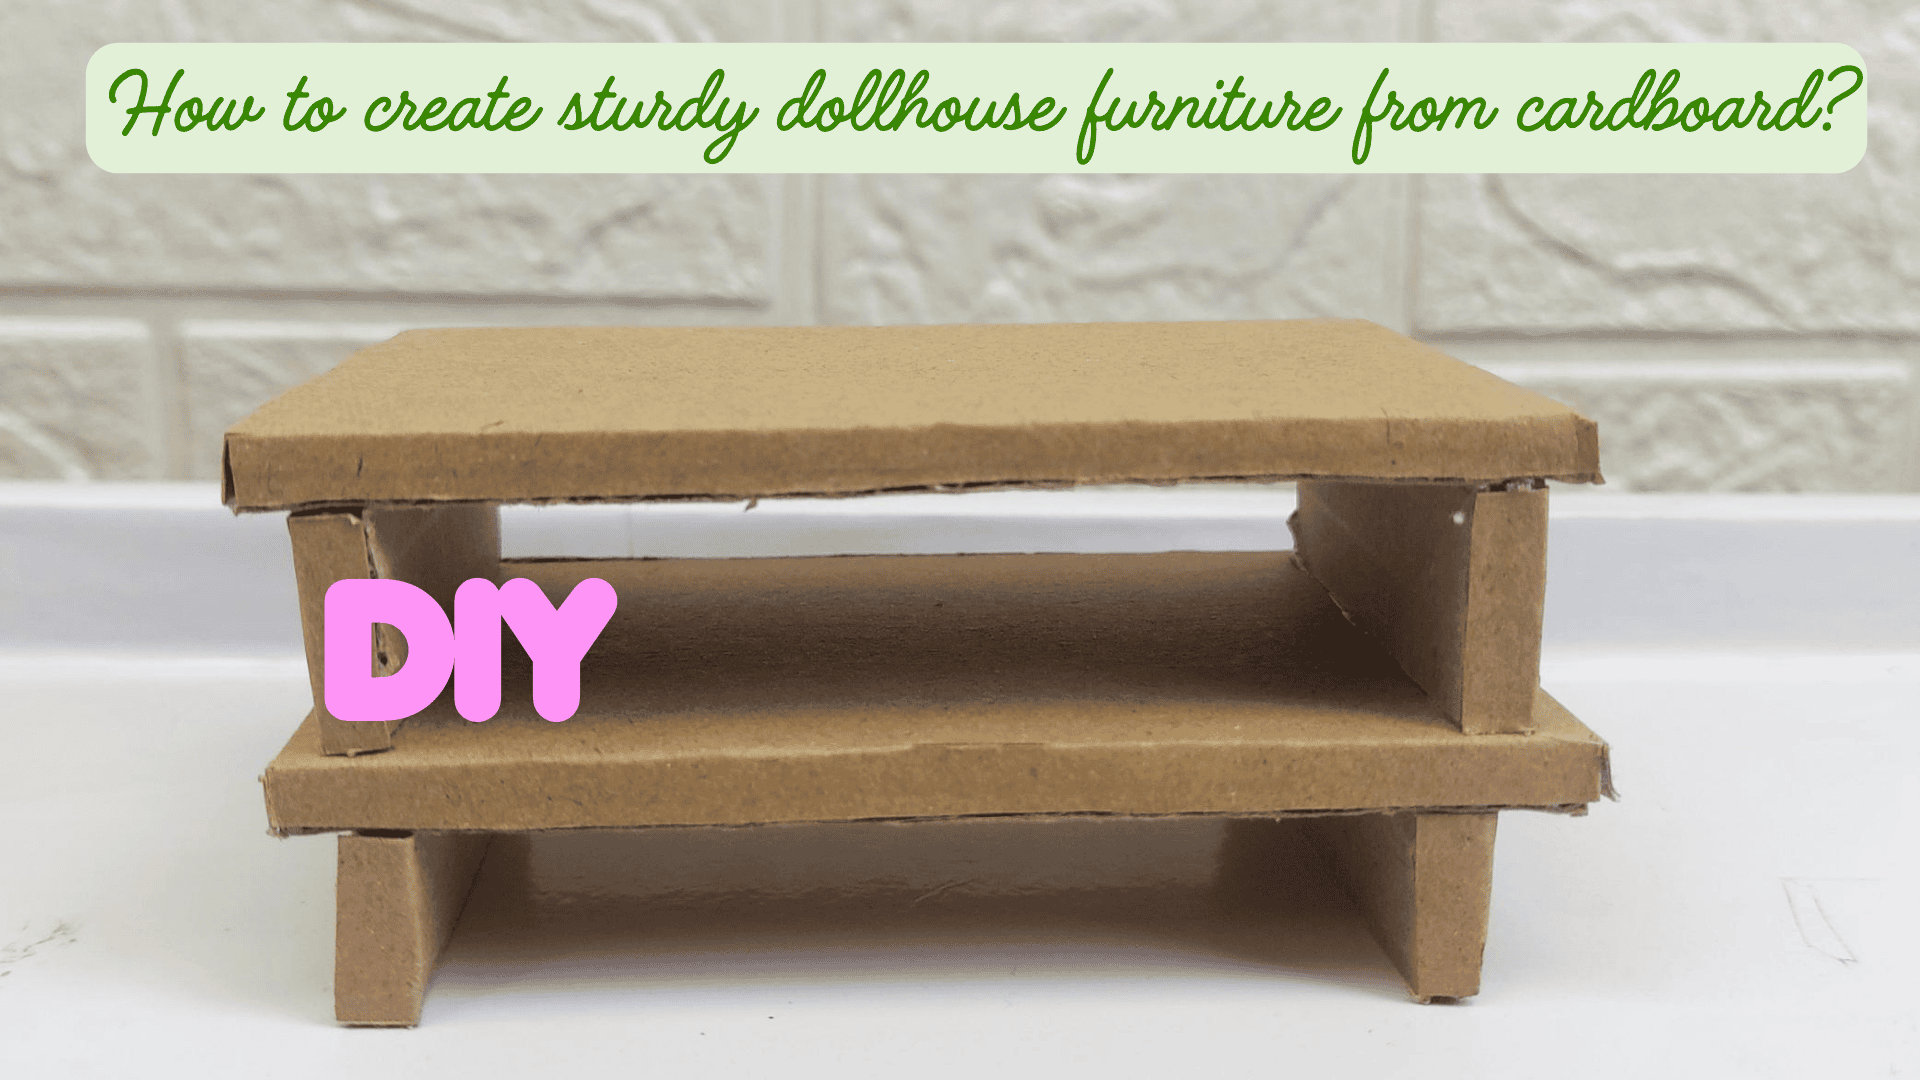
The focus is on simple cuts and reinforcing the cardboard so it feels solid, not flimsy. Let’s jump straight in with a coffee table!
As an Amazon, Etsy and Anavrin associate, I earn a small commission from your purchase, with no extra charges for you.
1 Currogated Cardboard Dollhouse DIY Coffee Table
In this tutorial, I show how I made a sturdy dollhouse coffee table from corrugated cardboard. The focus is on reinforcing the cardboard so the finished piece feels solid and keeps its shape.

Materials needed
- Corrugated cardboard (double-walled)
- Cutting mat
- Ruler / set square
- Craft knife/box cutter
- Scissors (optional)
- Glue
- Hot glue for fast assembly
- or strong craft glue
- Pencil
In contrast to former cardboard furniture projects, I am now using more sturdy cardboard, called corrugated. You can find it on Amazon, for example.
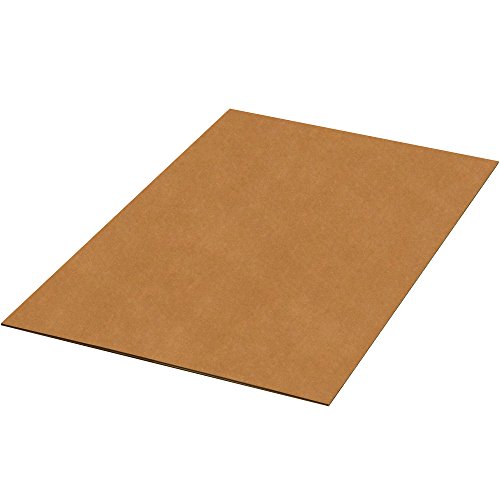
Double Wall Corrugated Cardboard Sheets, 36″ x 48″
Buy Now →Measurements
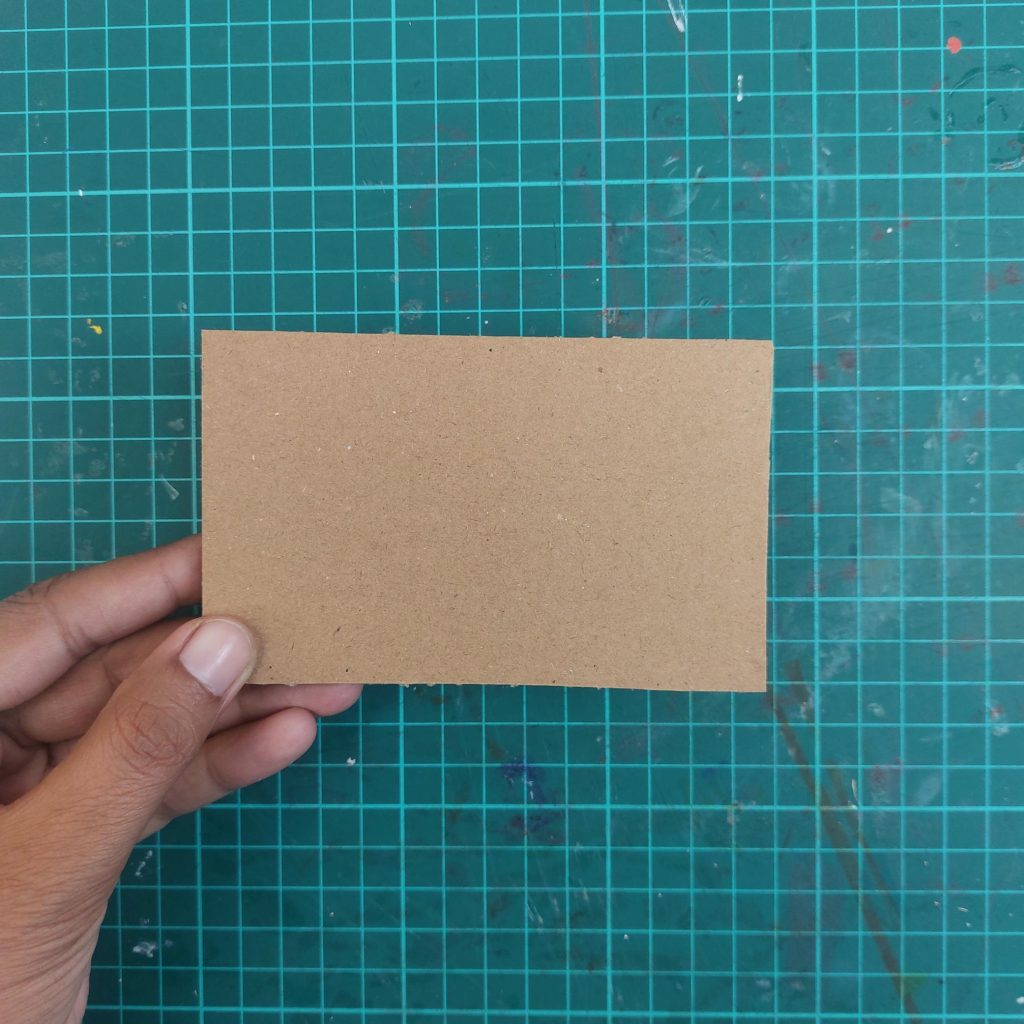
- 7.5 × 12 cm:2 pieces (tabletop and lower shelf)
- 1.5 × 7.5 cm: 4 pieces (legs/supports)
- Side border/inset depth: approx. 1 cm
Step-by-step tutorial
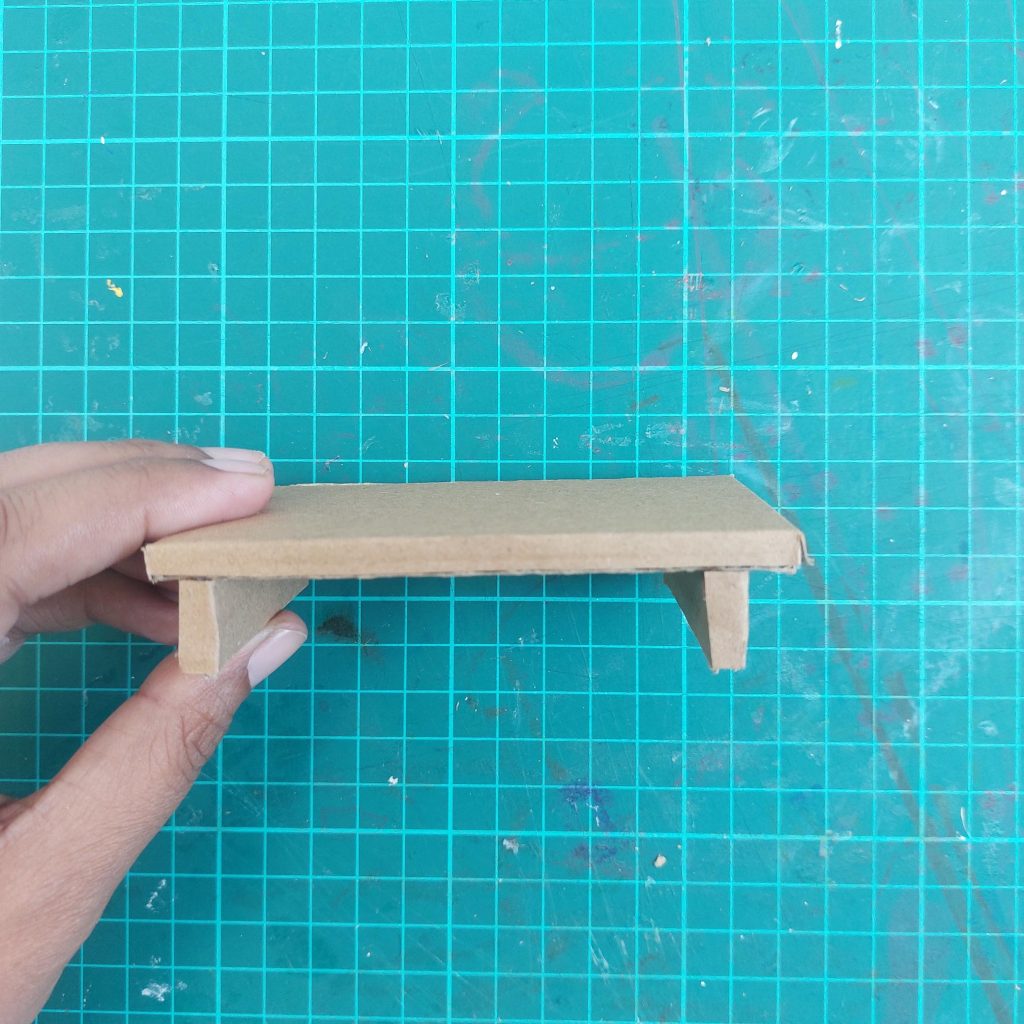
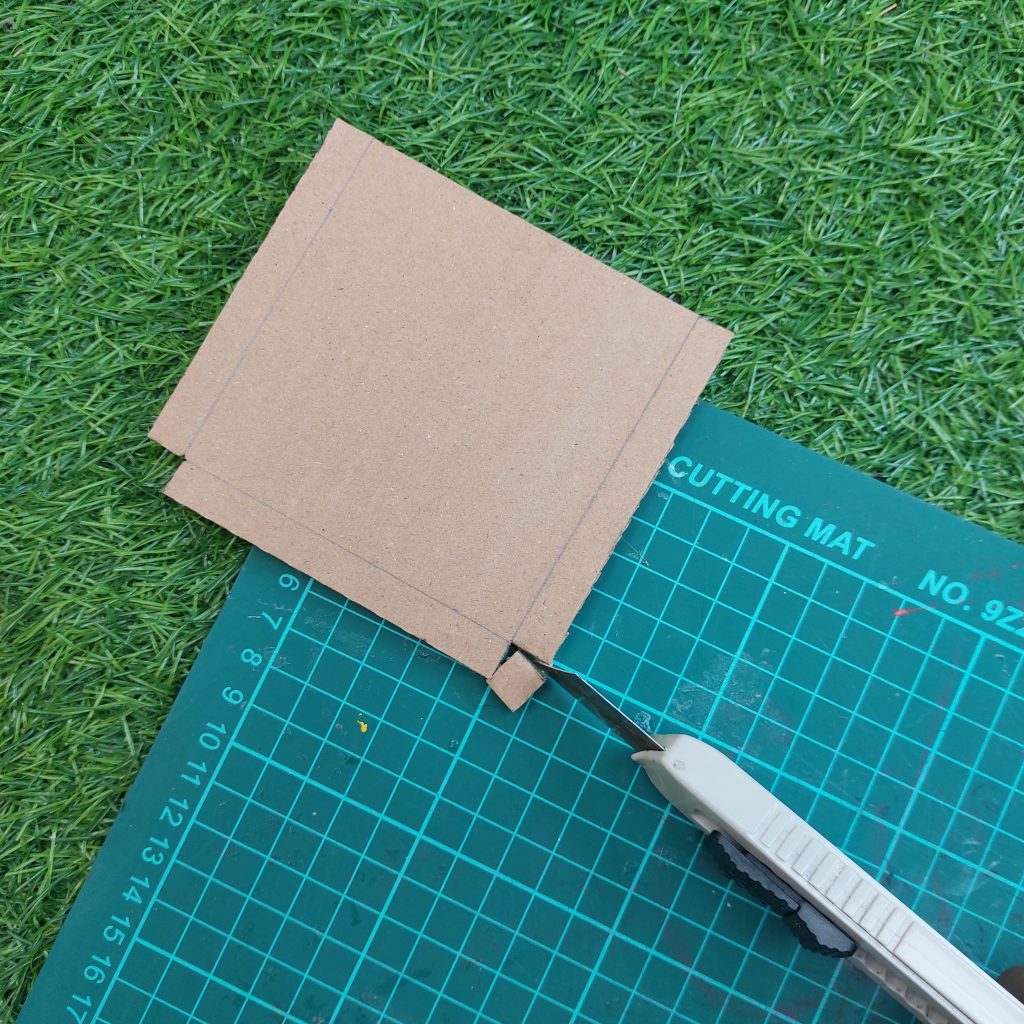
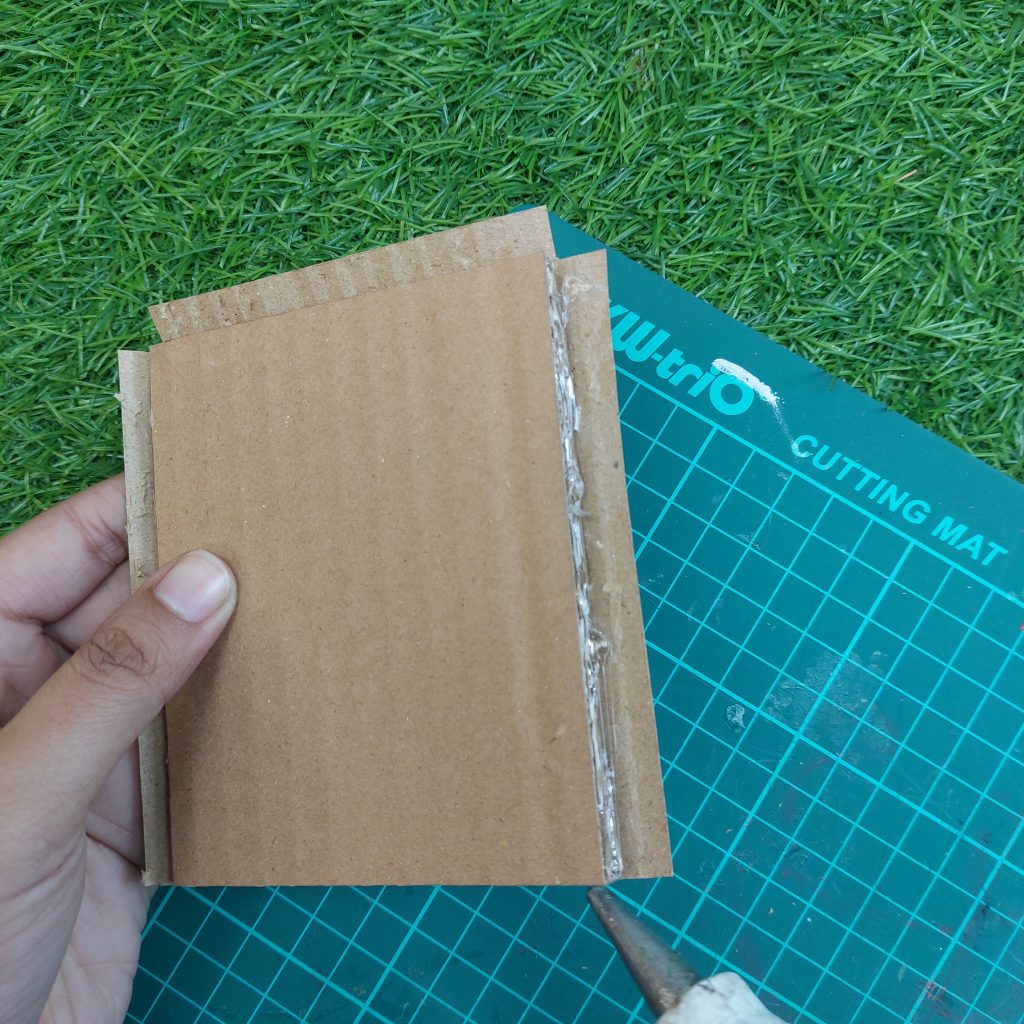
- Cut two rectangles measuring 7.5 × 12 cm from corrugated cardboard. These will become the tabletop and the lower shelf.
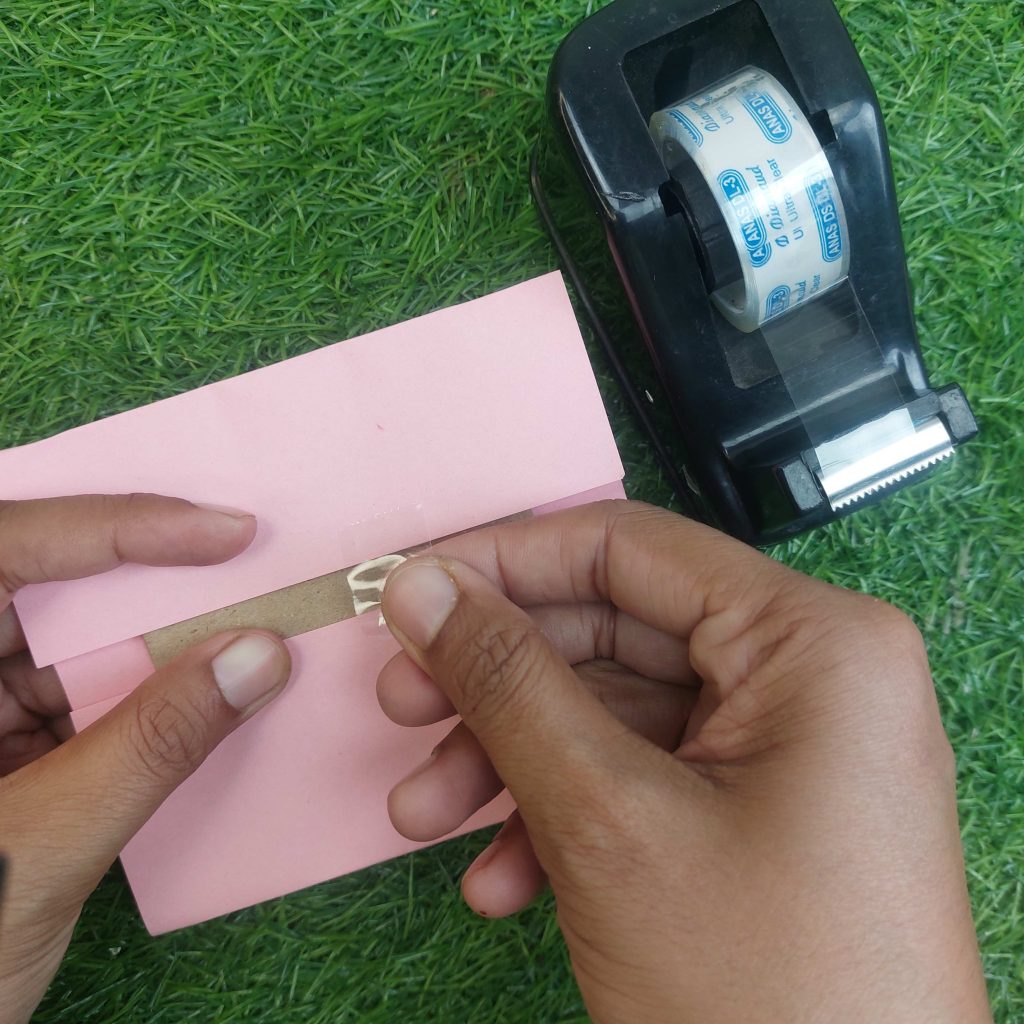
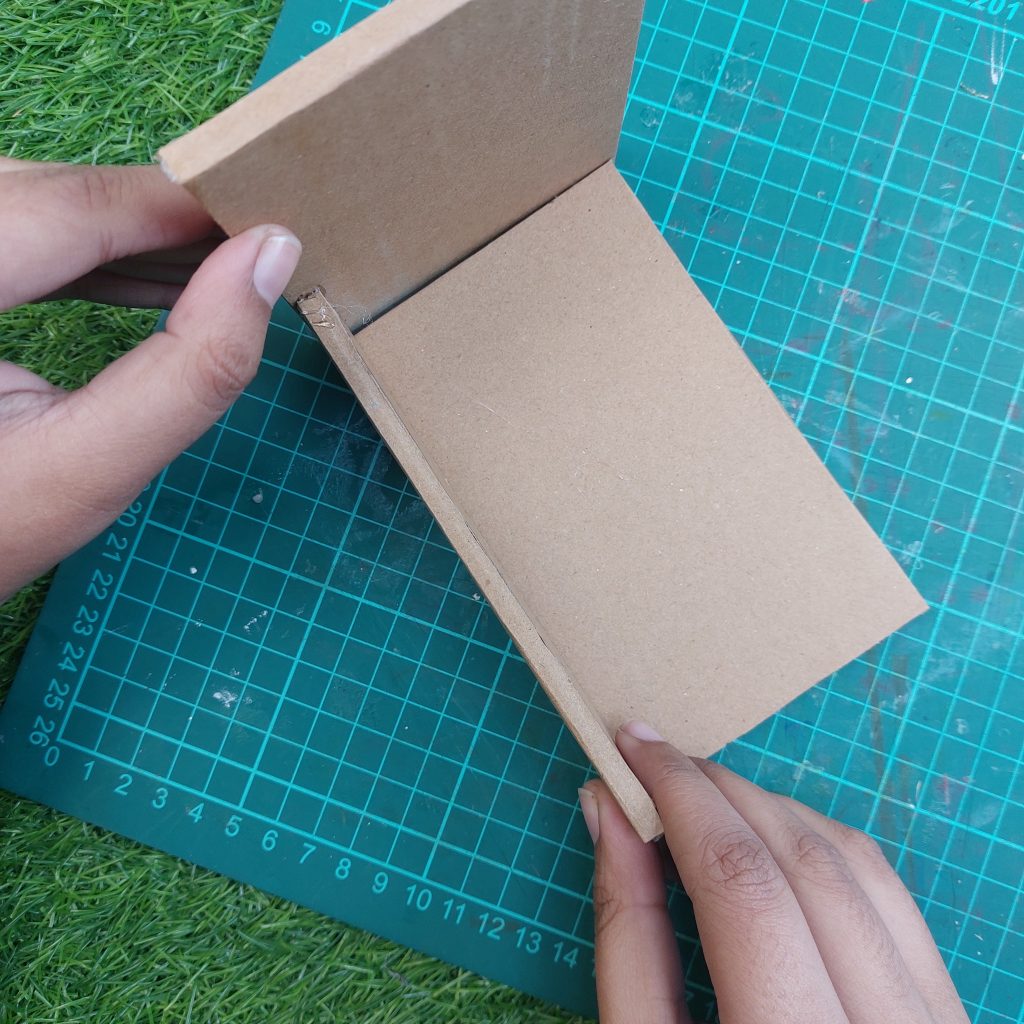
- On one of the 7.5 × 12 cm pieces, measure 1 cm in from all edges to mark the inset border.
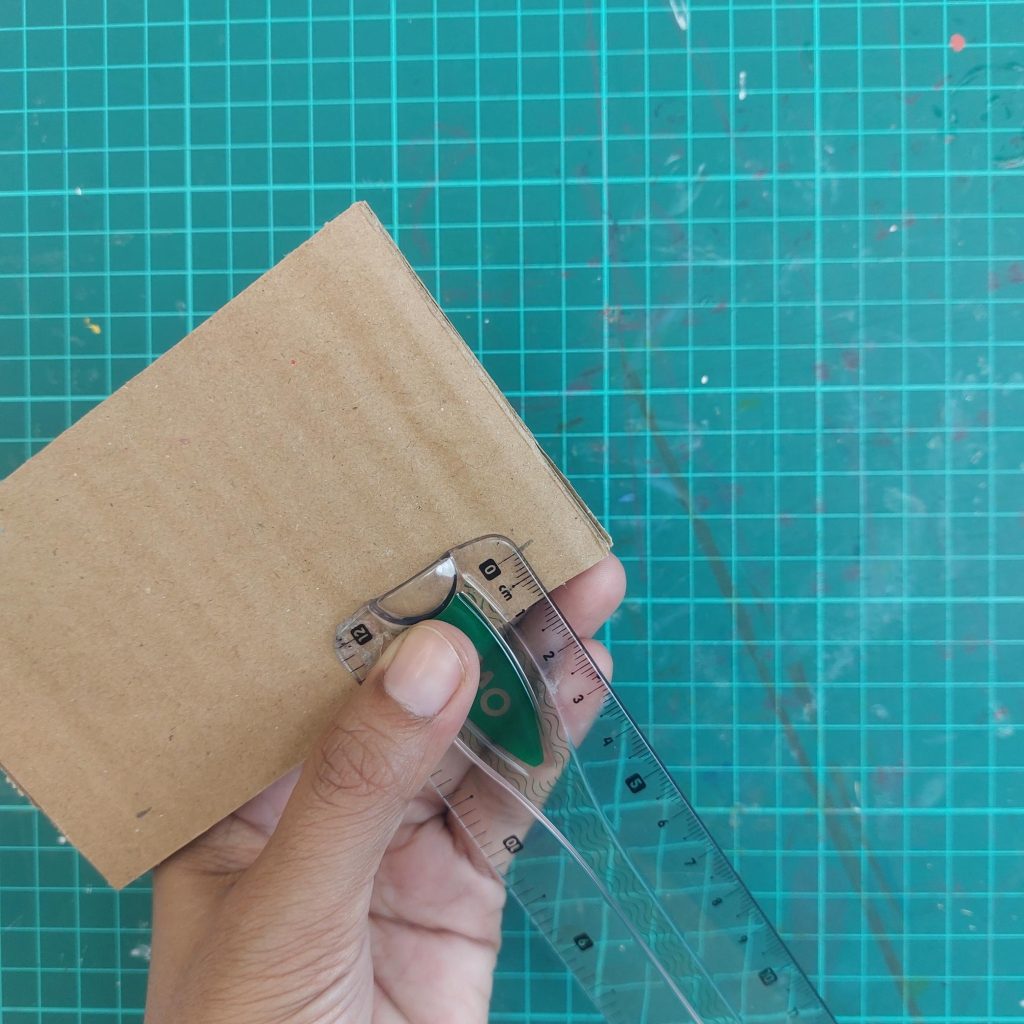
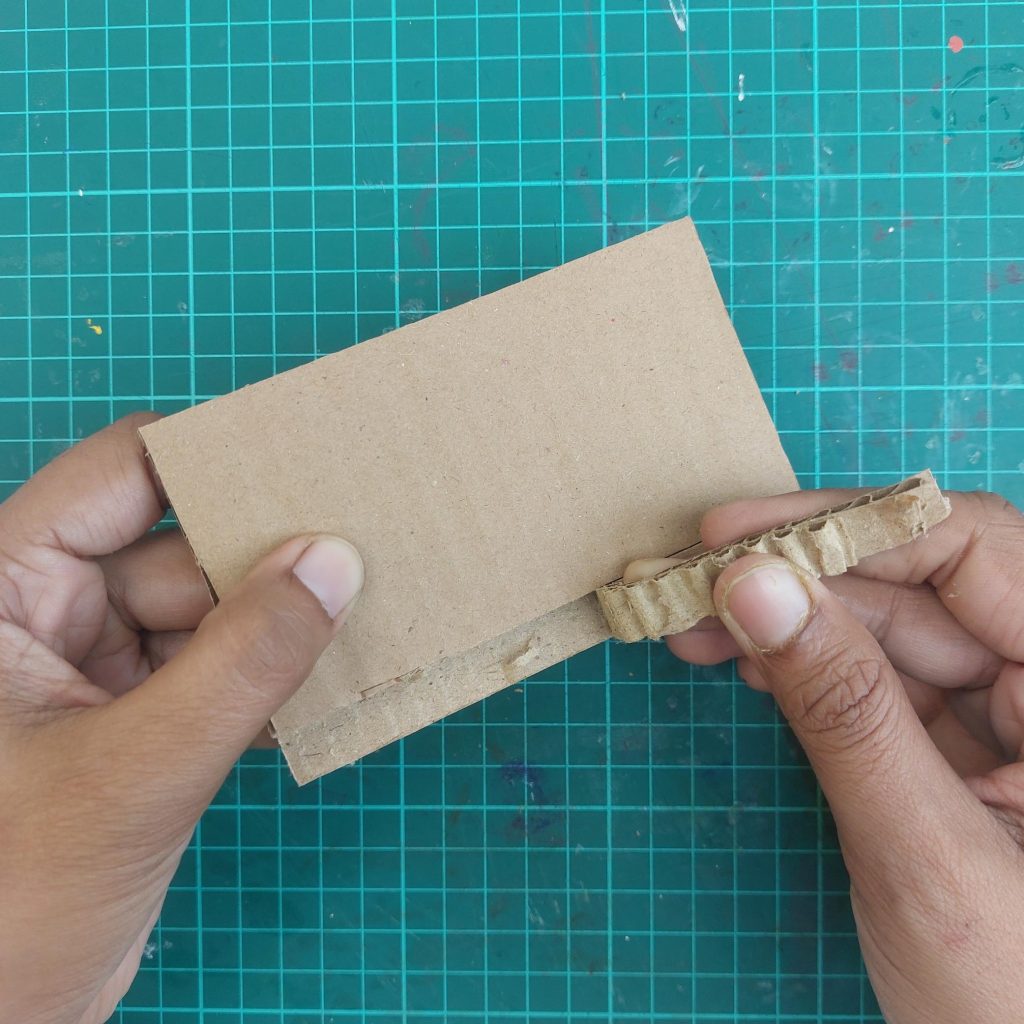
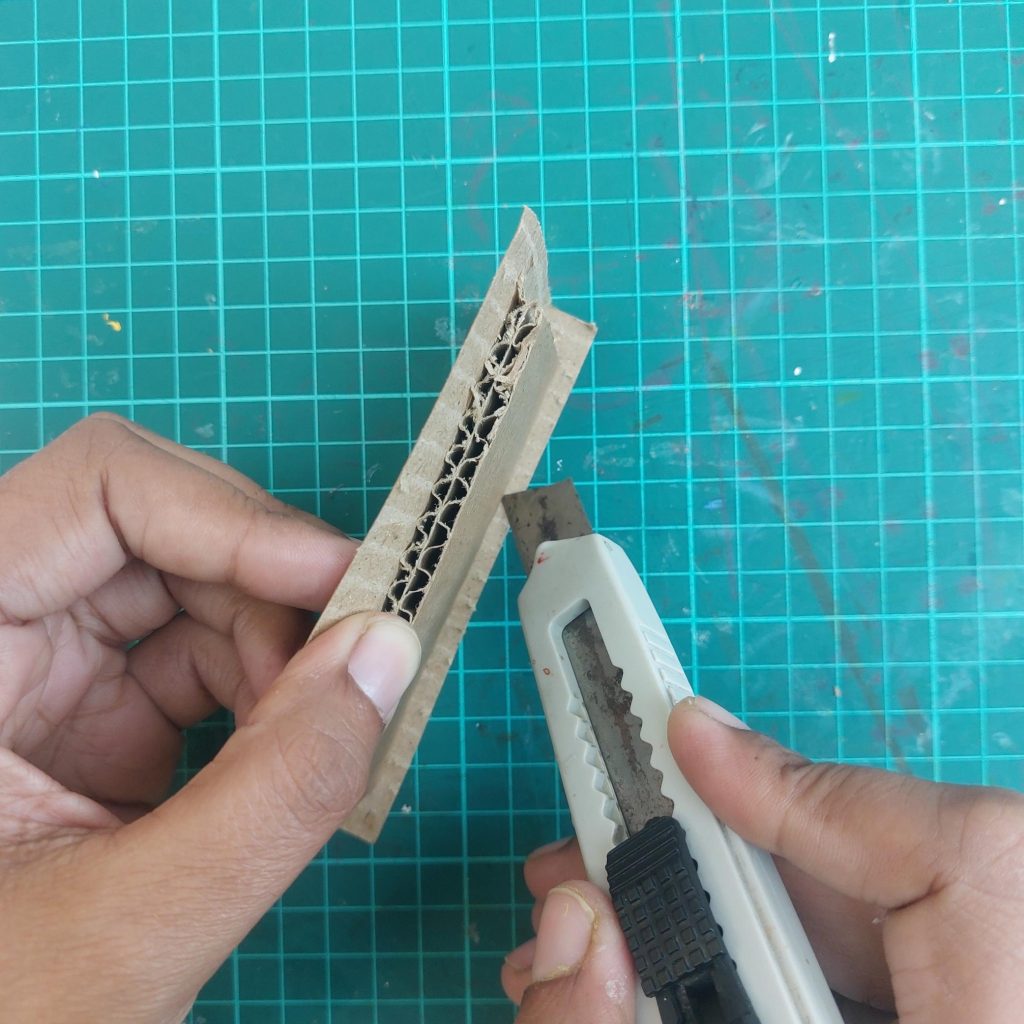
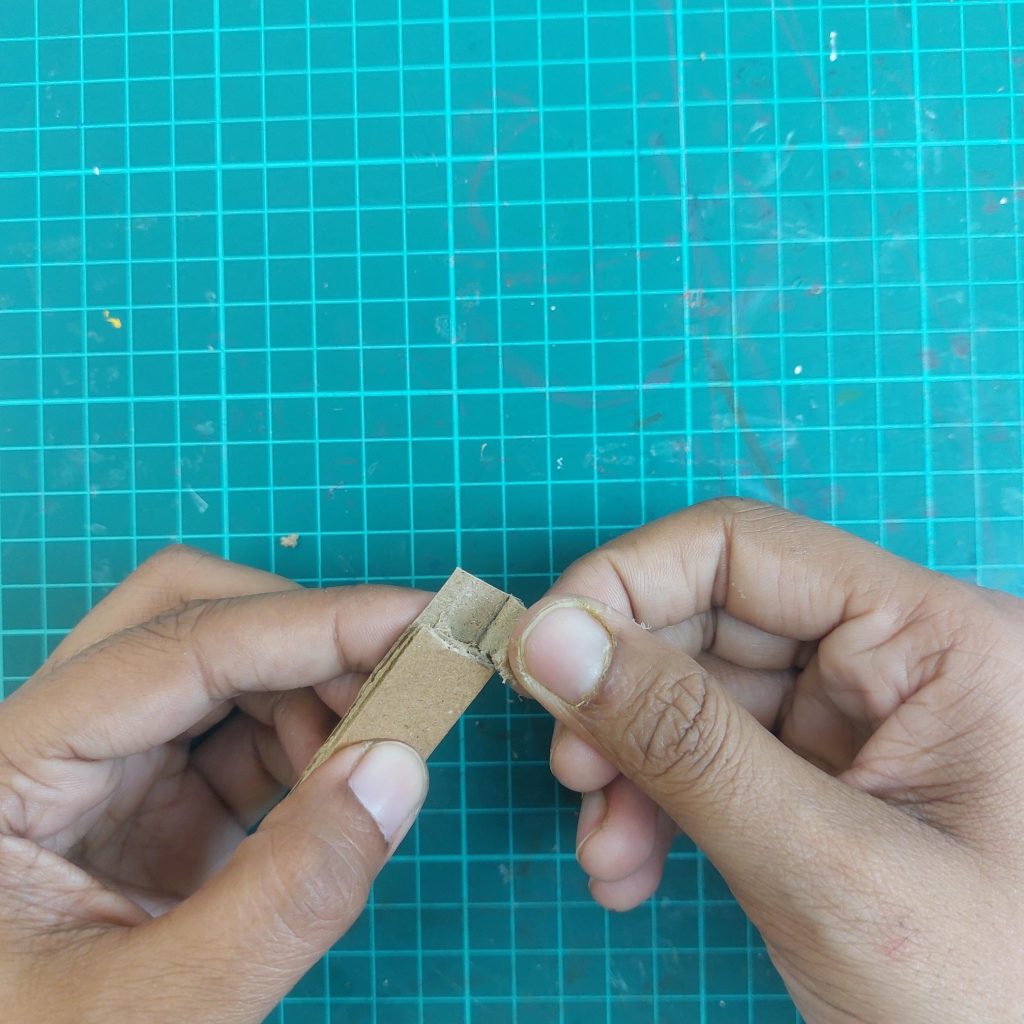
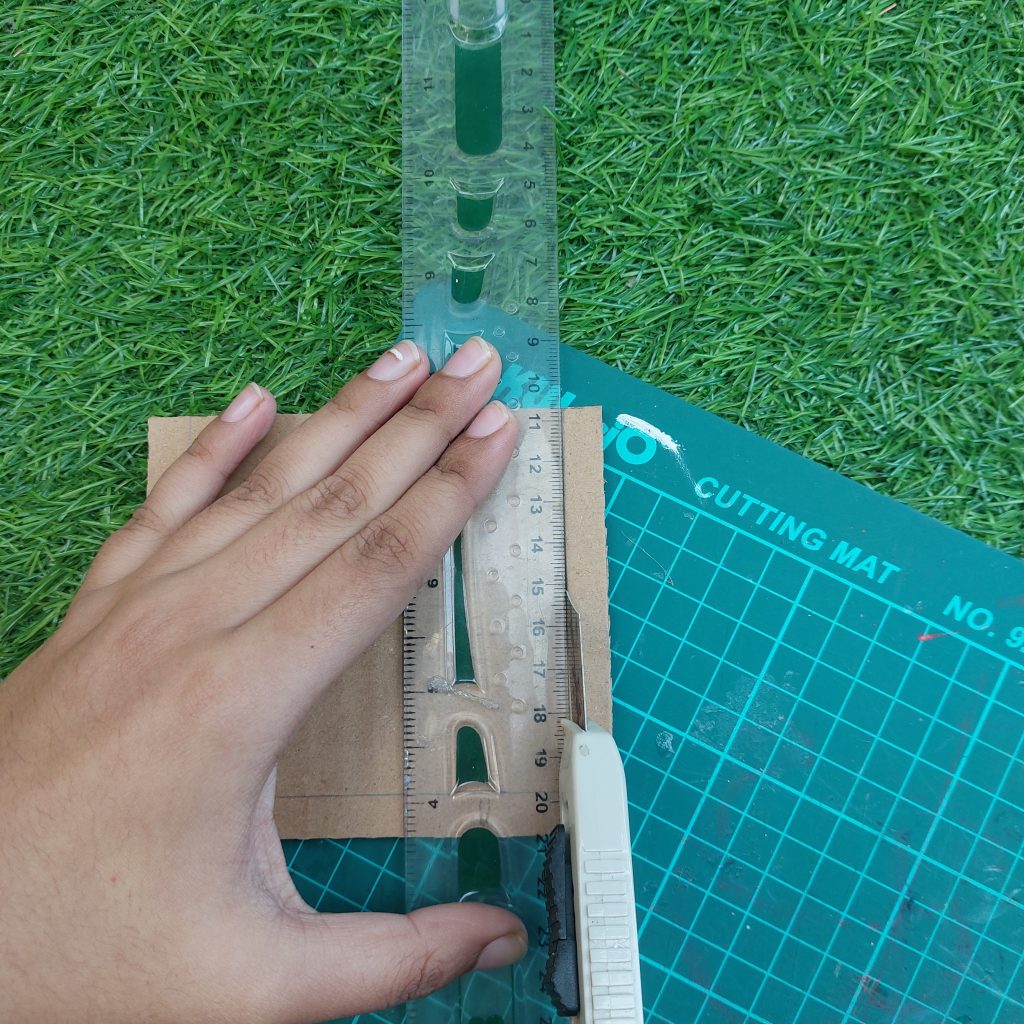
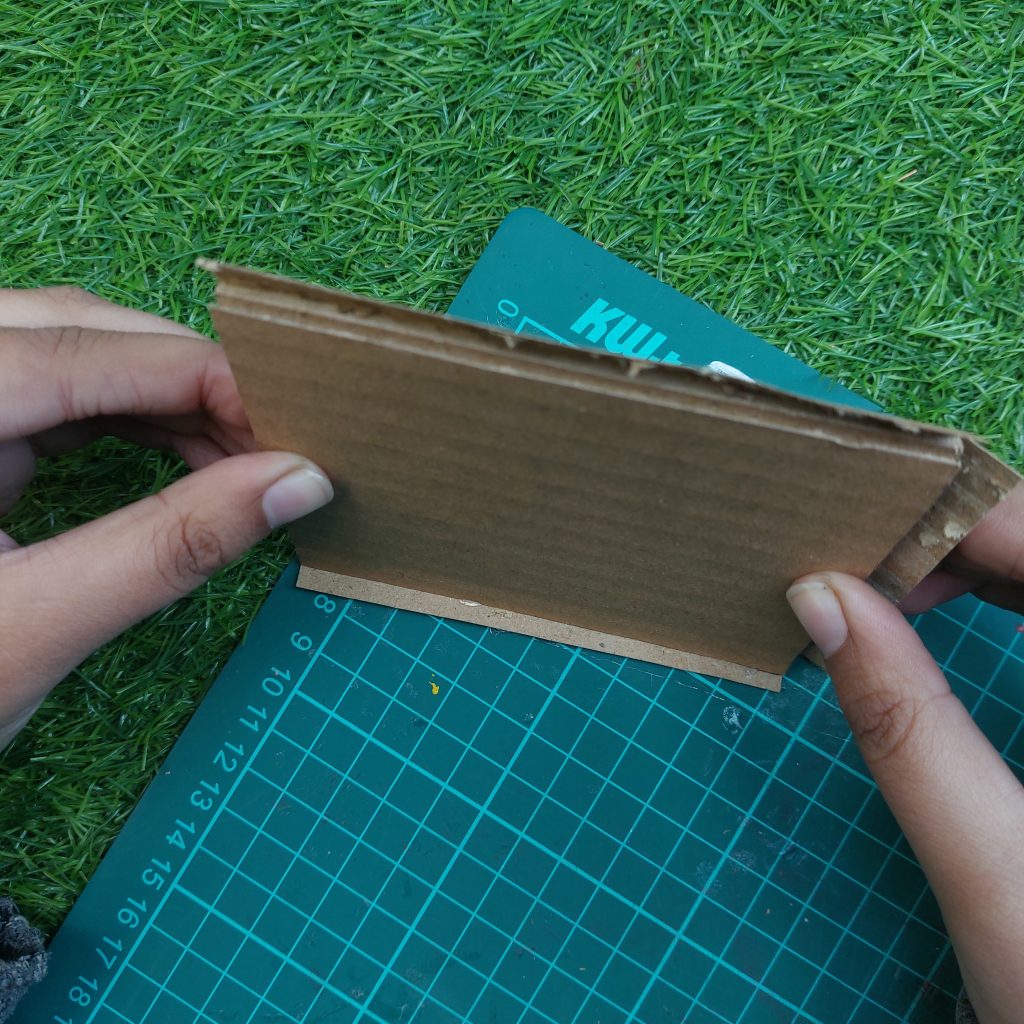
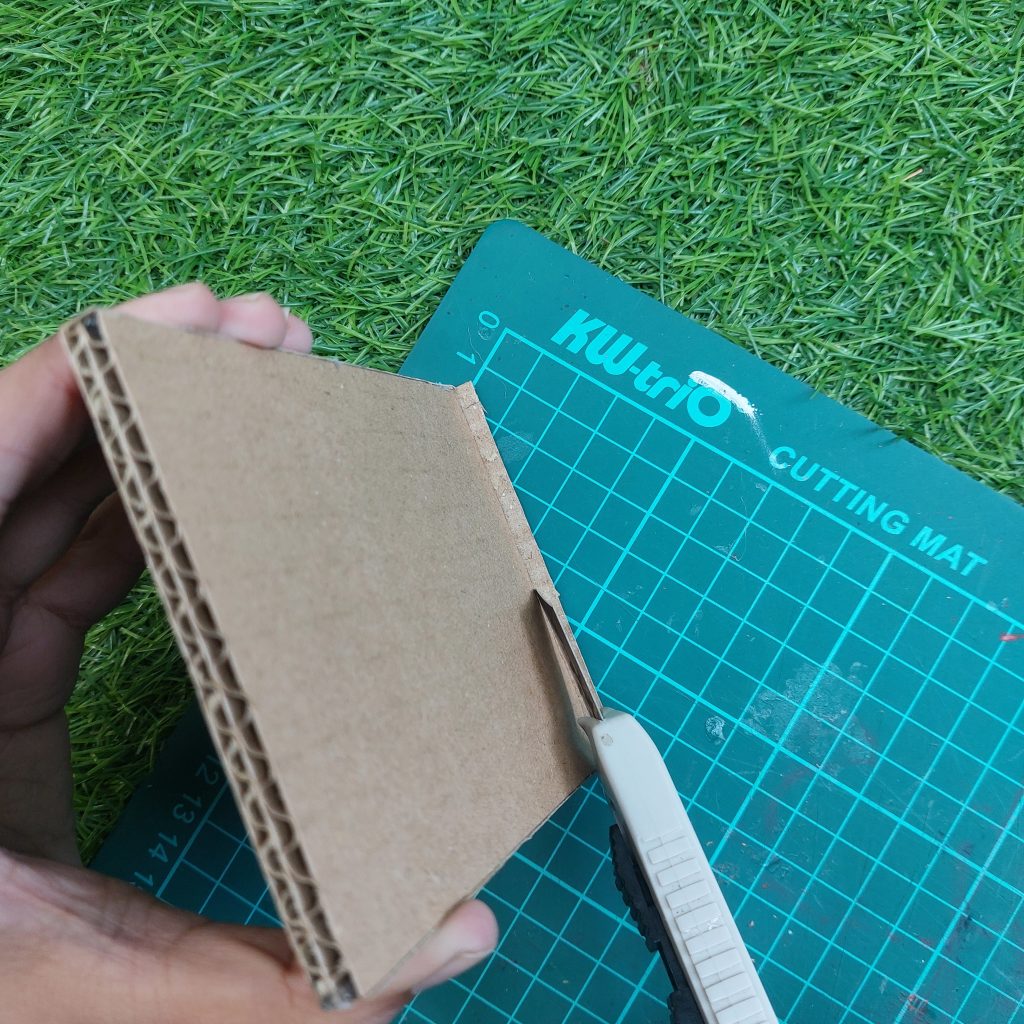
- Here comes the tricky part. Using a ruler as a guide, cut along these border lines, making sure not to cut all the way through the cardboard. You only want to cut through the top paper layer and slightly into the corrugated core.

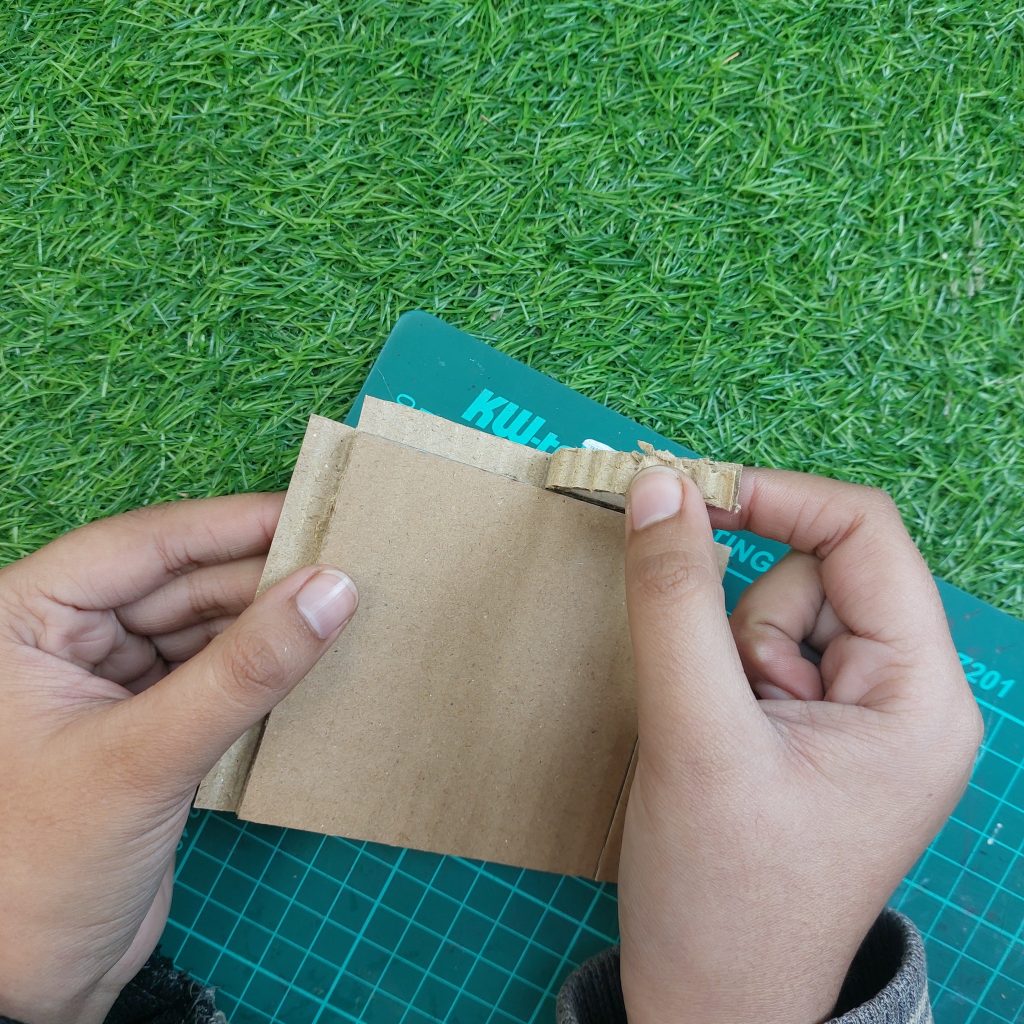
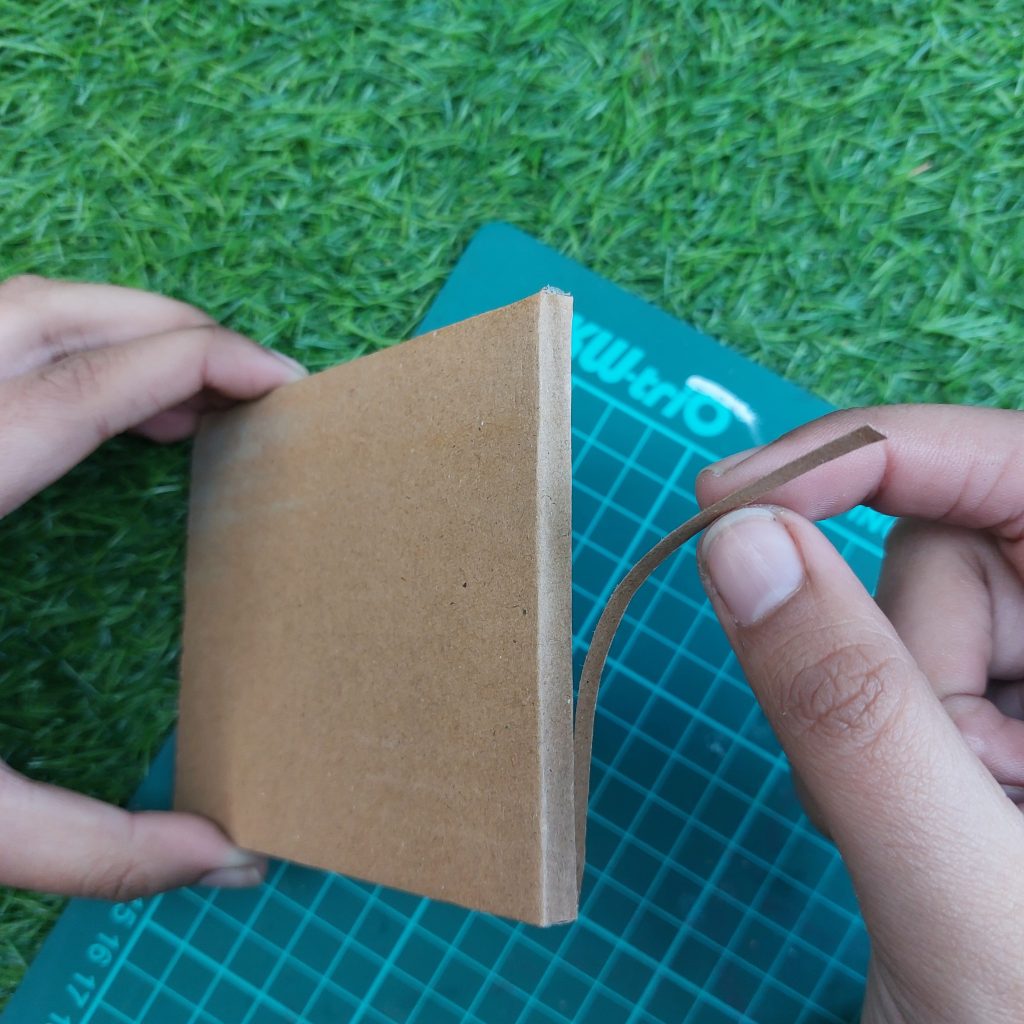
- Peel away the cut strip to remove the top paper layer and part of the corrugated core. This creates a recessed edge around the panel.
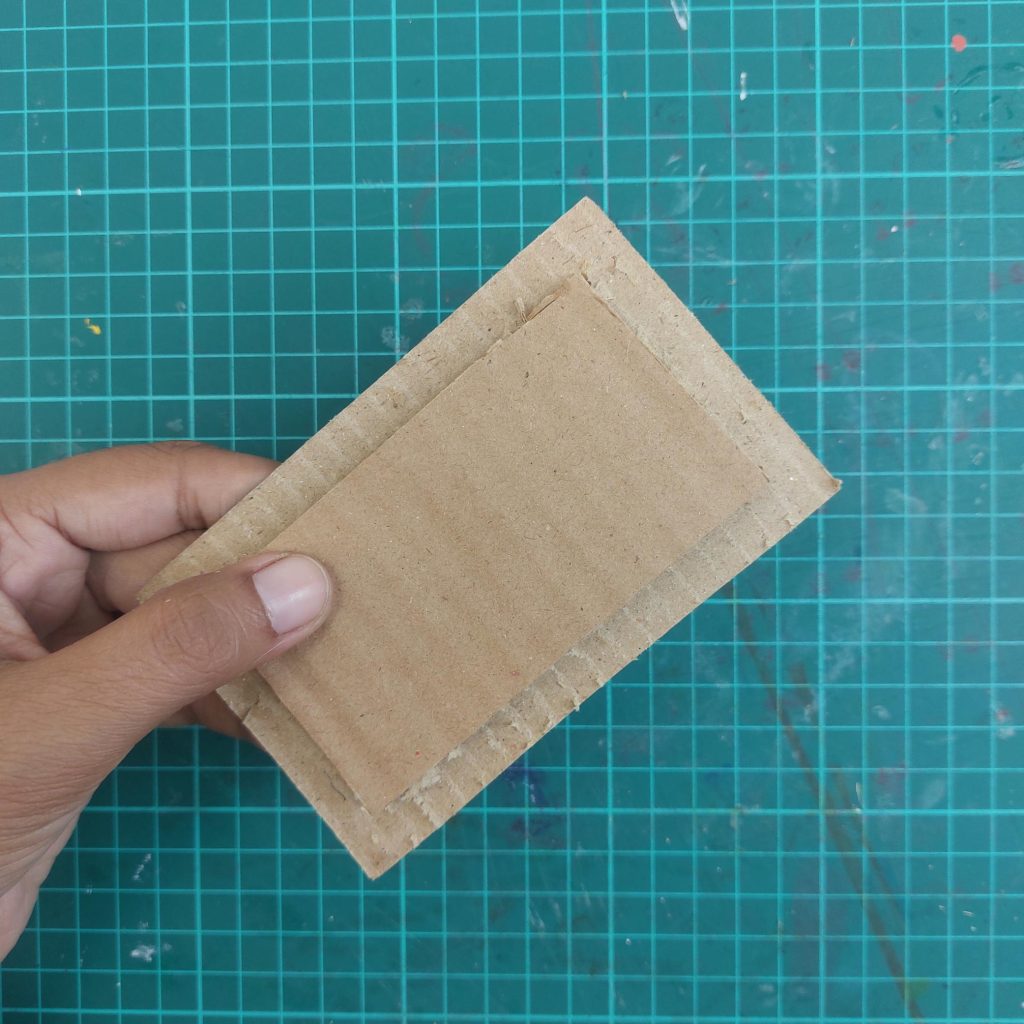
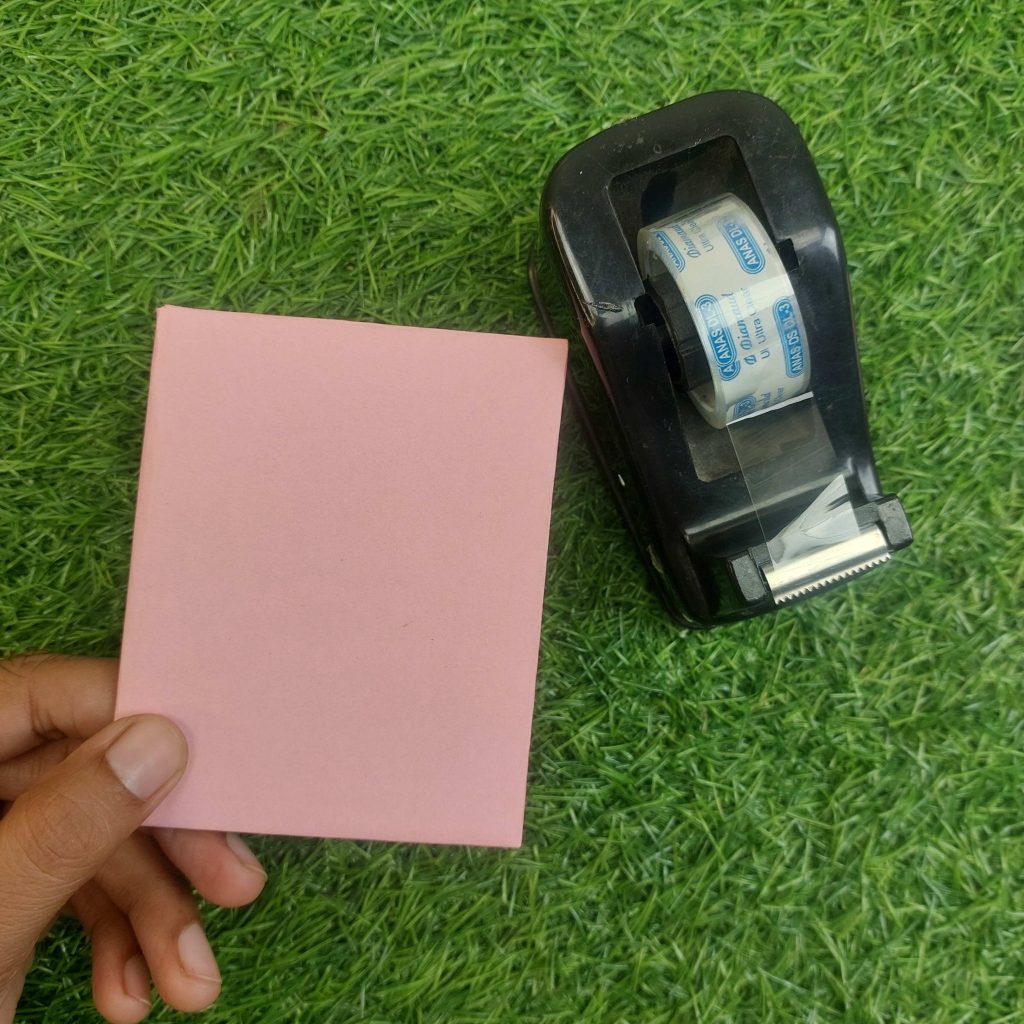
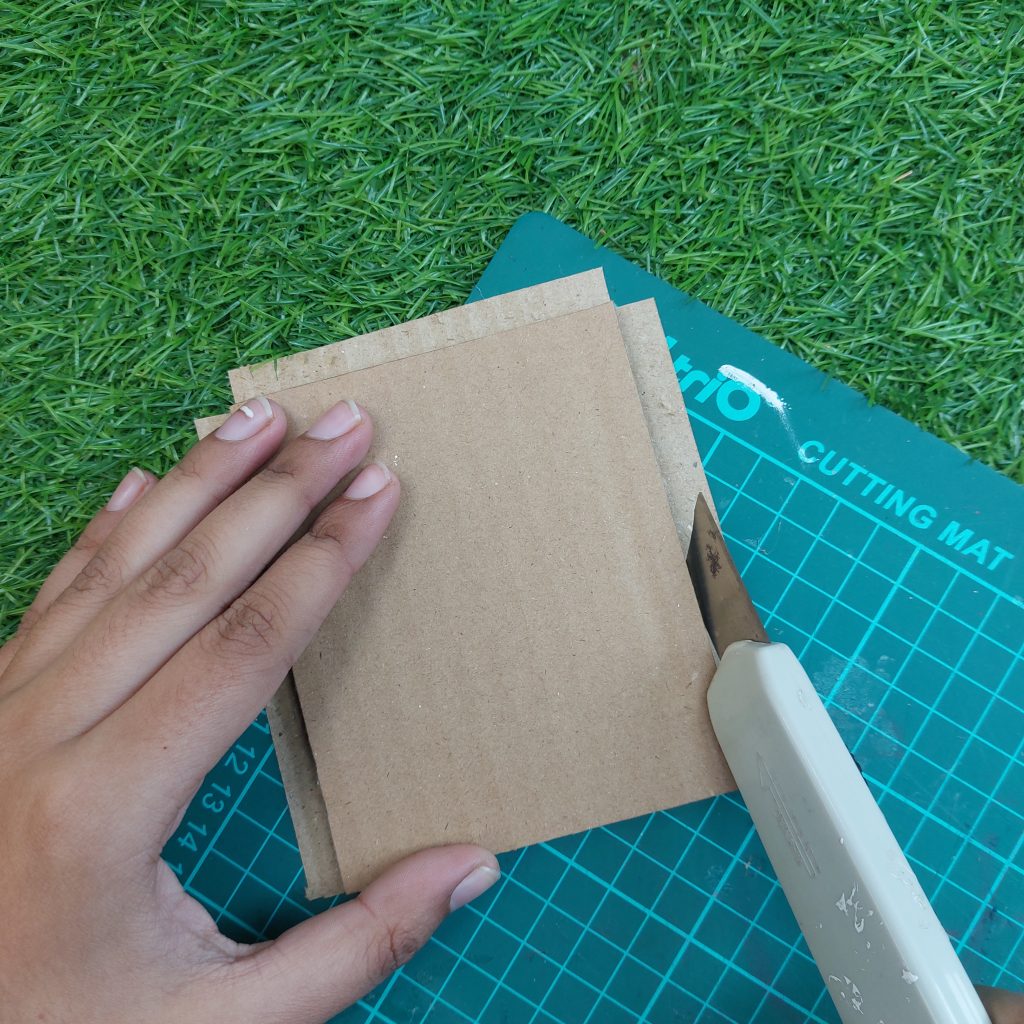
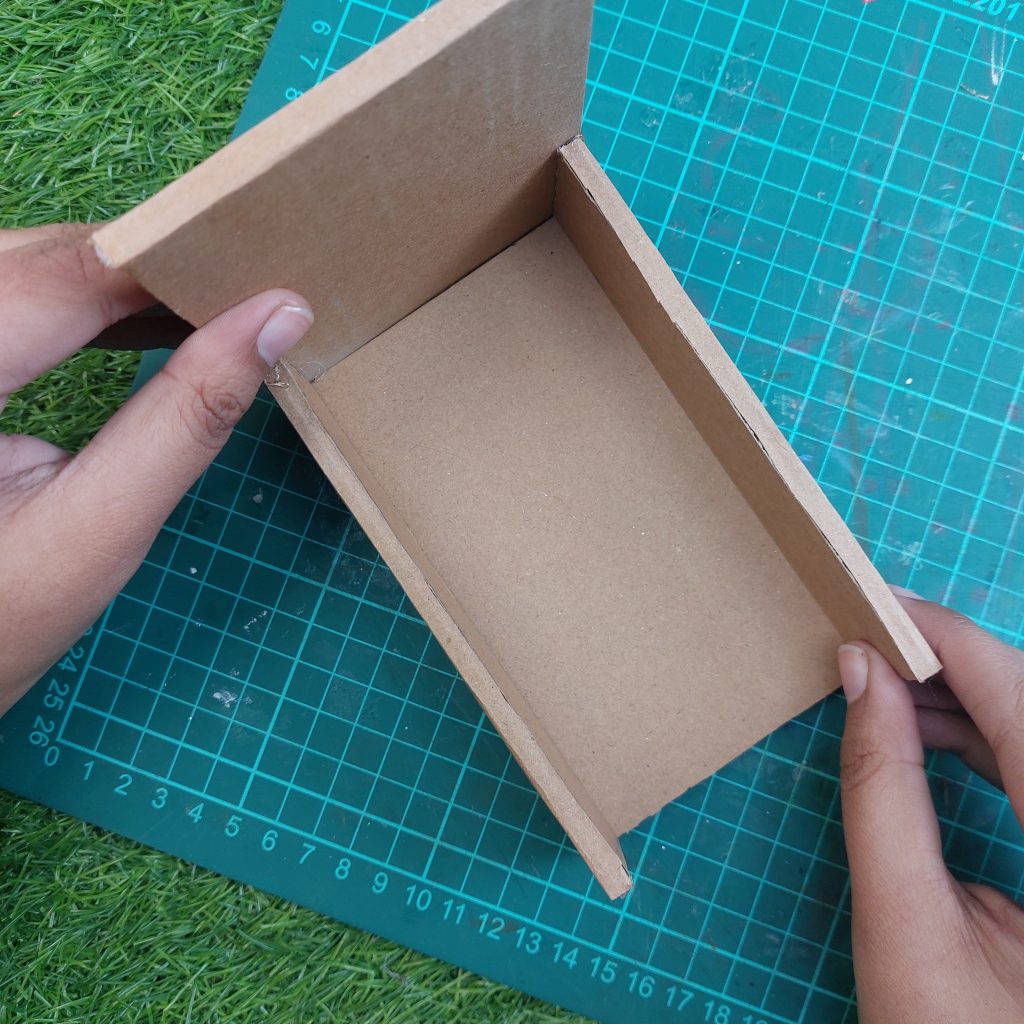
- Glue the edges to the borders, pressing firmly so the tabletop becomes neatly ‘finished’.
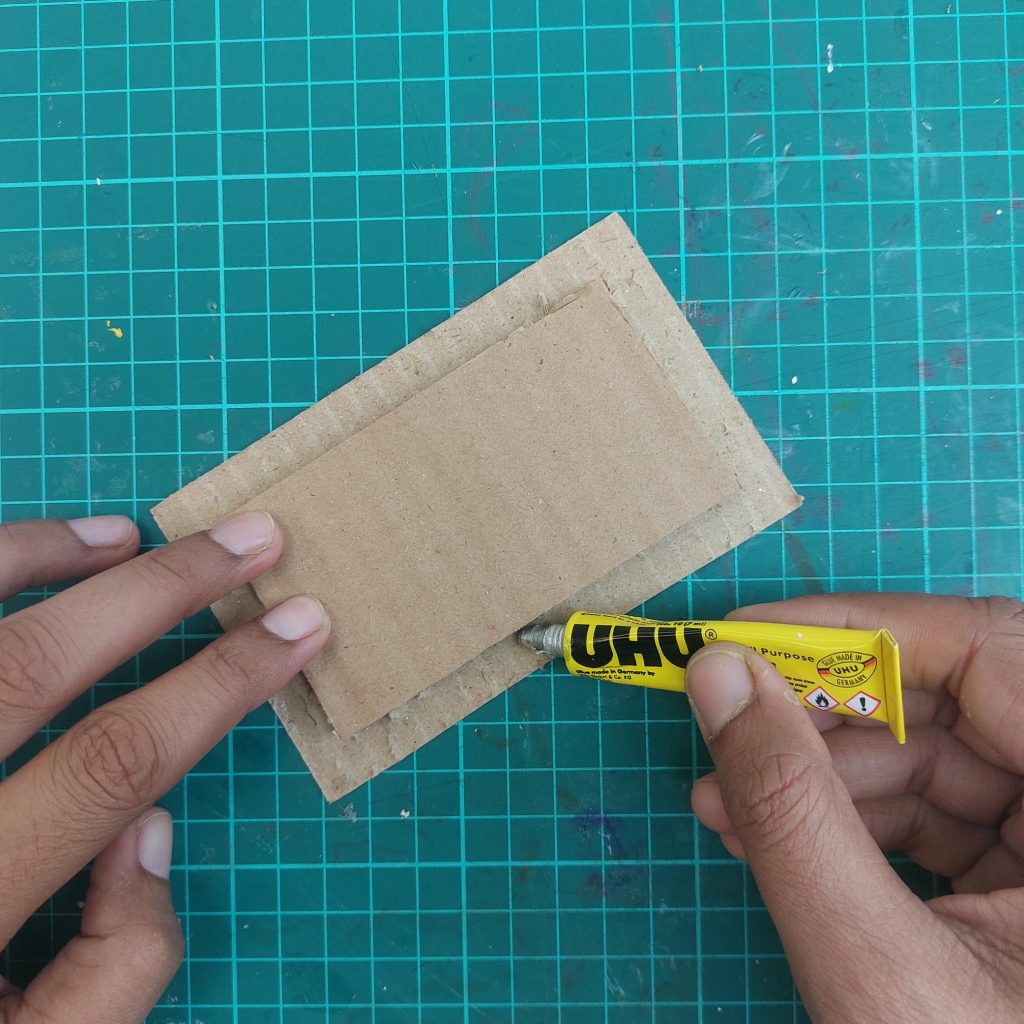
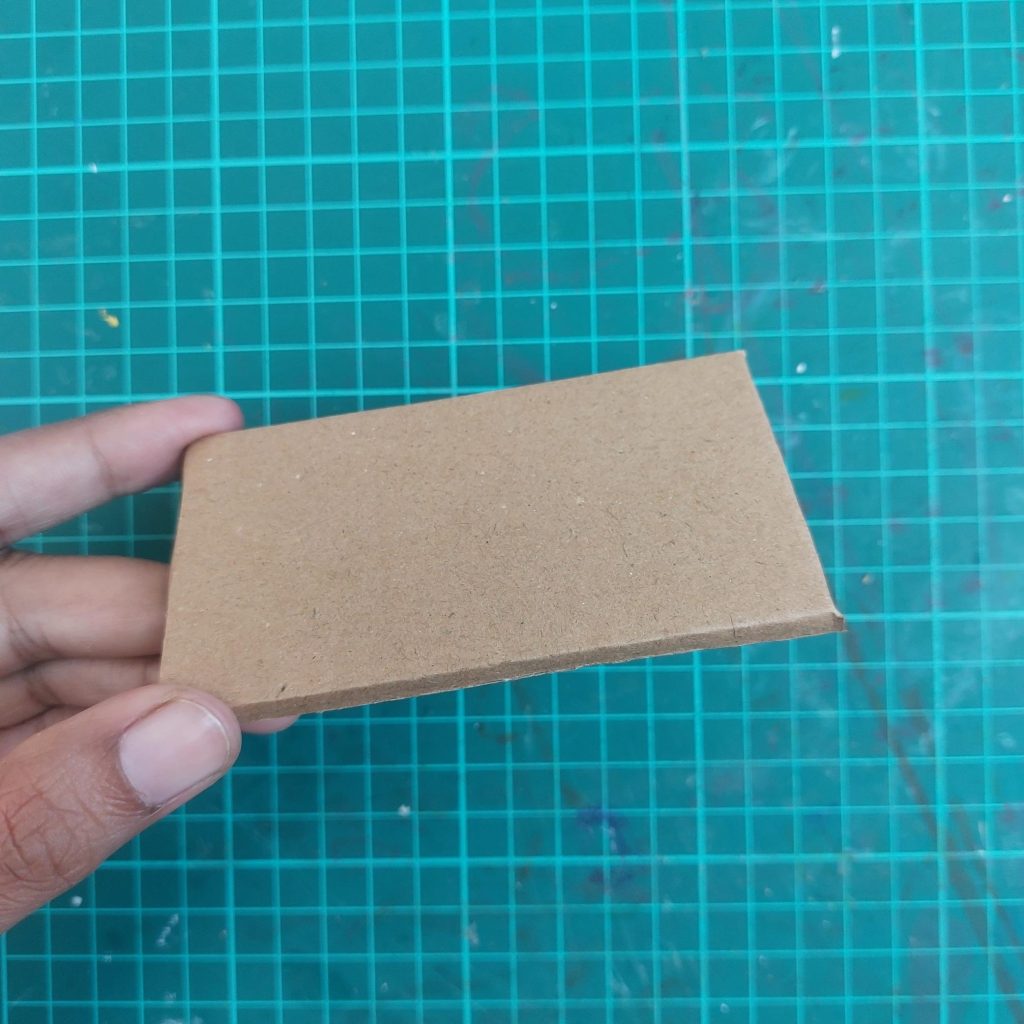
This looks neat and tidy, no?
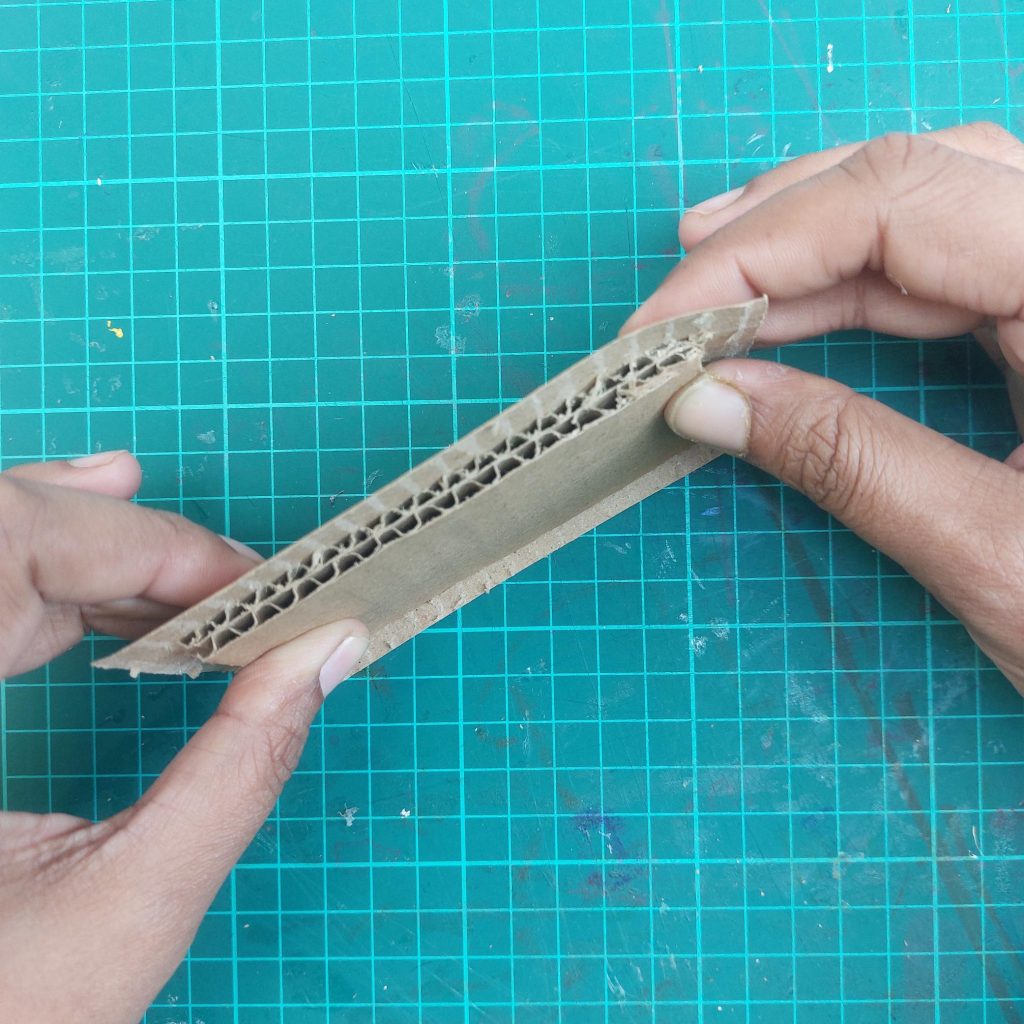
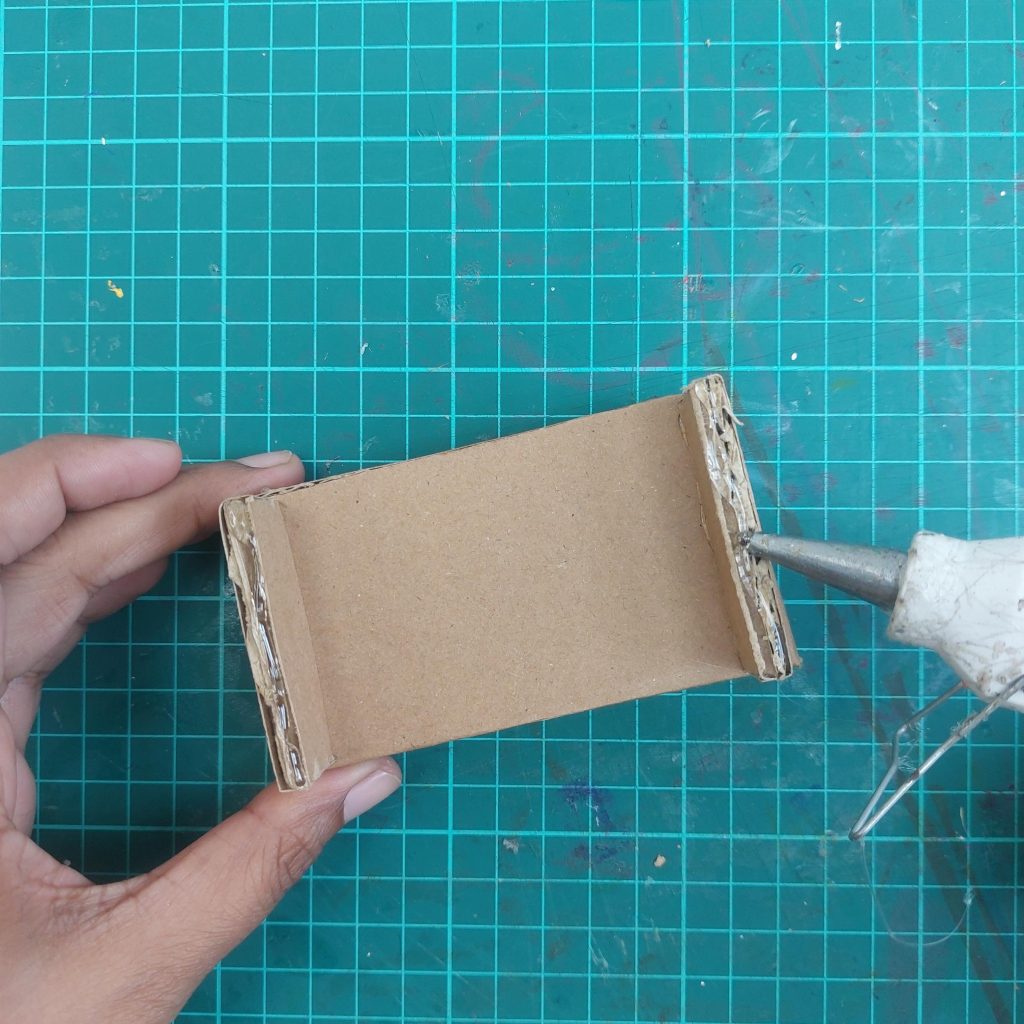
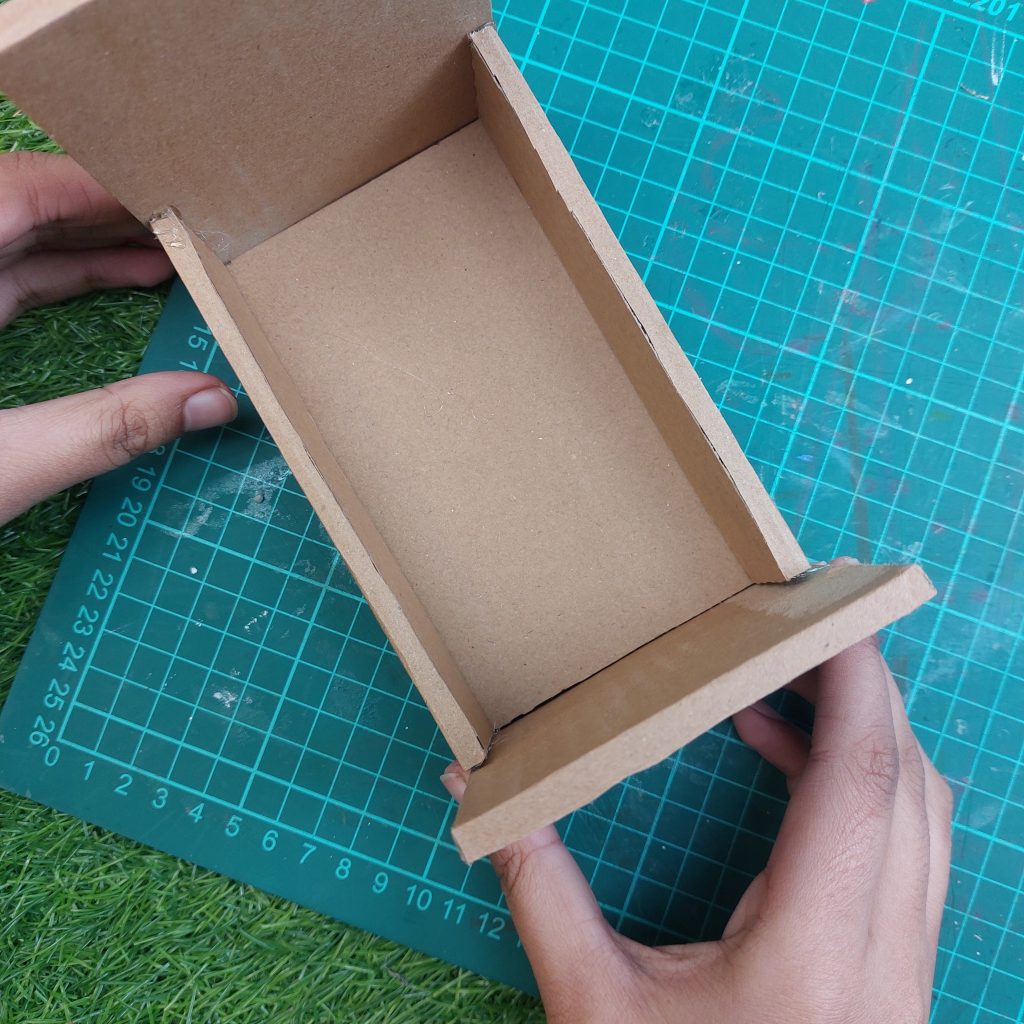
- Cut four strips measuring 1.5 × 7.5 cm. These will be used as the table legs/supports.
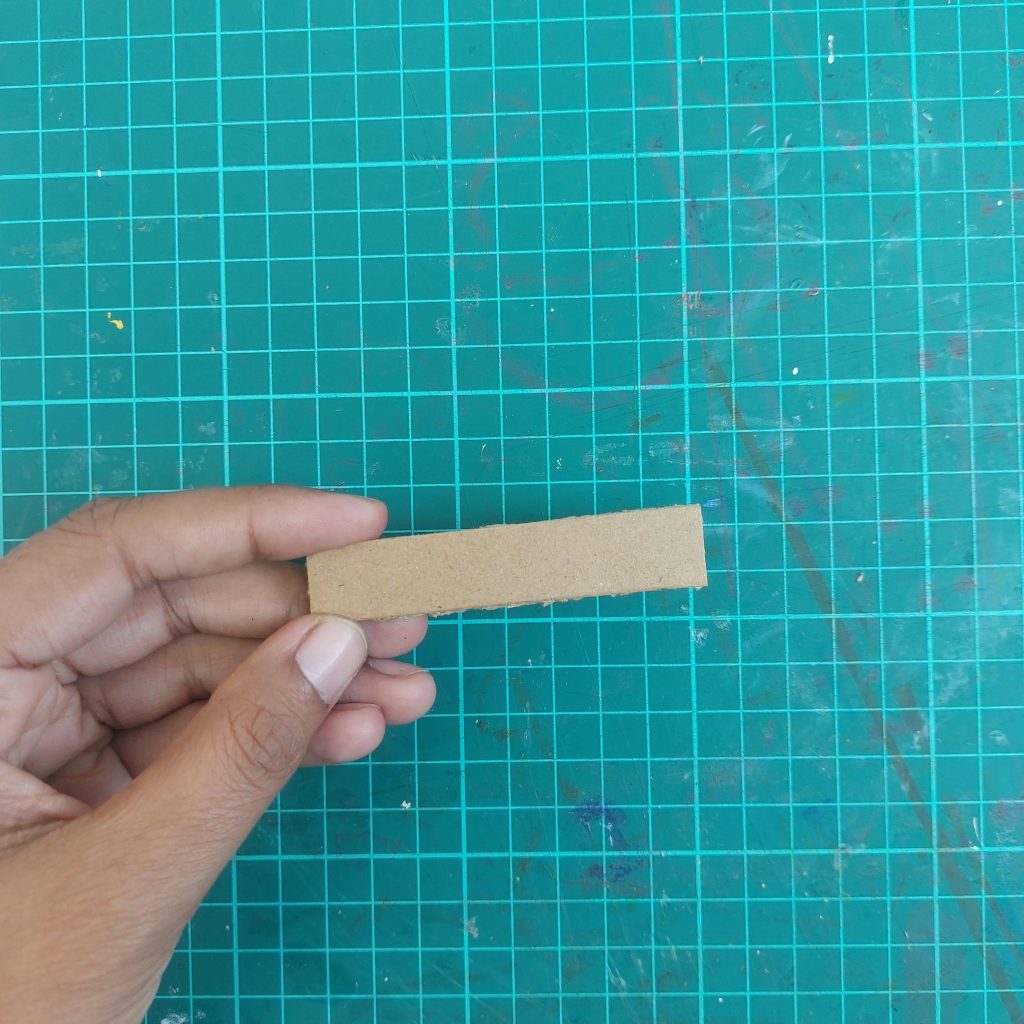
Make sure they are consistent in size.
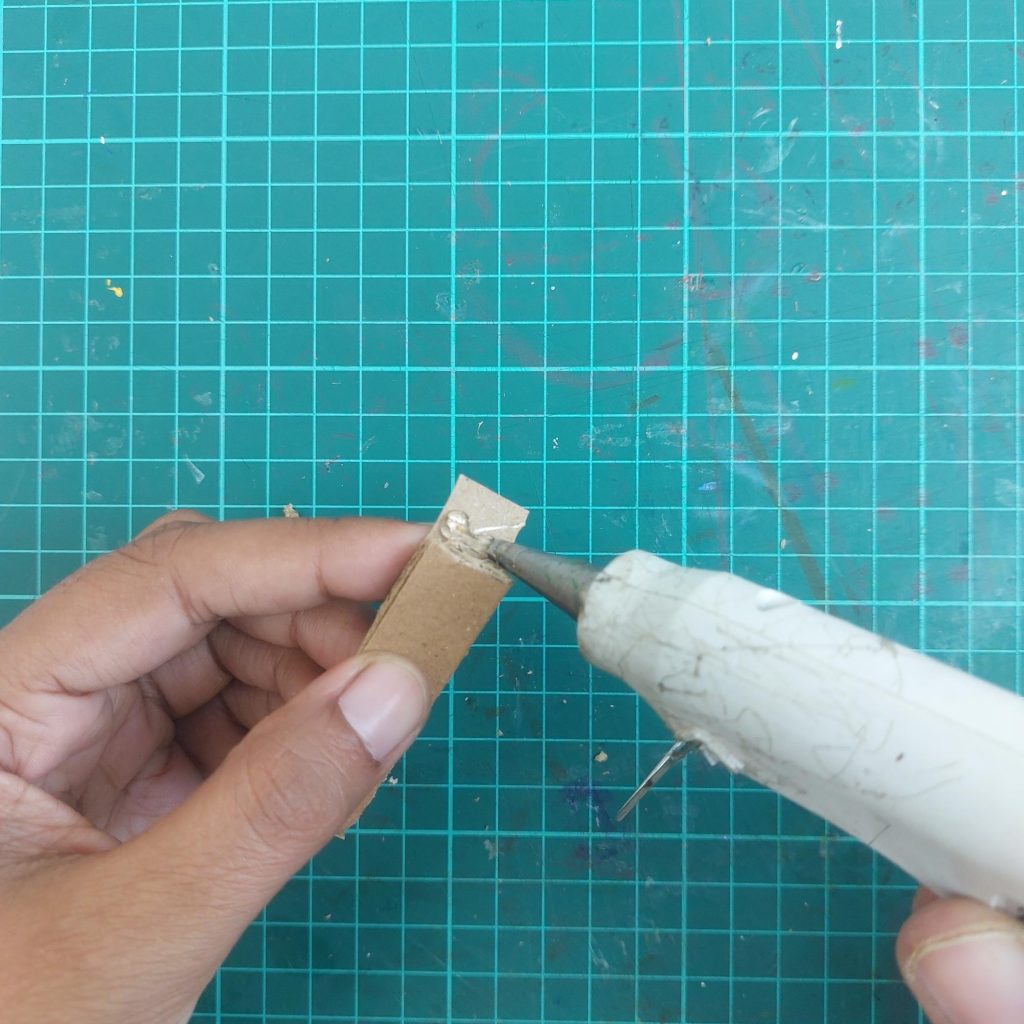
- At both ends of each strip, carefully remove some of the corrugated core again, as you did with the tabletop, to flatten the ends.
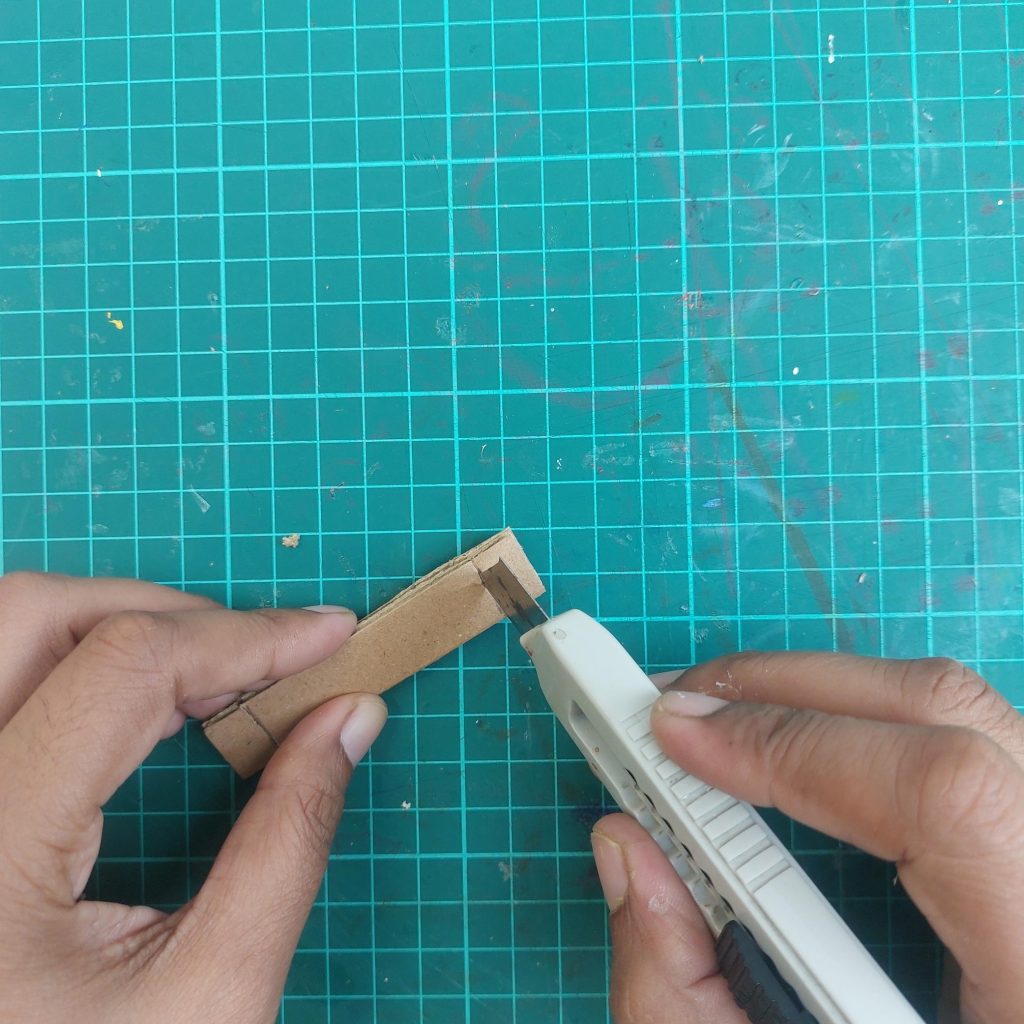
Apply glue to those ends again and bend the paper over the legs to make them look nice again.
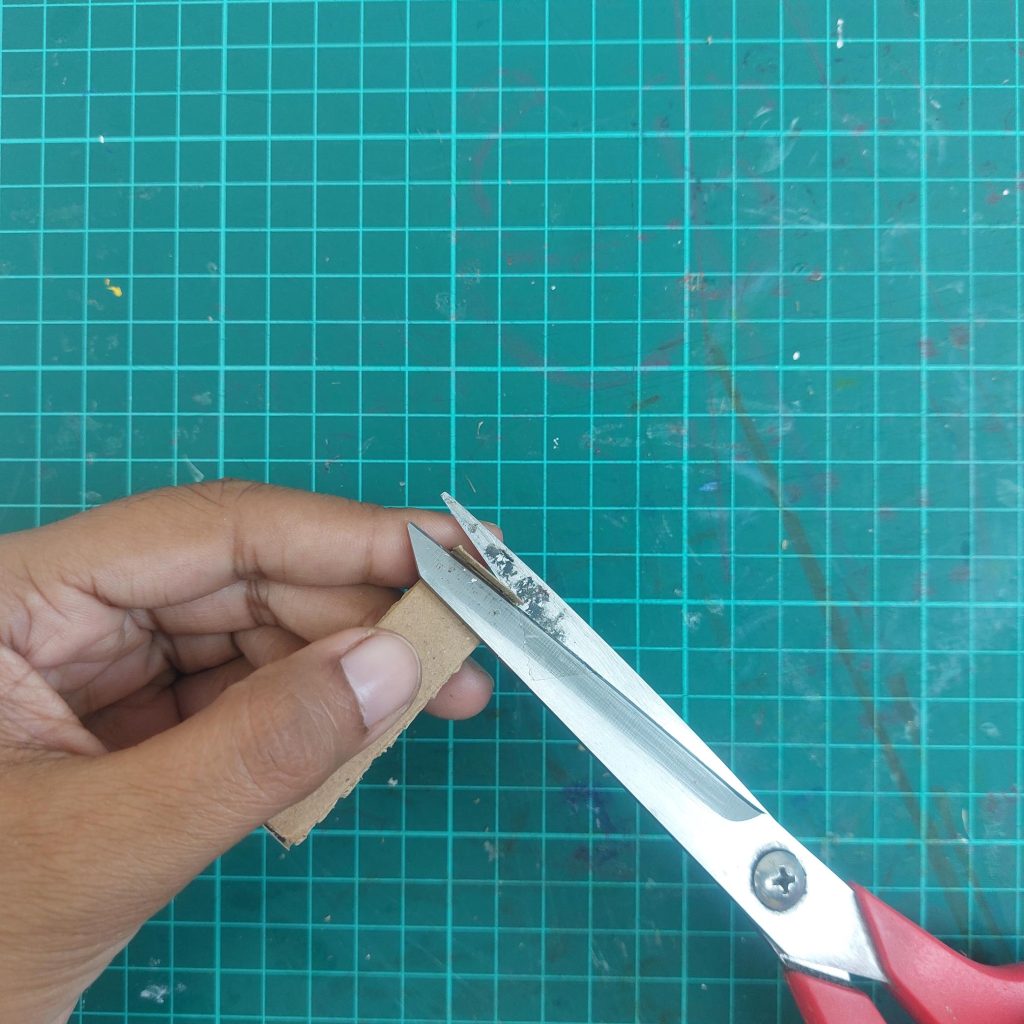
Trim away any excess glue and clean up the edges of the supports.
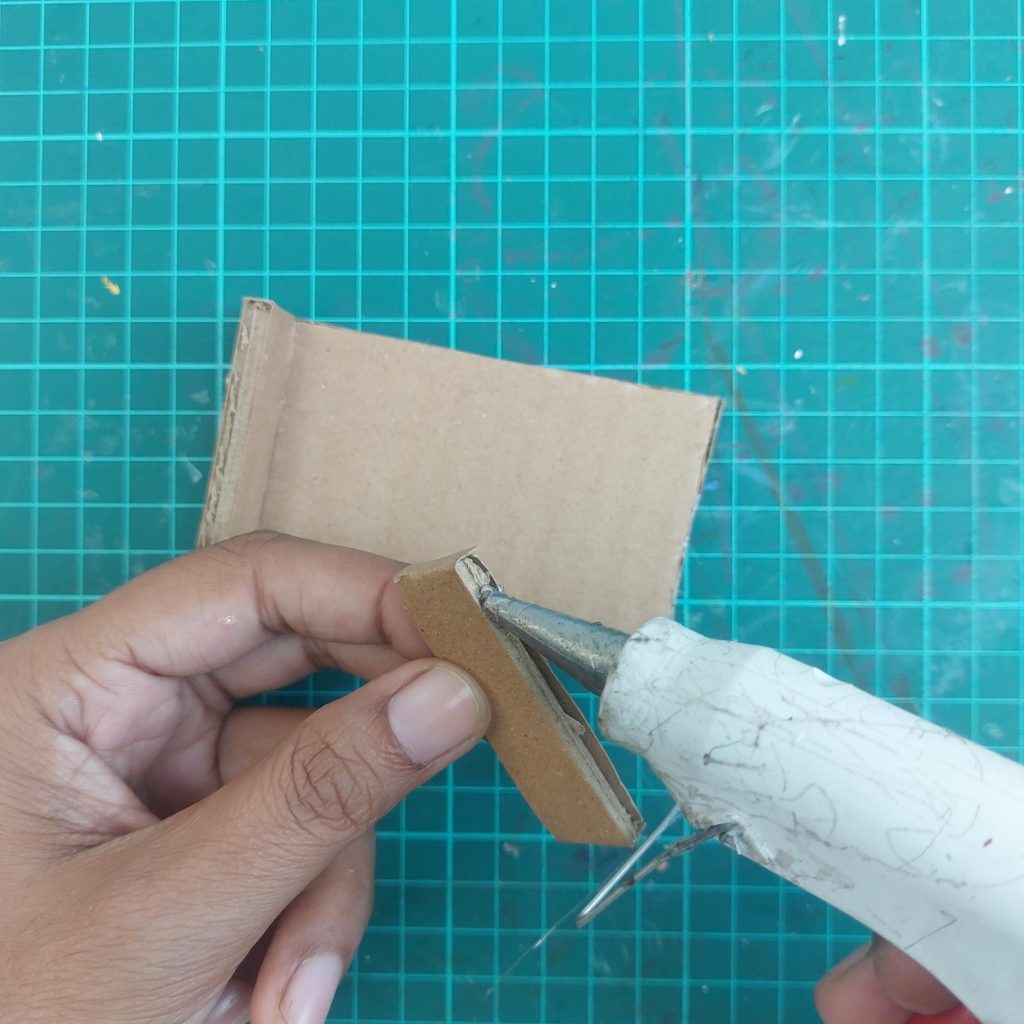
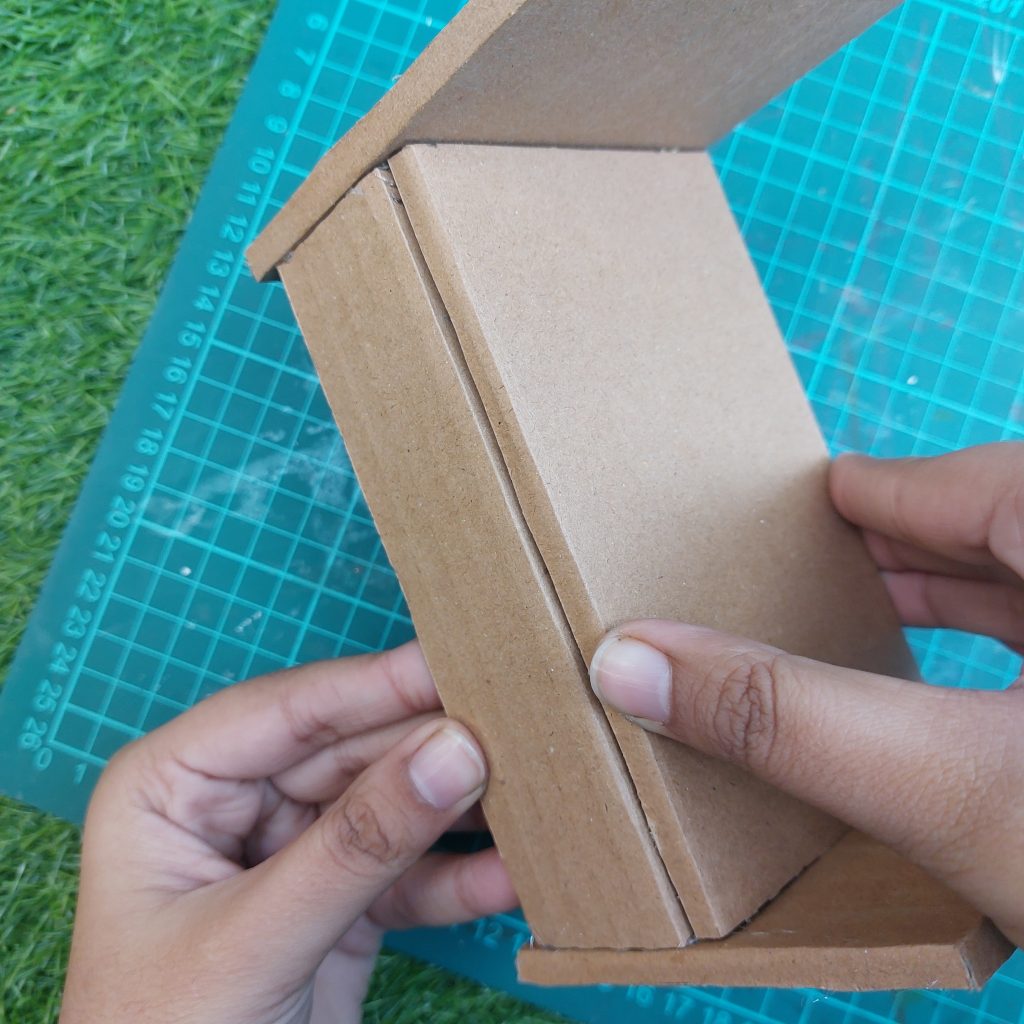
- Glue two of these support pieces under the tabletop, positioning them near the short edges and keeping them aligned.
- Glue the remaining two supports under the second 7.5 × 12 cm panel to form the base for the lower shelf.
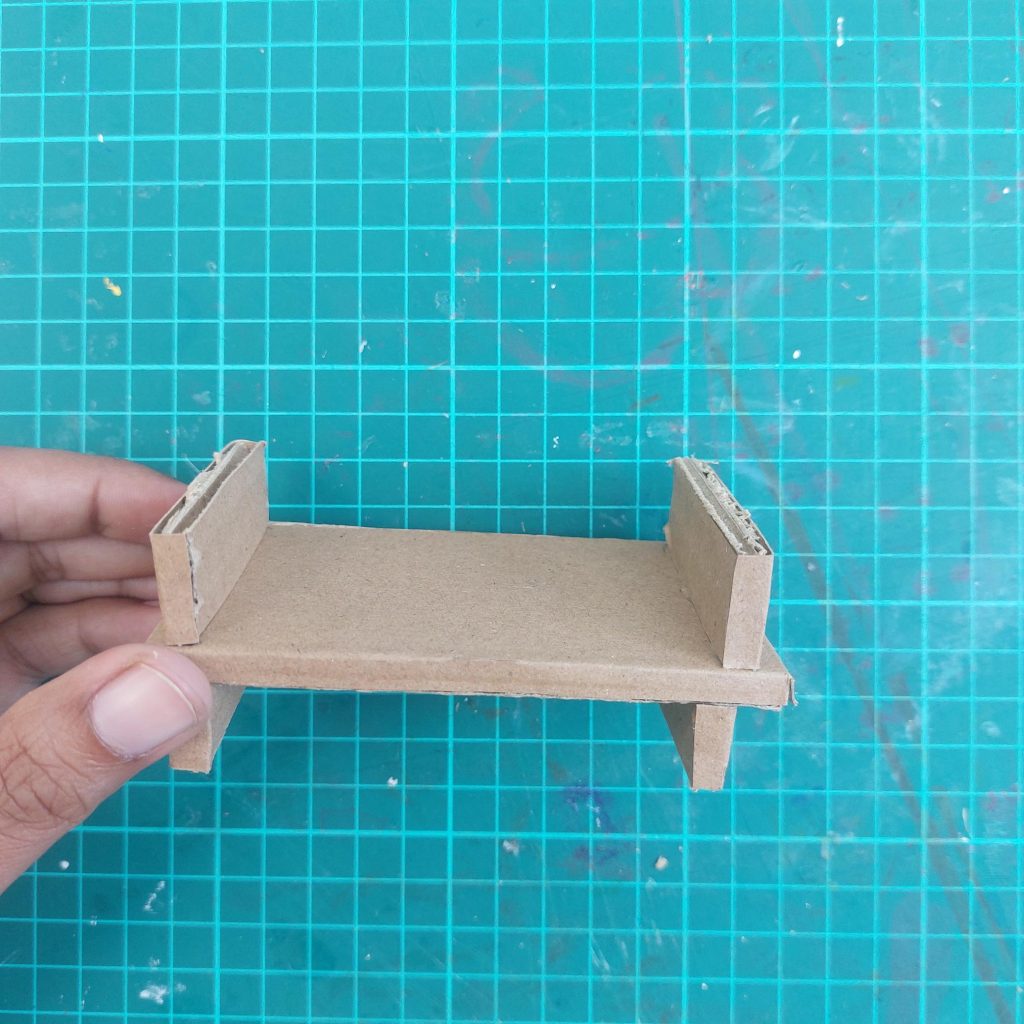
- Apply glue on top of the supports and carefully place the second tabletop structure on top, aligning everything so the table sits level.
Press gently and allow the glue to dry completely.
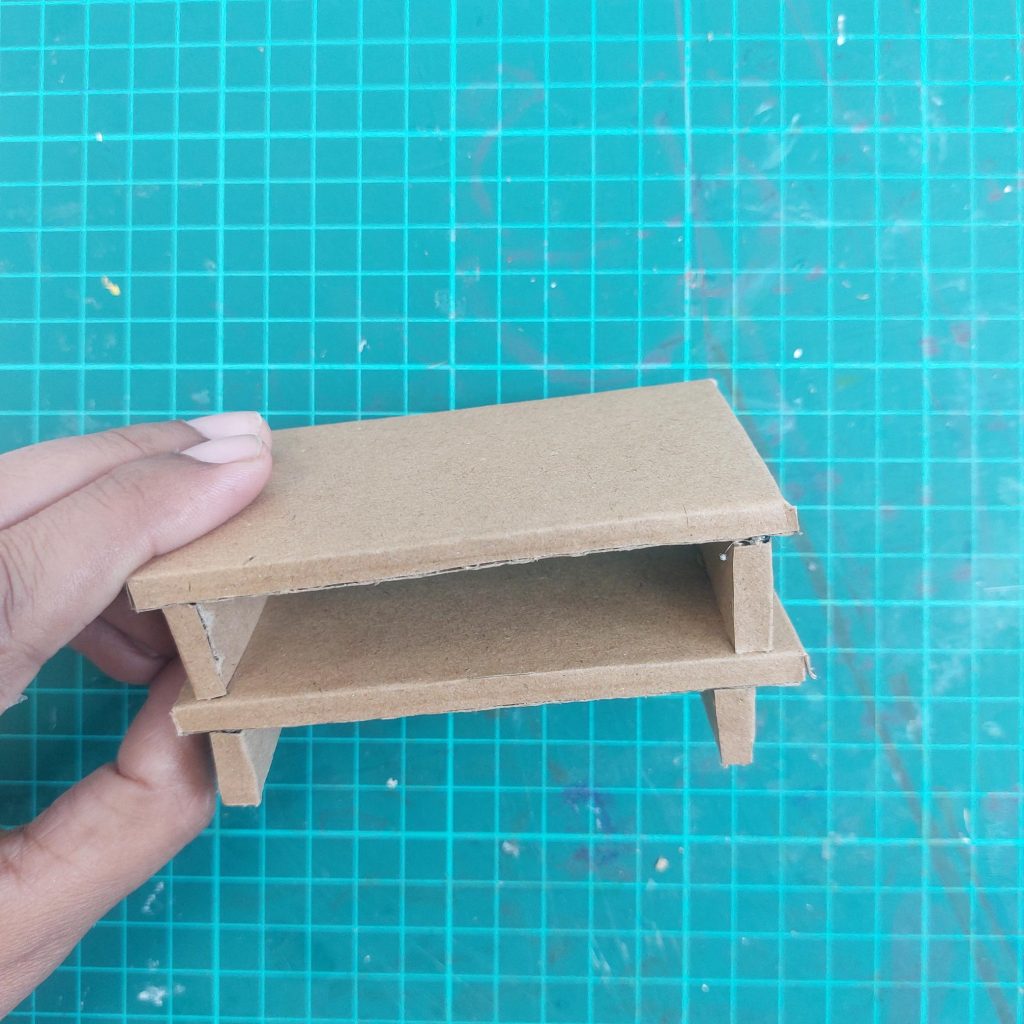
Trim any uneven edges and remove glue strings. The basic cardboard coffee table is now finished and ready for sealing, painting, or covering with a finish of your choice.

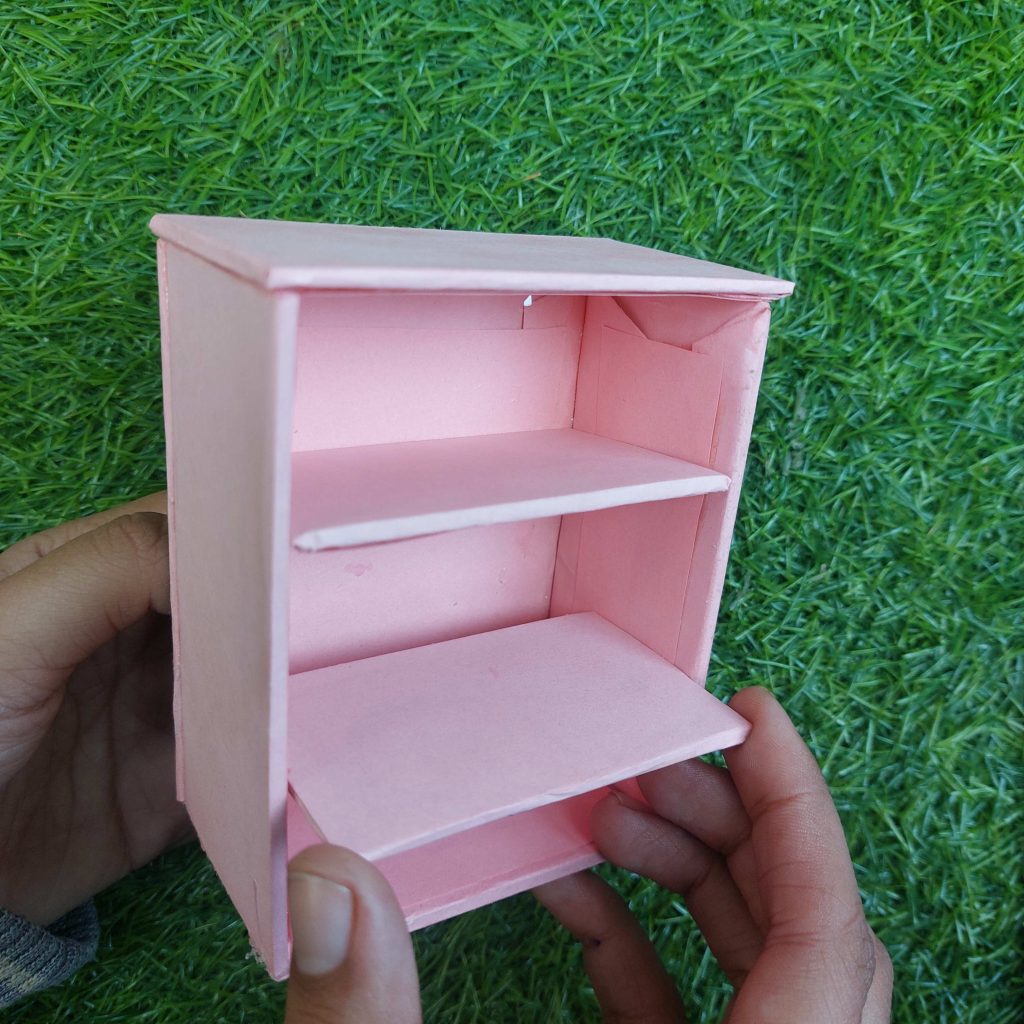
DIY Miniature Cardboard Drawer Cabinet (Coffee Table, Nightstand, or Storage Unit)
For this project, I made a small drawer cabinet from corrugated cardboard. Depending on how you use and finish it, it can work as a coffee-table-style storage piece, a bedside cabinet, or a small drawer unit in a dollhouse.
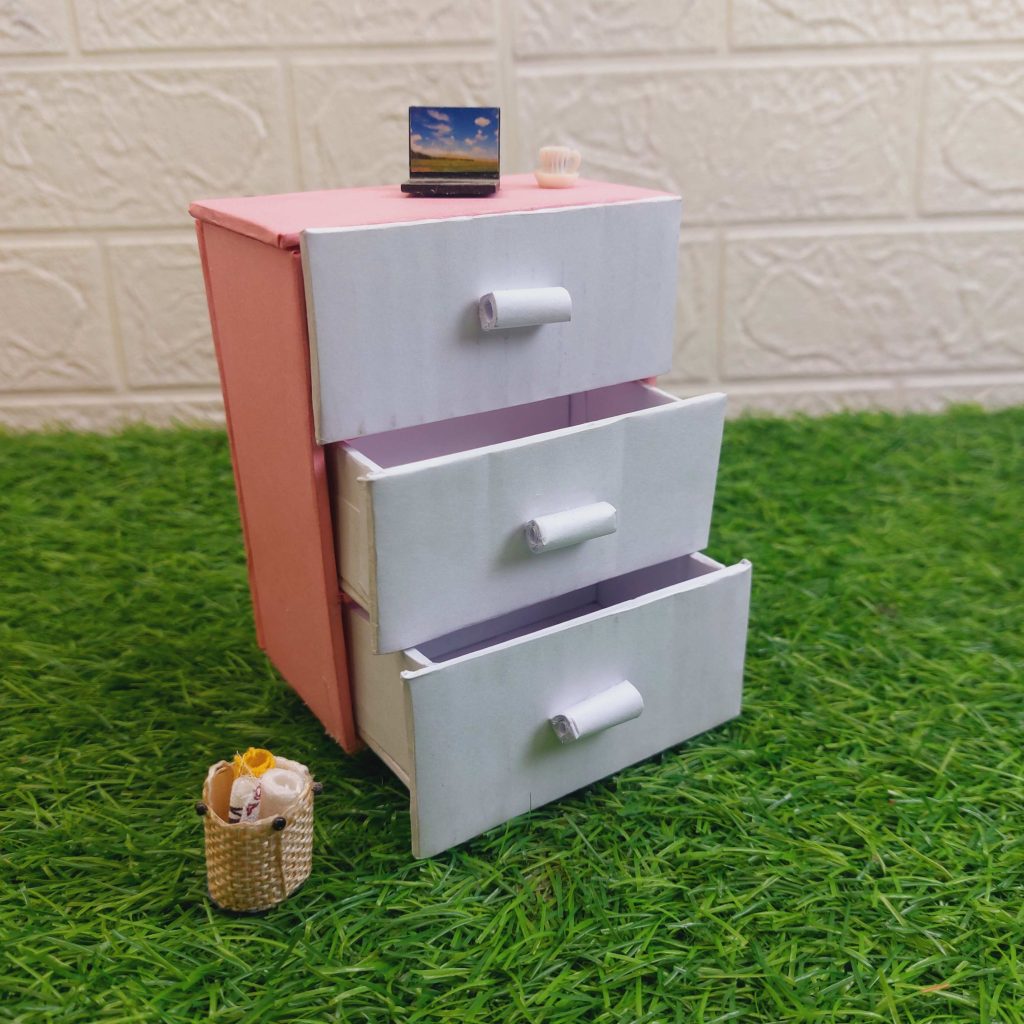
The focus is on building a sturdy structure and simple drawers using layered cardboard and paper.
Materials Used
- Corrugated cardboard
- Thin cardstock or paper (for covering and finishing)
- Craft knife
- Ruler
- Pencil
- Strong craft glue or UHU-style glue
- Double-sided tape (optional, for cleaner edges)
- Scrap paper (for drawer handles)
Step-by-Step Tutorial
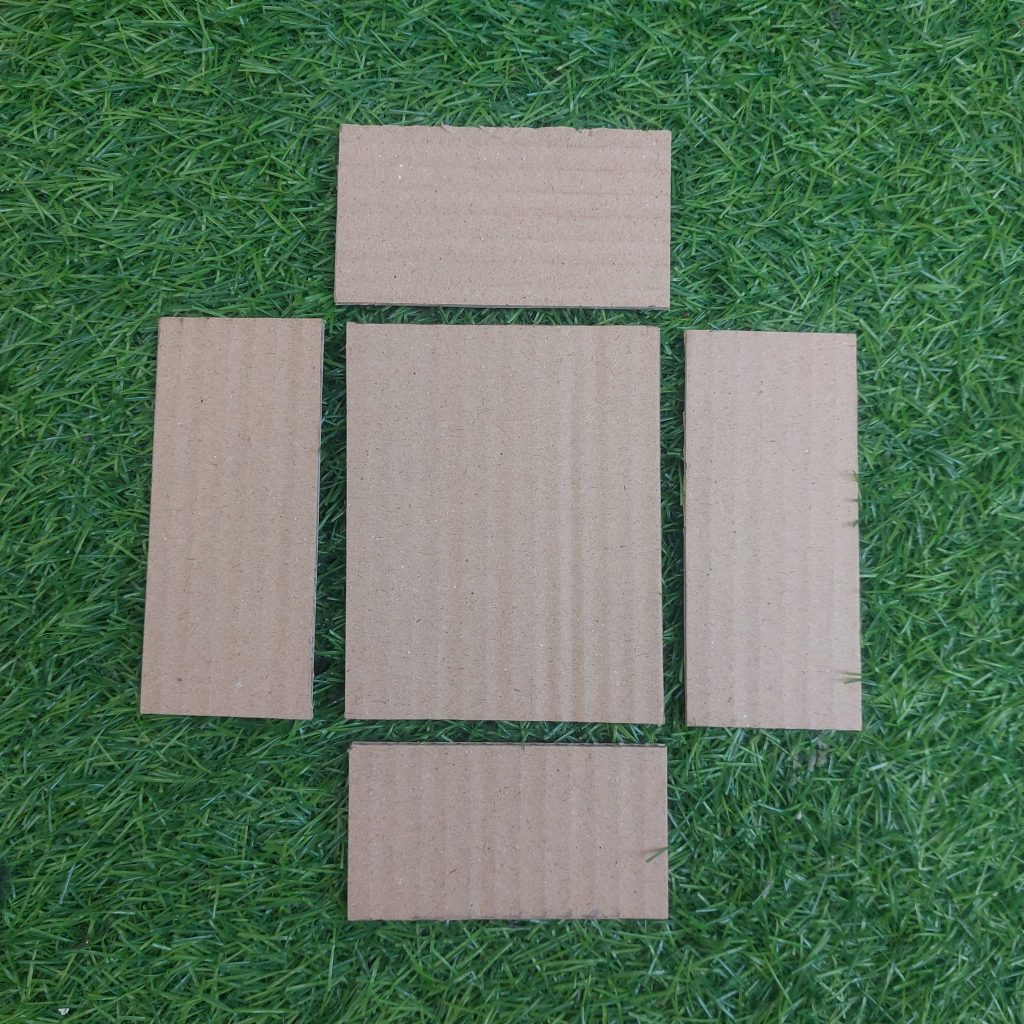
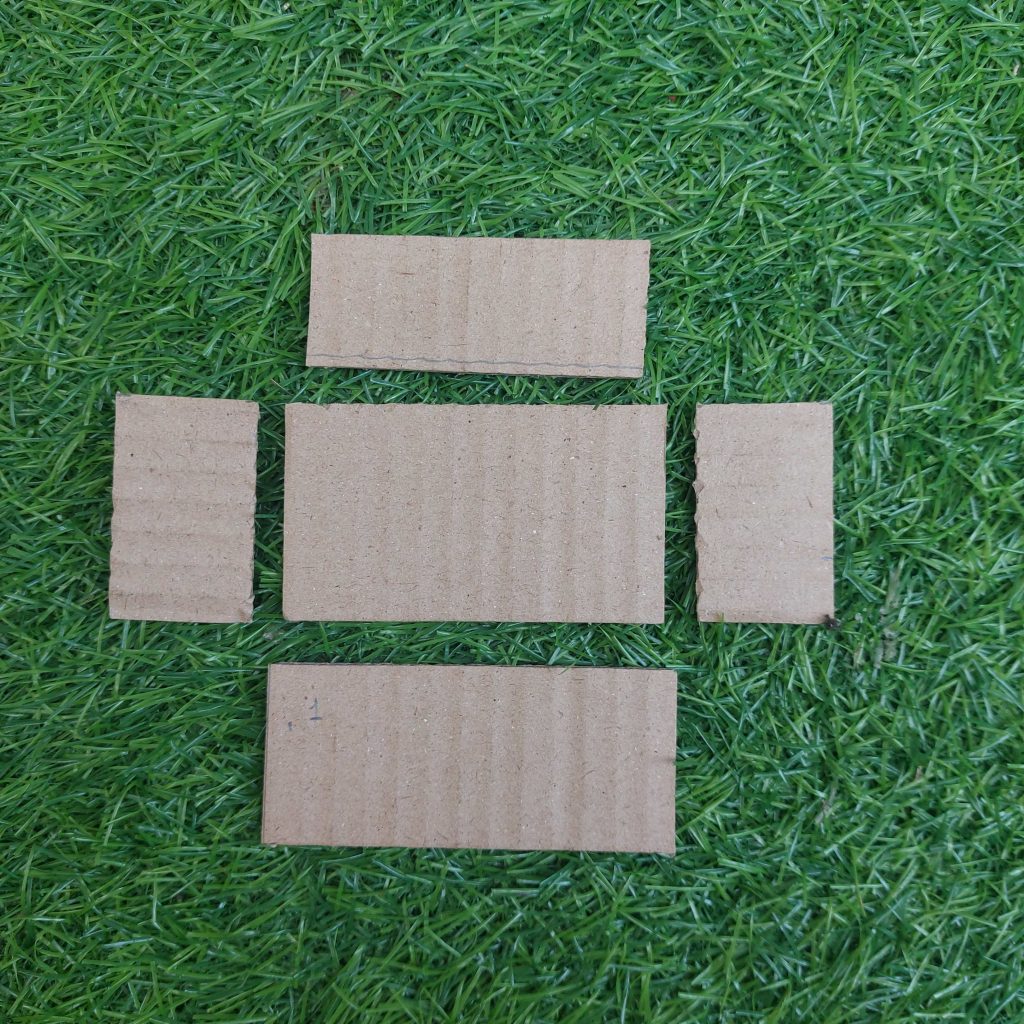
- Cut all the main cabinet pieces from corrugated cardboard: the back, sides, top, bottom, and internal supports. Keep edges as straight as possible.
Body – measurements
- Top: 5 × 9 cm
- Back: 8.5 × 10.5 cm
- Sides: 4.5 × 10.5 cm (2 pieces)
- Base: 4.5 × 8.5 cm
Dry-fit the pieces to check the overall size and alignment before gluing.
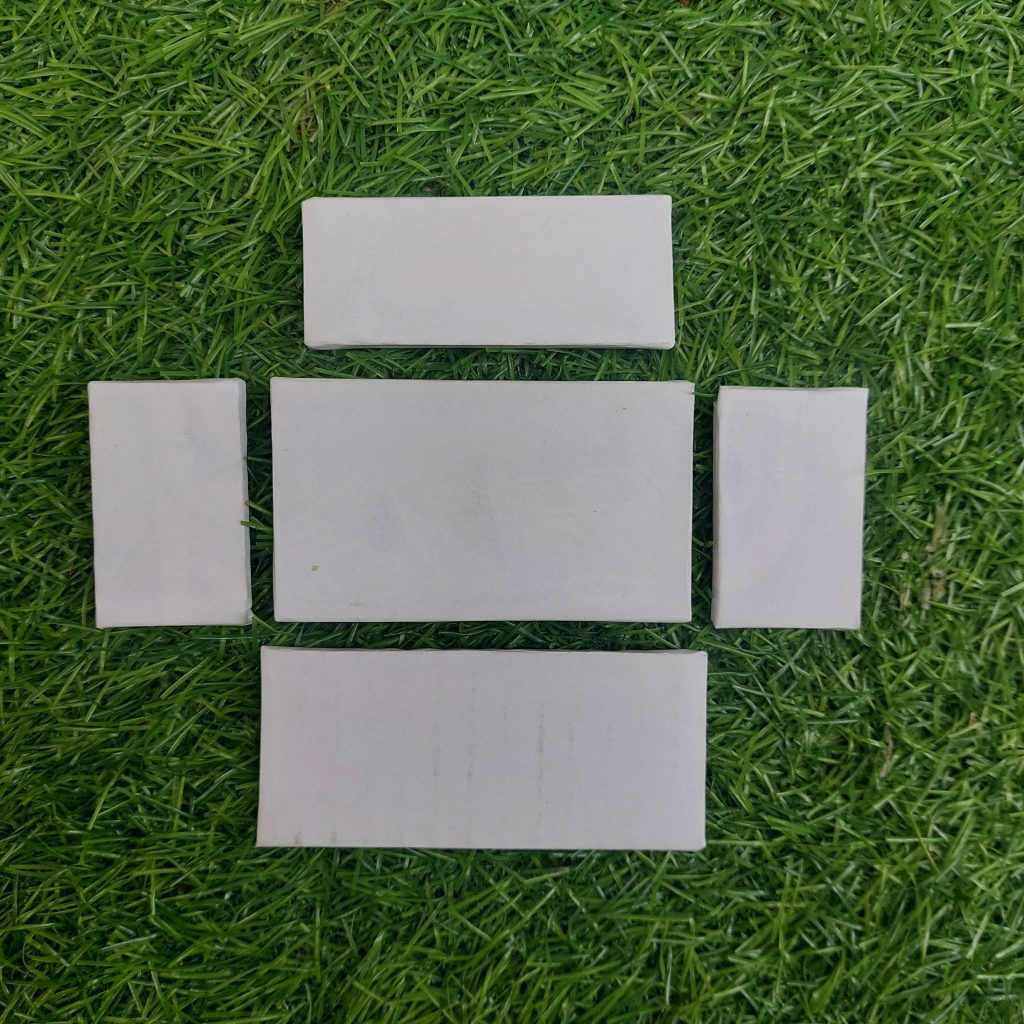
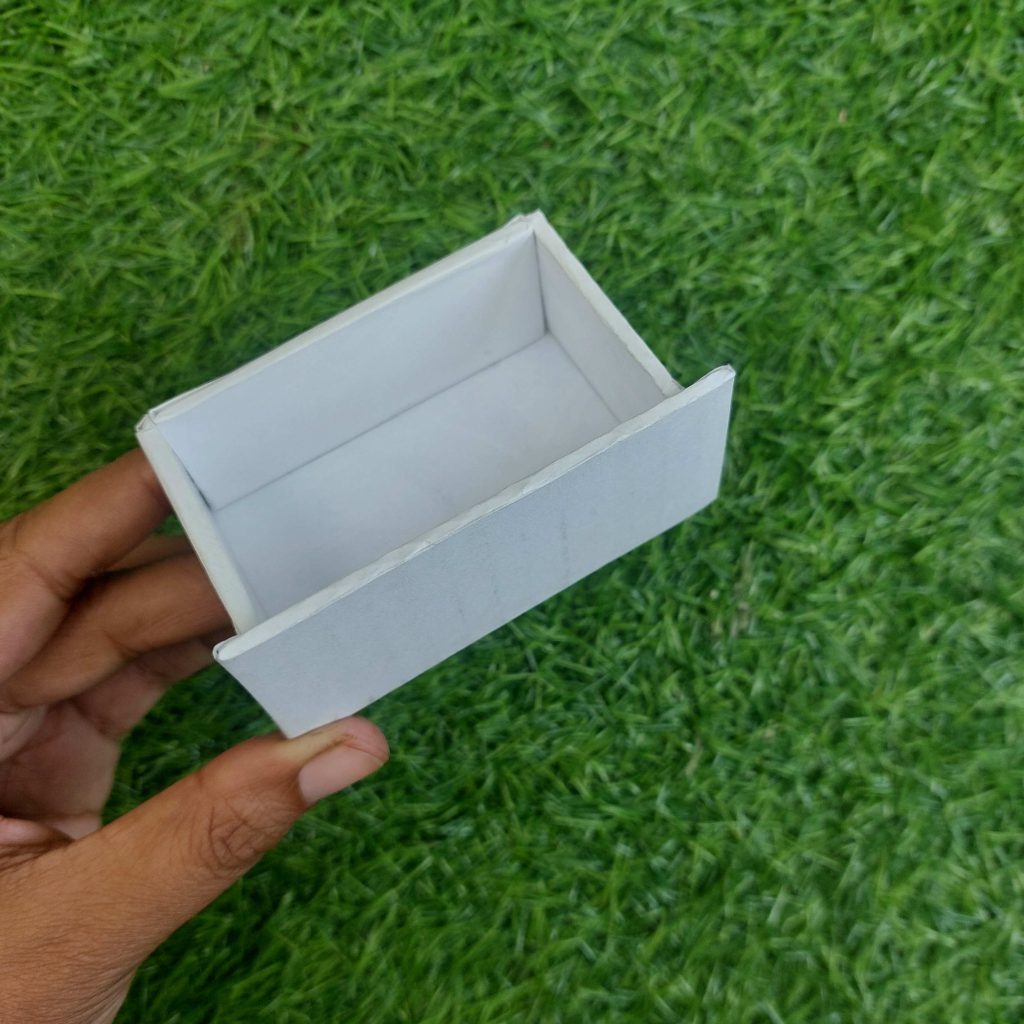
Glue the cardstock side to the back panel, keeping everything square. Add the bottom panel and let it set.
Glue the top panel in place, reinforcing the inside seams with extra glue if needed.
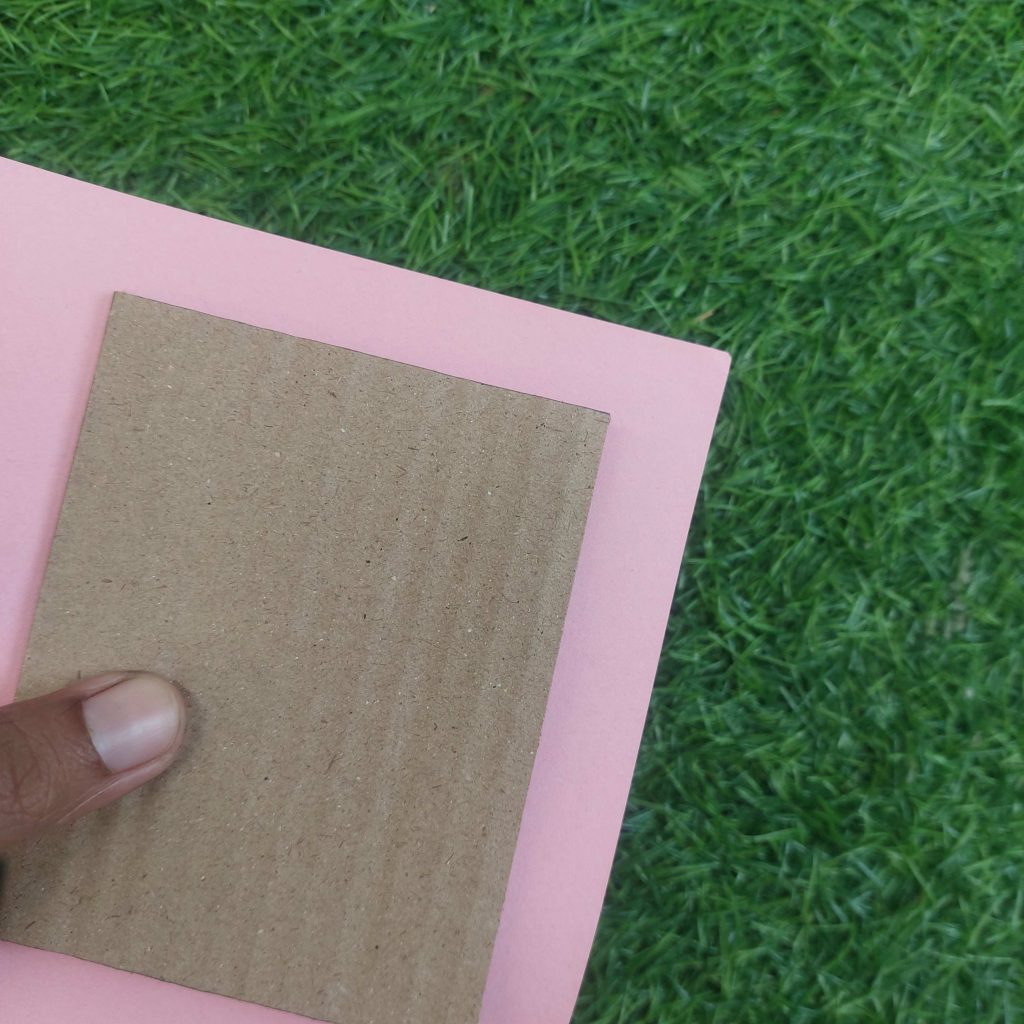
Cover all the pieces in the same with with cardstock paper.
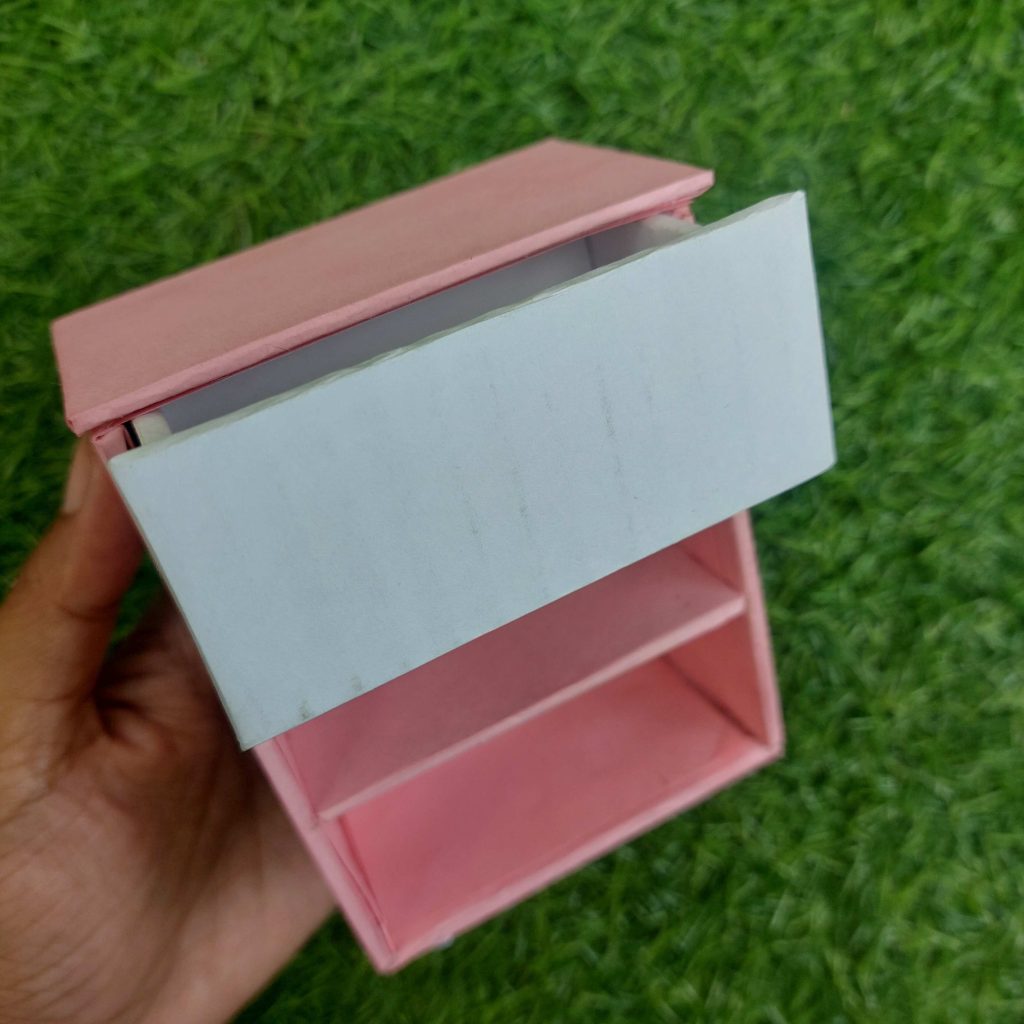
- Assemble the sides and measure and mark where the drawers will sit inside the cabinet. Glue narrow cardboard strips or panels inside to act as supports for each drawer level.
- Cut the drawer boxes from corrugated cardboard. Each drawer consists of a base, two sides, a back, and a front panel.
- Assemble each drawer box and let them dry fully before testing the fit inside the cabinet. Trim slightly if needed.
- Cover the drawer fronts and drawer boxes in the same way, keeping the edges neat. And assemble them as shown in the pictures below.
- Roll small pieces of paper tightly to form simple drawer handles. Secure them with glue and let them dry completely.
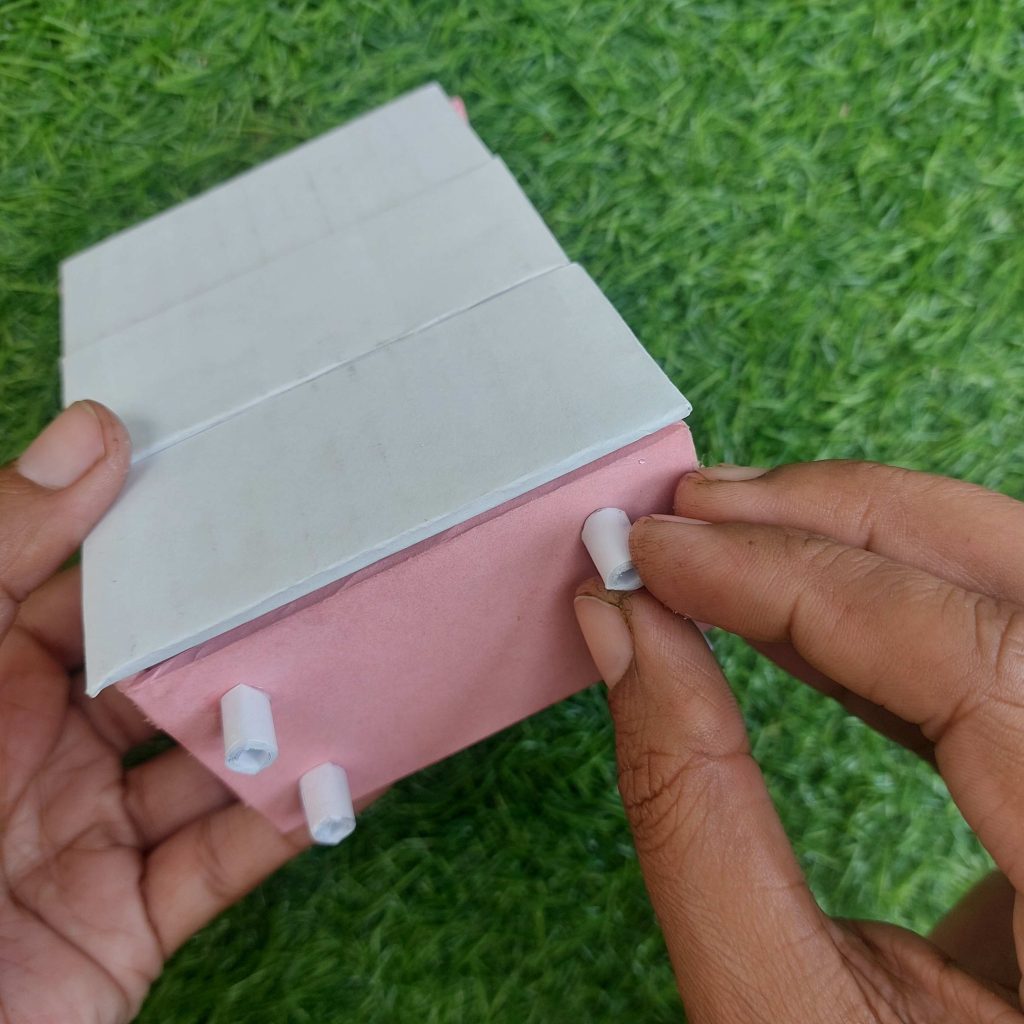
- Glue the handles onto the drawer fronts, making sure they are centered and aligned.
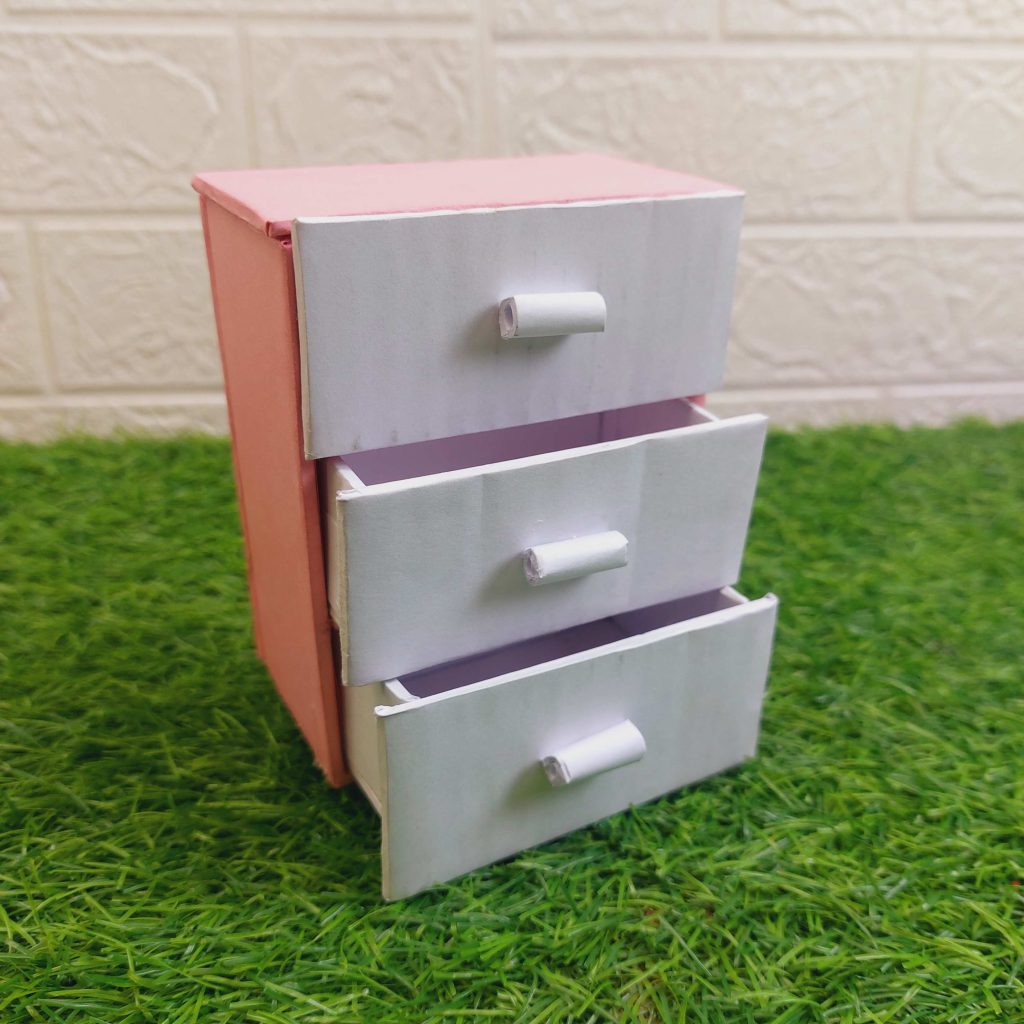
- Slide the drawers into the cabinet and check that they open and close smoothly. Adjust if necessary.
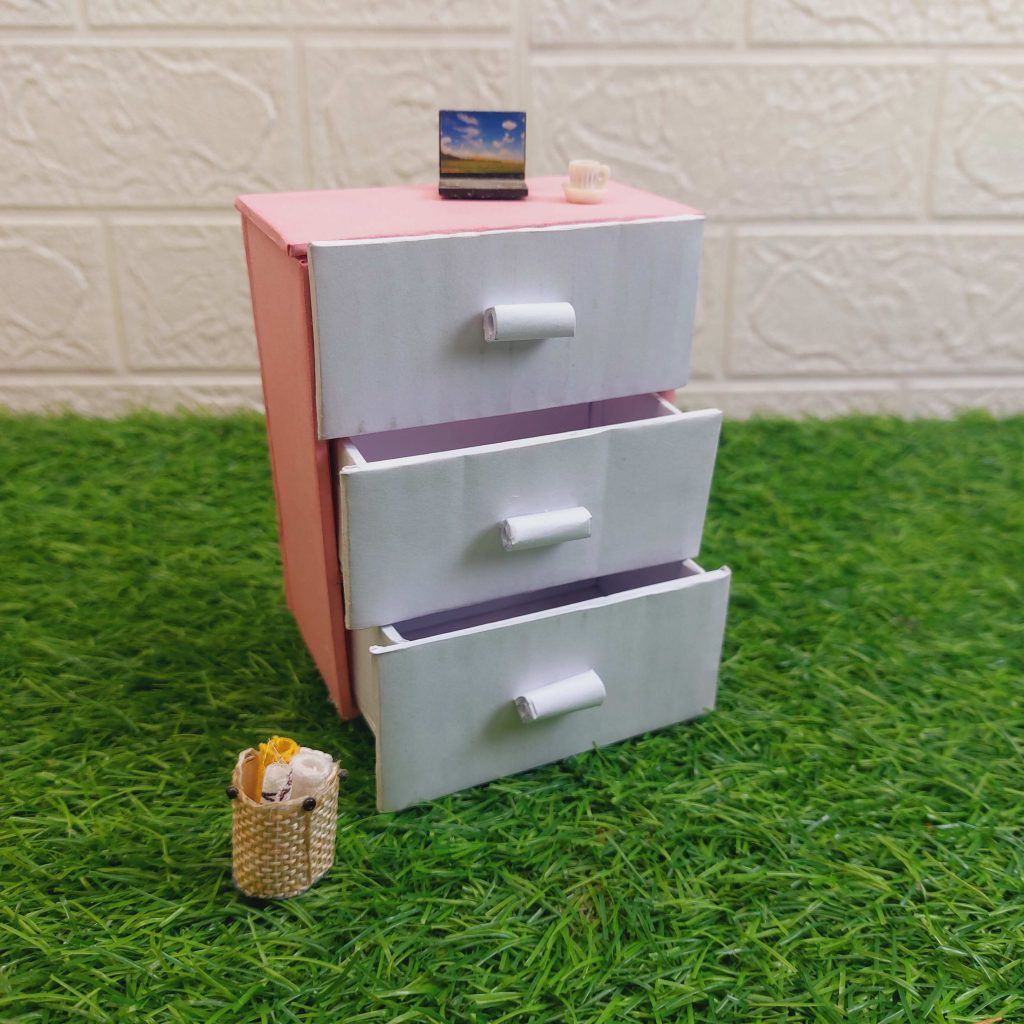
Let the entire piece dry thoroughly before styling or placing it in your dollhouse.
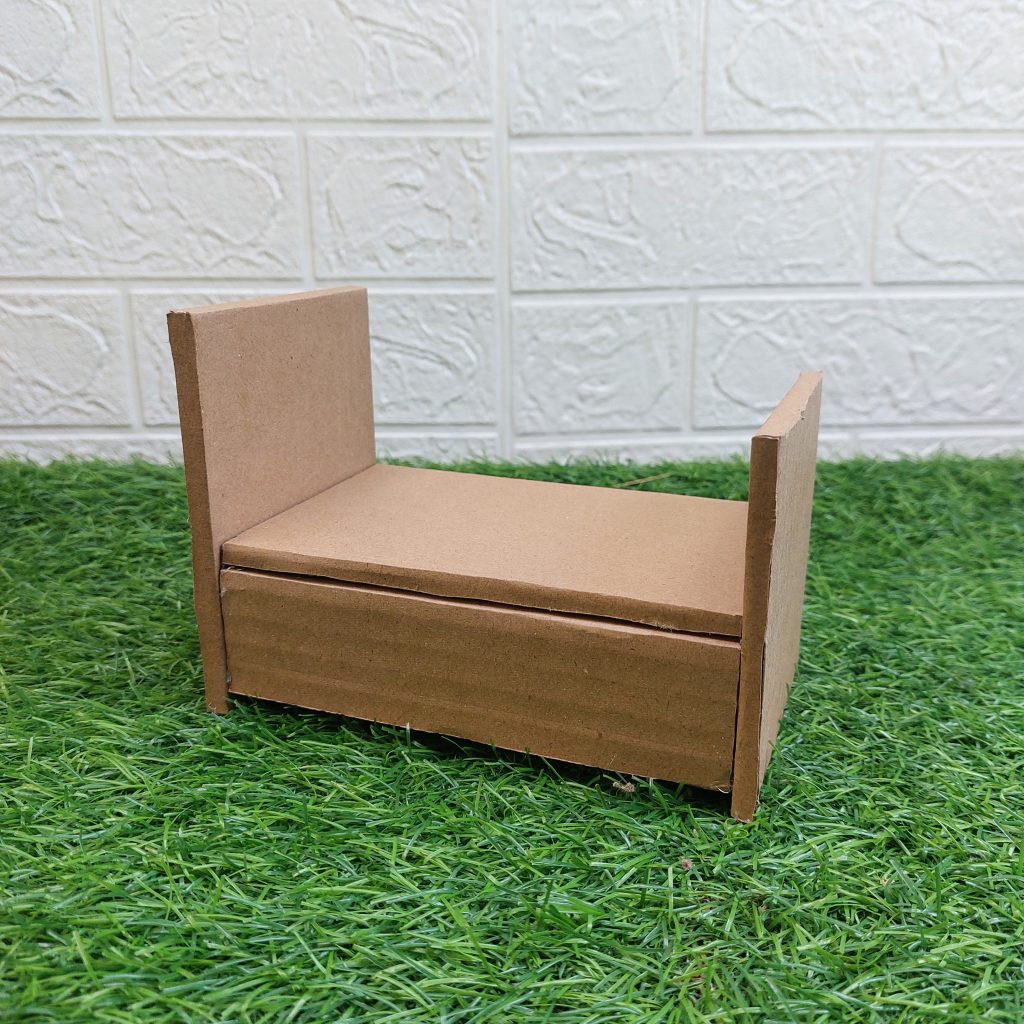
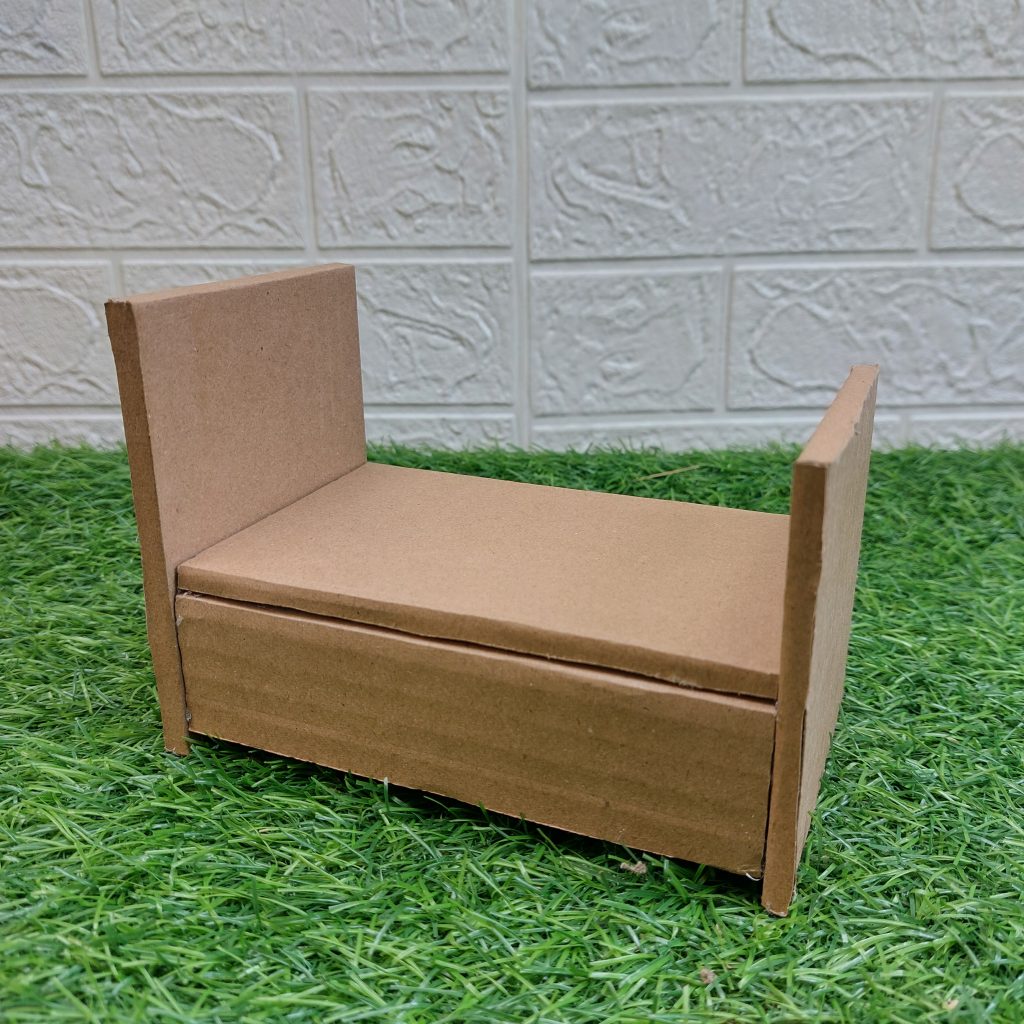
3. DIY Miniature Dollhouse Bed with Storage Drawer
In this project, I made a simple miniature dollhouse bed from corrugated cardboard, with a built-in storage drawer underneath.
The structure is kept sturdy by layering and trimming the cardboard, so it holds its shape well once finished.
Materials
- Corrugated cardboard
- Craft knife
- Ruler
- Pencil
- Cutting mat
- Strong craft glue, like Grab Fast tacky glue.
- Thin cardboard or cardstock (optional, for finishing)
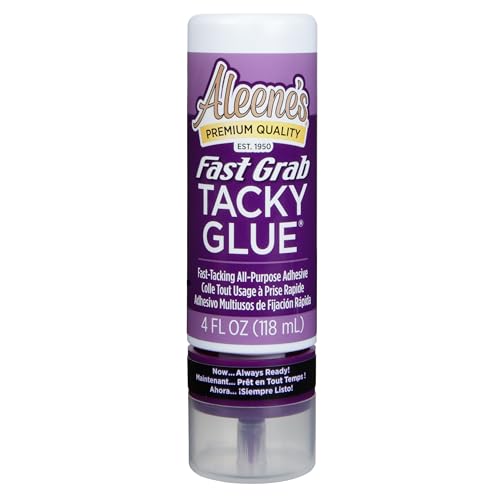
Aleene’s 33141 Fast Grab Tacky Always Ready Adhesives, 4 oz.
Buy Now →Measurements
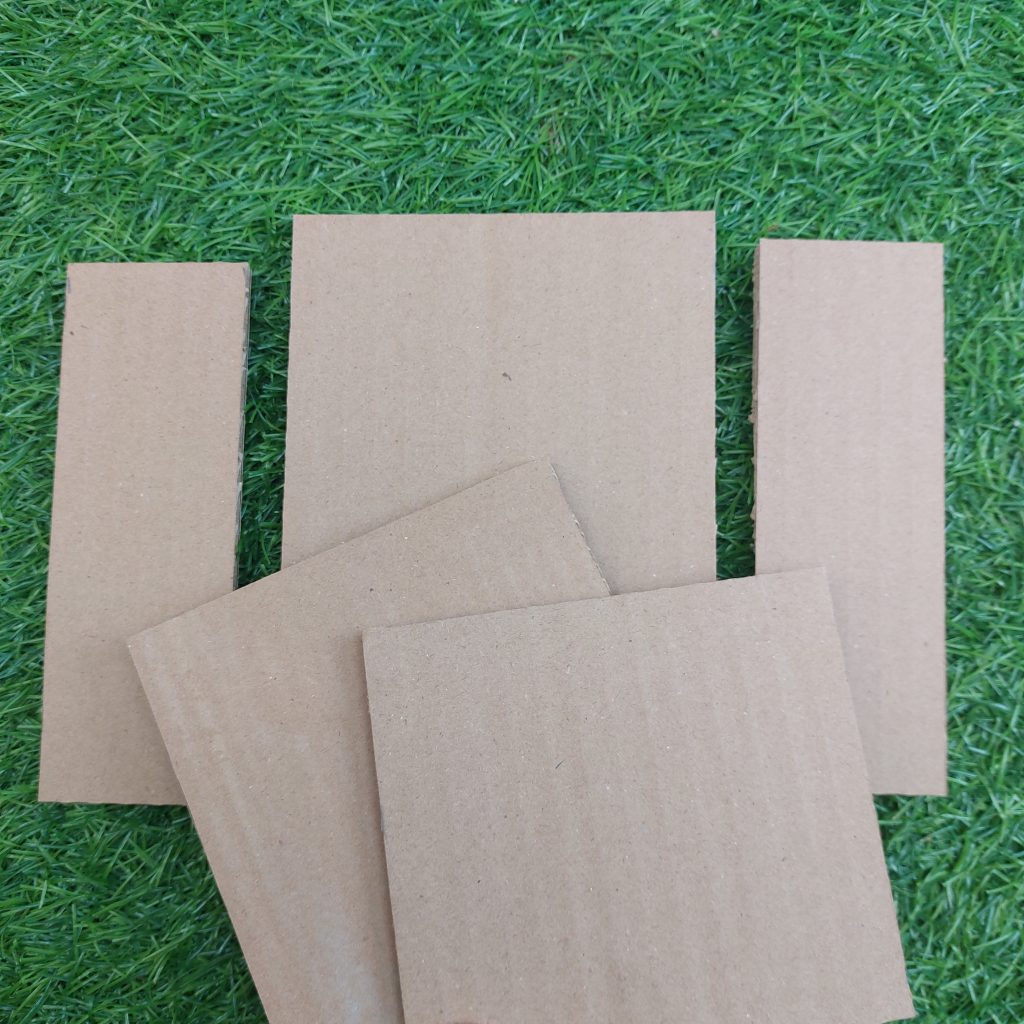
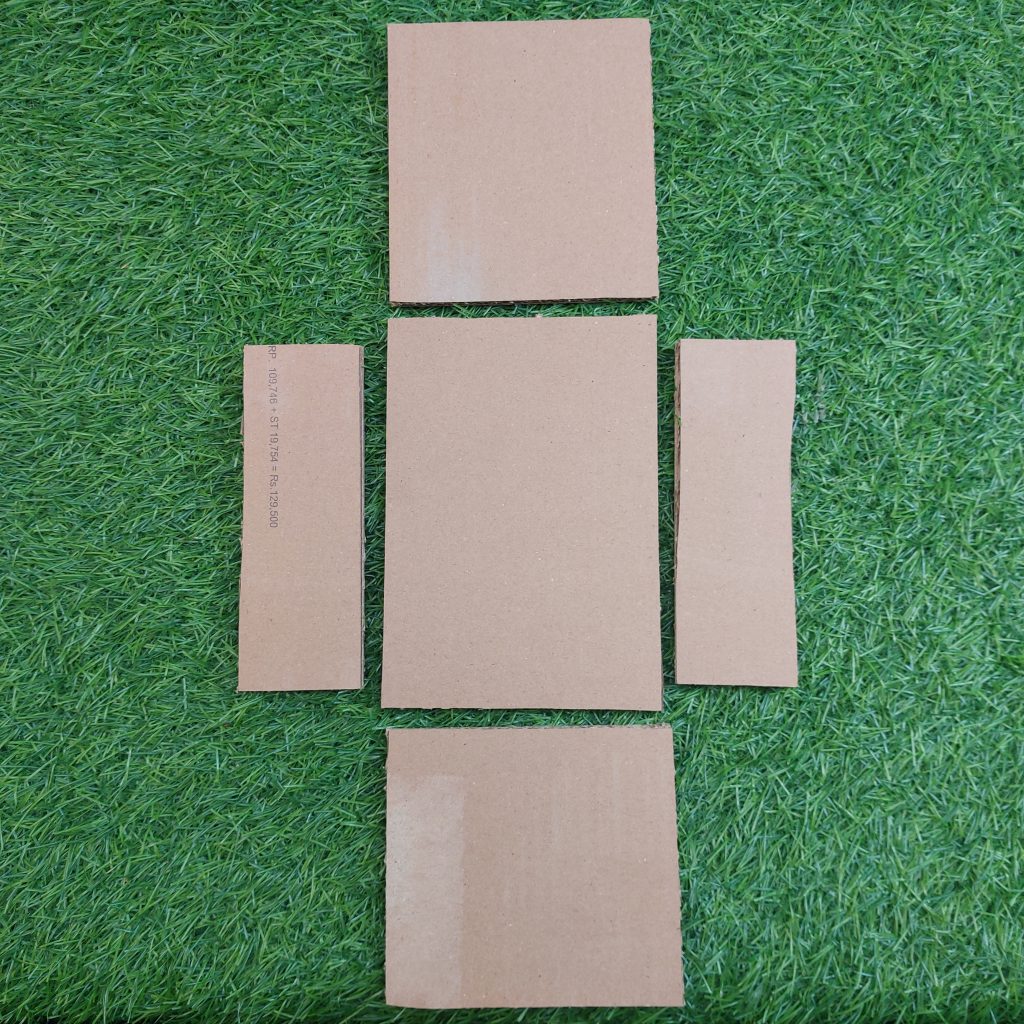
Bed
- Mattress / base: 11 × 11 cm
- Back panel: 11 × 8 cm
- Front panel: 4.5 × 11 cm
- Side panels: 10 × 11 cm (2 pieces)
- Side edge trimming: 1 cm on each side
Drawer
- Drawer front: 3.8 × 8.5 cm
- Drawer back: 3 × 7.3 cm
- Drawer sides: 3 × 4.5 cm (2 pieces)
- Drawer base: 4.5 × 8 cm
Step-by-step tutorial
- Cut all bed pieces from corrugated cardboard using the measurements above. Keep the edges as straight as possible.
- On the mattress/base piece, mark a 1 cm border along the sides. Carefully cut and remove the top paper layer and part of the corrugation to thin the edges.
- Trim away exposed corrugated edges where needed, so the sides sit well later.
- Glue a thin layer of tacky glue along the long sides of the base and then glue the thin cardboard to the edges, to have that clean look. Let dry.
- Glue the back panel (11 × 8 cm) upright onto the base, keeping it square.
- Also, glue the side panels (10 × 11 cm) onto both sides of the base, pressing them firmly against the back panel.
- Attach the front panel (4.5 × 11 cm) at the bottom front of the bed to form the basis.
Once everything fits well, glue the mattress/top panel onto the bed structure.
Let the entire piece dry fully before handling further.
The raw cardboard bed with storage drawer is now finished and ready to be painted, covered, or styled with bedding.
My Final Conclusion
Do you have any questions or something to share? Feel free to leave your comment in the comment section below, or join my new and small Facebook group and show us all what you are working on!
Happy crafting!
Kind regards,
Lizzy

Hi everyone!
My name is Lizzy, and I am an amateur miniaturist obsessed with everything in the dollhouse and miniature world, ever since I was a teenager.
So far, I have created 2 dollhouse projects, a backyard shed and a miniature treehouse, tons of DIY dollhouse kits, and “hacked” some.
I also created a fairy garden, and lots of small and simple miniature projects on my YouTube channel. (mostly made from trash or everyday items).
I love to write as well about all things happening in the miniature world, hence the reason why I created this blog!
I wish you happy reading and crafting!
Lizzy


")
