I’ve always loved the idea that miniature projects don’t have to be expensive. In fact, some of my favorite pieces started out as something that was headed for the bin: a bit of packaging, a button, even a scrap of fabric that most people wouldn’t give a second glance.
For me, part of the fun is looking at something ordinary (or downright trashy) and thinking, “Okay… what tiny thing could this become?” Recognizable?
So in this post, I’m going to share a new projects made entirely from what most people would throw away.
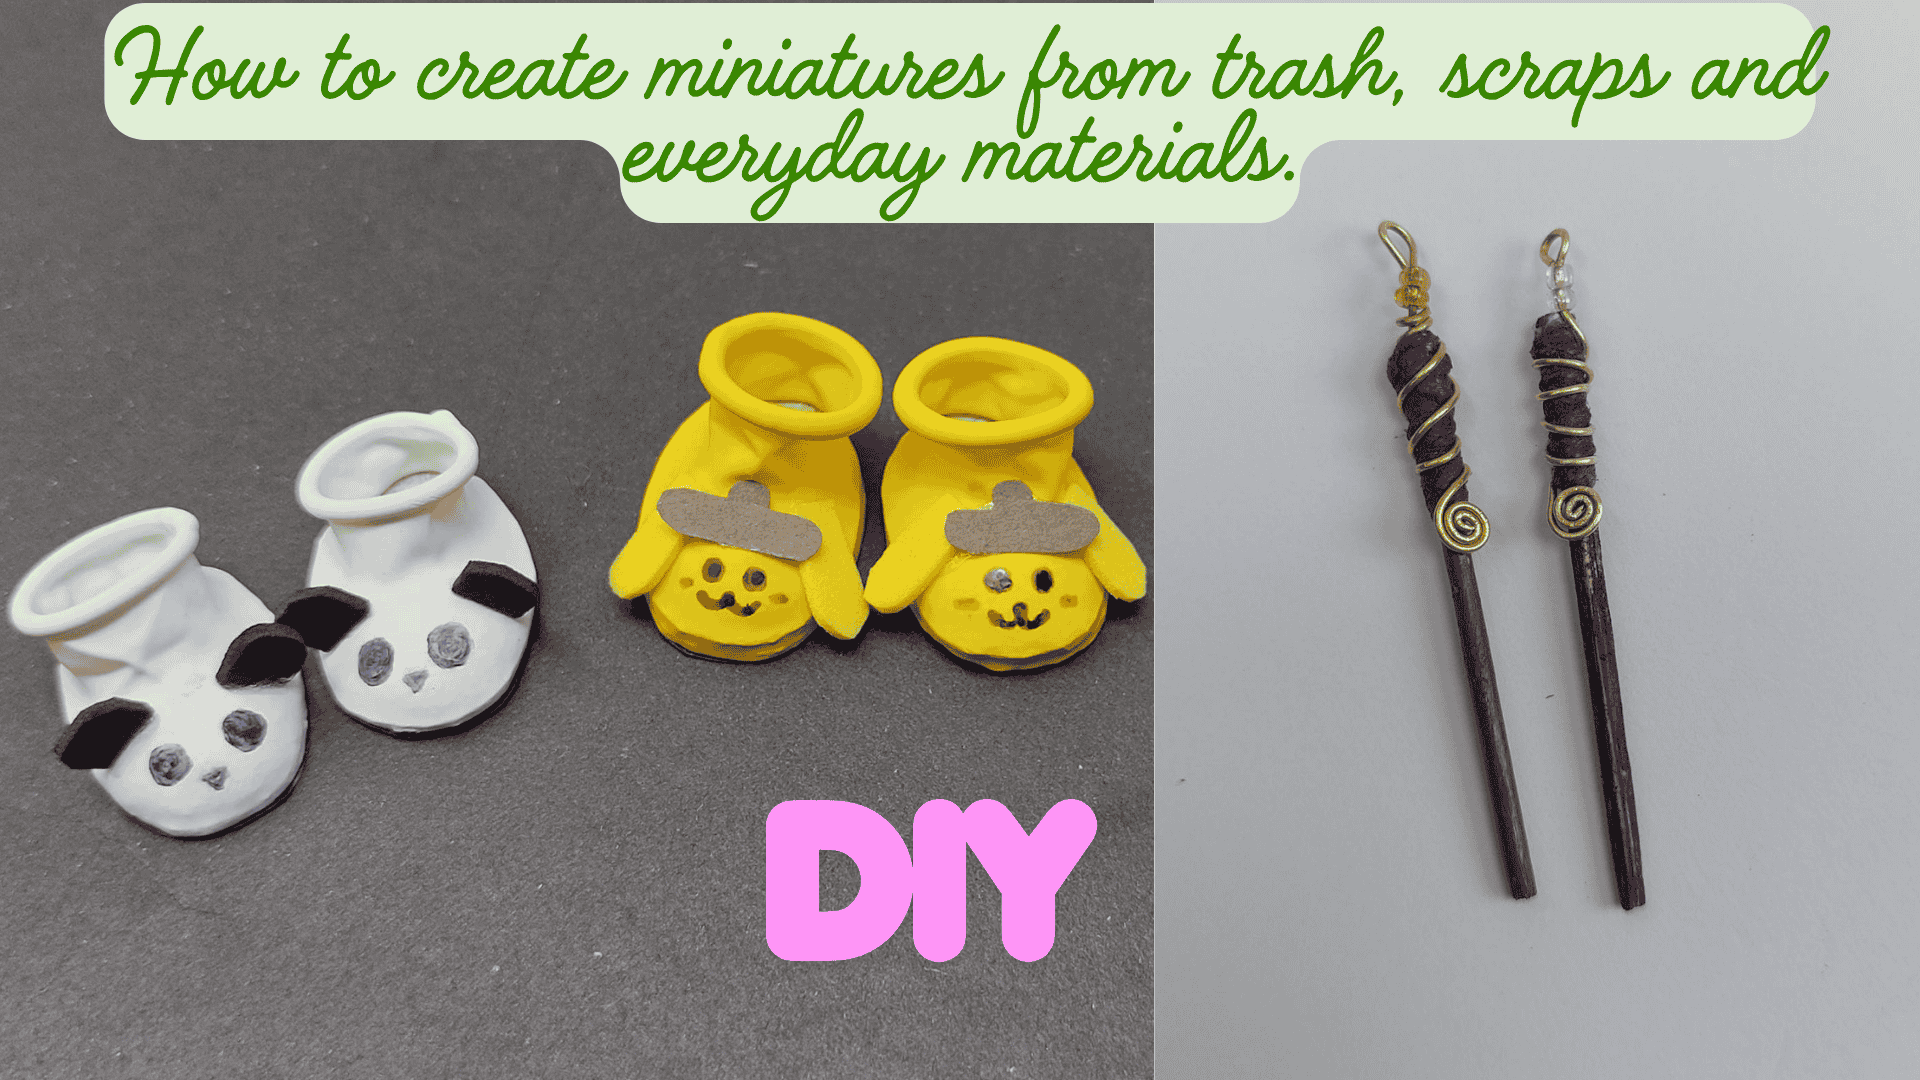
And to kick things off, we’re starting with something fun, colorful, and a little unexpected: miniature shoes made from balloons. Yep, the party kind. Have fun!
As an Amazon, Etsy and Anavrin associate, I earn a small commission from your purchase, with no extra charges for you.
Miniature Shoes from Balloons (1:12 Scale)
If you’ve ever wondered what to do with leftover balloons from a party, here’s a fun idea: turn them into adorable miniature shoes! The stretchy material makes a perfect shoe upper, and you can decorate them however you like.
Materials You’ll Need
- Deflated balloons (any color)
- Thin cardboard (for the soles)
- Scissors
- Strong craft glue (I used UHU glue)
- Cotton or fiberfill (for stuffing)
- Small pieces of colored paper or foam (for decoration)
- Marker pens for details
- Pencil & ruler
Step-by-Step Instructions
Step 1 – Pick and Prepare the Balloons
Choose your balloon color. Make sure they’re clean and dry before cutting.

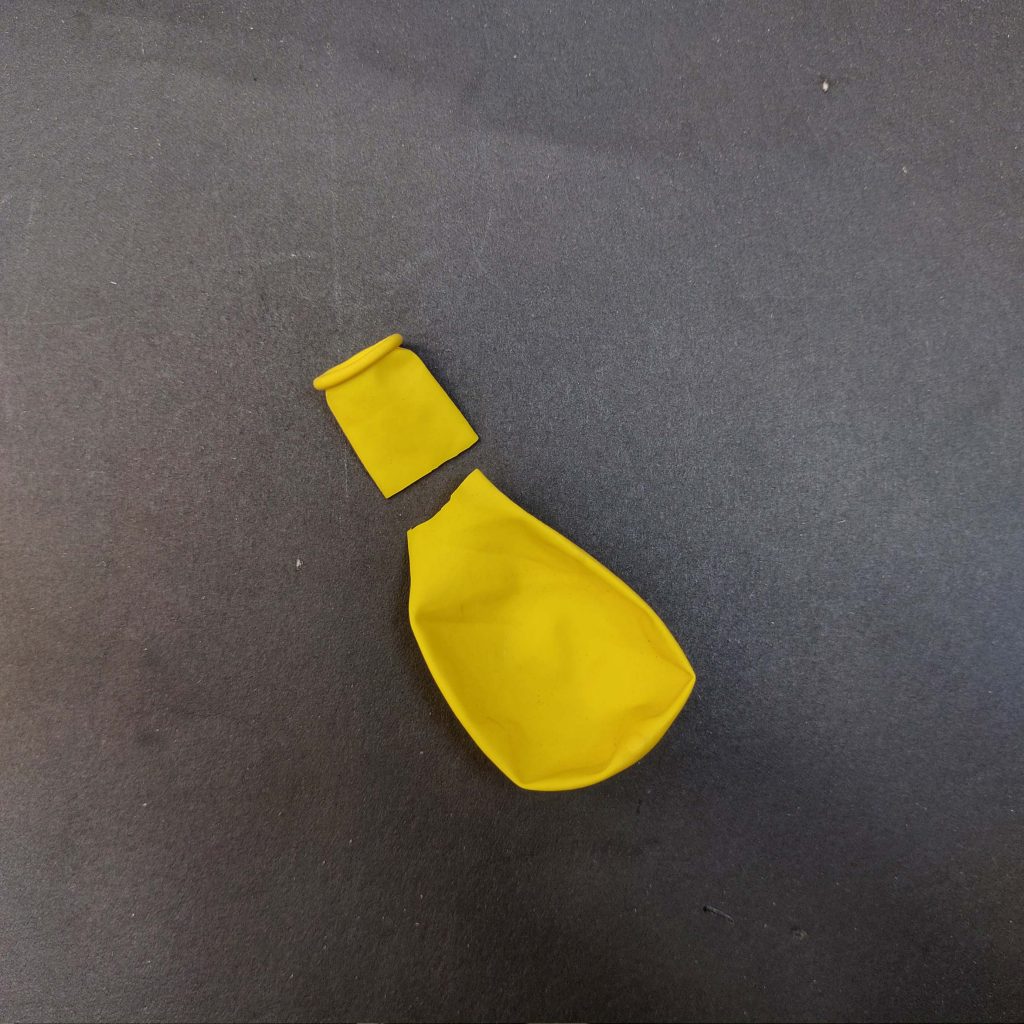
Step 2 – Cut the Neck Off
Use scissors to cut off the neck of the balloon. You’ll be left with the rounded part, which will form the shoe upper.
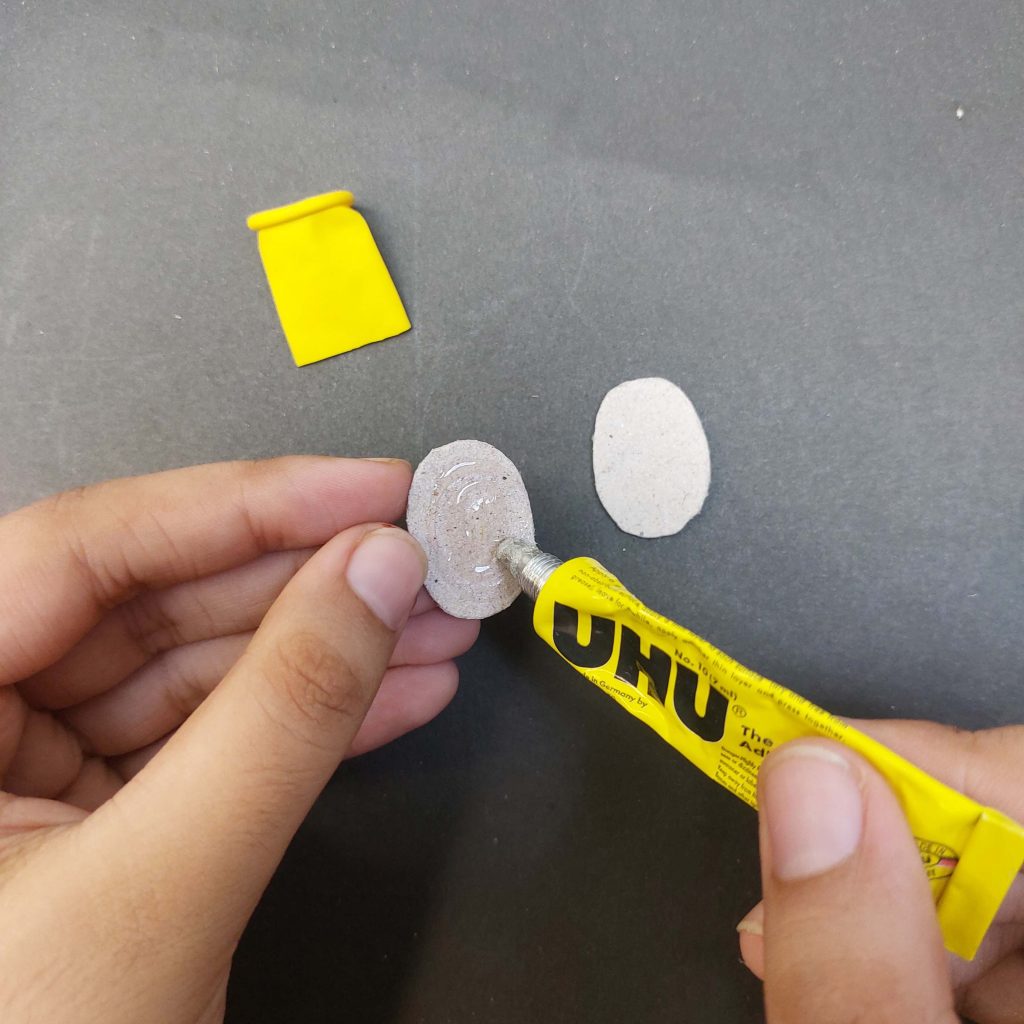
Step 3 – Cut Out the Soles
Draw and cut two small ovals from thin cardboard. Size them to the form of the balloon.

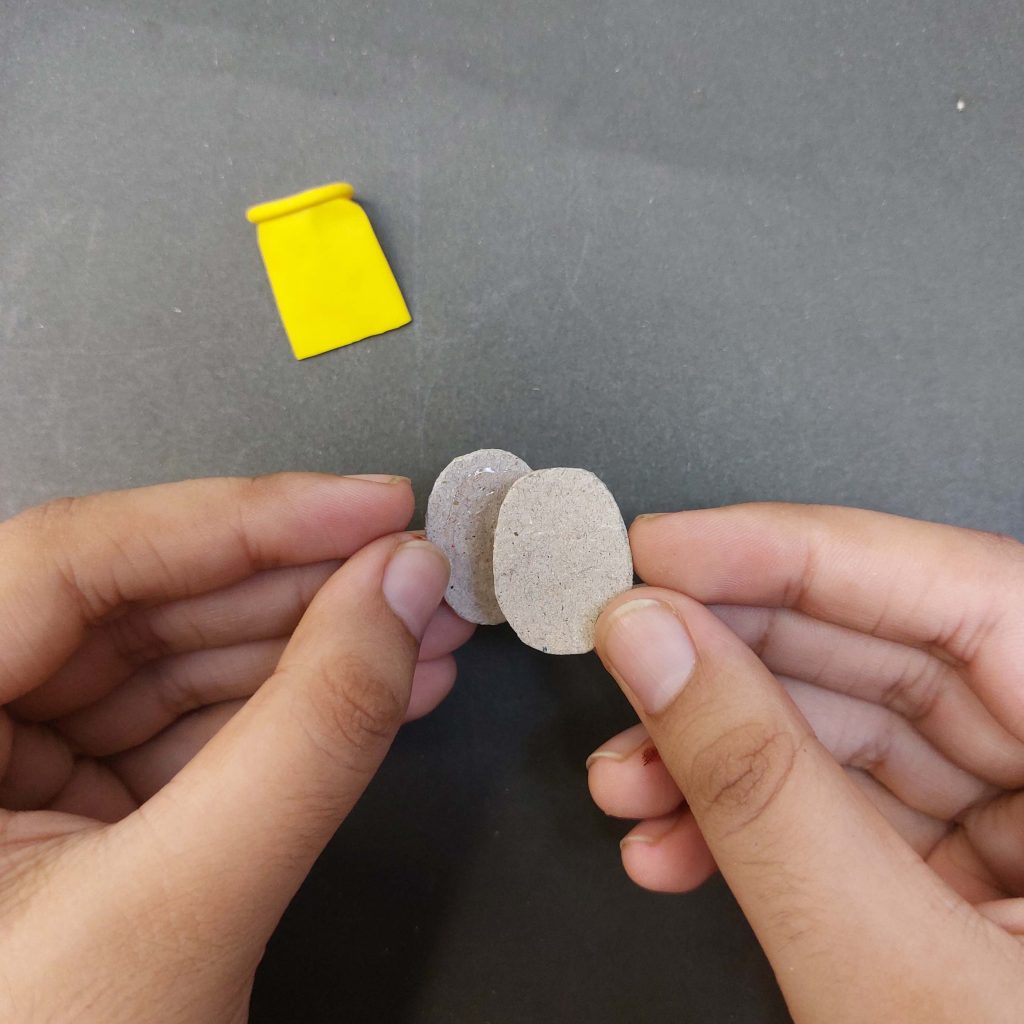
Step 4 and 5 – Apply Glue to the Soles and stick them together.
Spread a thin, even layer of strong glue on one side of each oval. Press the glued sides together to make each sole thicker and sturdier.
Step 6 – Stretch the Balloon Over the Sole
Slide the cut balloon piece over the sole, starting from the toe. Stretch it gently until it wraps snugly.
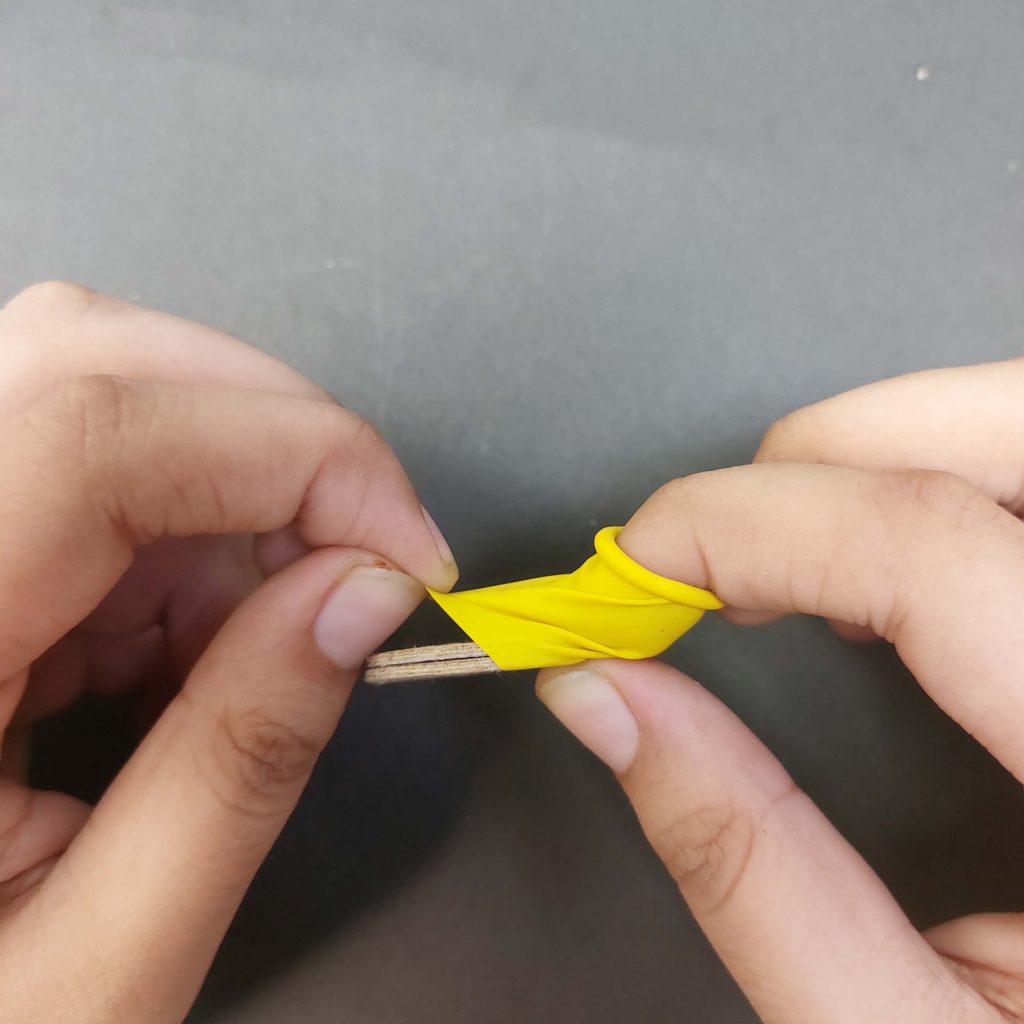
Step 7 – Secure with Glue
Apply glue along the underside edges of the sole to fix the balloon in place.

Step 8 – Press and Shape
Press the glued sole onto a piece of scrap card, smoothing the balloon to stick firmly.

Step 9 – Trim Excess Cardboard
Once the glue is dry, trim off the excess cardboard around the shoe sole for a neat edge.

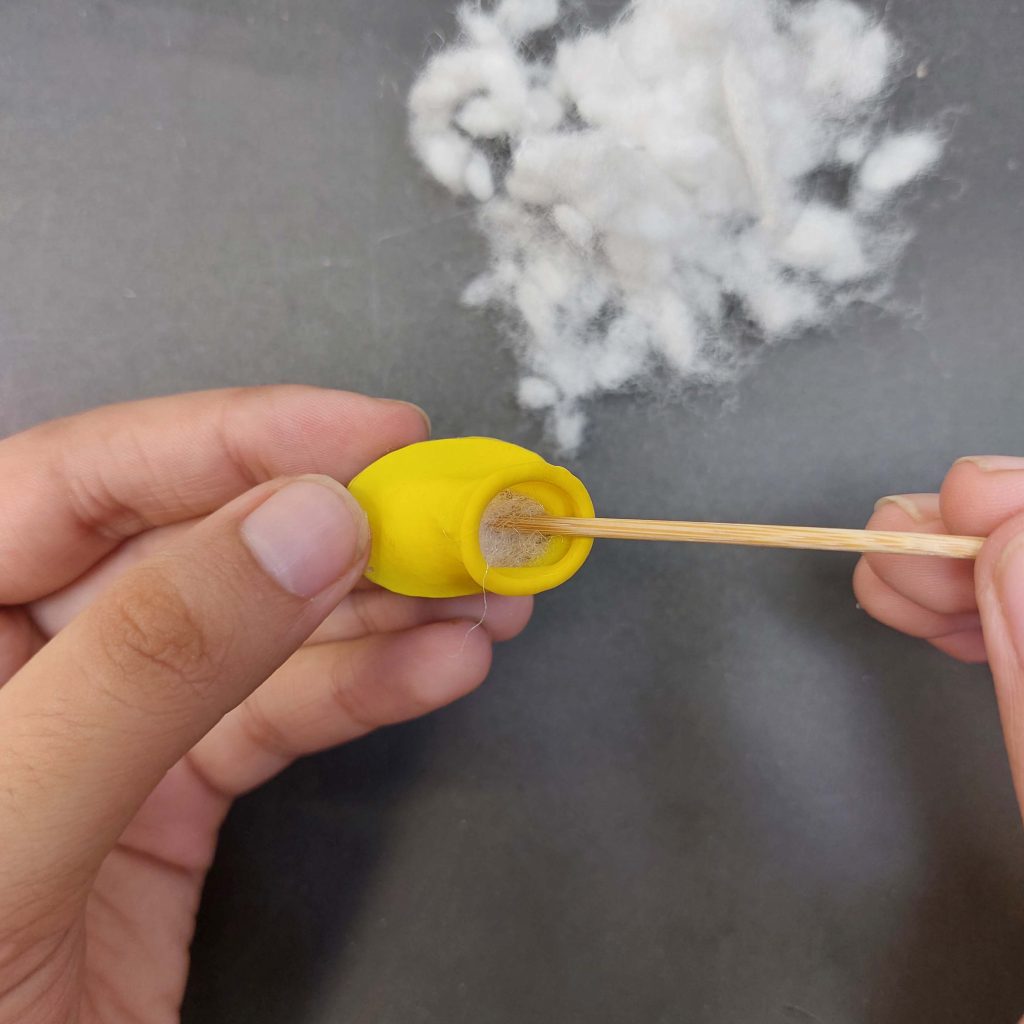
Step 10 – Add Stuffing
Stuff the shoe with a bit of cotton or fiberfill to help it keep its shape. Use a toothpick or skewer to push it in neatly.
Step 11 – Prepare Decorations
Cut small pieces of colored paper or foam for details — for example, ears and a hat if you want to make a character shoe.

Step 12 – Decorate the Shoe
Glue on your paper or foam shapes, then draw facial features and details with markers.

Final Touches
And there you have it — a pair of cheerful, balloon-based miniature shoes! You can adapt this method for boots, slippers, or even themed costume shoes.

Next up: how to make miniature magic wands!
I’m writing this in the summer of 2025, but it is already that time of the year to start thinking about magical autumn and Halloween stuff, no? I think so! 🙂
Let’s make some magic with these tiny magical wands!

Materials I Used
- Toothpicks
- Wool thread
- Gold-plated jewelry wire (thin and bendable)
- Small pearls or beads
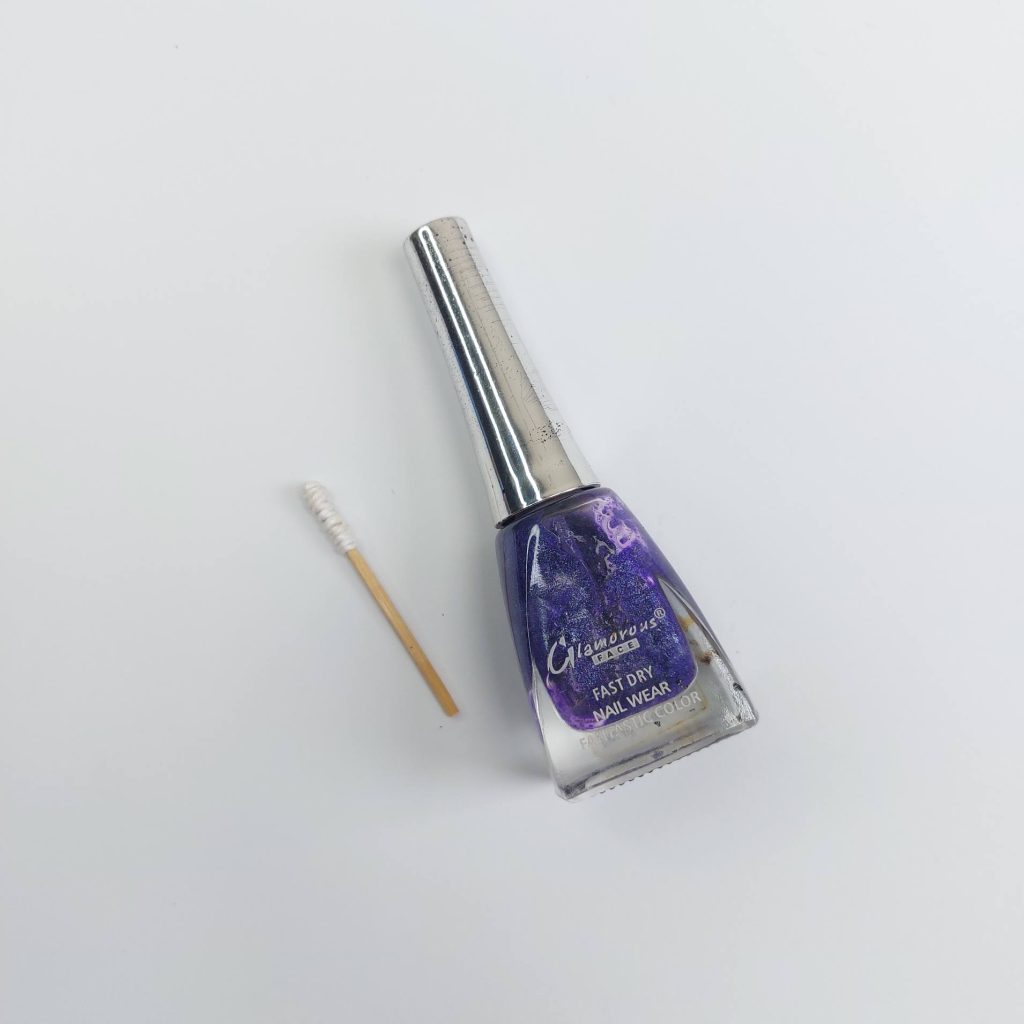
- Nail polish (I used dark purple and burgundy shades)
- Craft glue (UHU glue)
- Scissors and wire cutters
- Round-nose pliers (optional, for shaping wire)
Step-by-Step: Making the Miniature Wands
Step 1: cutting the toothpicks
Just cut off the pointy edges of the toothpics.


Step 2: Wrap some wool around the top
Wrap the wool around the top of your toothpick very tightly, while using UHU glue to press it down hard. This gives it texture.


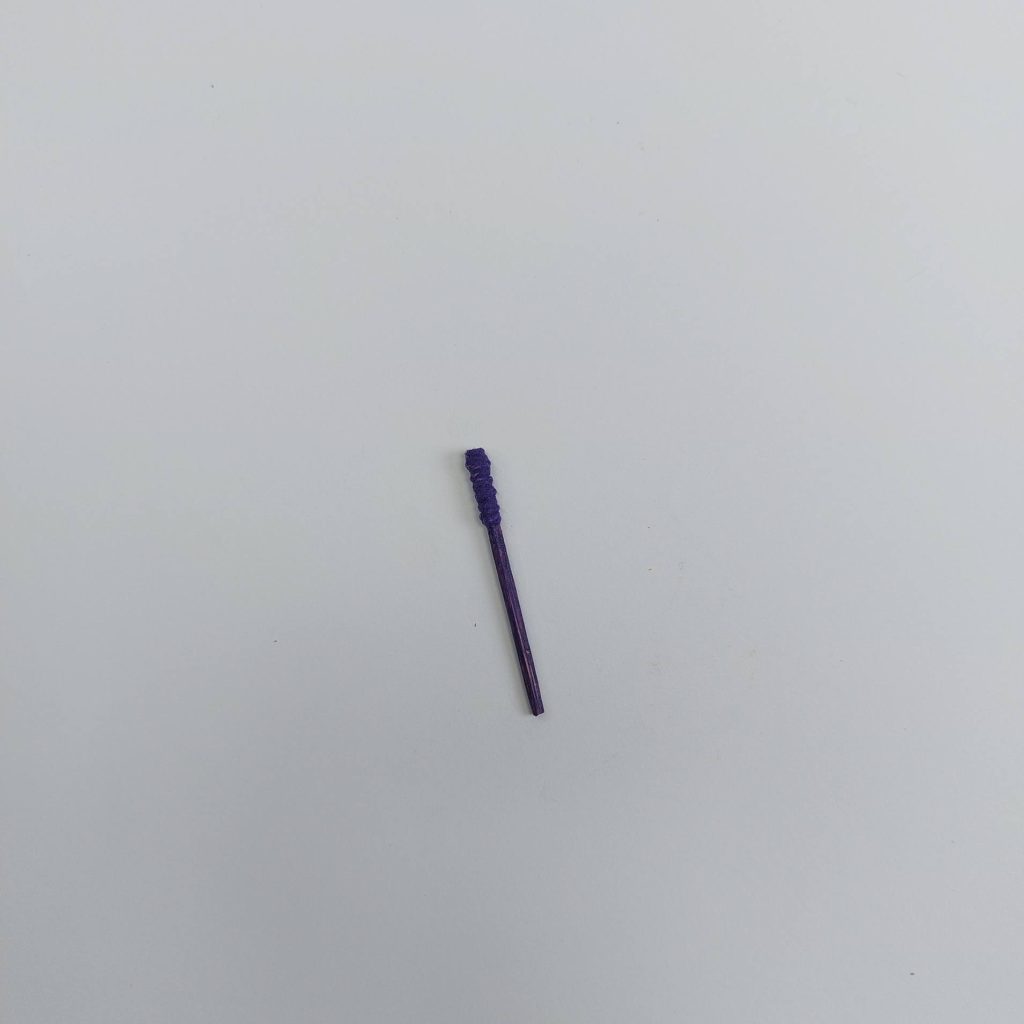
Step 3: paint the wand with nail polish.
I coated each toothpick with nail polish instead of regular paint—it dries fast and gives a rich, glossy finish. Let them dry completely before the next step.
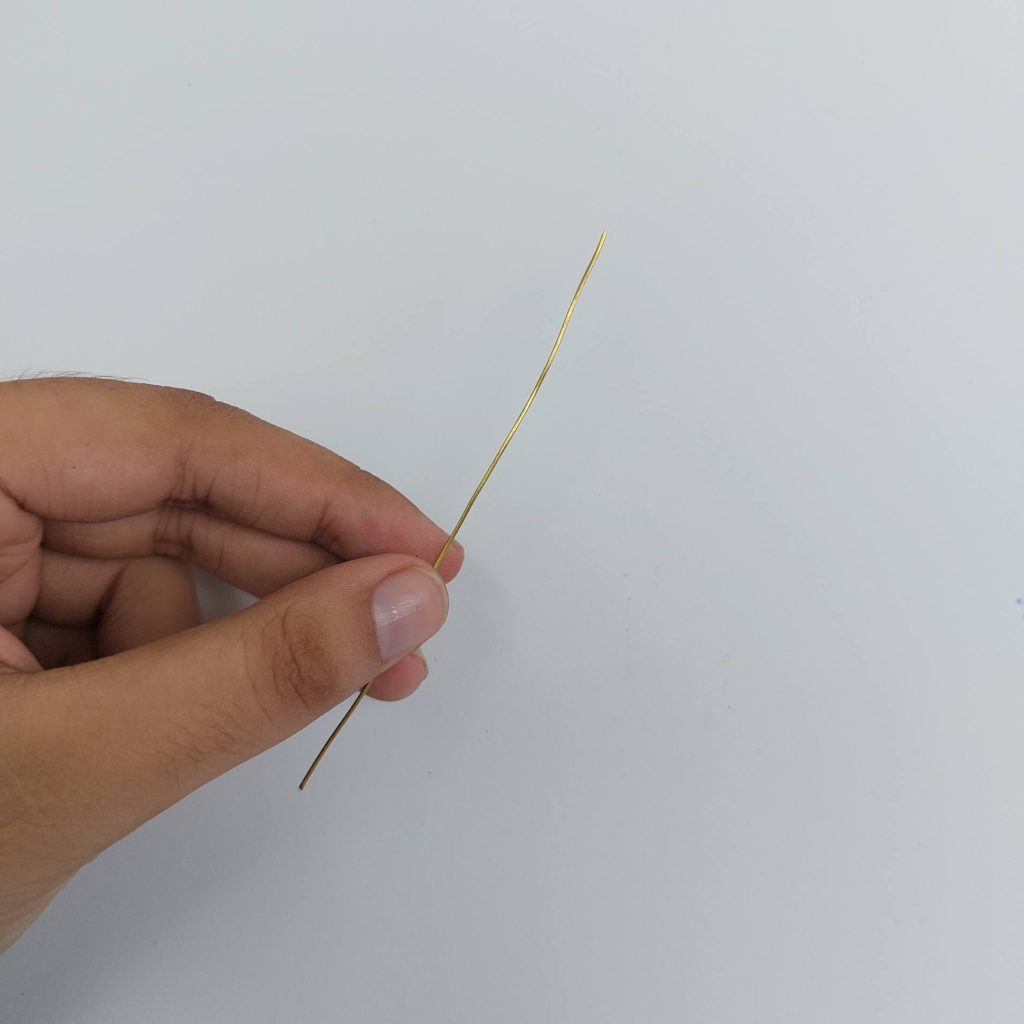
Step 4: Prepare the wire
I cut a piece of gold-plated jewelry wire and used pliers to form a small spiral at one end. This spiral becomes the decorative base of the wand.

Step 5 : Add the pearls and top loop
I slid 2 small, clear pearls onto the other end of the wire and created a tiny loop above it, so the wand could be hung or used as a charm.
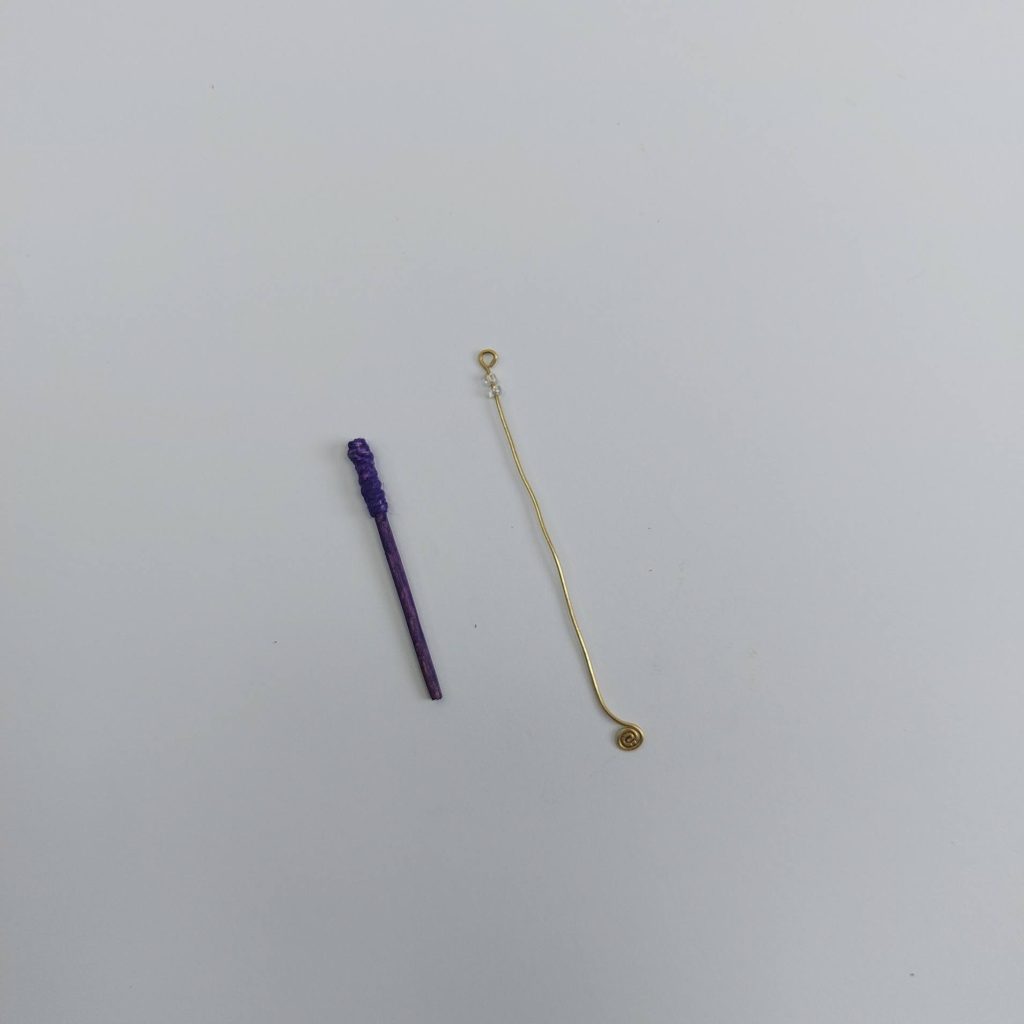
Step 6: Wrap the wand
I carefully wrapped the golden wire around the wand, spiraling it from the pearl at the top to the spiral at the bottom. This gives it that magical, enchanted look.
And done!

Final adjustments
Once everything was in place, I gently adjusted the wire to sit snugly and trimmed off any excess.
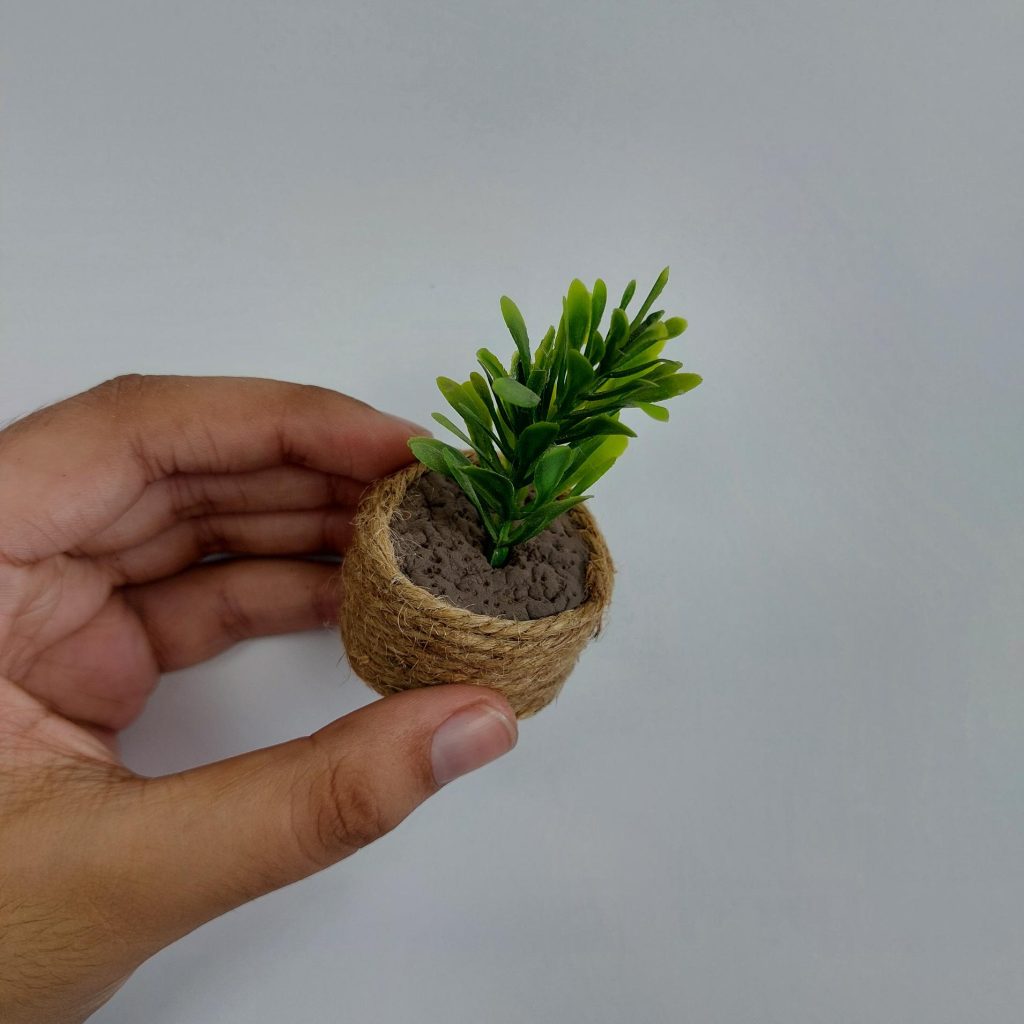
How to create this miniature plant pot from a bottle cap.

This little plant pot is perfect for dollhouses, dioramas, or desk décor. The rustic rope texture makes it look handmade and natural, and it’s easy to put together in just a few steps.
Materials I Used
- Small plastic or cardboard cap (as the pot base)
- Jute rope or twine
- Air-dry clay (brown)
- Acrylic paint (brown or earthy tones)
- Small artificial plant or greenery stem
- Craft glue
- Paintbrush

Step-by-Step Tutorial
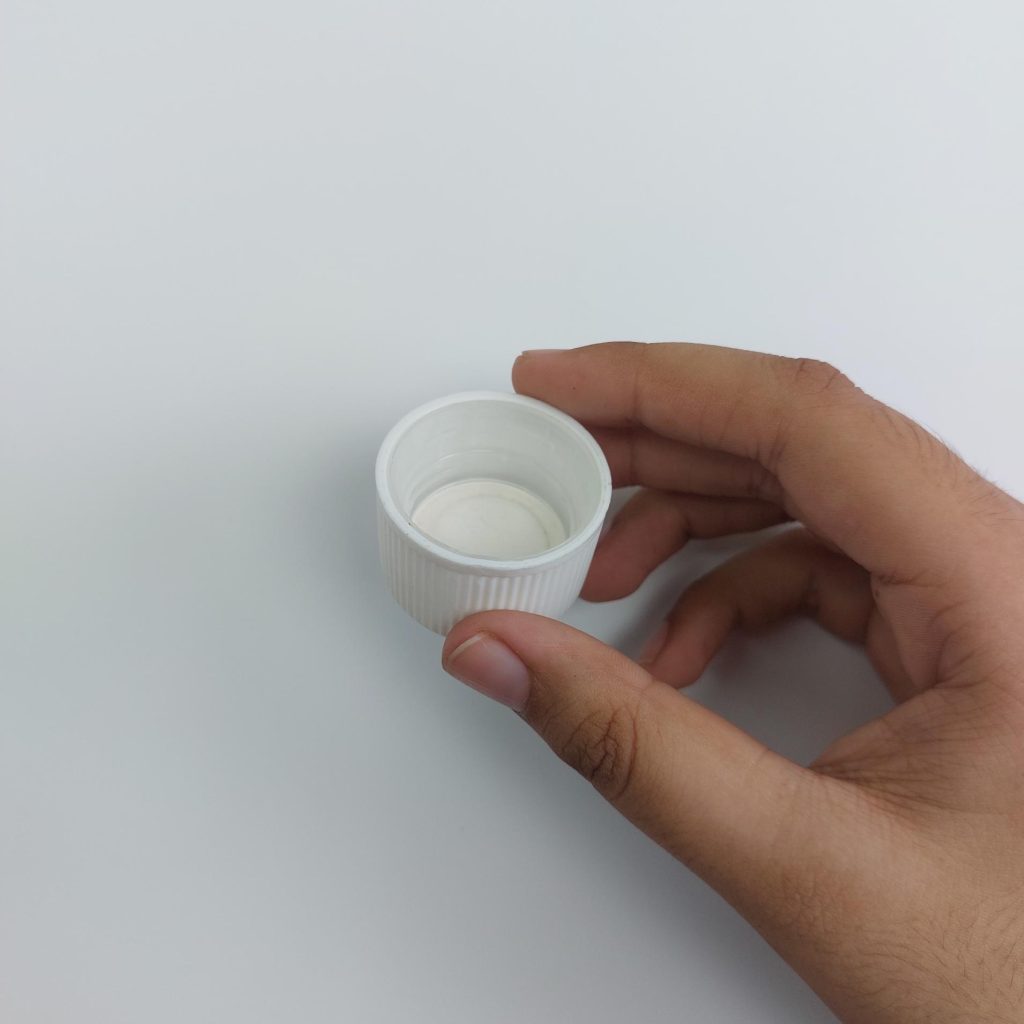
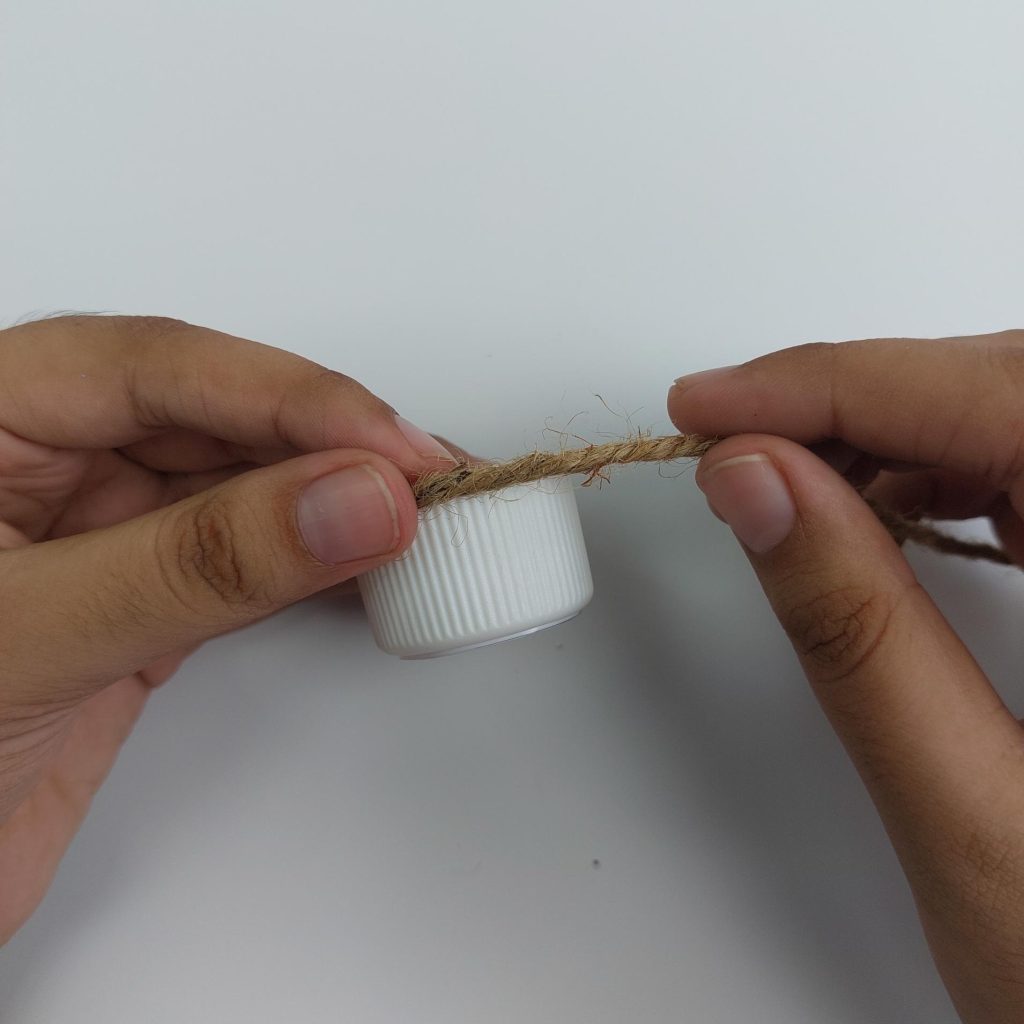
Prepare the pot base
Take a small plastic cap or base and wrap it with jute rope. Secure it with craft glue, making sure the coils are tight and even.

Fill with clay
Press brown air-dry clay into the top opening of the pot, shaping it flat on the surface.

Use a small tool or your fingers to texture the clay so it looks like soil.
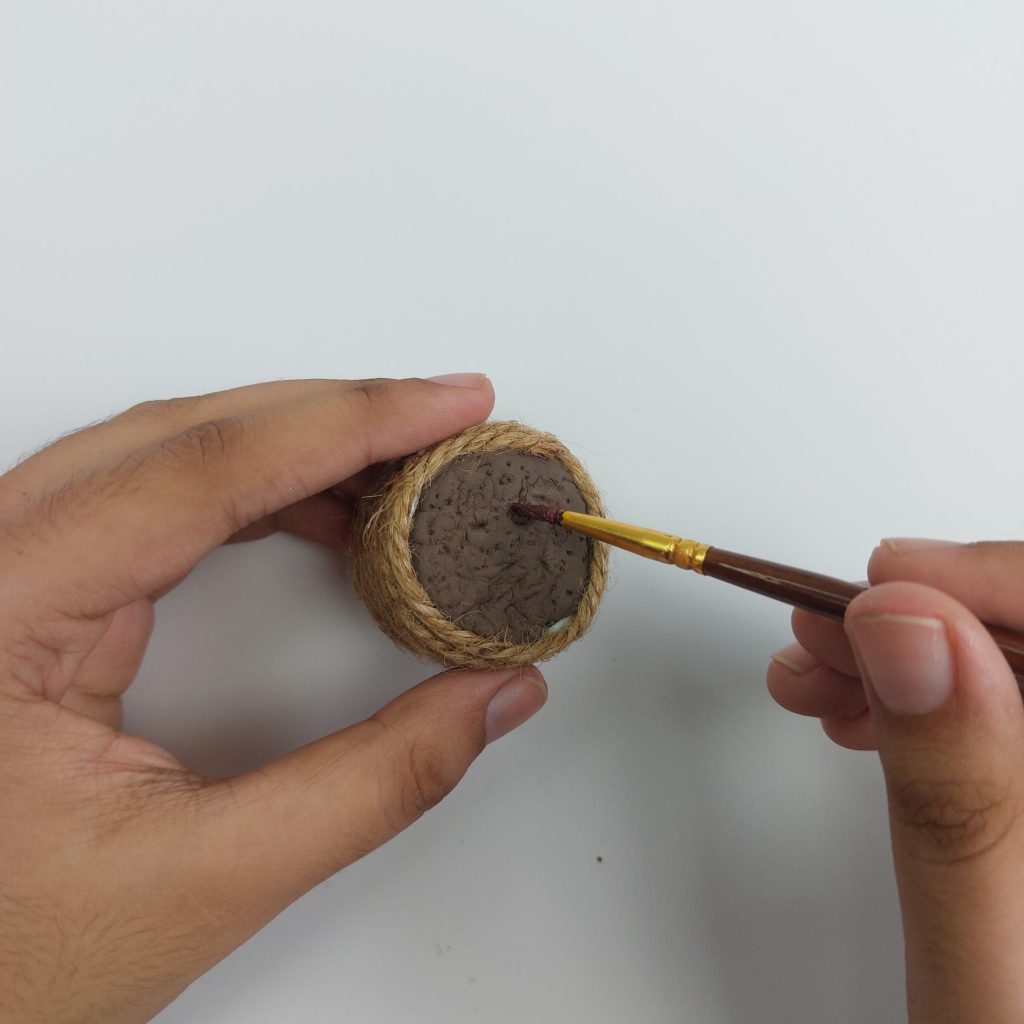
Paint for realism
Once the clay is dry (or partly dry for a rustic look), use a thin paintbrush to add darker brown tones for depth.
Insert the plant
Make a small hole in the center of the clay and insert your artificial plant or greenery stem. Press it in so it’s secure.
And, finished!
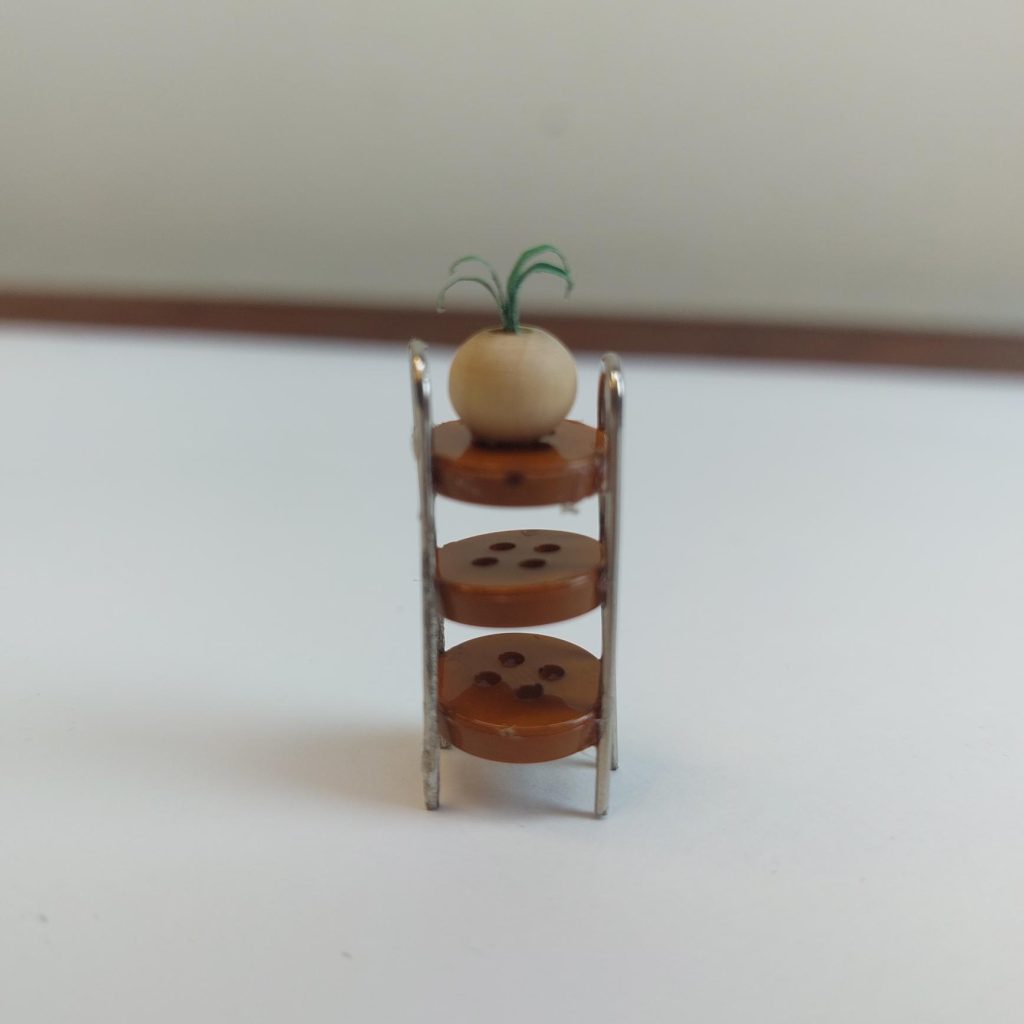
How to create a miniature rack with buttons and paperclips?
This little three-tier rack is a fun and simple project. You can use it in a dollhouse kitchen, living room, or even outdoors as a plant stand. The best part? It’s made from just a few everyday materials.

Materials Needed
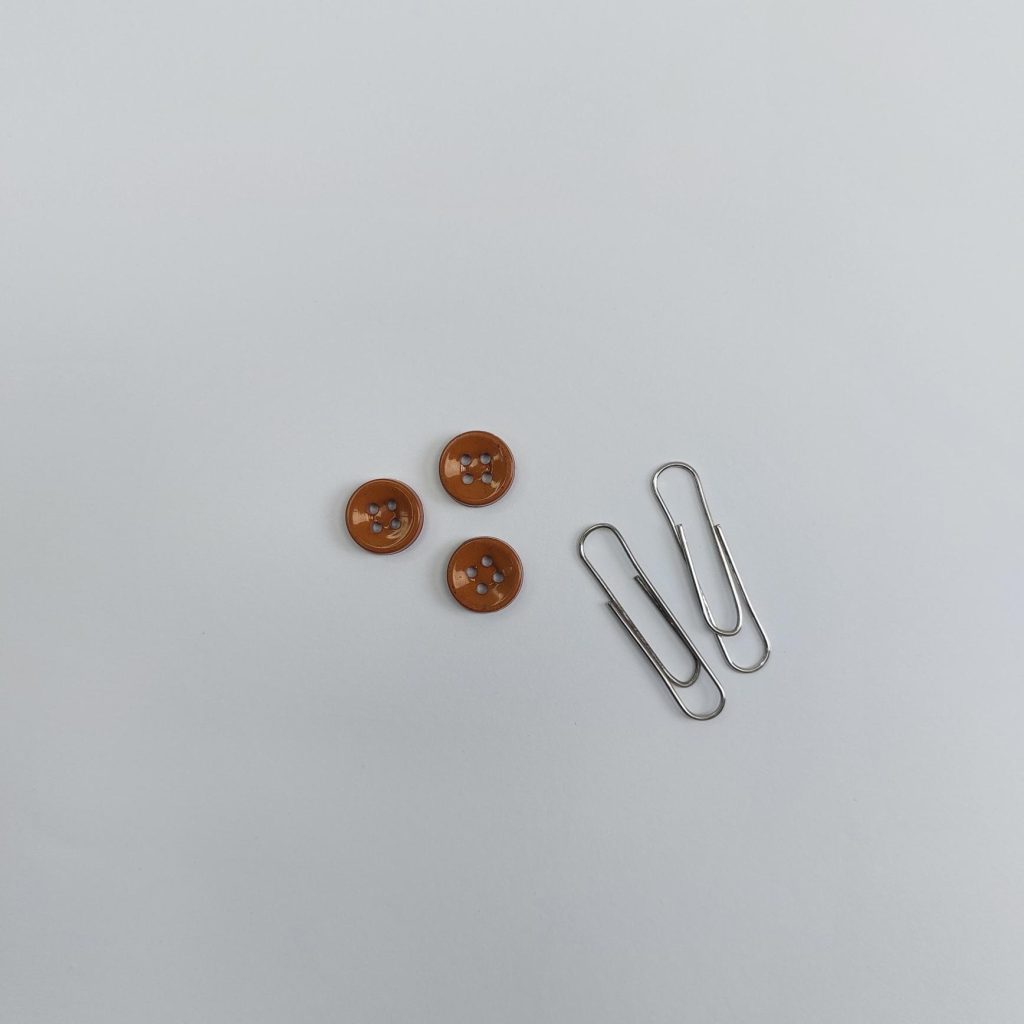
- 2 large paperclips (for the frame)
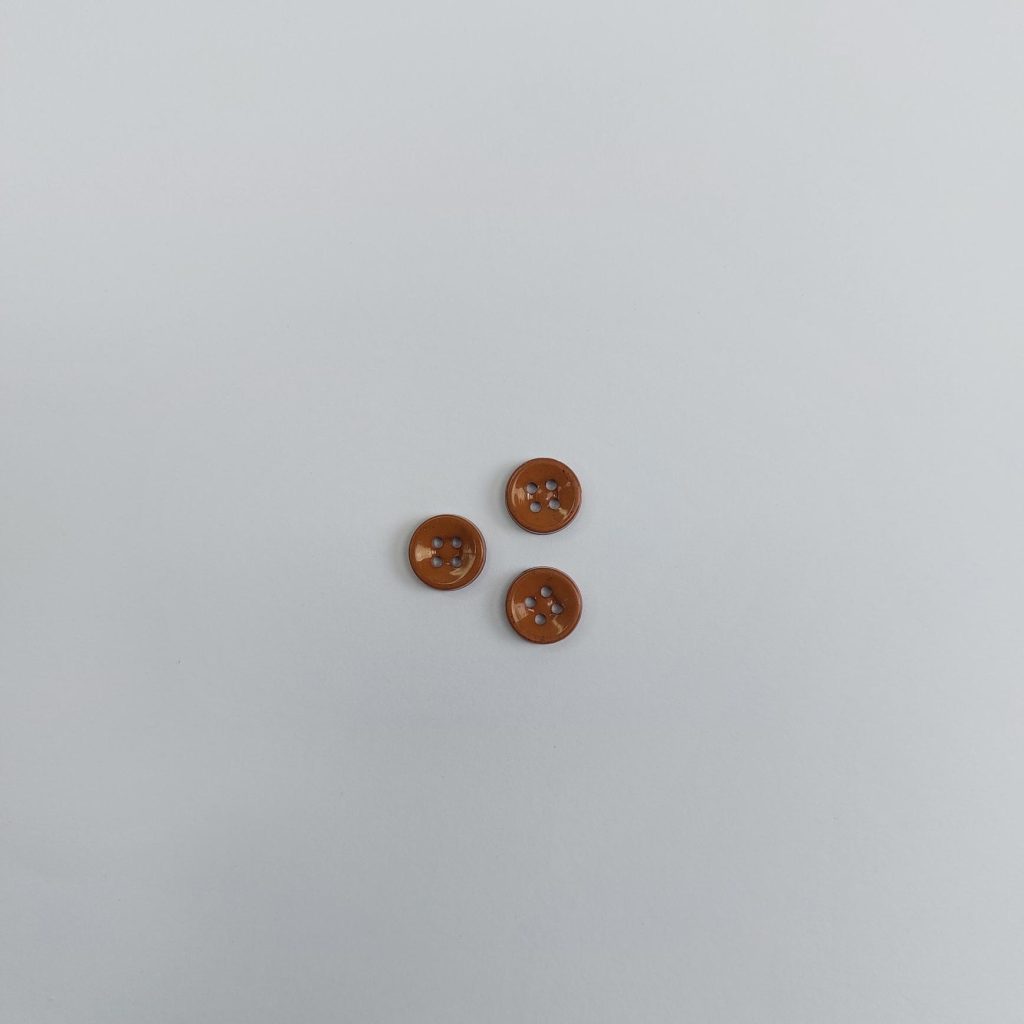
- 3 medium-sized buttons (any color—plastic or wood works best)
- Strong crafting glue ( superglue/ UHU glue )
- Krylon Fusion All-In-One spray paint (optional, for an even finish)
- Testors enamel paint (optional, if you prefer brush-on painting)
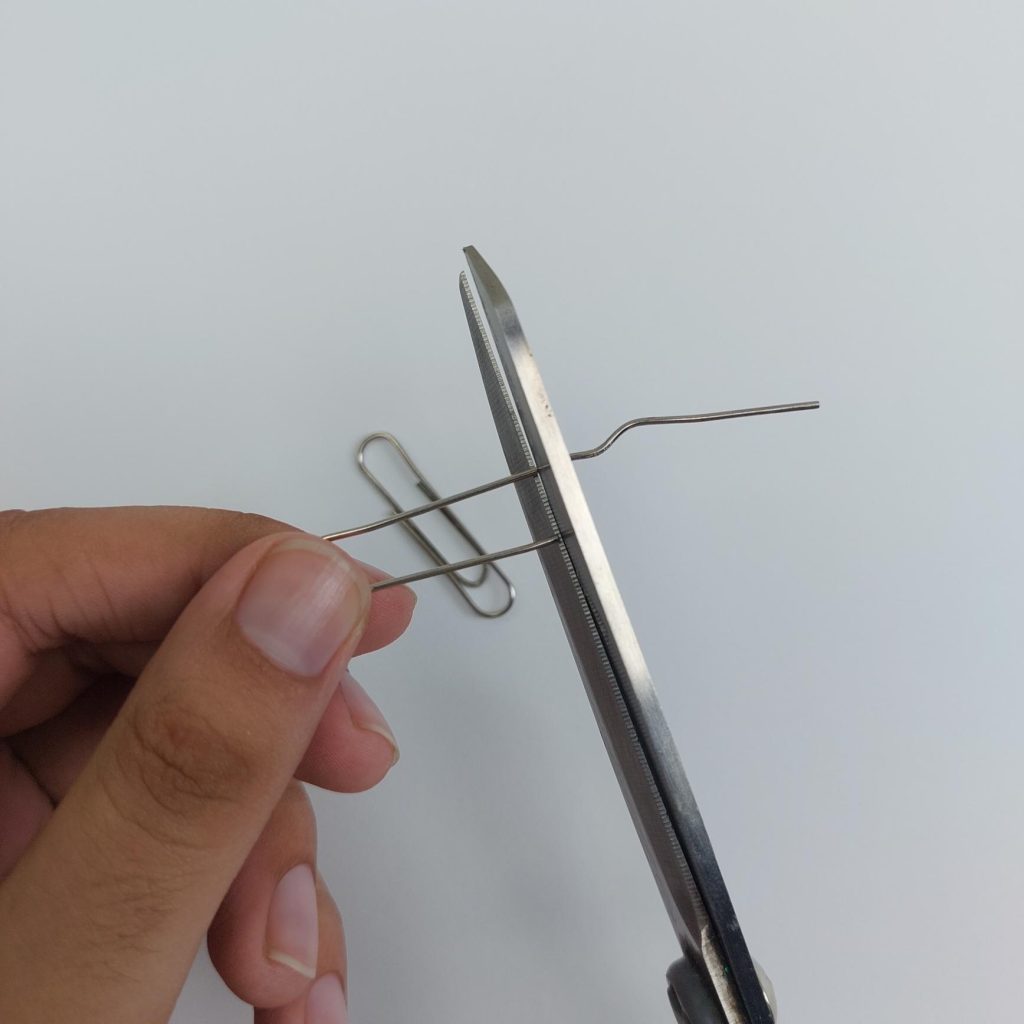
Step 1: Prepare the Frame
Unfold two paperclips into long U-shapes. These will form the sides of your rack. Try to make them as even as possible so your rack stands straight.

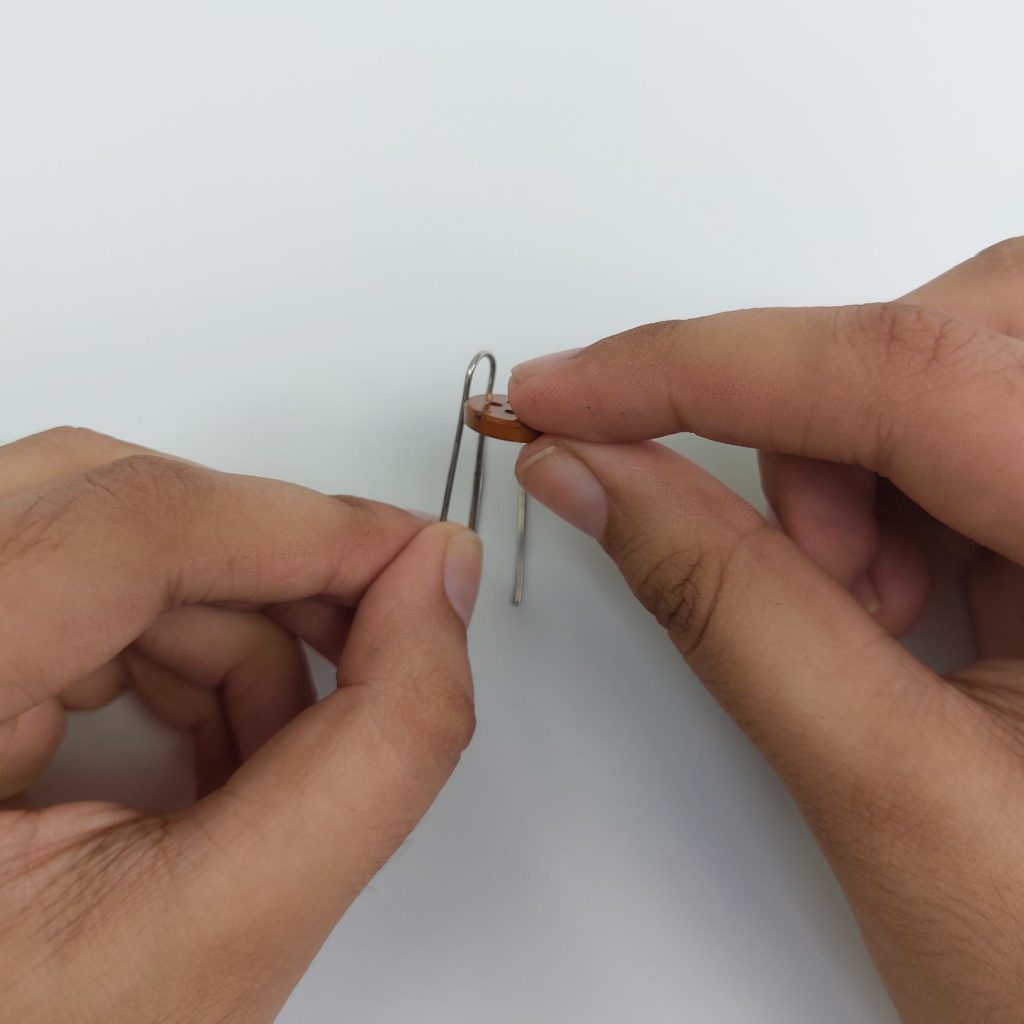
Step 2: Attach the First Button
Take one button and glue it near the bottom of the U-shaped frames. This will be the base shelf. Hold it in place until it sets.
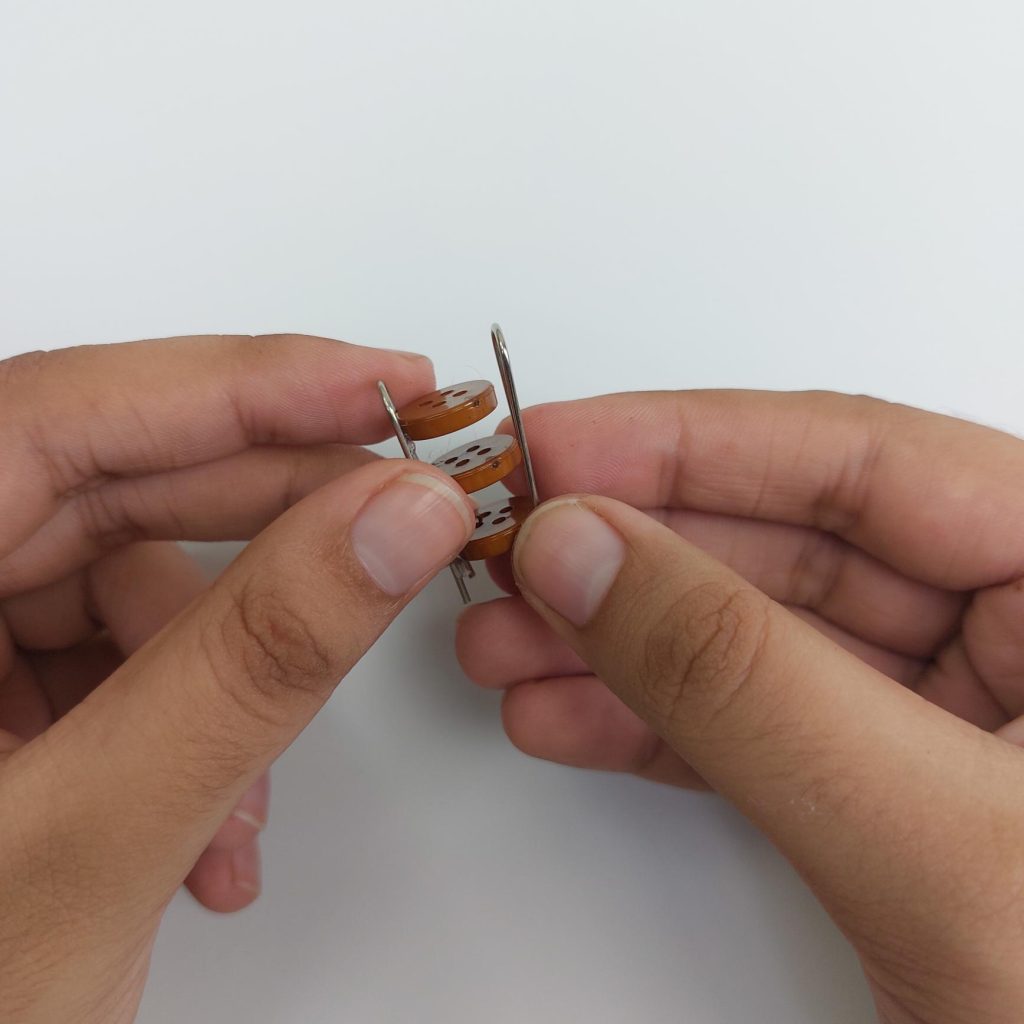
Step 3: Add More Shelves
Glue the next two buttons in place, spacing them evenly to create three tiers. Make sure the holes of the buttons line up with the frame so they look neat.

Step 4: Let It Dry
Leave the rack to dry completely before moving it. Once dry, it should stand on its own like a tiny shelving unit.
Step 5: Optional Painting
If you’d like the rack to look like a solid piece rather than buttons and paperclips, you can paint it:
- Use Krylon Fusion spray paint for an even coat over the entire rack.
- Or try Testors enamel paint if you prefer brushing on the color.
Thin coats work best; let each layer dry before adding another. You can go for a classic black, a rustic bronze, or even a bright pop of color to match your dollhouse style.
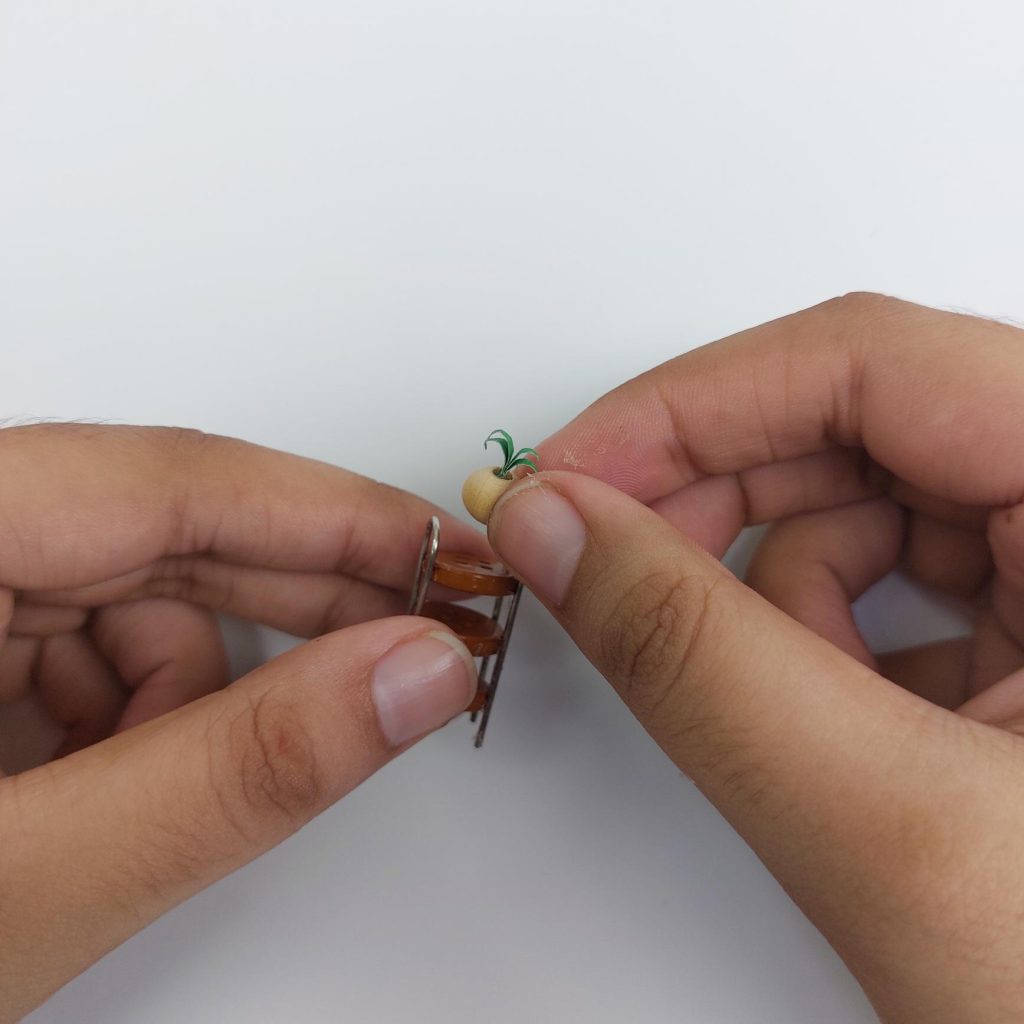
Your miniature rack is ready! Place it in your dollhouse kitchen with fruits, dishes, or a little potted plant on top.
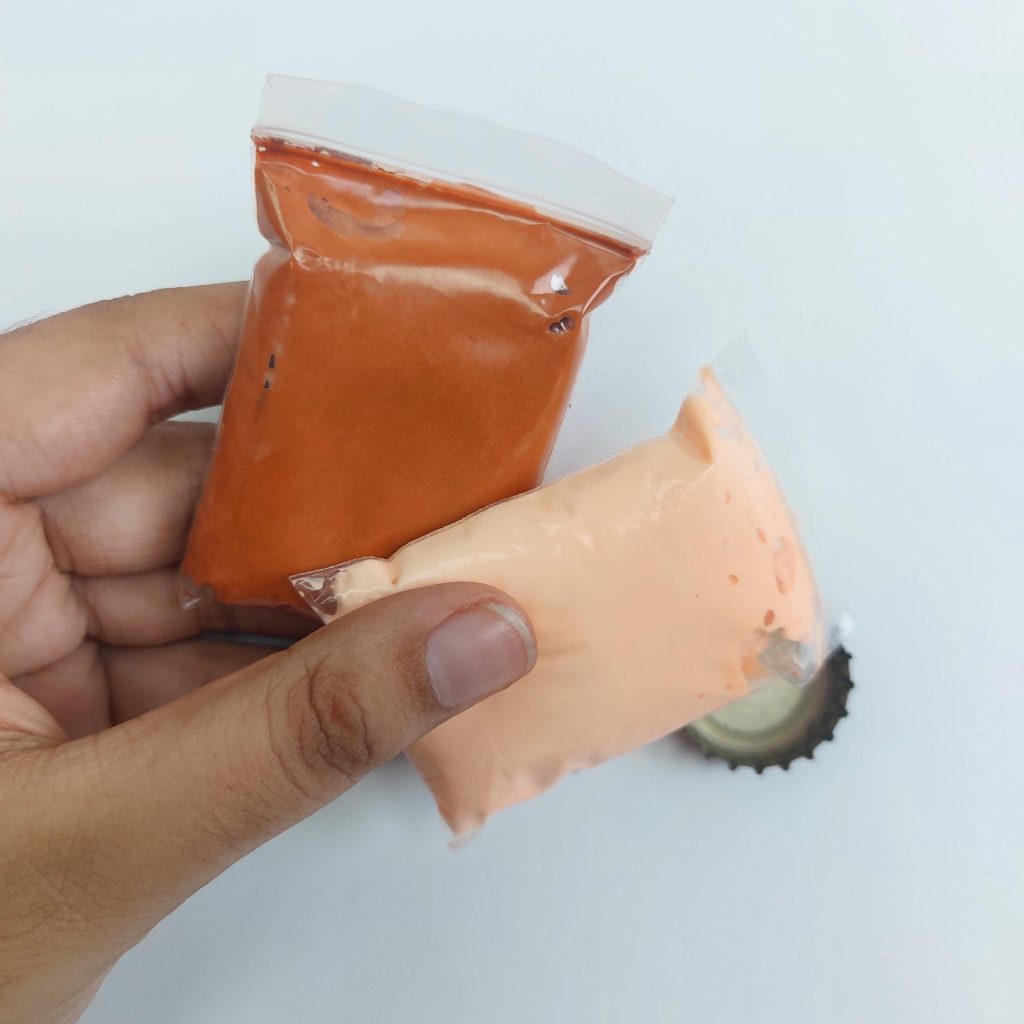
How to Make This Miniature Pie
Sometimes the simplest scraps make the most fun projects. When I looked at a bottle cap, it instantly reminded me of a little pie tin; so I decided to turn it into a miniature pie with a lattice crust.

Materials I Used
- Bottle cap (as the pie tin)
- Polymer clay (for the filling and lattice crust)
- Old eyeshadow palette (for dusting realistic baked colors)
- Button & bead (to make the pie stand)
- Hot melt glue (to attach the stand)
- Small knife or blade (for cutting clay strips)
- Paintbrush (for applying eyeshadow dust)

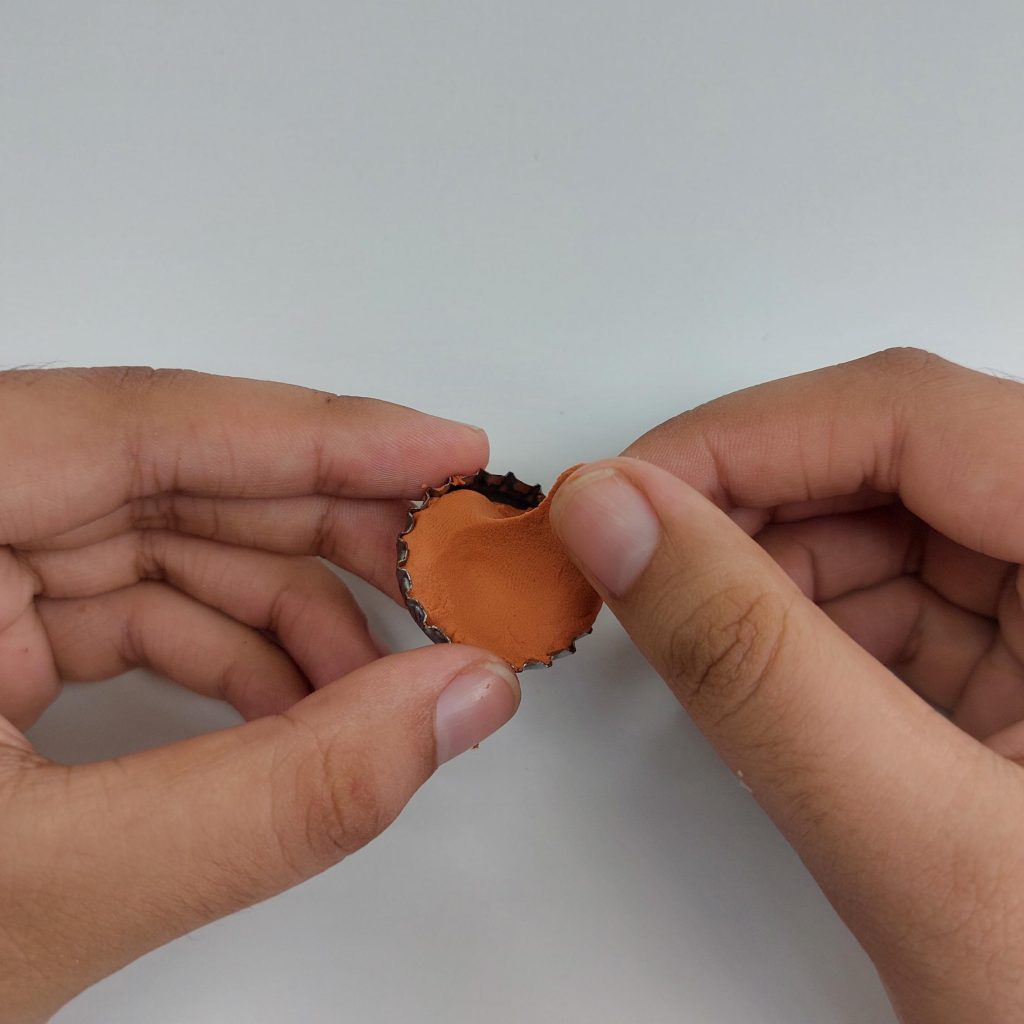
Step 1: Preparing the Pie Tin
I used an old bottle cap as the pie tin. Its crimped edges already resemble a real-life pie dish. If your cap looks too shiny, you can dull it down with a bit of black or brown acrylic paint to give it a more “used” baking pan look.
Step 2: Making the Pie Filling
- Roll out a piece of polymer clay in a warm, “baked pie” color (browns or golden shades work best).
- Flatten it and press it into the bottle cap to form the base of the pie filling.
- You can add small lumps or texture with a toothpick to give the illusion of fruit beneath the crust.
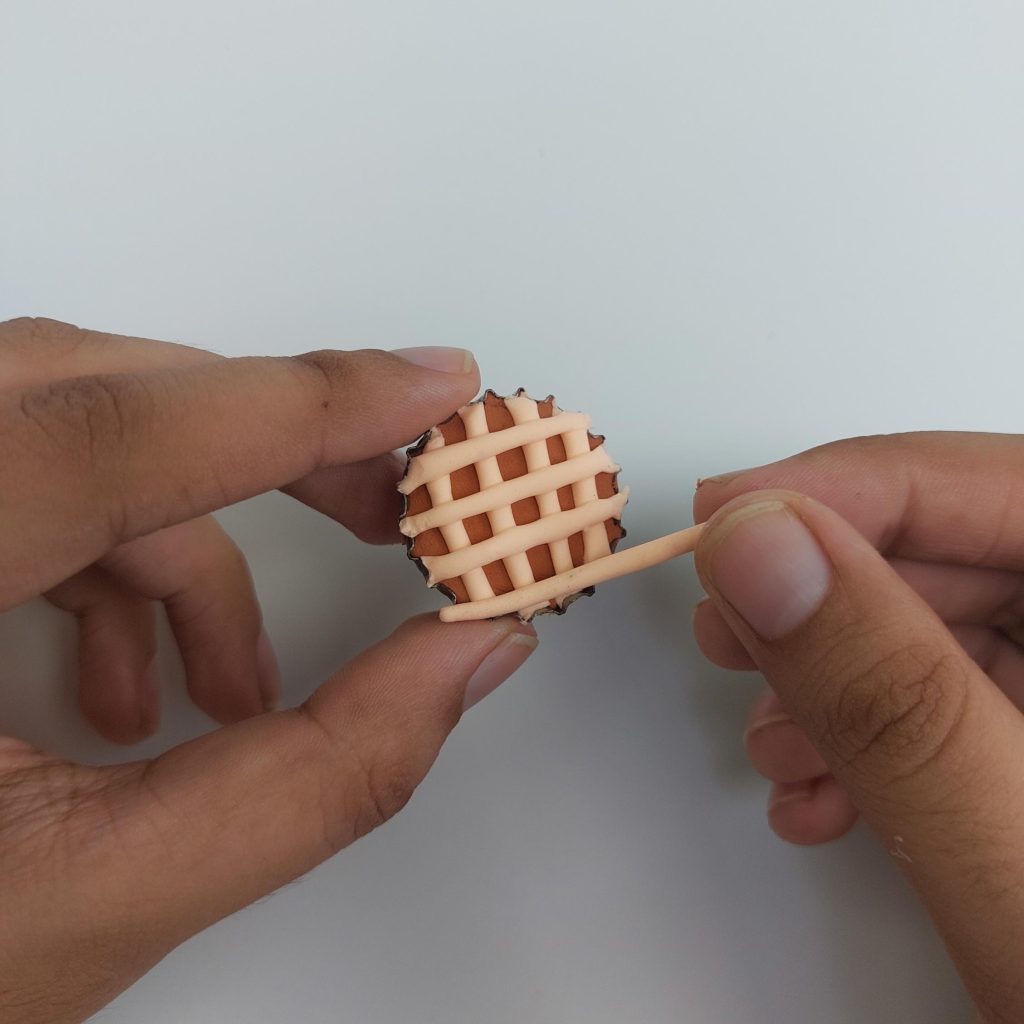
Step 3: Creating the Lattice Crust
- Roll thin strips of polymer clay.
- Lay them across the pie in one direction, then weave more strips across in the other direction to make the lattice.
- Press down gently at the edges so they stick to the filling.
Step 4: Adding a Baked Effect
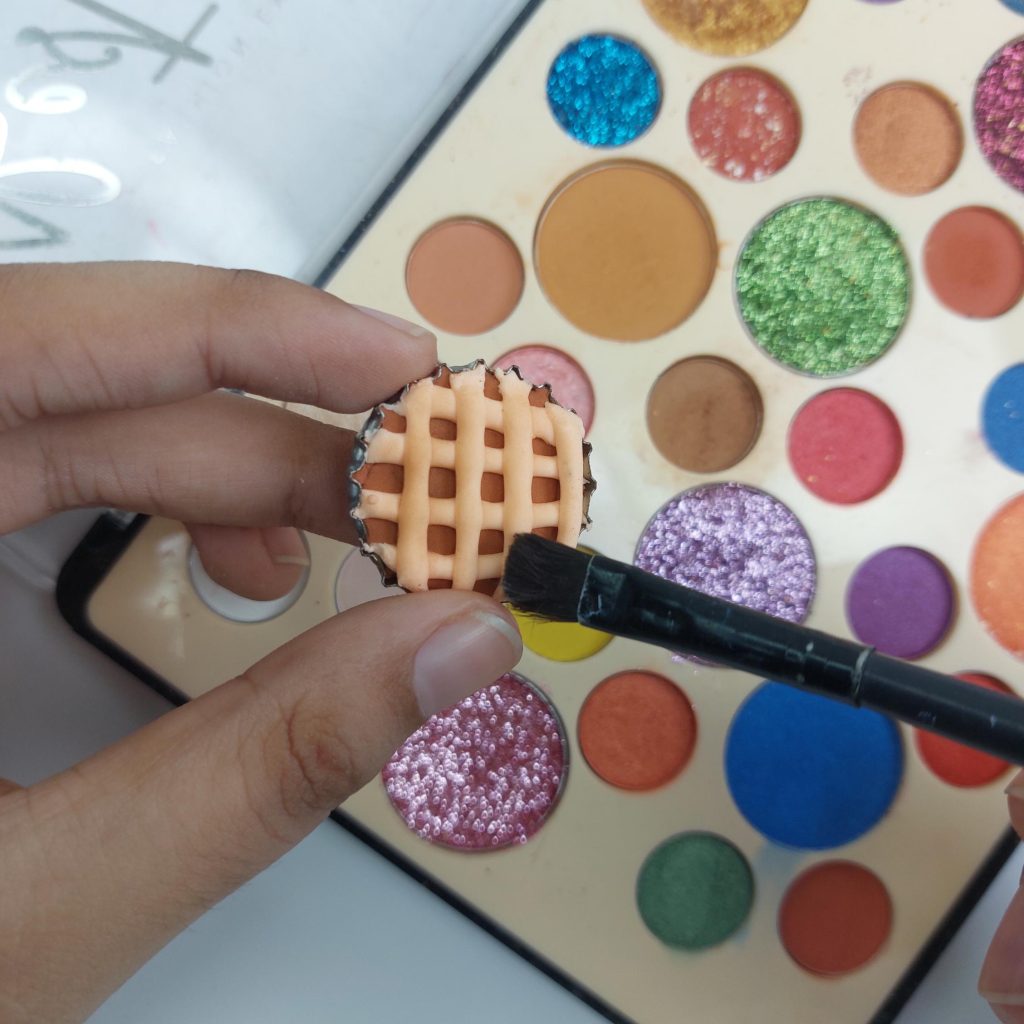
Instead of paint, I dusted the crust with shades from an old eyeshadow palette. A soft golden brown makes it look freshly baked, while a hint of darker brown gives it that slightly toasted finish.

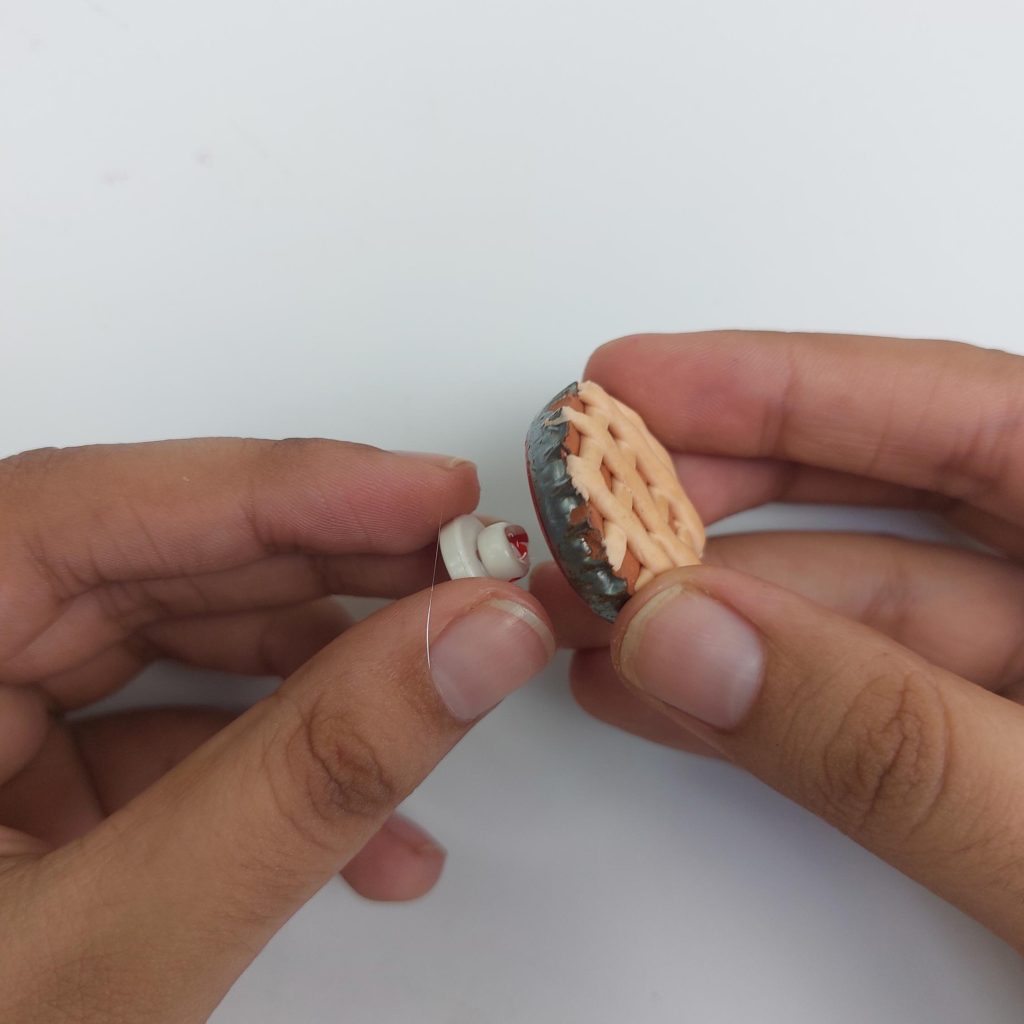
Step 5: Making the Stand
- I stacked a button and a bead, then glued them together with hot-melt glue.
- Once dry, I glued the bottle cap pie on top of it, creating a raised pie stand that looks perfect for a dollhouse kitchen table.

Step 6: Finishing Touches
Bake your polymer clay according to the instructions on the package (temperature and time vary by brand). Once cooled, you’ll have a sturdy little pie that looks like it just came out of the oven!

Dollhouse furniture made from matchboxes – A dressing table
By the way, (this is not a step-by-step tutorial with pictures, though. Sorry!). Have you seen this dollhouse dresser made from matchboxes on my YouTube channel yet?
Next project coming up soon!
My Final Conclusion
There are many more “trash to treasures” project updates coming up on this blog post, as well as other posts, so stay tuned and subscribe to my newsletter or bookmark this page!
I wish you happy crafting!
Kind regards,
Lizzy

Hi everyone!
My name is Lizzy, and I am an amateur miniaturist obsessed with everything in the dollhouse and miniature world, ever since I was a teenager.
So far, I have created 2 dollhouse projects, a backyard shed and a miniature treehouse, tons of DIY dollhouse kits, and “hacked” some.
I also created a fairy garden, and lots of small and simple miniature projects on my YouTube channel. (mostly made from trash or everyday items).
I love to write as well about all things happening in the miniature world, hence the reason why I created this blog!
I wish you happy reading and crafting!
Lizzy


I love this! Thank you for posting. I’m looking forward to more “trash to treasure” projects. I love your emails and I appreciate all of your advice and videos!
Hi Diann!
Thank you so much and rest assure, a lot more is comming up!
Happy crafting!
Lizzy
I love all your post. I find so much inspiration in them. Thank you so much. Keep up the great work.
Thank you and you are welcome Rosa! Happy crafting!
Lizzy