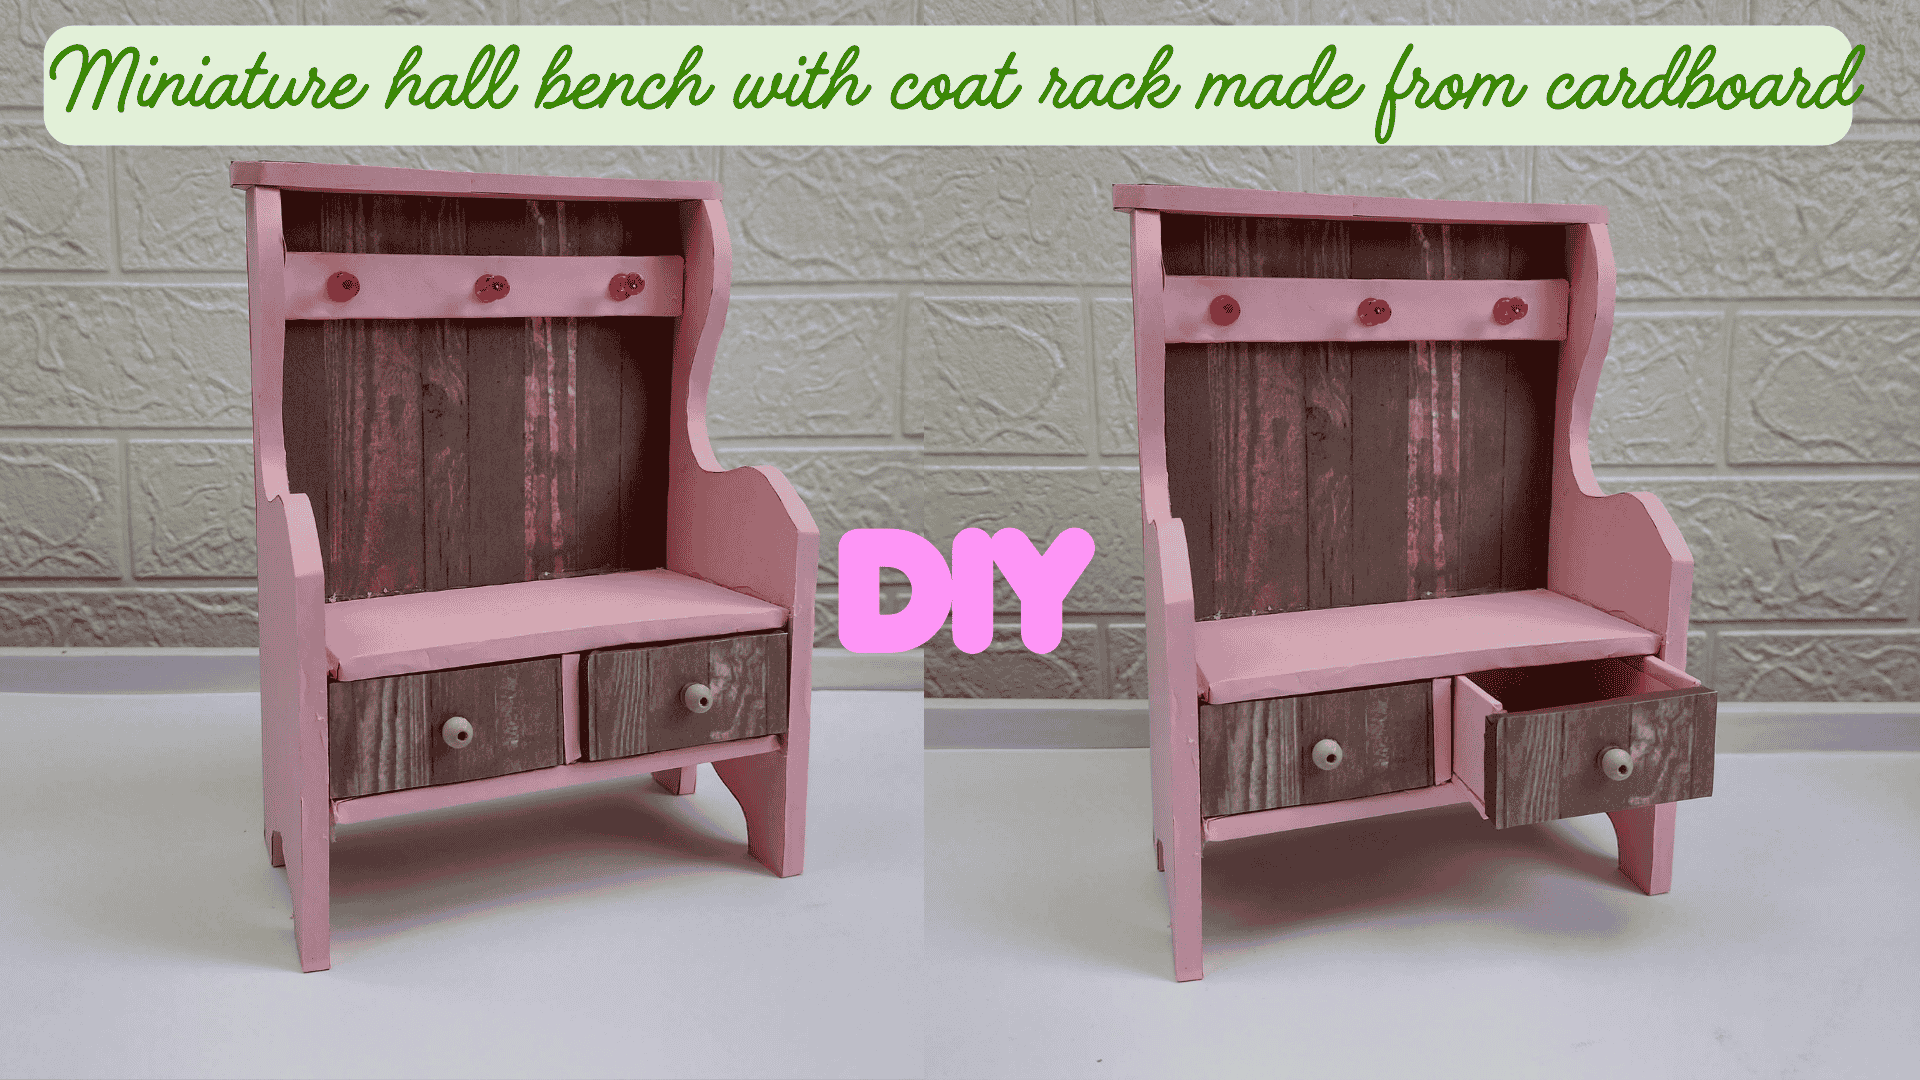
Sometimes I just want to build a piece of furniture that looks detailed and realistic, but is still completely doable with cardboard and decorative paper. This little miniature hall bench is exactly that.
Side panels (2x) → 8 × 20 cm (cut into curved shape as shown)
Drawer cover strip (upper front bar) → 7 × 13 cm
Center divider → 3 × 7 cm
Top inner holder strip → 1.7 × 13 cm
Top front edge strip → 15.5 × 2 cm
Drawer Measurements (each drawer)
Drawer base → 6.2 × 6.5 cm
Sides (2x) → 2.7 × 6.5 cm
Back → 6.1 × 2.8 cm
Front (structure) → 6.2 × 3 cm
Drawer front cover (wood print) → same size as front piece
Tutorial
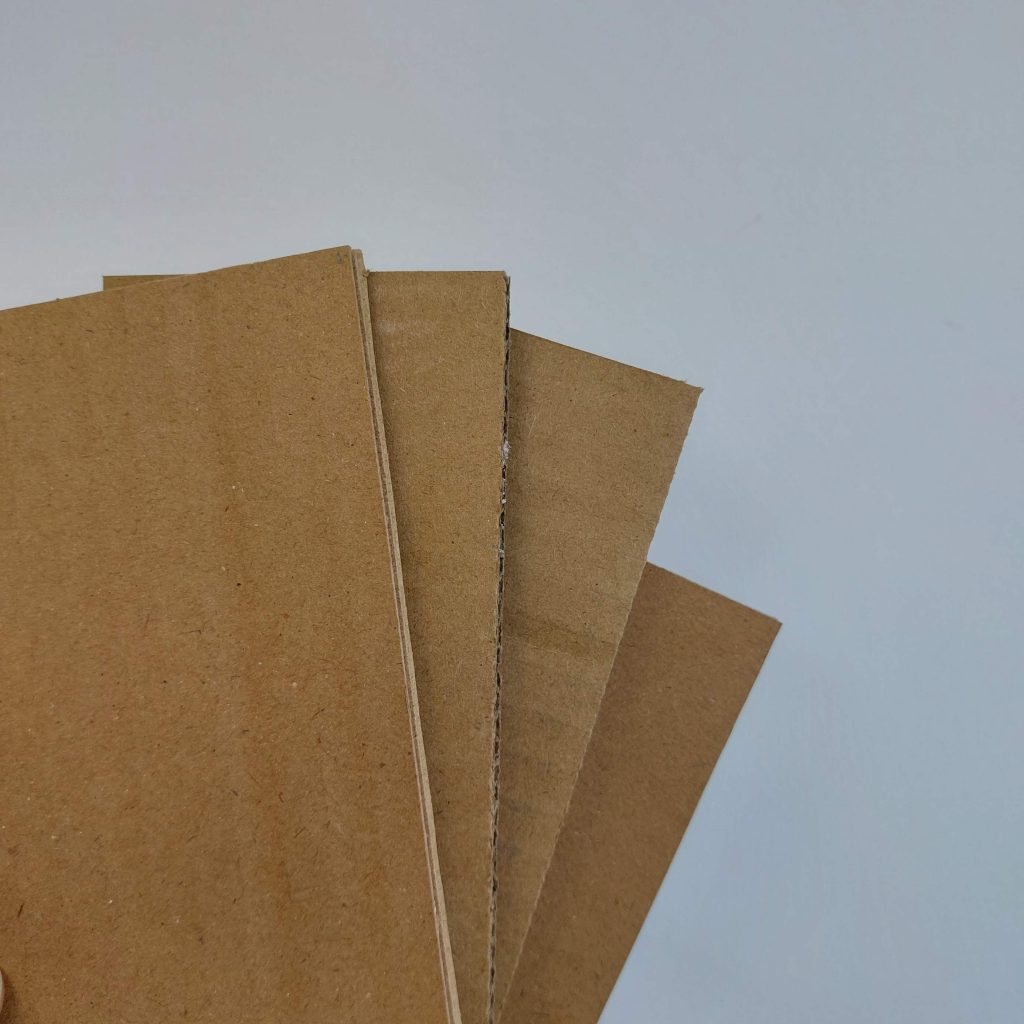
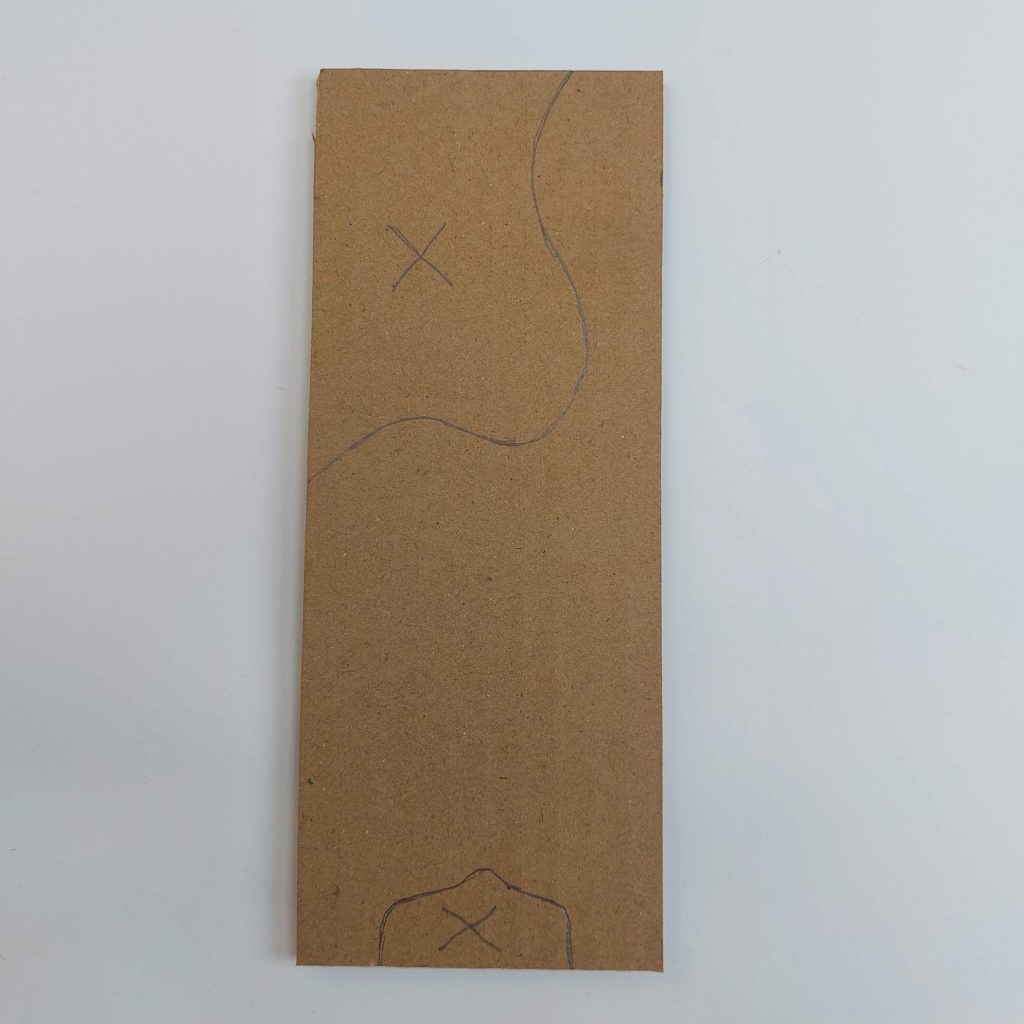
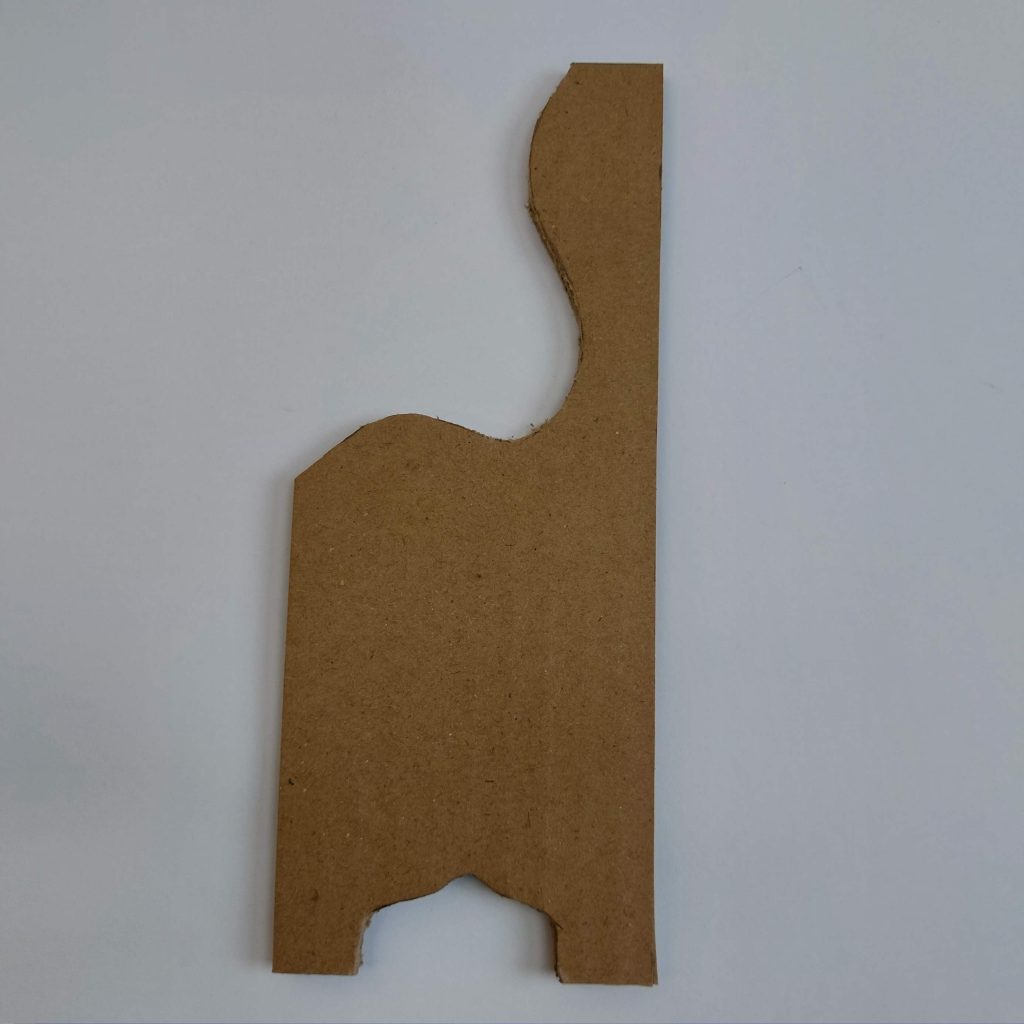
Start by drawing and cutting the two side panels from thick cardboard. Both sides have a curved inner section and small feet at the bottom. Cut one first, then use it as a template to trace the second so they match perfectly.
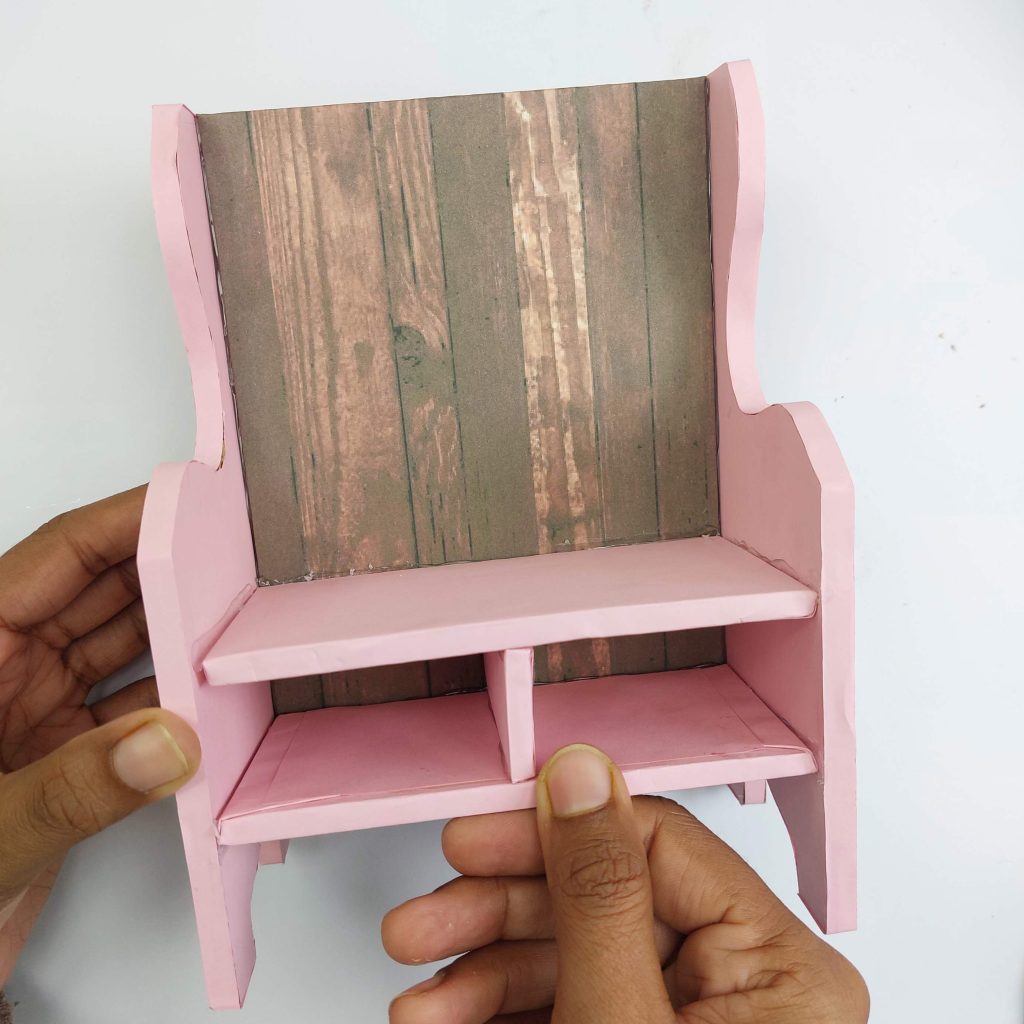
Once cut, wrap both side panels completely in your pink decorative paper. Glue the paper smoothly around the curves and trim any excess neatly.
Prepare the back panel (13 × 18.5 cm) and cover it with the wooden-print decorative paper. This will form the visible back wall inside the dresser.
Glue the two side panels upright onto the back panel. Make sure everything is aligned and square before the glue fully sets.
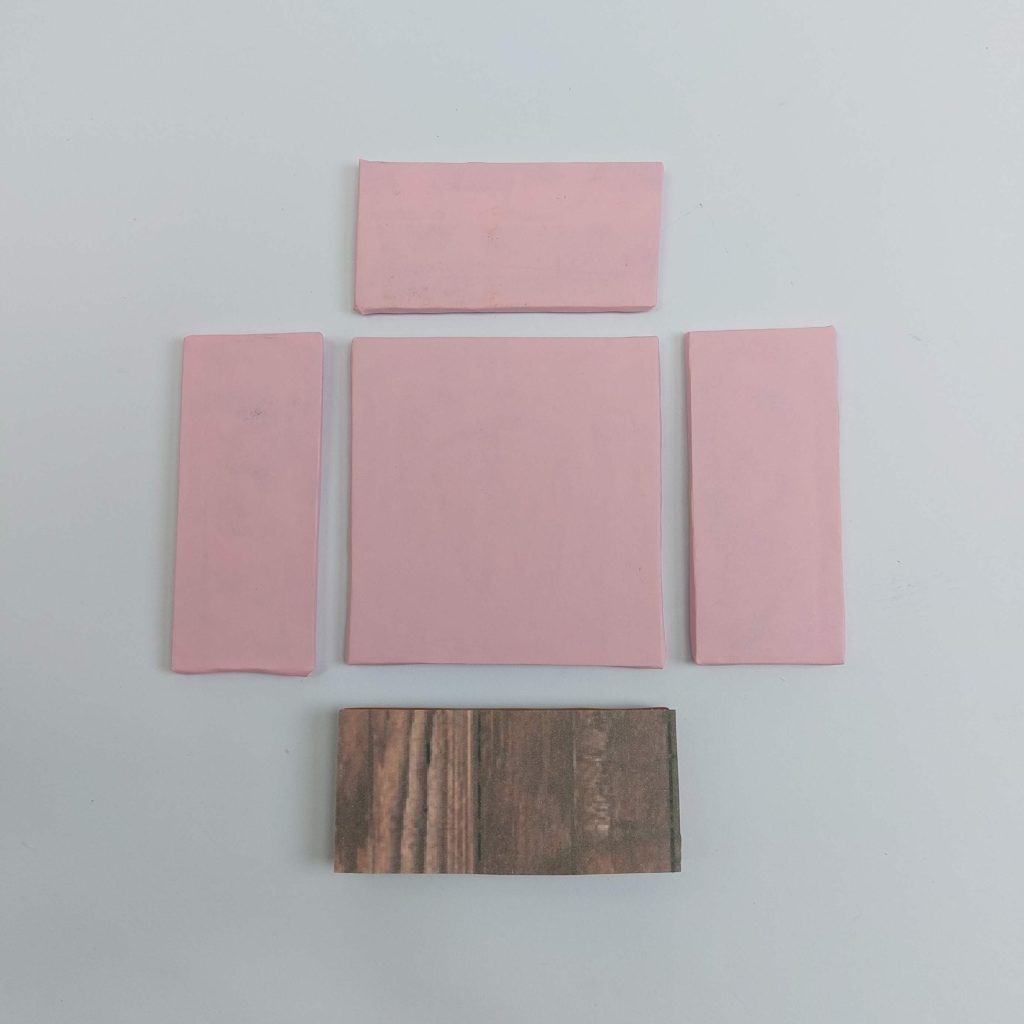
Cut and wrap all the rest of the pieces in pink paper.
Glue the pink shelves between the sides about one-third from the bottom. Add the center divider (3 × 7 cm) vertically underneath this shelf to separate the two drawer spaces.
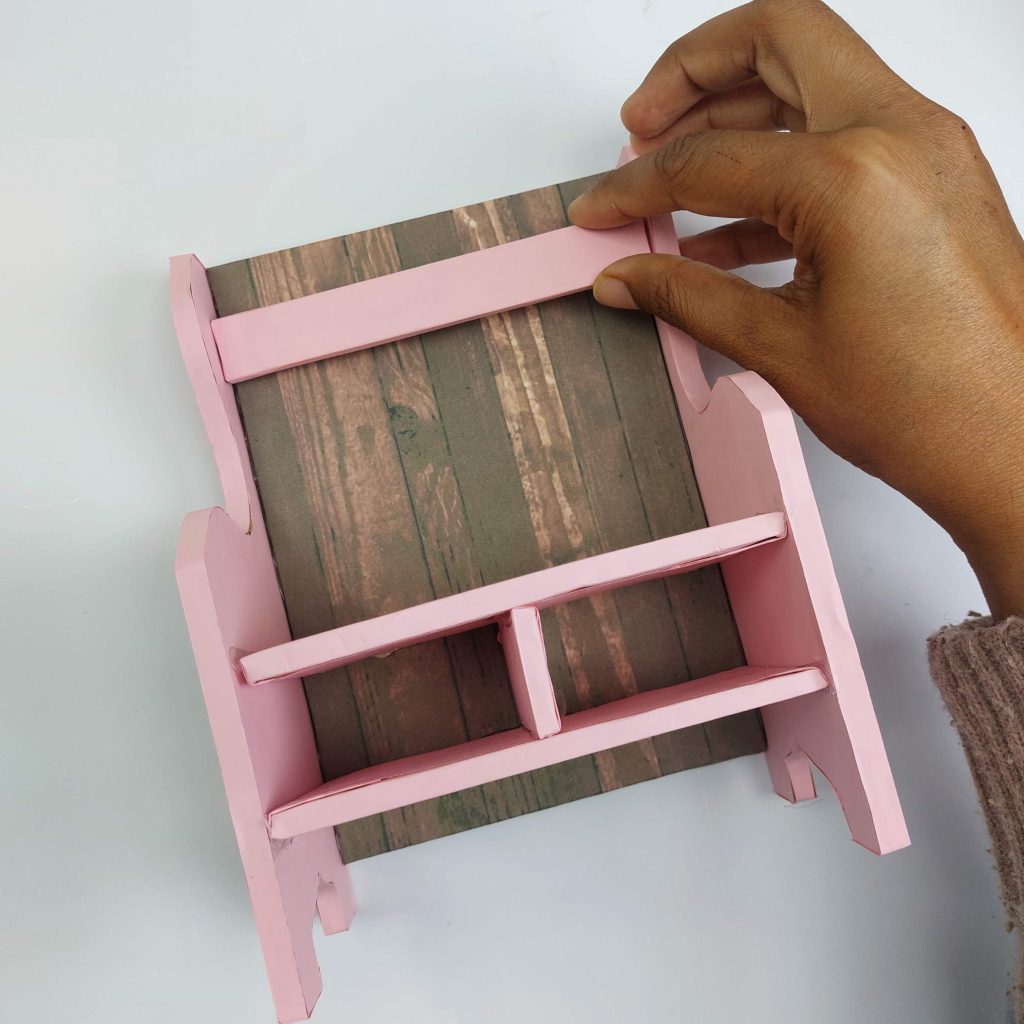
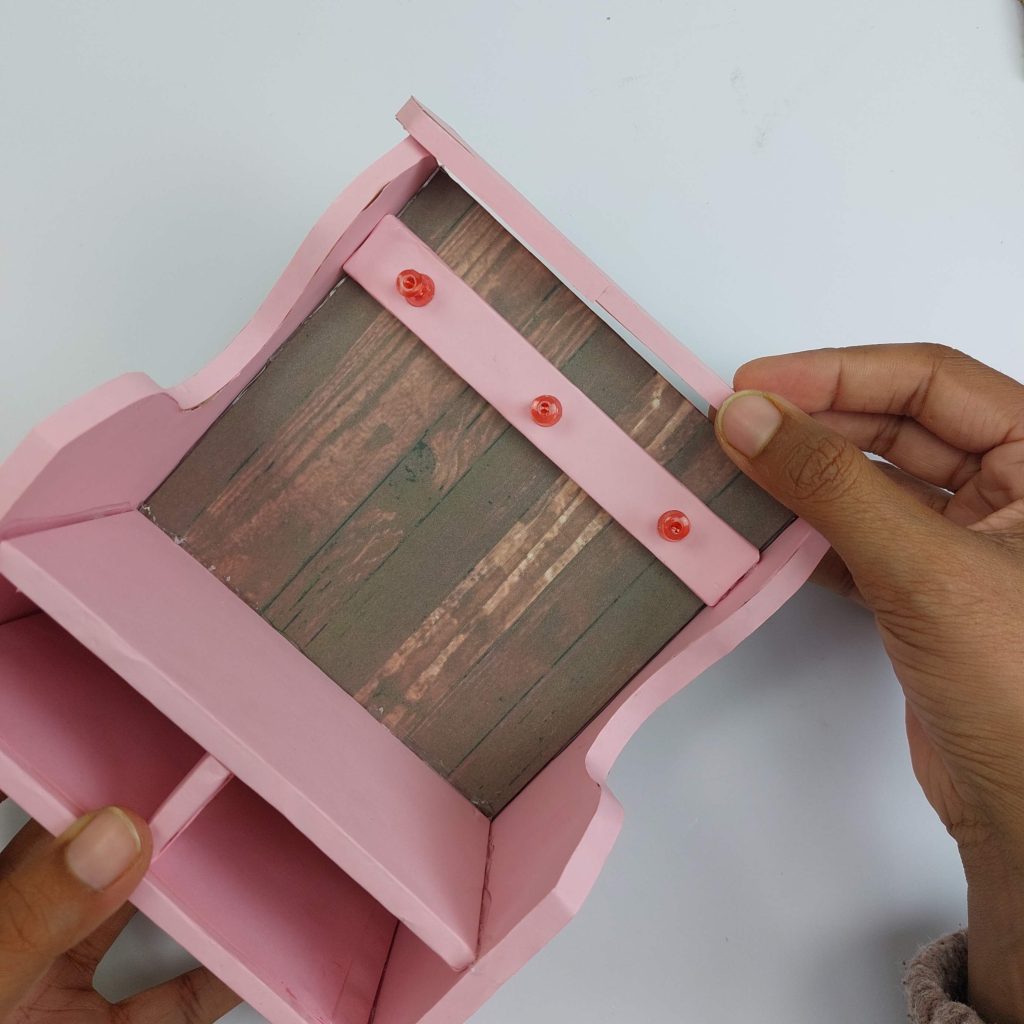
Next, glue the upper shelf in place to form the open display section above the drawers.
Wrap it in pink paper first. This piece will hold the decorative push pins, which act as small hooks.
Finally, glue the 15.5 × 2 cm strip along the very top front edge to finish the structure neatly.
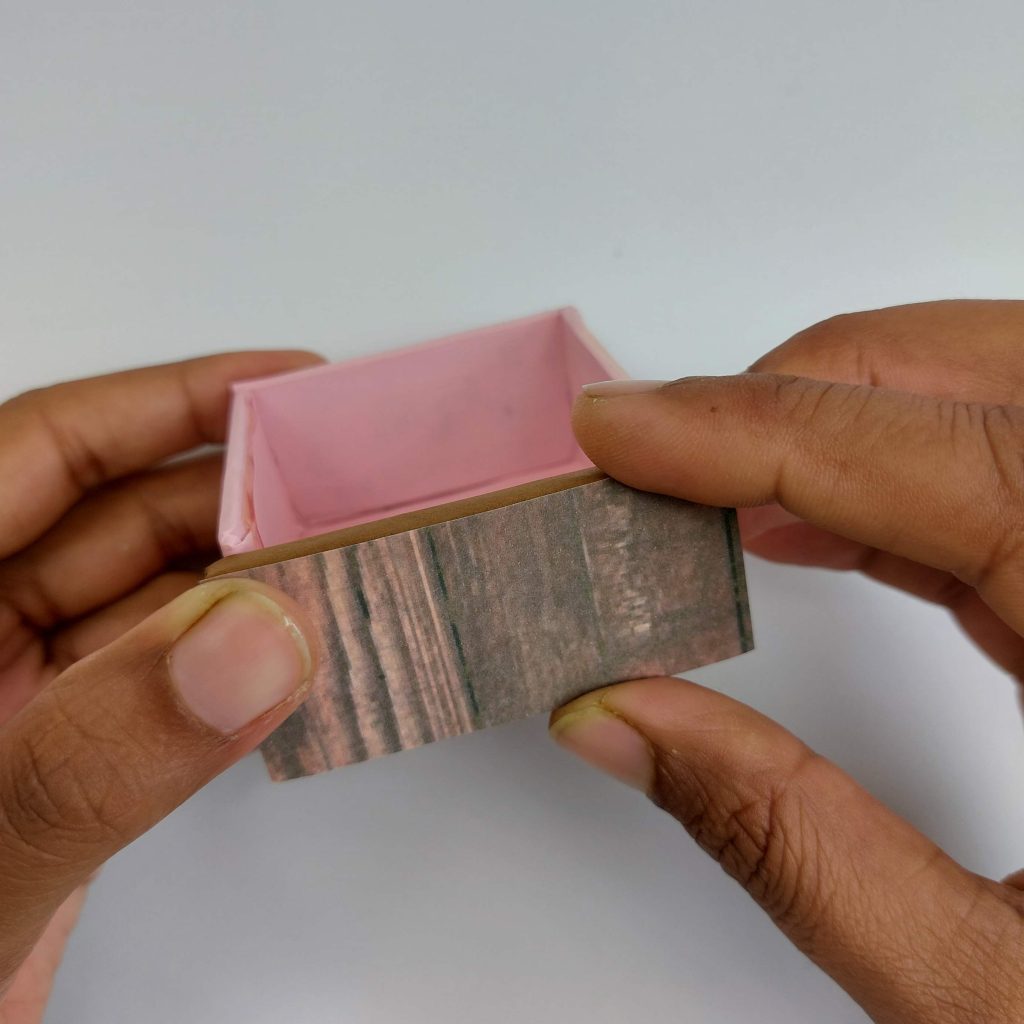
To build the drawers, start with the base (6.2 × 6.5 cm). Glue the side pieces to both long edges, then attach the back piece. Add the front structure piece (6.2 × 3 cm).
Wrap the drawer box in pink decorative paper. Glue the wooden-print paper onto the front to match the back panel design.
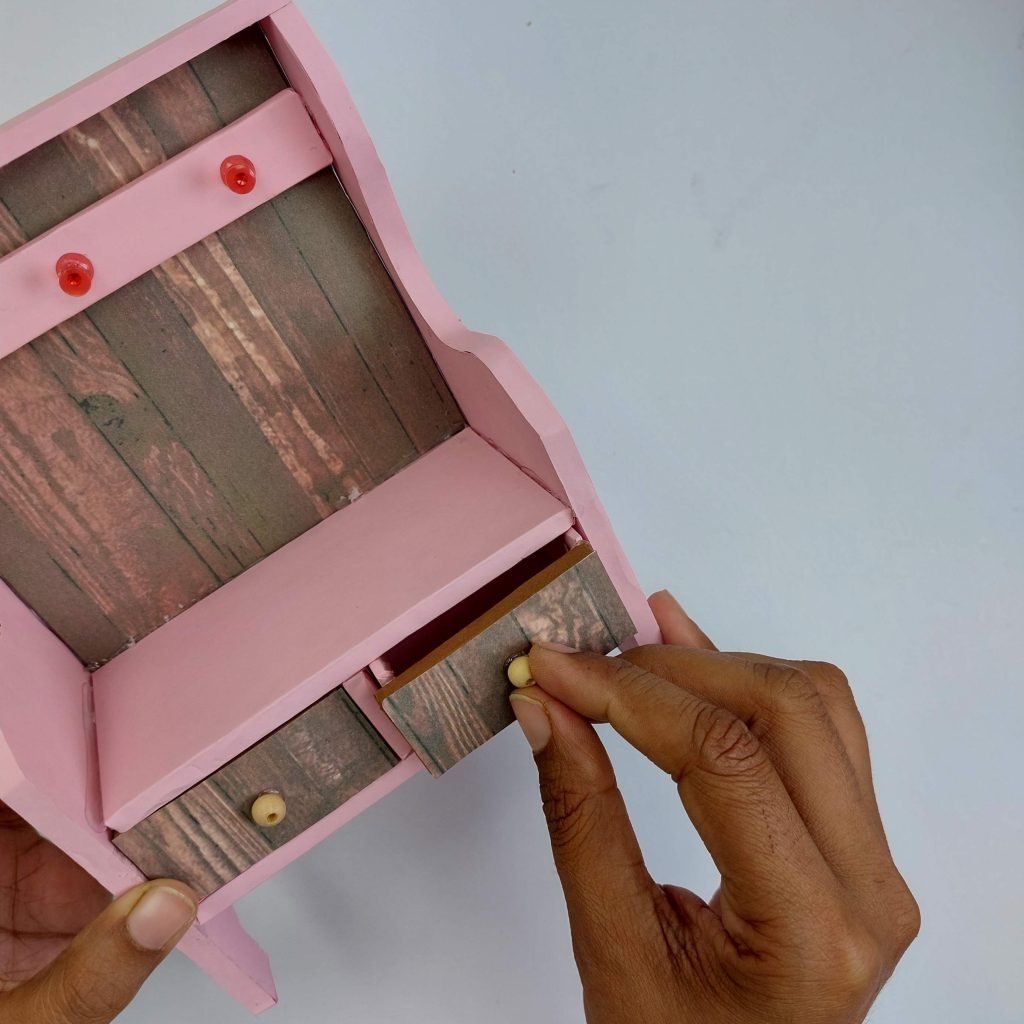
For the drawer front, glue a small wooden bead in place as the knob.
Slide both drawers into their compartments. They should fit snugly but still move easily.
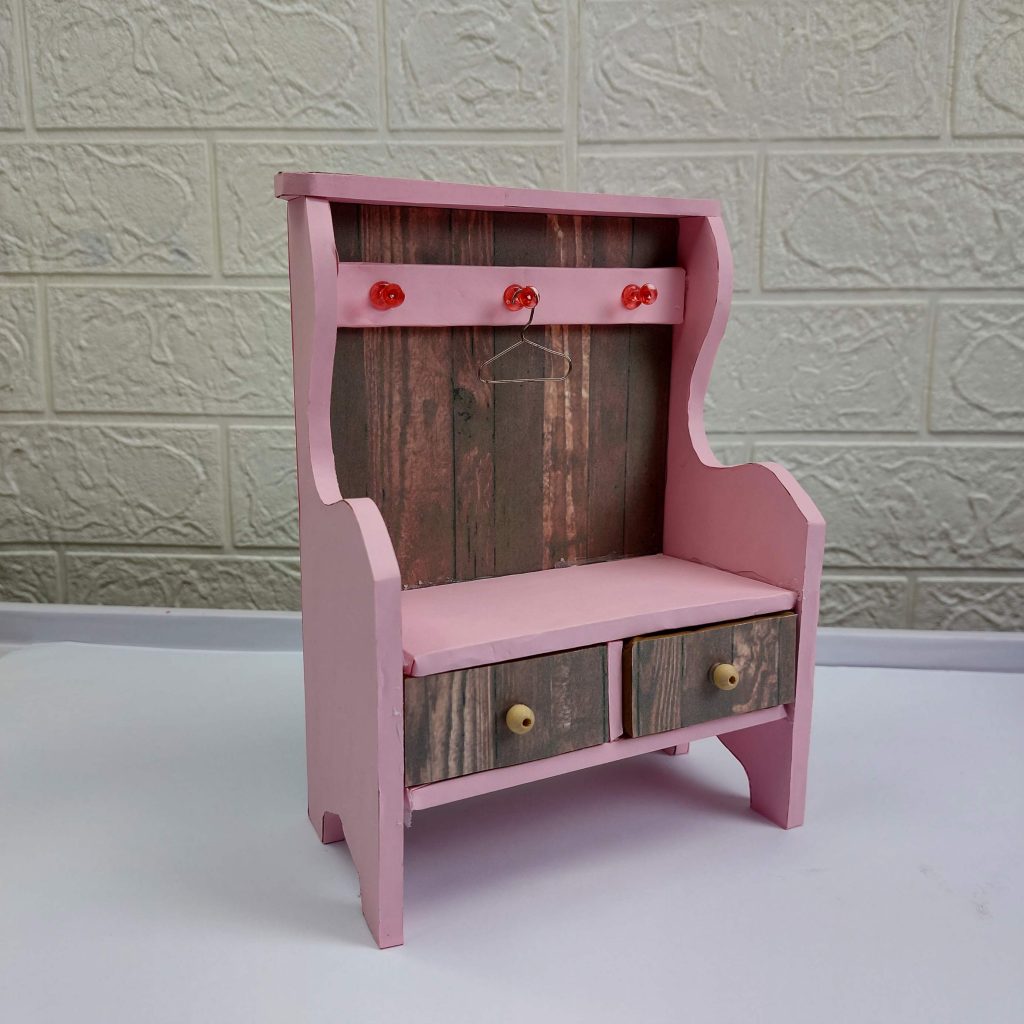
And that’s it: a small but detailed miniature dresser that adds a lot of character to any dollhouse hallway! Decorate it with tiny jackets, an umbrella, etc.. 🙂
My Final Conclusion
If you decide to build this miniature dresser yourself, I’d genuinely love to see how yours turns out. Did you stick to the measurements, or did you tweak the design to fit your dollhouse?
Let me know in the comments below! I read every single one.
And if you want to share your mini makes, ask questions, sell or buy miniatures, come join my Facebook group.
4 thoughts on “DIY Cardboard Miniature Hall Bench with Coat Rack And Drawers (1:12 Scale)”
hi Lizzy: really like this hall tree. looks like a perfect size for a smaller house and is lovely with the paper covering the cardboard. i am going to put it on my list of “to dos” 😊
Hi Judith!
Thank you so much for the positive note today, I am a bit frustratred with some negative comments on my Facebook page, to be honest, so you are making my day! Thanks again.
Happy crafting!
Lizzy
Hello Lizzy,
looks like it will be a good build. I don’t have a Facebook account.
but I must say that I really appreciate you taking time to do what you do for everyone.
and those who want to leave negative comments. why don’t they come up with their own blog and accounts and see what they can come up with!!?! I’m sorry but that makes me so mad! have a blessed day and thank you for everything


")


hi Lizzy: really like this hall tree. looks like a perfect size for a smaller house and is lovely with the paper covering the cardboard. i am going to put it on my list of “to dos” 😊
Hi Judith!
Thank you so much for the positive note today, I am a bit frustratred with some negative comments on my Facebook page, to be honest, so you are making my day! Thanks again.
Happy crafting!
Lizzy
Hello Lizzy,
looks like it will be a good build. I don’t have a Facebook account.
but I must say that I really appreciate you taking time to do what you do for everyone.
and those who want to leave negative comments. why don’t they come up with their own blog and accounts and see what they can come up with!!?! I’m sorry but that makes me so mad! have a blessed day and thank you for everything
thank you so much Lisa, and have a blessed day as well!
Lizzy