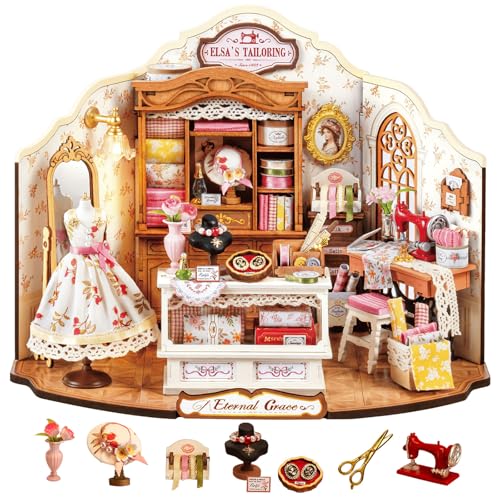
I recently got the Elsa’s Tailoring miniature kit from Robotime, and yes, they kindly sent it to me for free ( I never thought I would become an “influencer” hahahaha). That being said, this review is completely my own.
Disclaimer: I’m not paid to write about it, nor to take photos or make videos. As always, I just share my honest experience of putting the kit together: what went smoothly, what didn’t, and whether I’d recommend it to you.
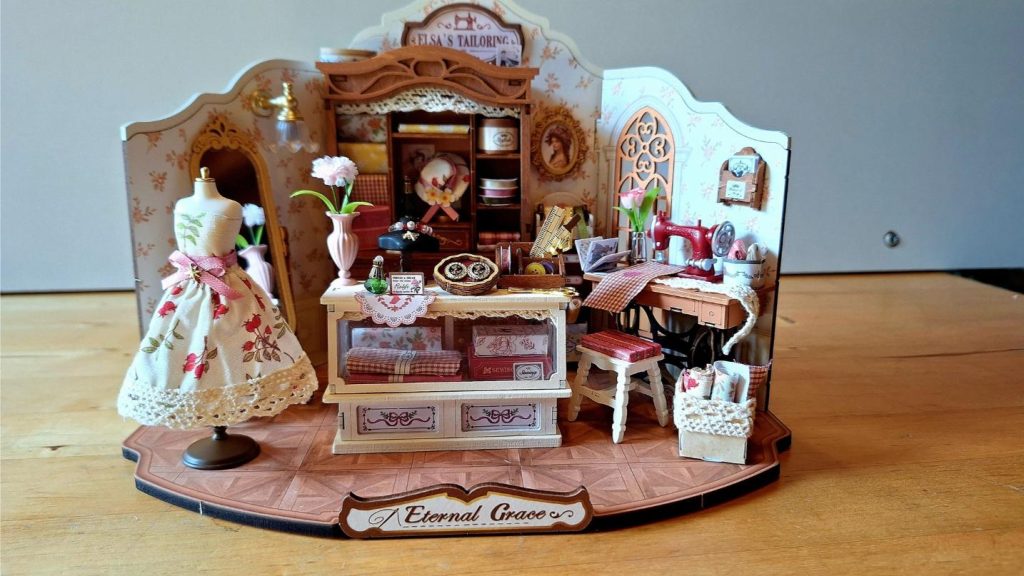
Elsa’s Tailoring, the trickiest part was the dress for the mannequin!
As an Amazon, Etsy and Anavrin associate, I earn a small commission from your purchase, with no extra charges for you.
But first, why choose Robotime (Rolife)?
If you’ve been around my blog for a while, you probably already know that Robotime (also known as Rolife) is one of my go-to brands for miniature kits.
I’ve built quite a few of them over the years, and you can find plenty of reviews on my site: just type “Robotime” or “Rolife” in the search bar if you’re curious.
What keeps me coming back is their balance of sturdiness, design, and detail
And yes, I’ve even kitbashed a couple of their sets into completely different scenes – I just love that!
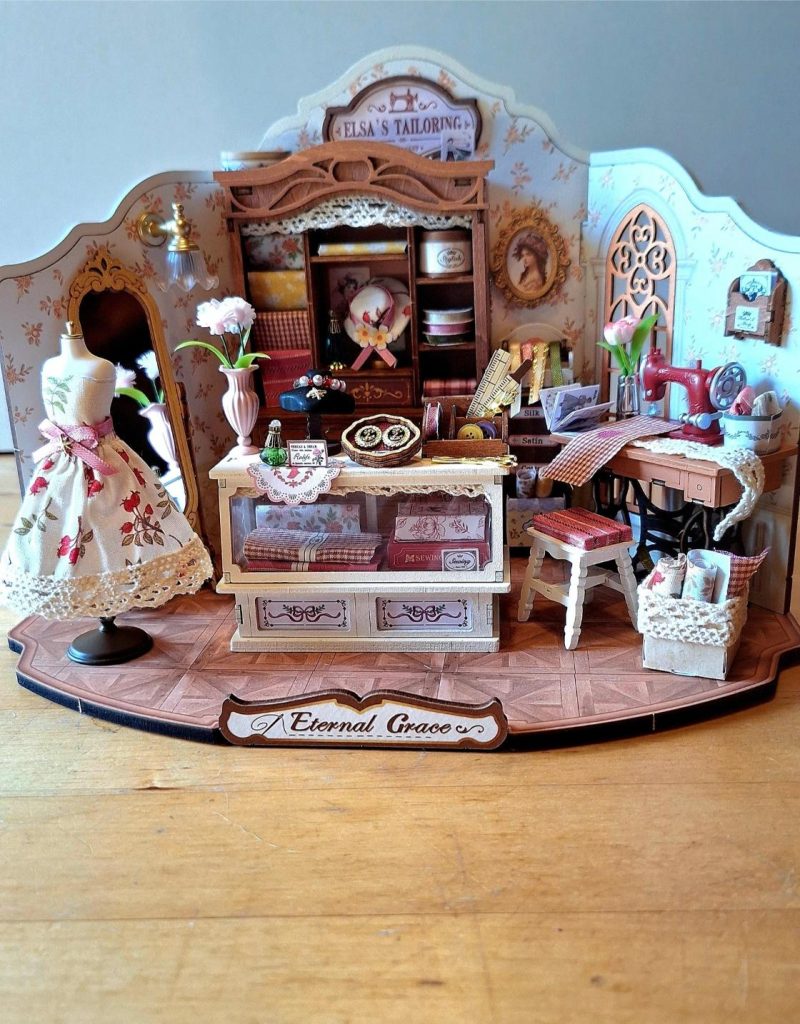
Assembling “Elsa’s Tailoring” — my process & views
In general, Elsa’s Tailoring turned out to be one of the easier and fastest Robotime kits I’ve built.
I really enjoyed the design: it feels like a corner shop that could easily exist in real life. For now, it’s staying on my shelf, but I can picture it fitting perfectly in a sewing classroom.
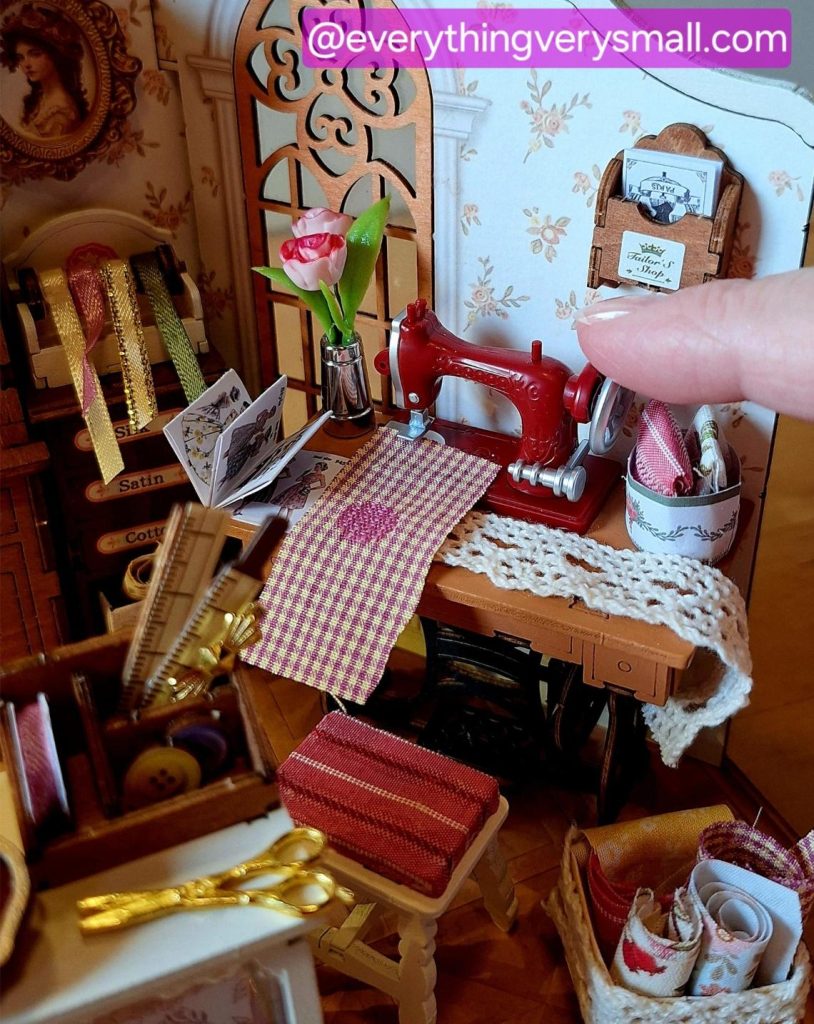
Elsa’s sewing machine
The assembly is straightforward: just follow the manual step by step.
Most of the wooden pieces slot together with the familiar tab-and-glue system.
Walls, windows, floors, picture frames, and all furniture are clicked together like a good-fitting glove.
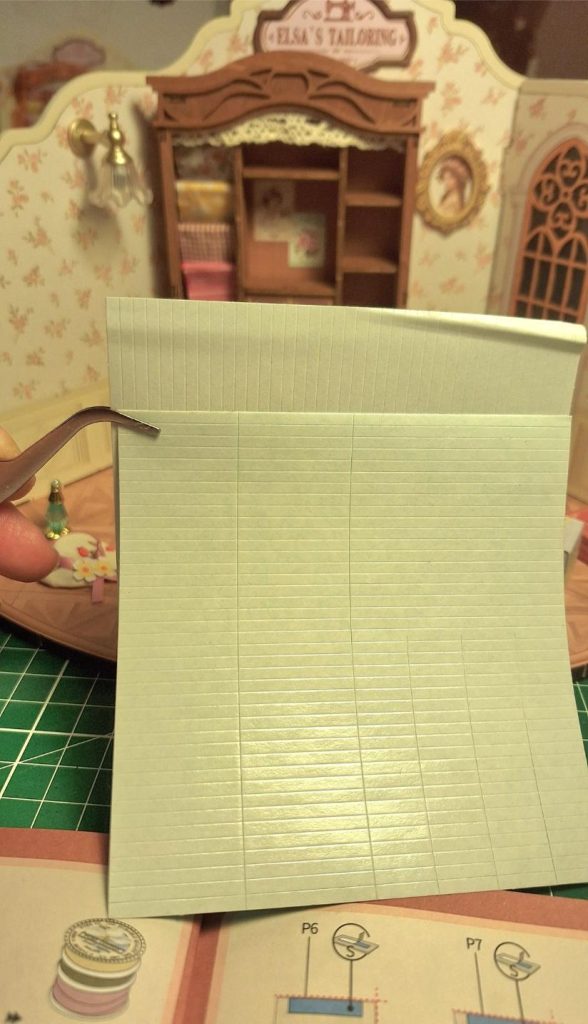
A few areas need extra reinforcement, so I stuck with my trusty Grab Fast Tacky Glueinstead of the included glue strips (those strips felt too fiddly for me).
glue strips included in the kit
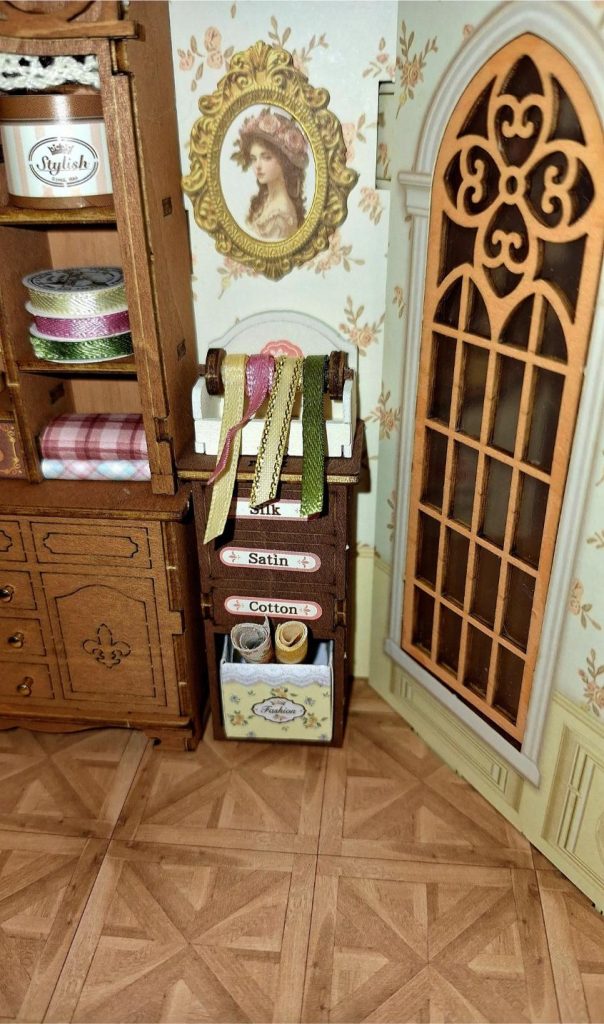
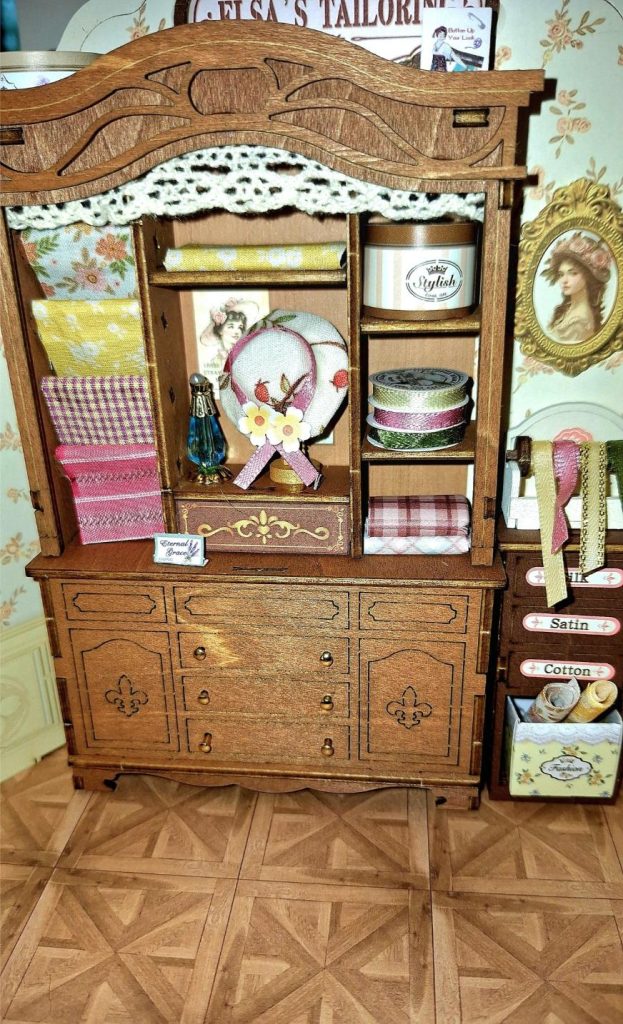
Ribbons & Fabric Rolls
One of the most charming little details is the ribbon stand. That said, it did take some fiddling. The rolls didn’t want to stay perfectly round on their own, so I glued them carefully and clamped them until they dried into shape.
Once done, they look great: it adds a lot of character to the shop interior.
LED Light & Battery Box
The LED light was surprisingly simple. All the wiring was premade, so it was just a matter of attaching it in the right spots.
However, the battery box at the back is a bit of a letdown. It sits loose, doesn’t look very nice from behind, and tends to move around when you try to flip the switch (see photo). Not a dealbreaker, but it could have been designed a little neater.
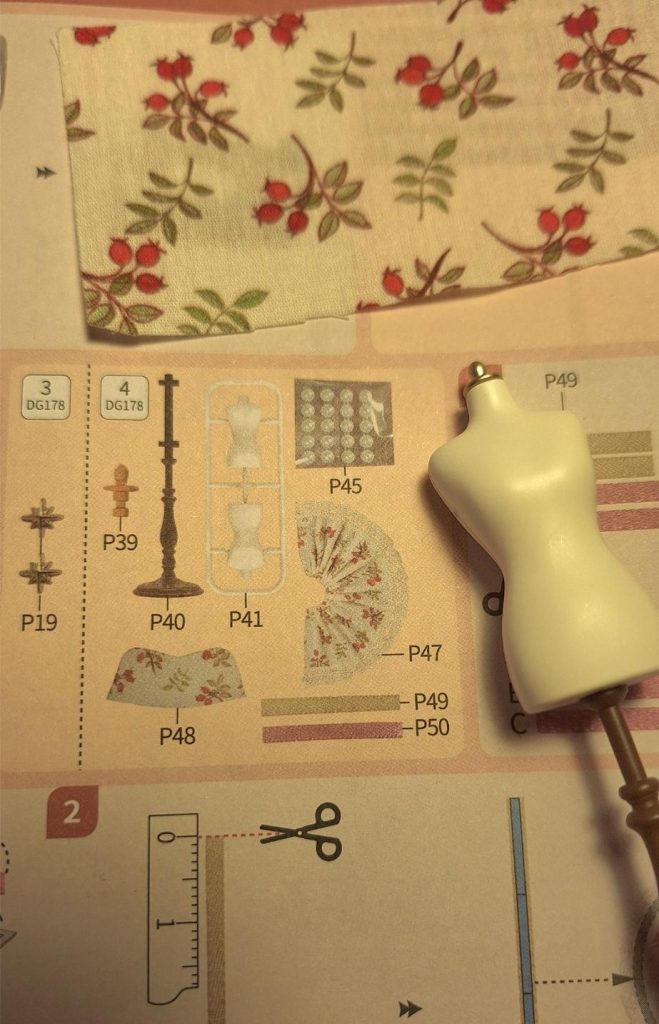
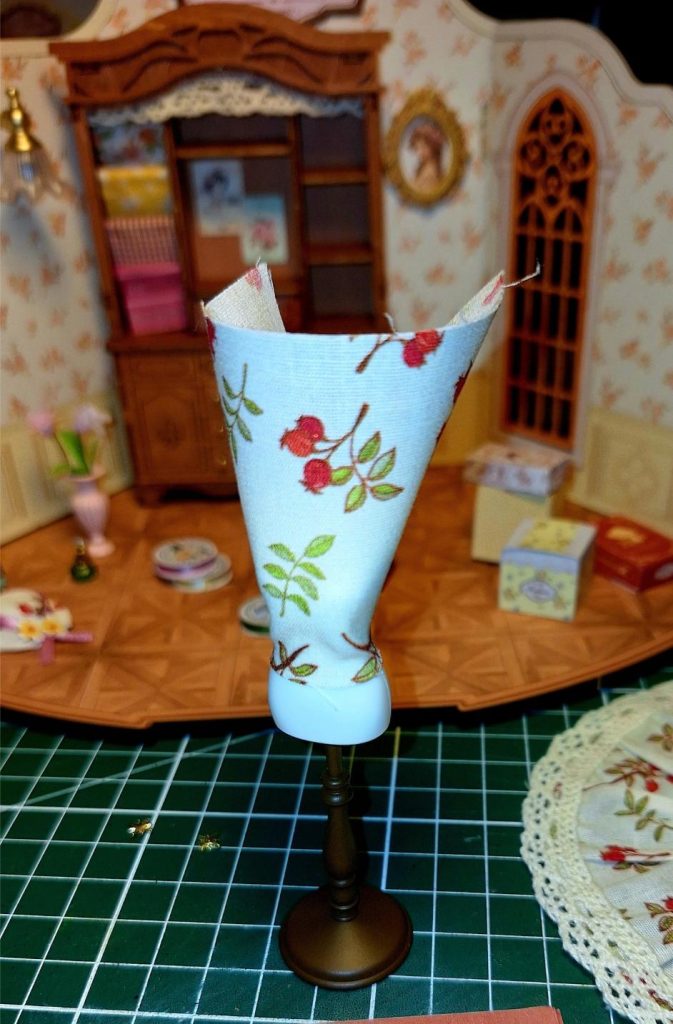
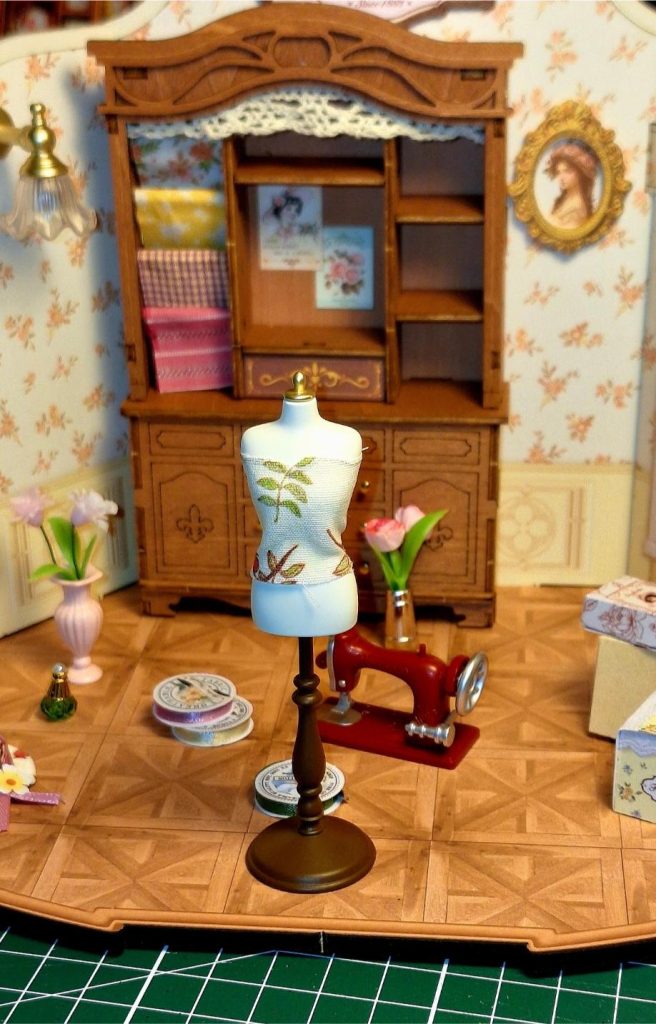
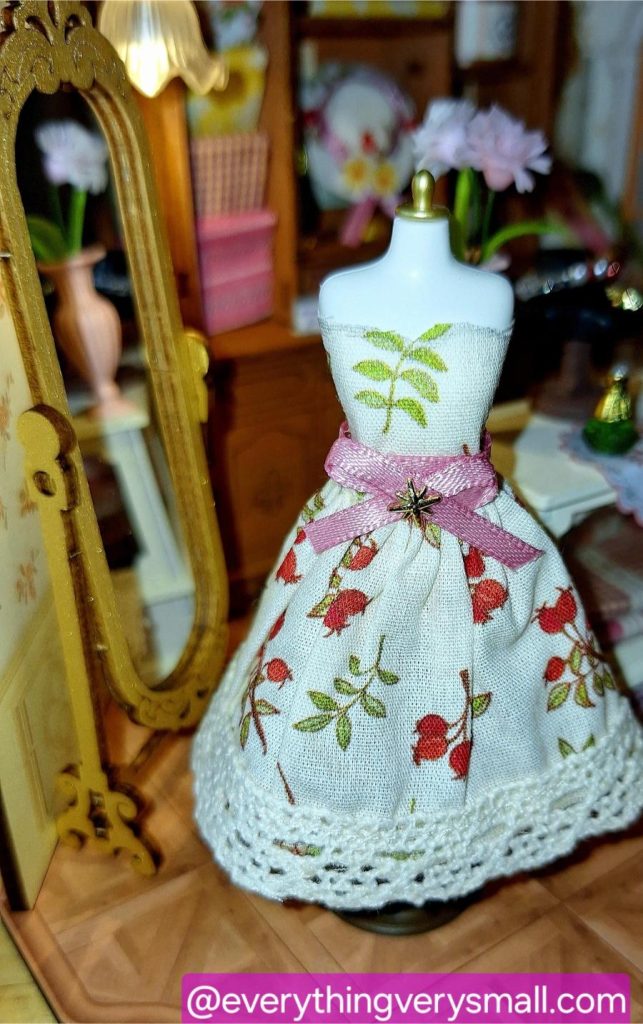
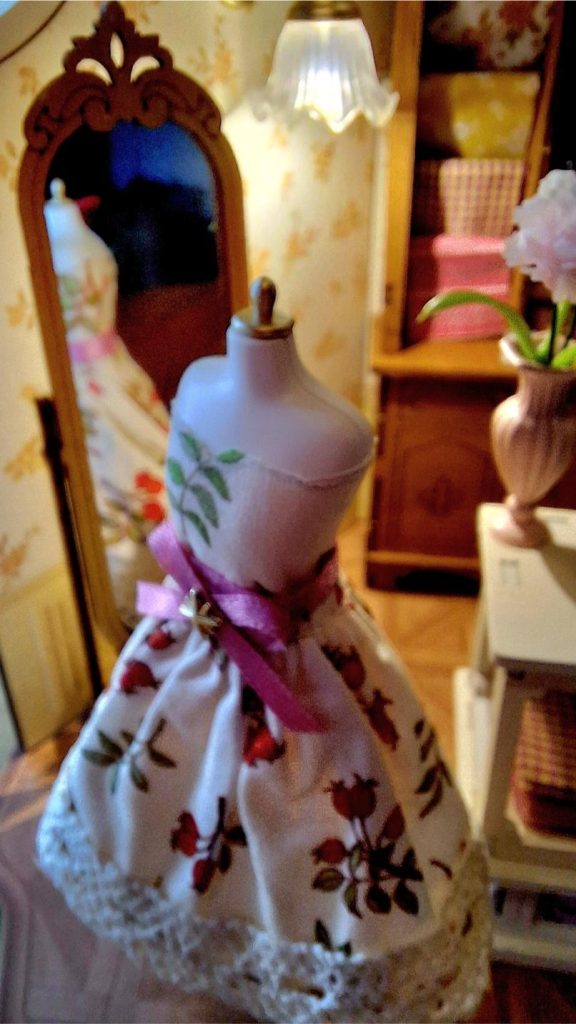
The Mannequin (Dress Form)
Ah, the tricky part: the dress form (or mannequin). I think my husband heard me swearing a few times.
The skirt fabric went on easily enough, but the top of the dress gave me trouble.
The pattern of the top part of the mannequin’s dress wasn’t large enough. In the manual as well as on the parts sheet.
There wasn’t a ready-made pattern for the bust, so I had to improvise: first, glue a piece of fabric around the shape, then cut it to size to make the top.
Needless to say, it wasn’t easy, but I managed to get a decent result in the end.
Fun Details
A couple of small things made me smile while building:
– The tiny printed fabrics and ribbons give the whole kit a very cozy, authentic feel.
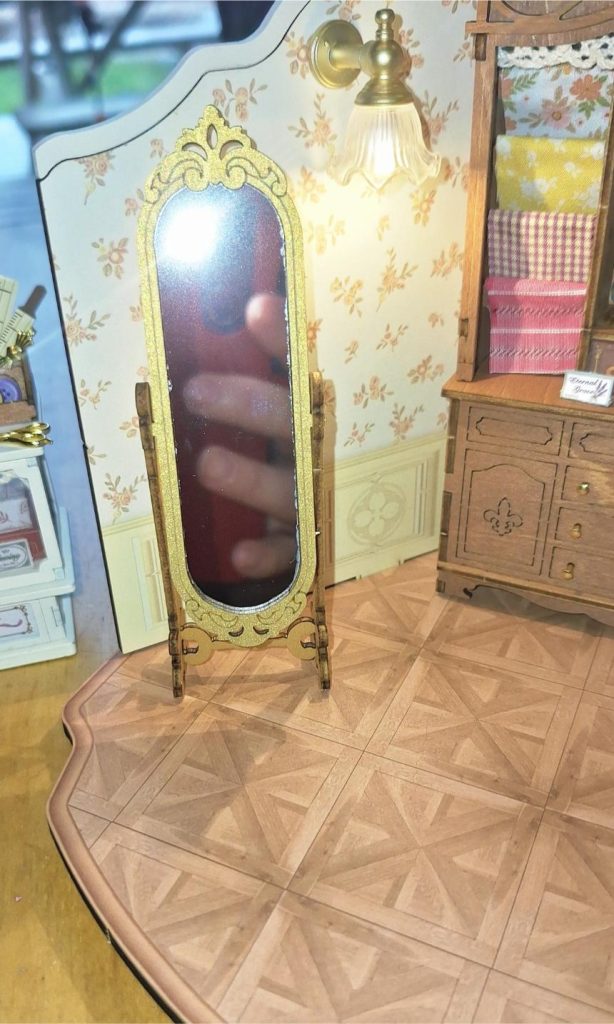
– The mirror looks incredibly realistic: so realistic that my own hand kept photobombing my video footage whenever I filmed in front of it – lol!
See the dress mirrored from behindFilming my hand instead of the mirror
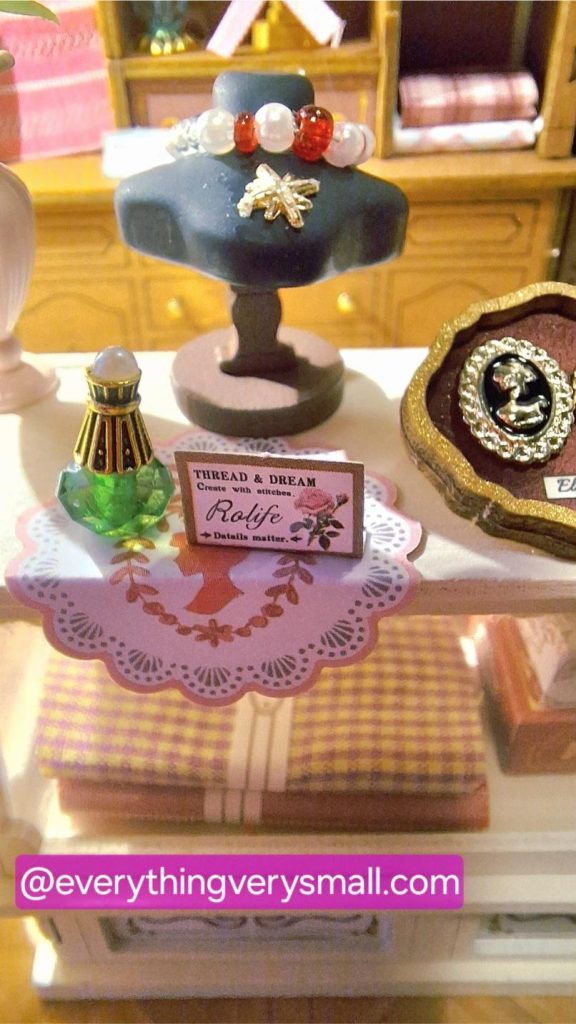
– I also noticed that Rolife sneaked their name onto some of the accessories—like on little boxes and cards. It’s a playful touch that makes the set feel like a branded shop.
– The hat and the little perfume bottles were also very cute and a reminder I need to create a little workshop on how to make these bottles from scraps 🙂
Rating, Pros & Cons
My rating: 4,5 / 5
The Good: easy fit, sturdy parts (never push too hard on the furniture pieces though), cute design, clear manual, fast project
The Not-So-Good: as mentioned above, the pattern for the dress’s top needs to be on the same scale. I don’t like the glue strips.
Building Elsa’s Tailoring was a really enjoyable project. It’s on the easier side compared to some other Robotime kits, but that doesn’t mean it’s boring—quite the opposite.
The little ribbons, fabrics, and jewelry details make it feel like a real sewing corner, and I love how cozy the whole shop looks once finished.
👉 Have you built this kit yourself, or are you thinking about adding it to your collection? Let me know what you think in the comments below; I’d love to hear your experiences!