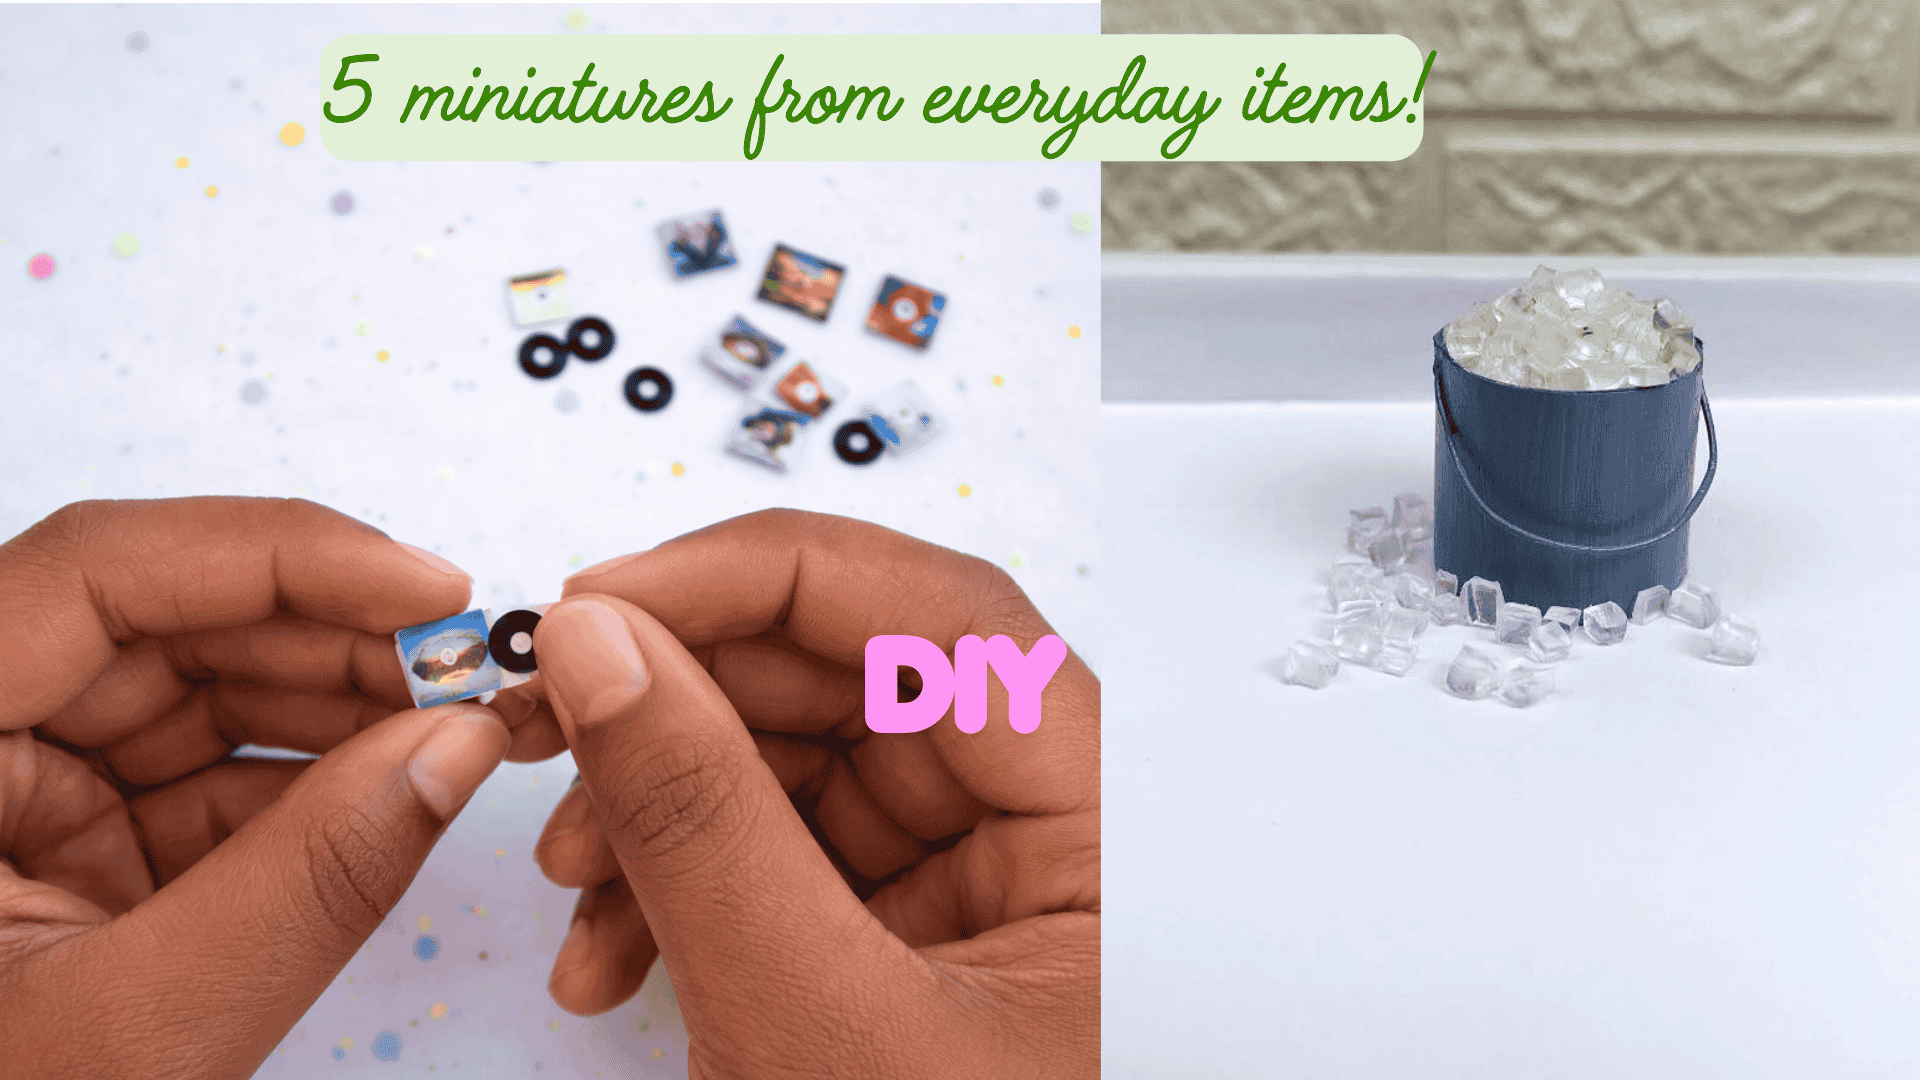
You don’t always need special miniature supplies. Sometimes the best materials are already sitting in your craft drawer or in your home! Over time, I’ve collected a few simple tricks for transforming everyday items into realistic miniature objects.
In this post, I’m sharing five small DIY miniature projects that use common materials you probably already have. They’re quick to make, and inexpensive.
Let’s start with the first one: tiny ice cubes made from hot glue sticks.
As an Amazon, Etsy and Anavrin associate, I earn a small commission from your purchase, with no extra charges for you.
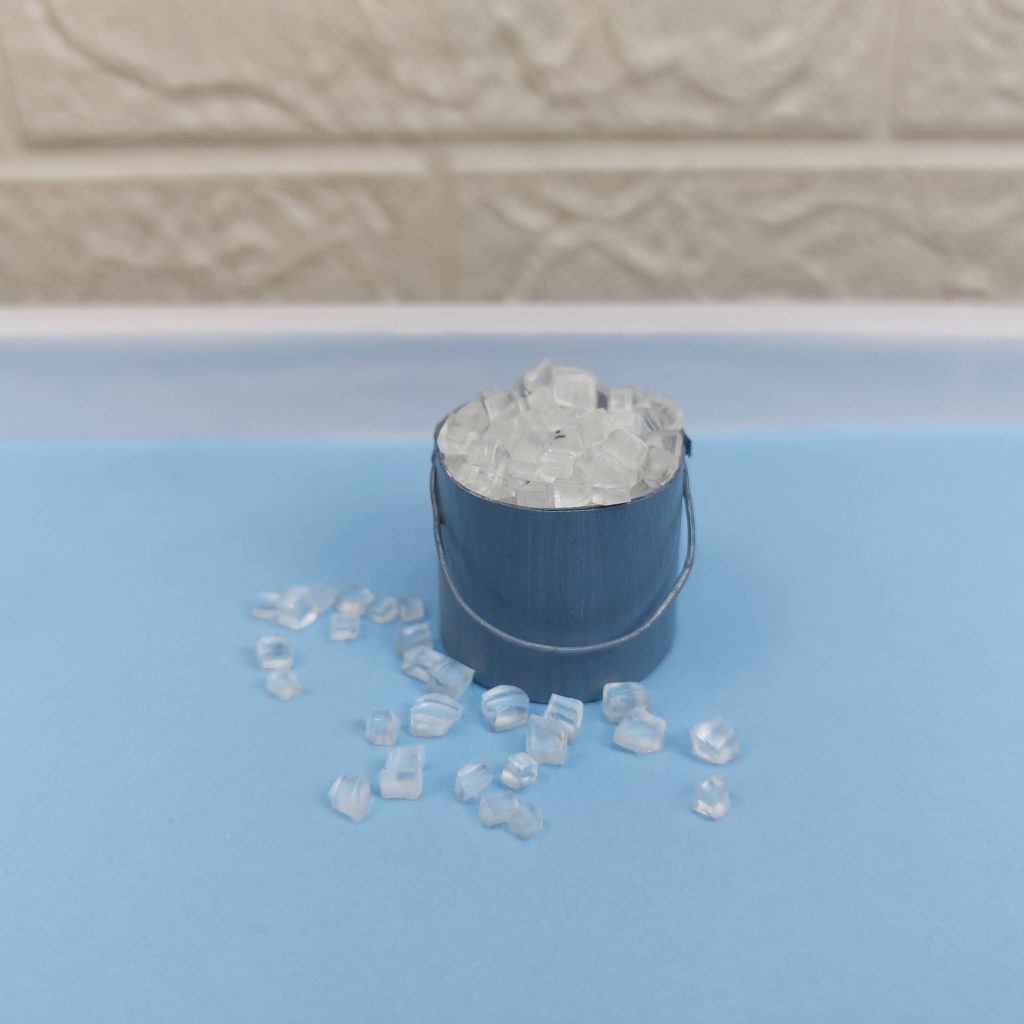
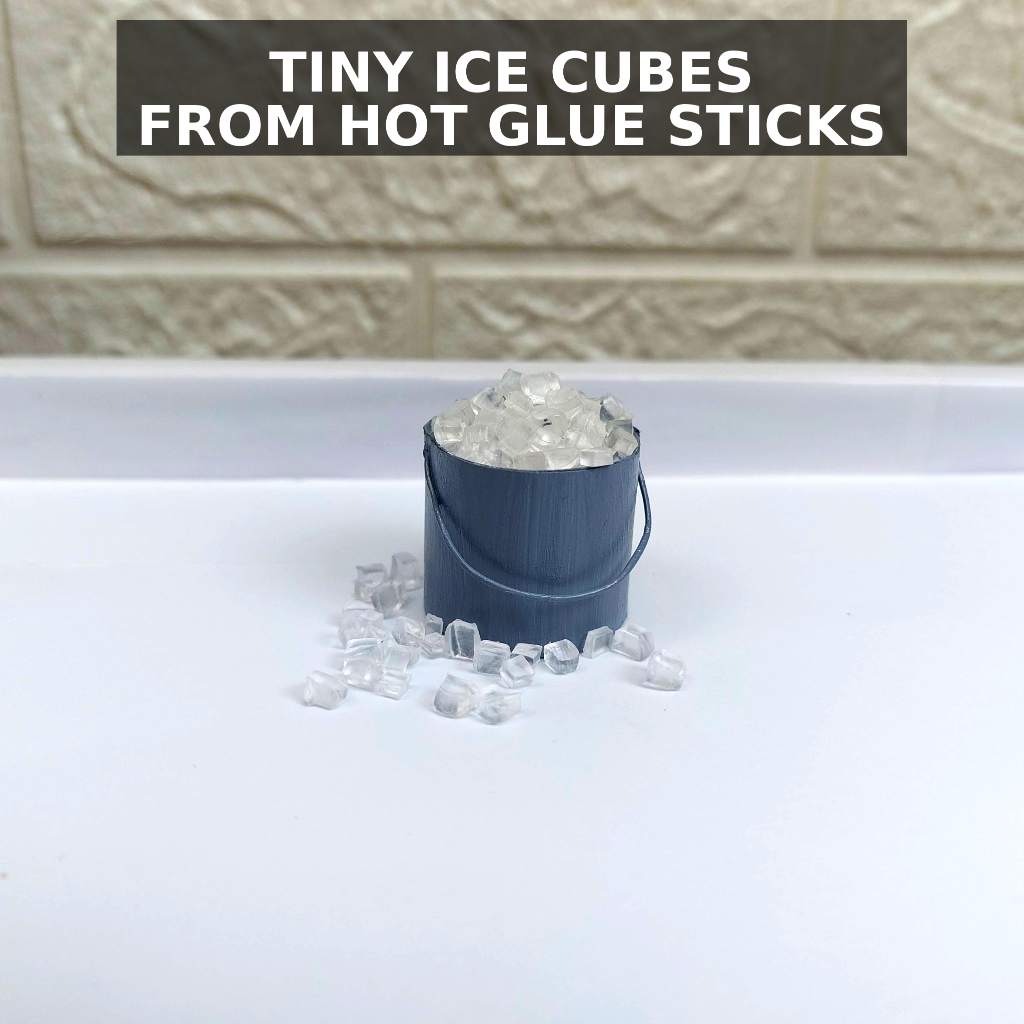
Miniature Ice Cubes from Glue Gun Sticks
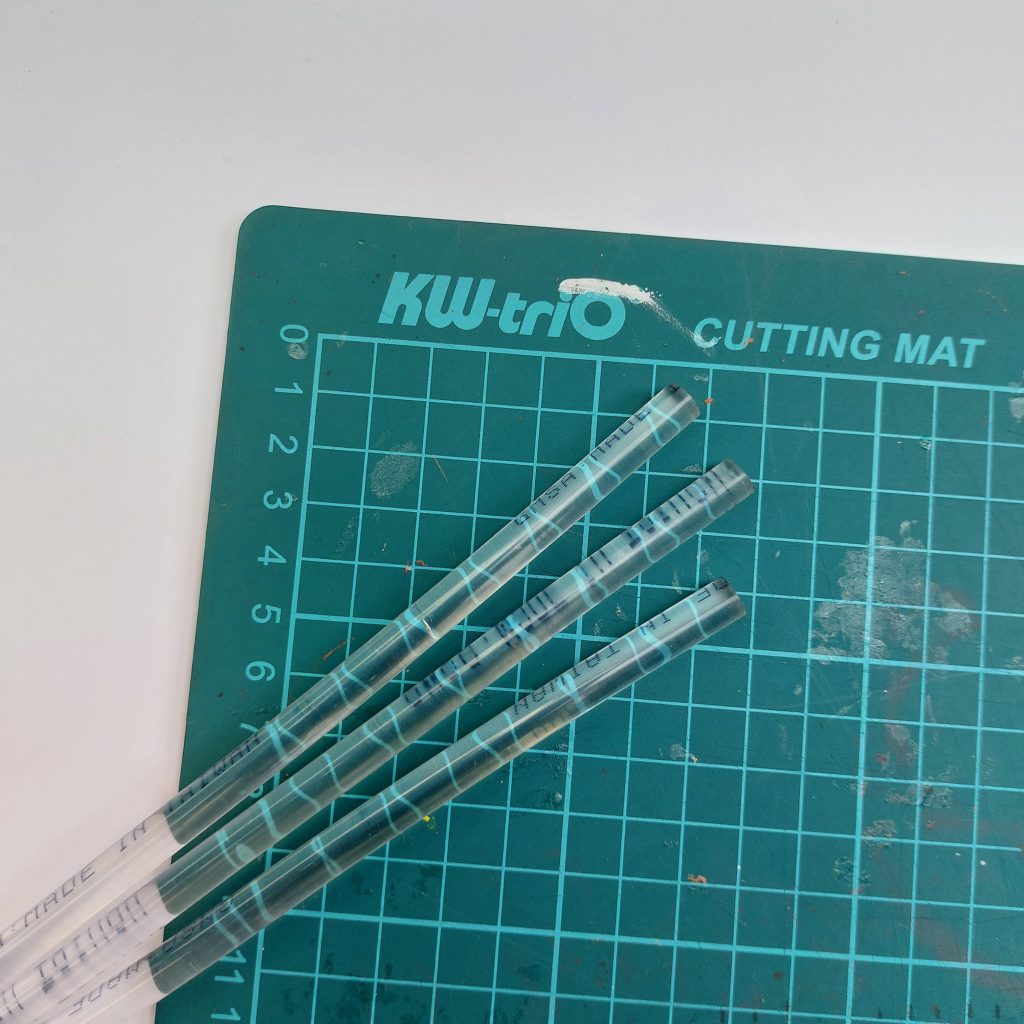
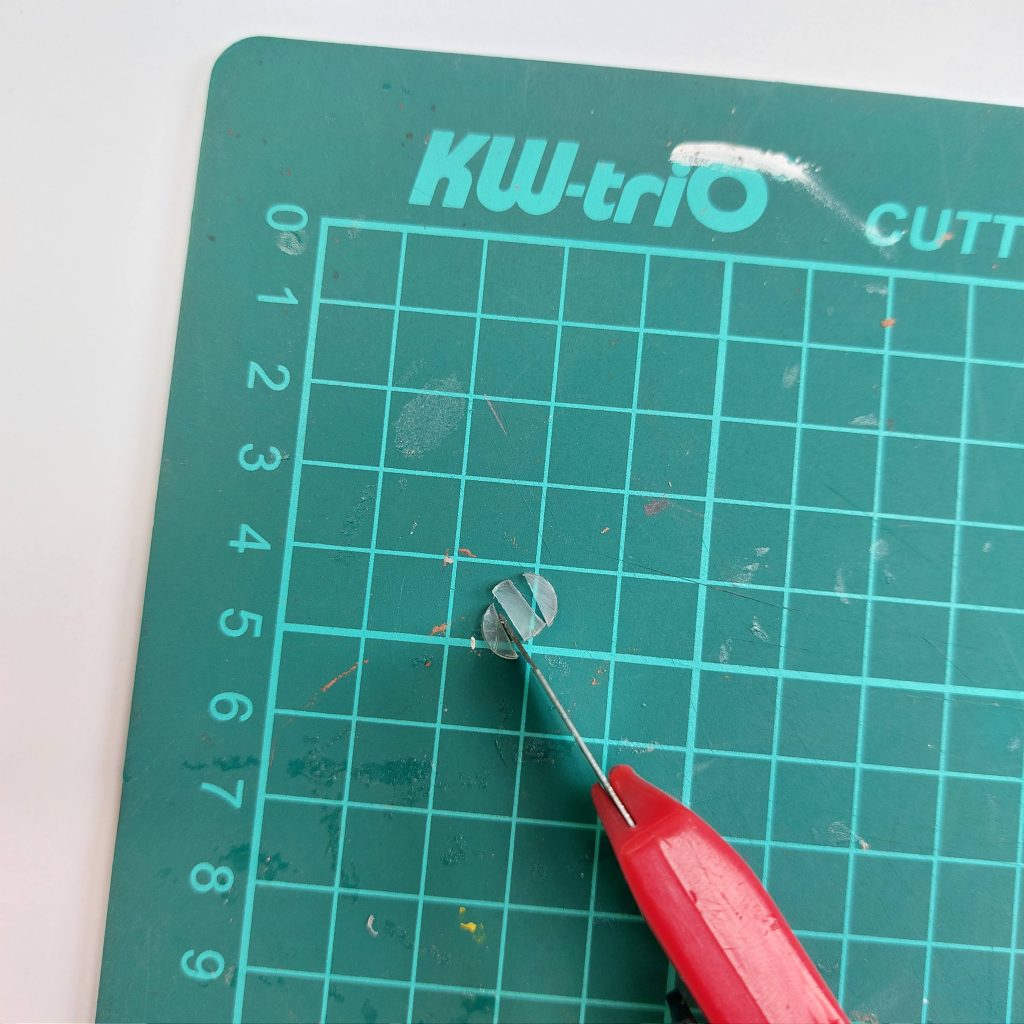
For this first little trick, I used hot glue gun sticks to make tiny ice cubes. The material already has a slightly frosted, translucent look, which makes it surprisingly convincing in miniature drinks or ice buckets.
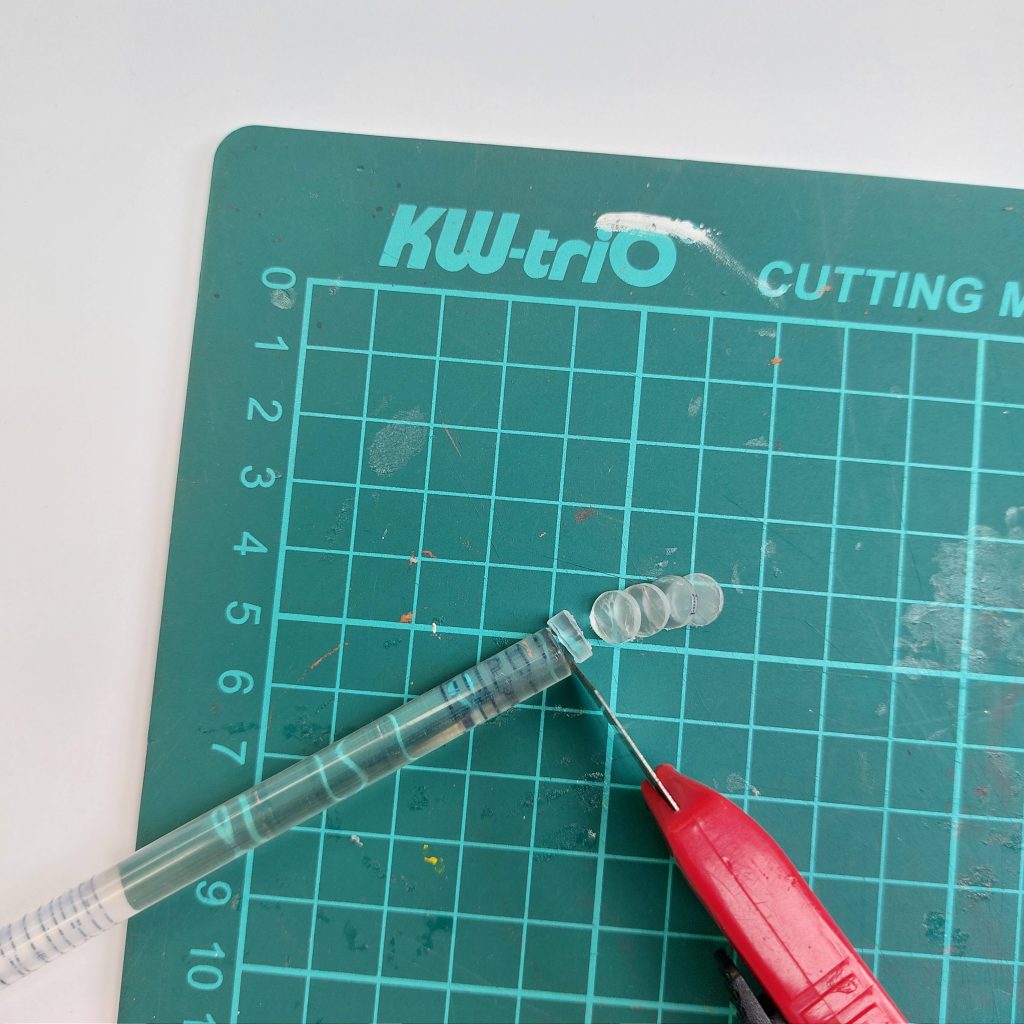
Start by taking a clear glue stick and placing it on a cutting mat. Using a sharp craft knife, carefully slice the glue stick into pieces. You don’t need to measure anything precisely: the goal is simply to create small segments that will later become cubes.
Once you have a few slices, cut those pieces again into smaller sections. At this stage they will look a bit irregular, but that actually helps. Real ice cubes are rarely perfect, and the slightly uneven shapes make them look more natural.
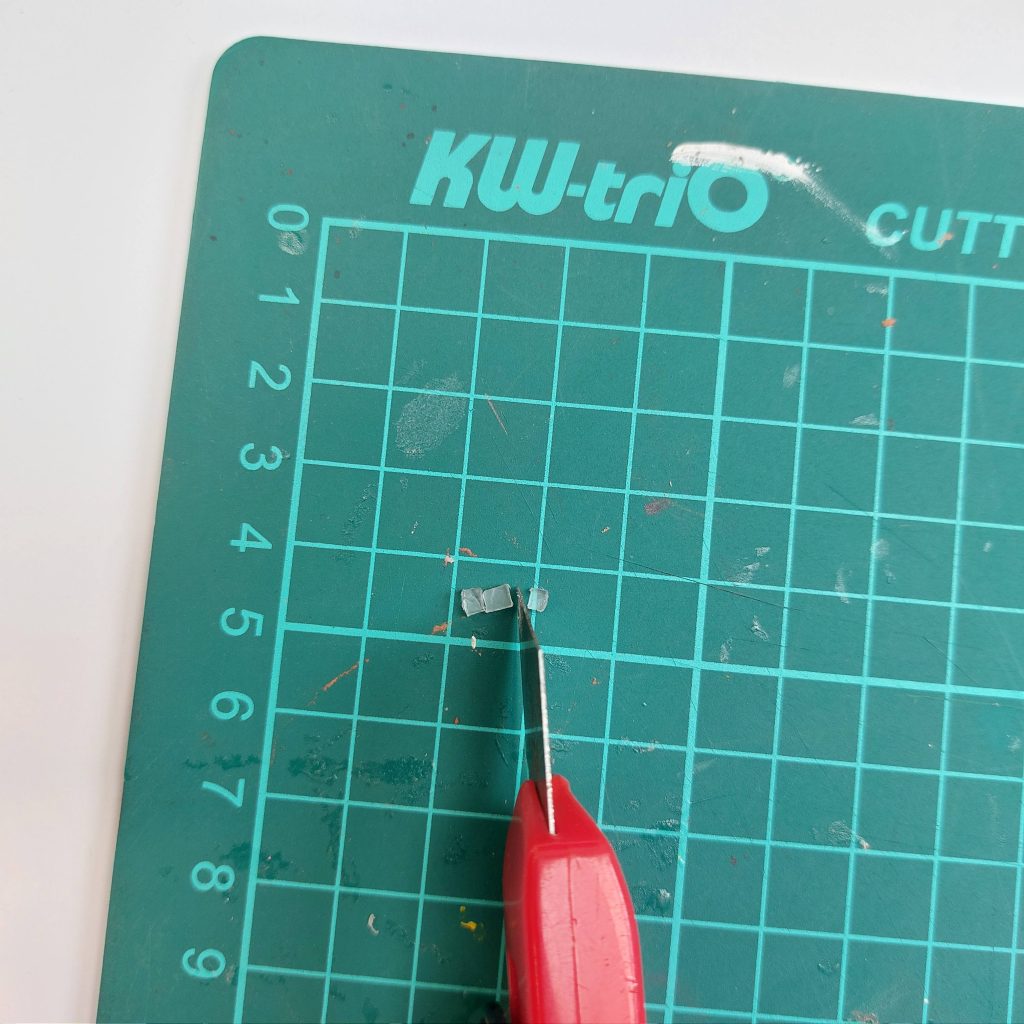
Continue cutting until you have a small pile of tiny pieces. If some pieces look too large, simply trim them again with the knife.
If you want the cubes to look a little less smooth, you can lightly nick the edges with the knife. This gives the ice a more realistic appearance.
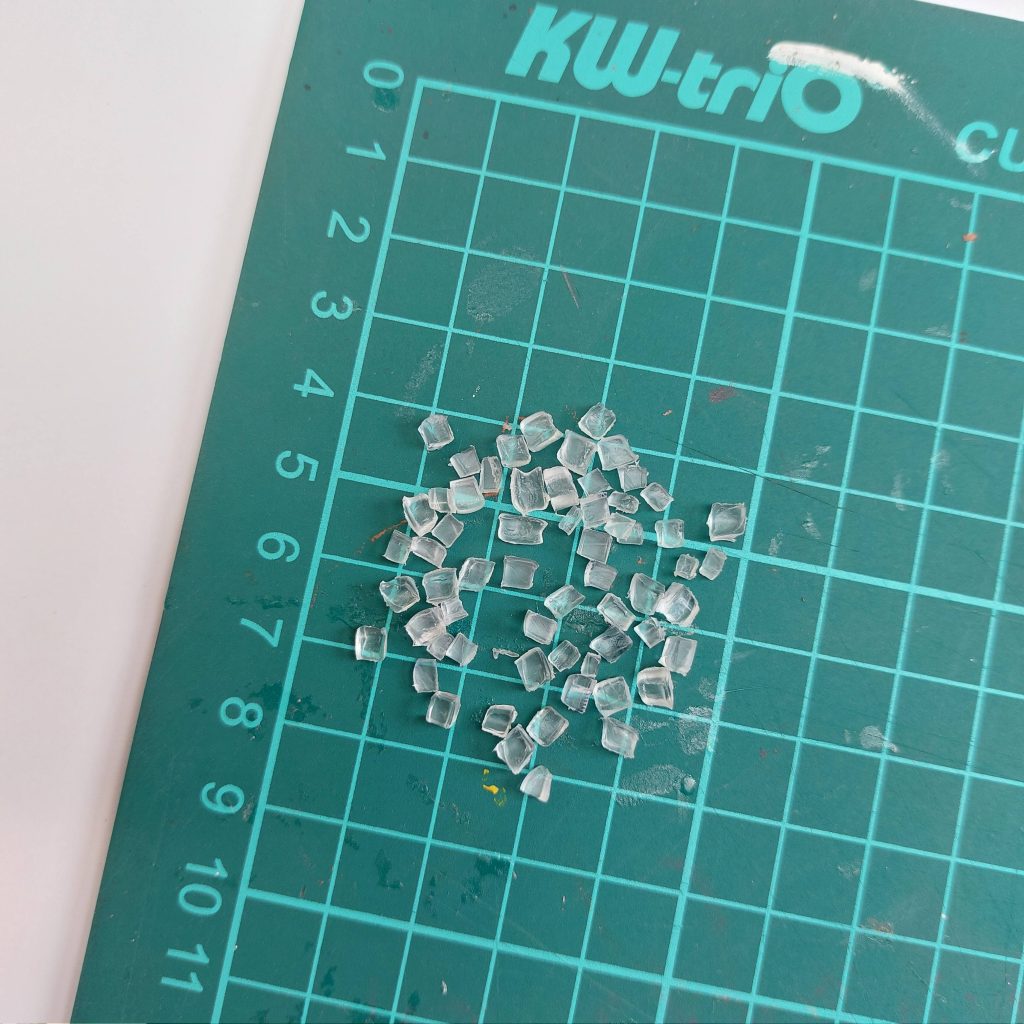
Once finished, the miniature cubes can be placed in dollhouse glasses, cocktail scenes, coolers, or ice buckets.
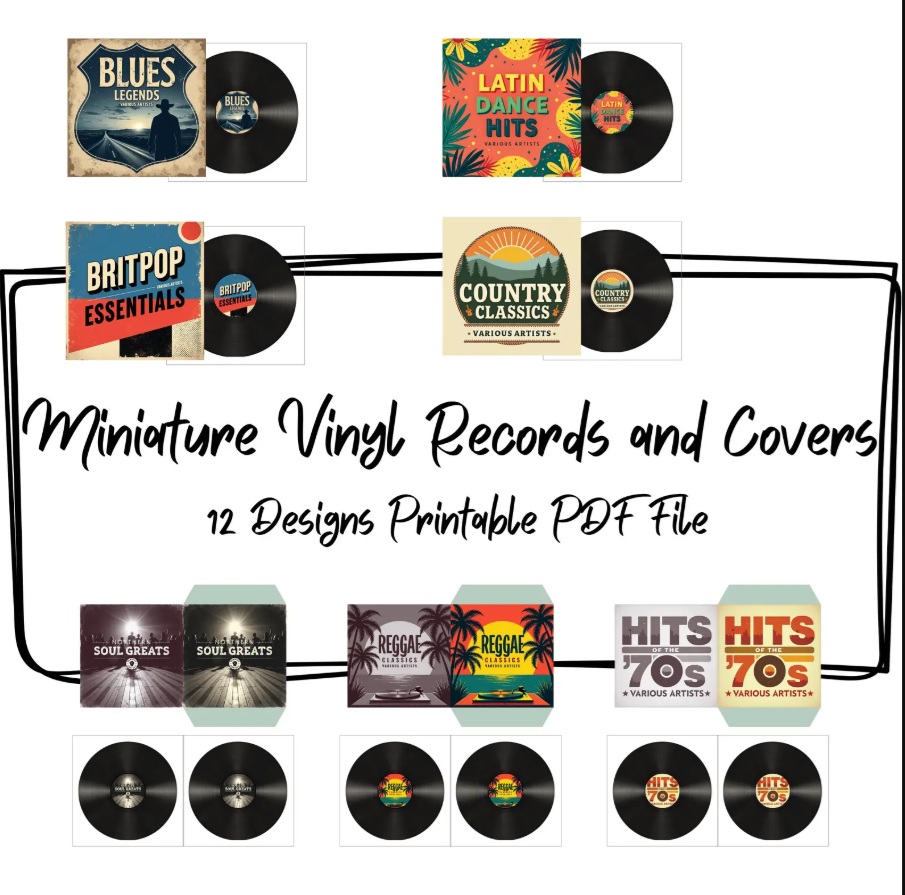
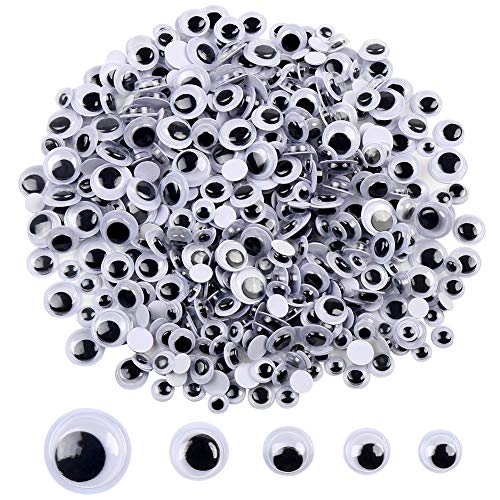
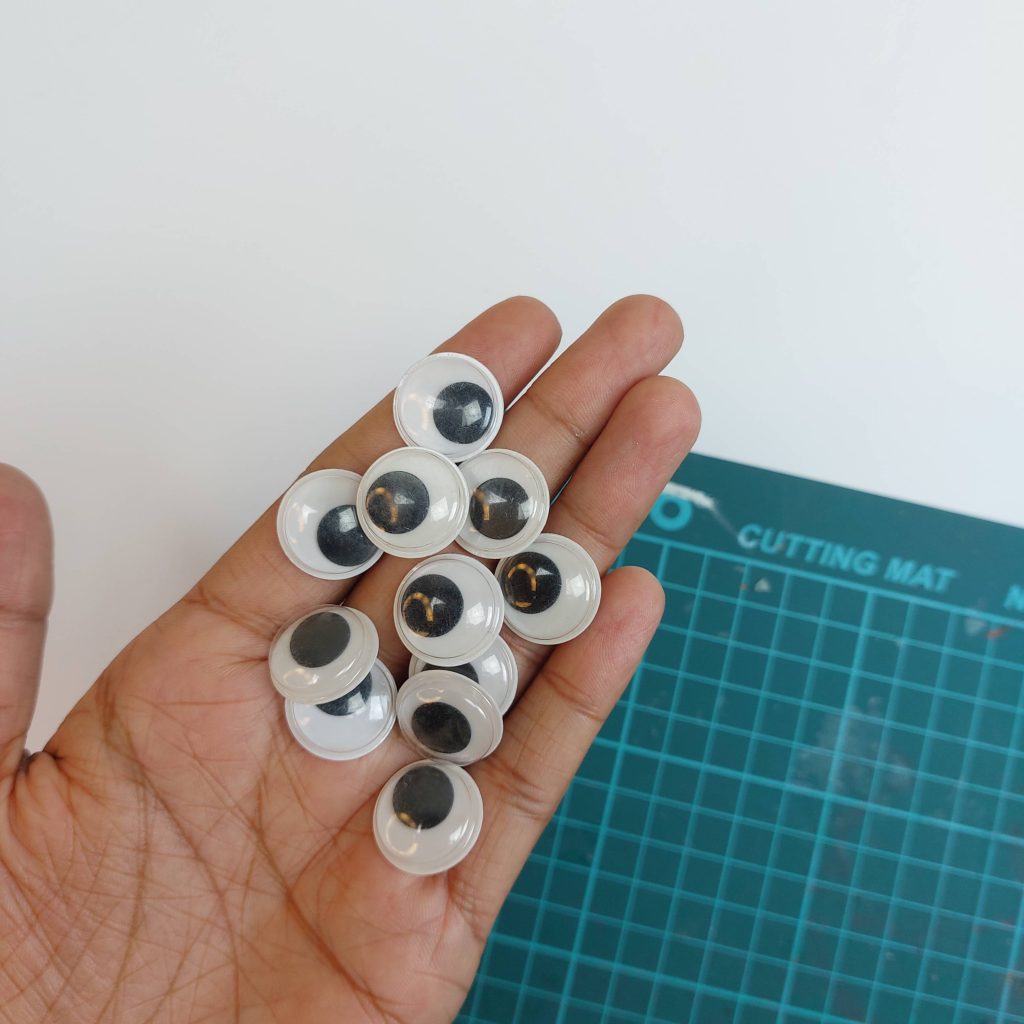
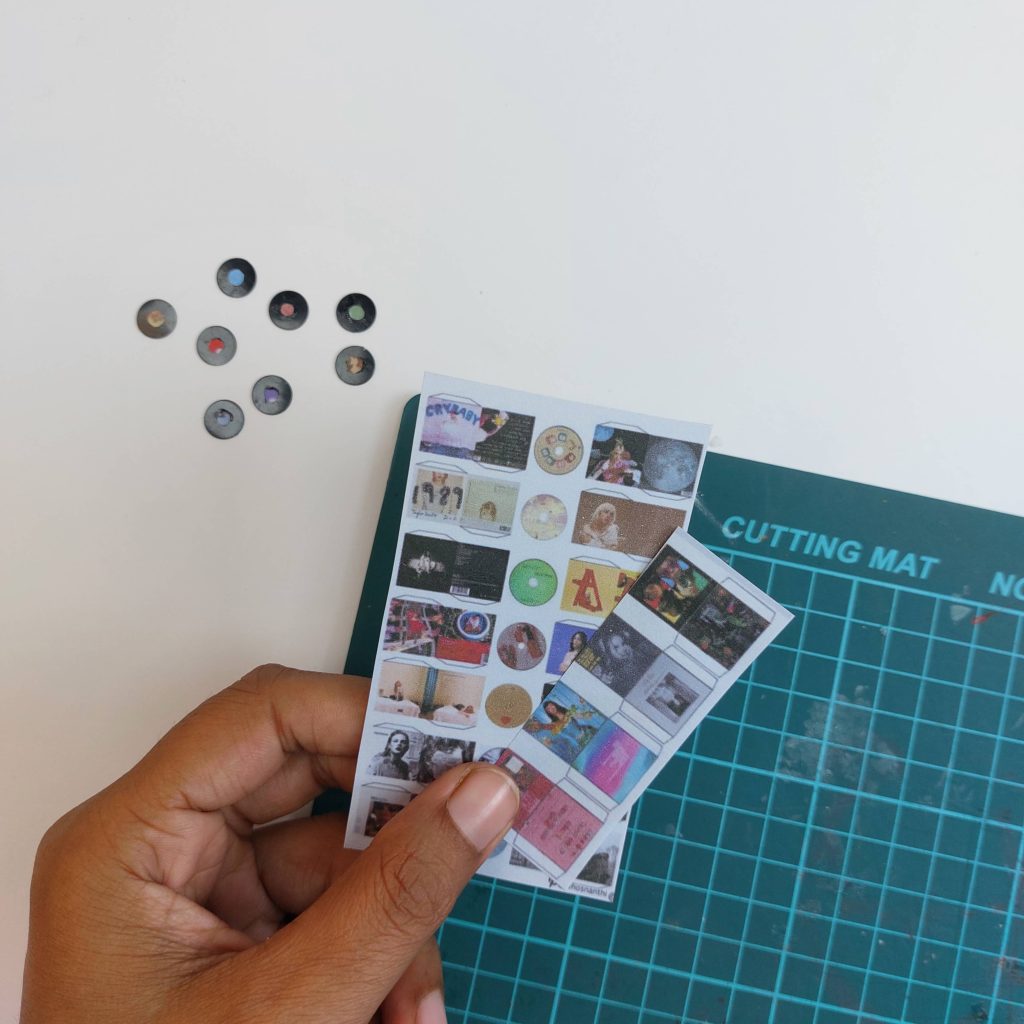
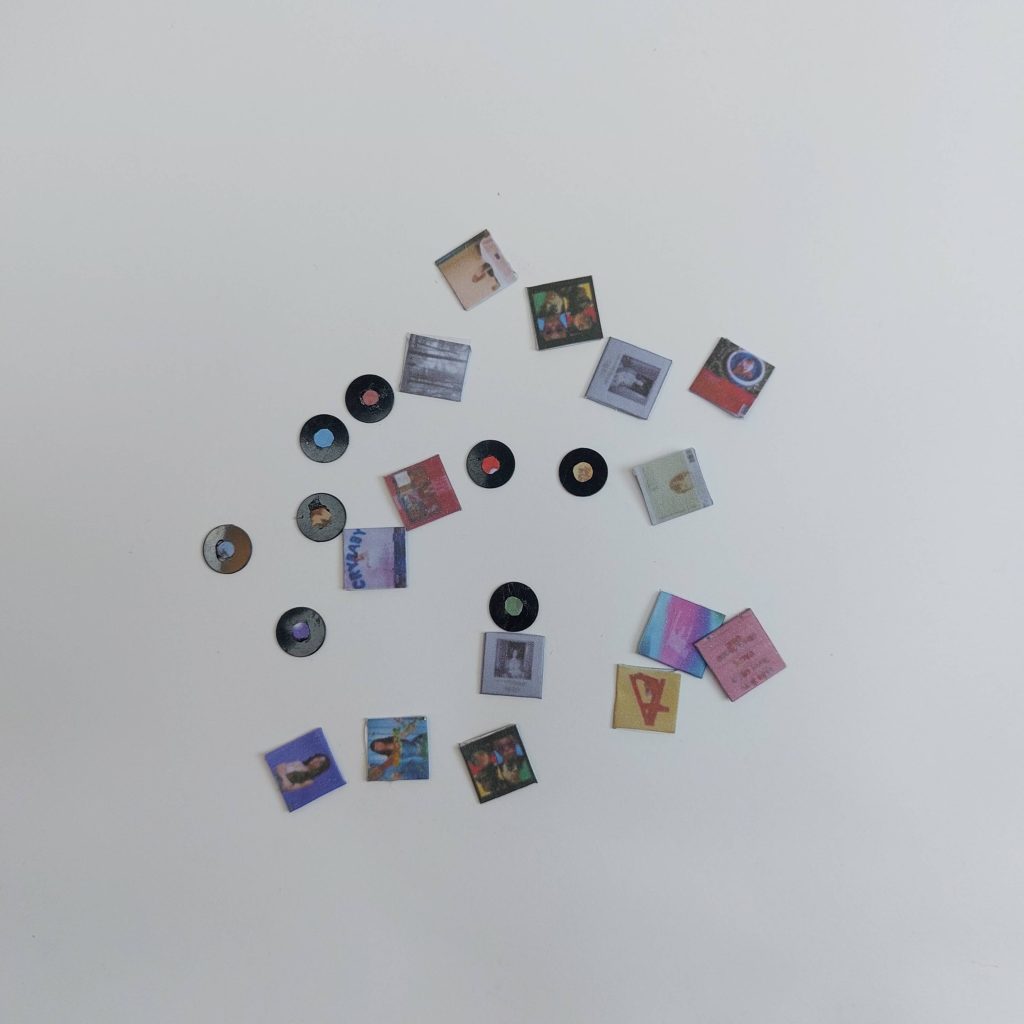
Tiny vinyl records are a fun detail to add to a dollhouse music room, record shop, or living room shelf. These miniature records are surprisingly easy to make using small craft googly eyes and tiny printed album covers.
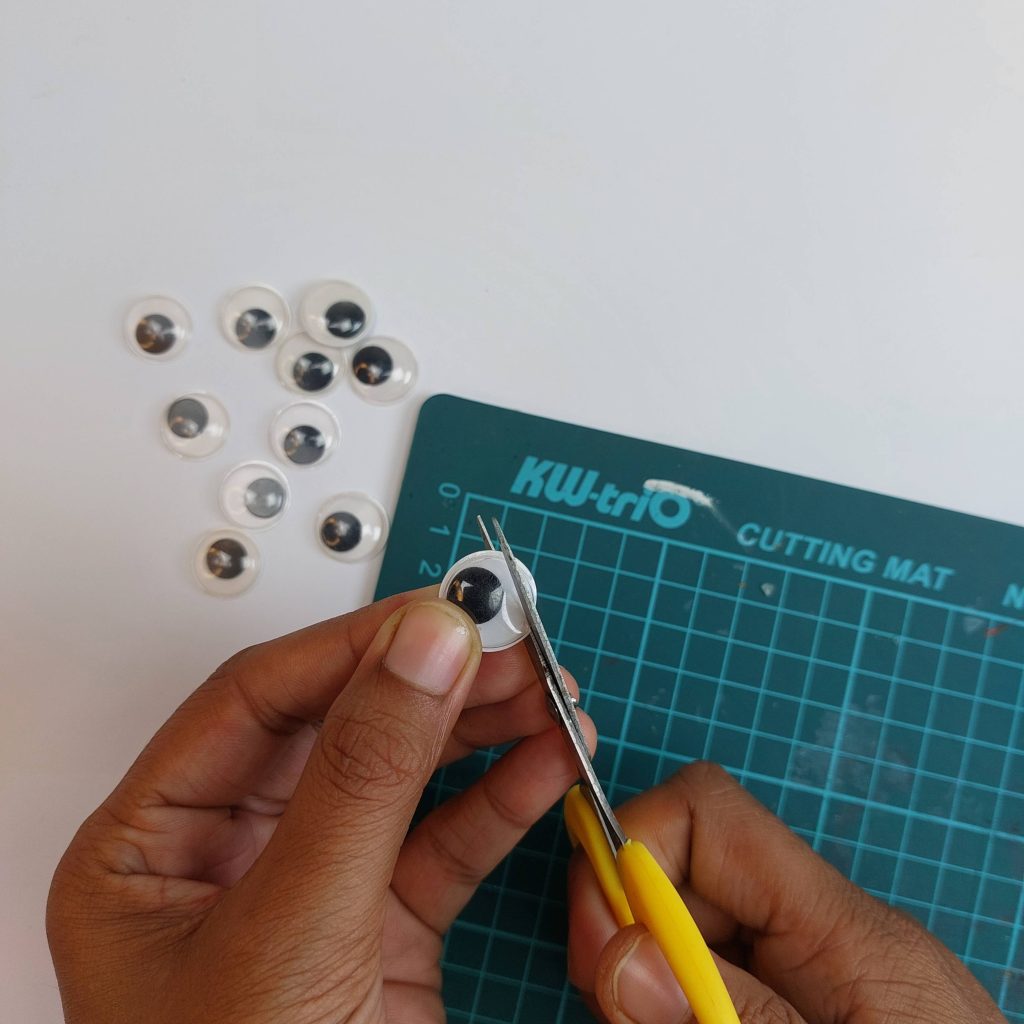
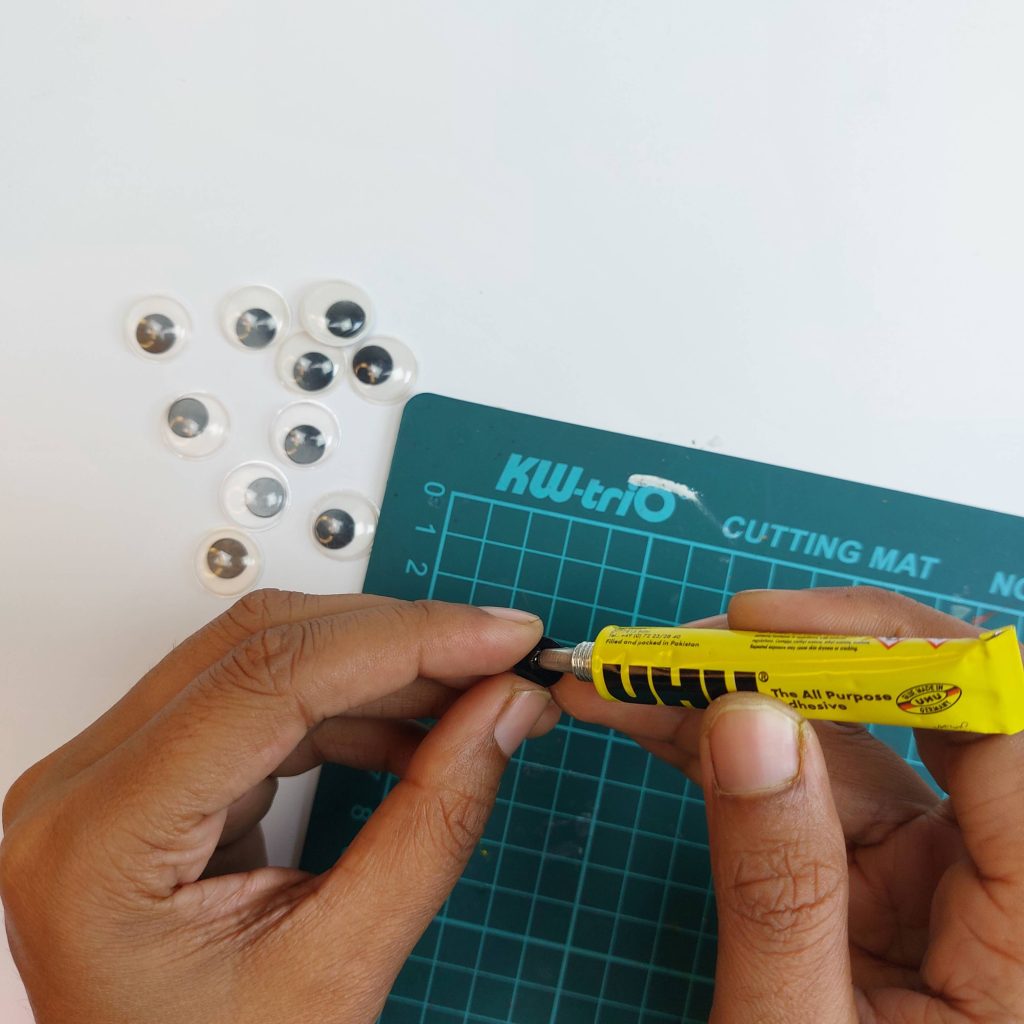
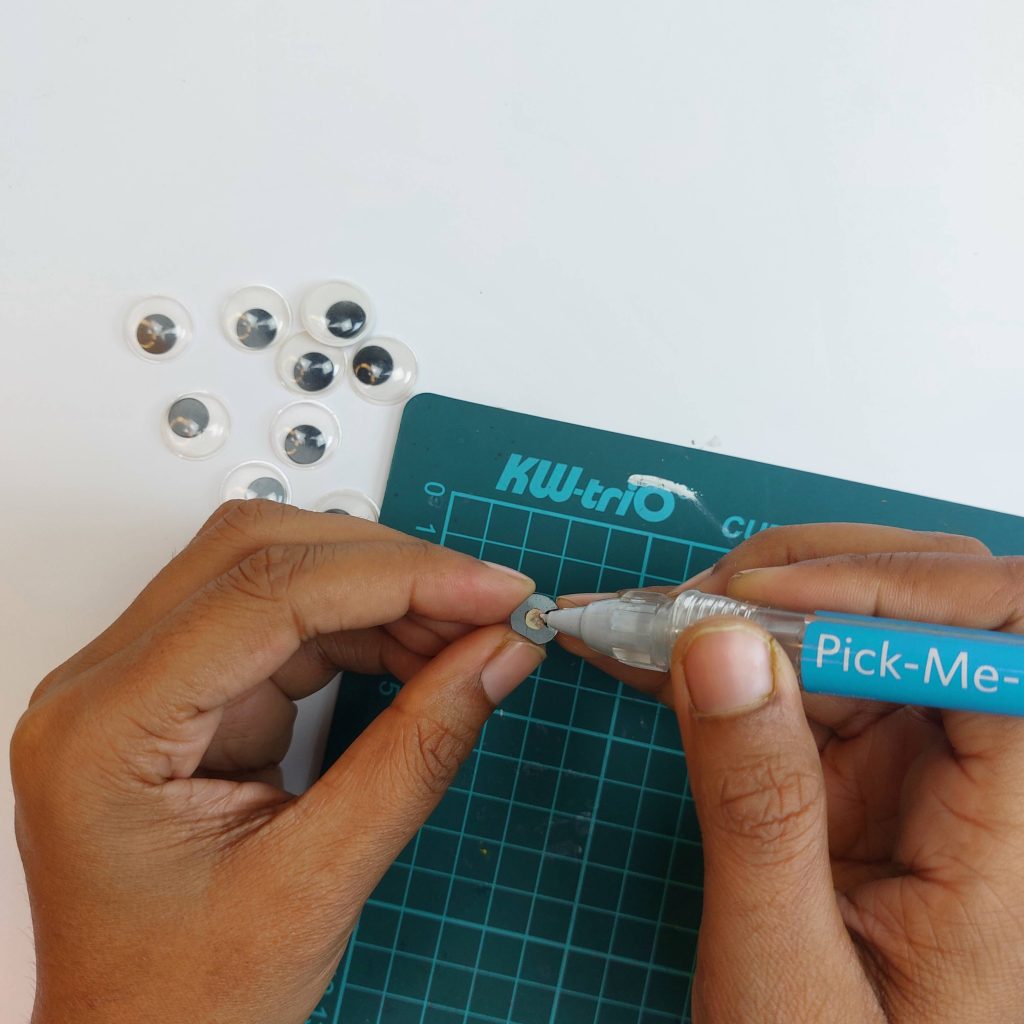
Take a black googly eye and remove the plastic dome if needed so that you are left with the flat black disc.
This disc already looks very similar to a miniature vinyl record.
You can now glue the tiny vinyl labels on these googly eyes.
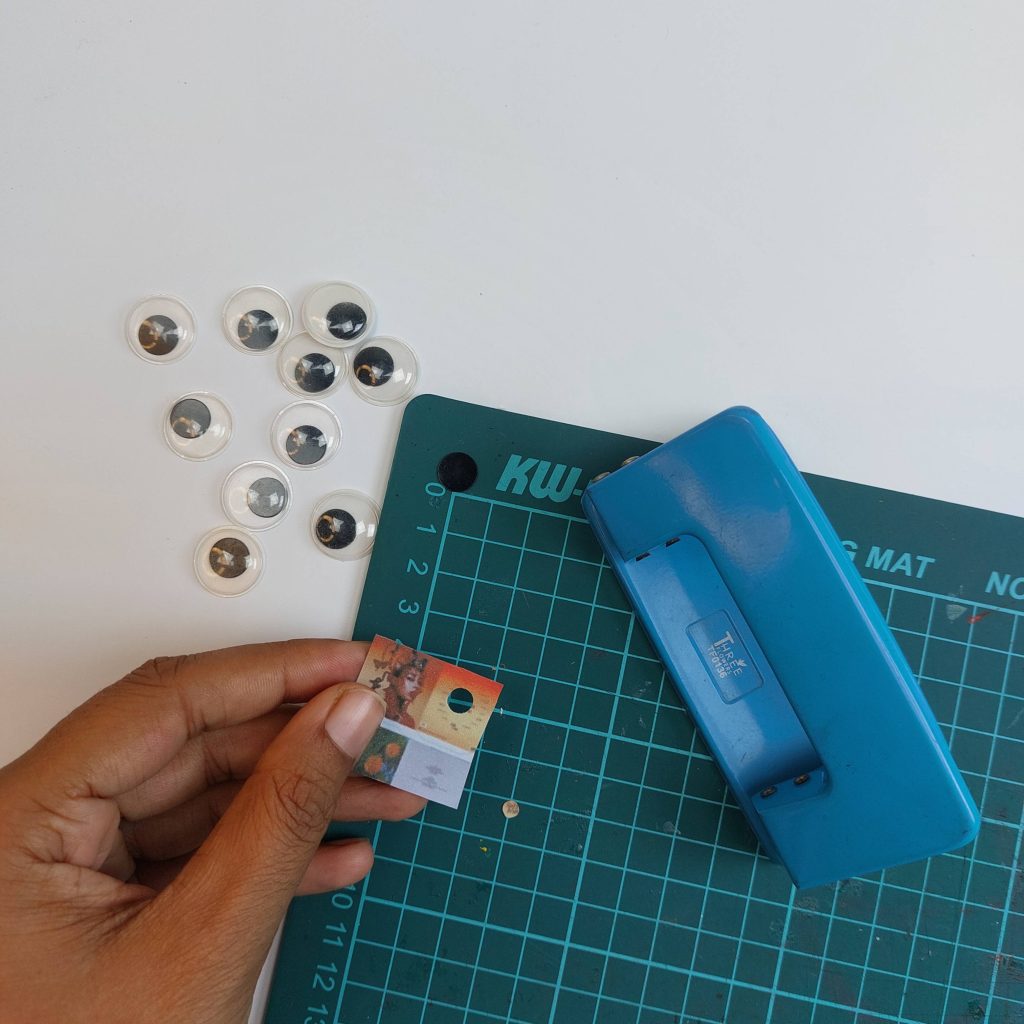
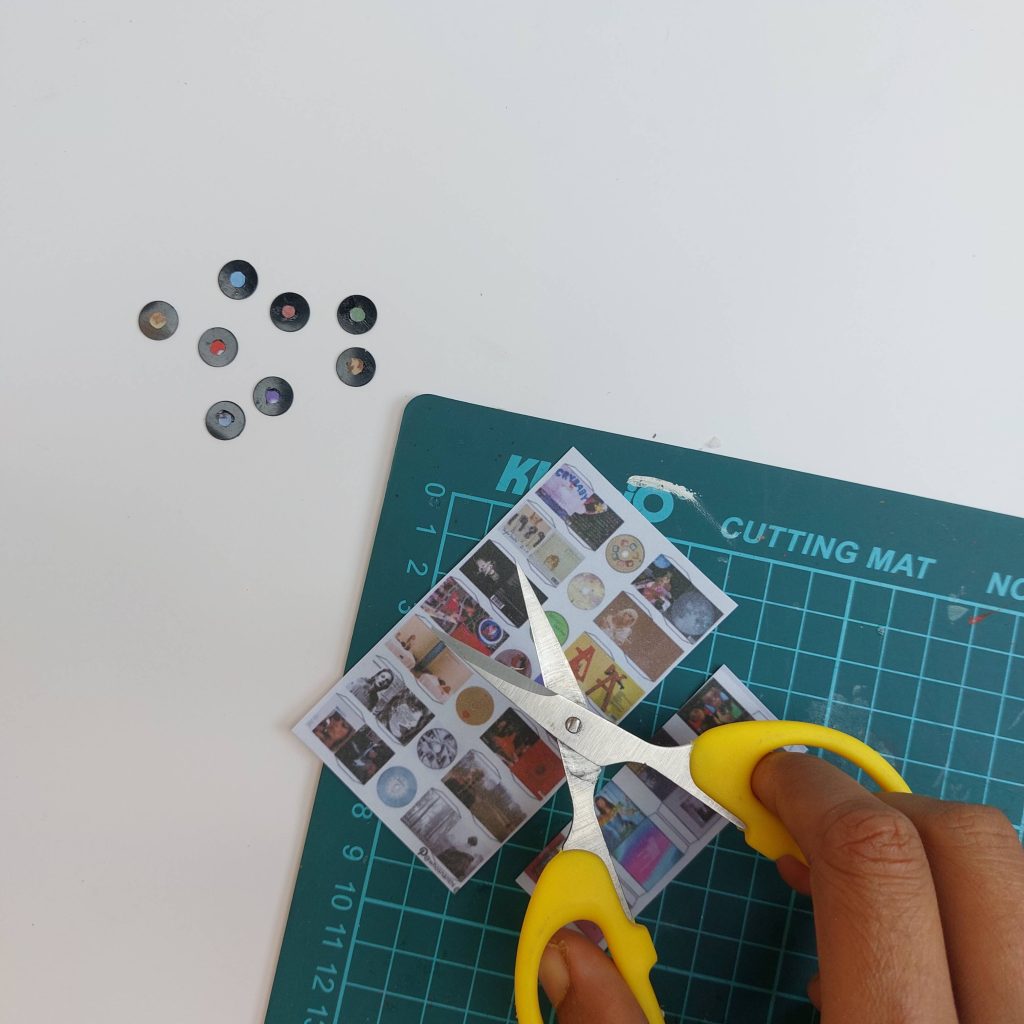
I used a small hole punch to cut the tiny circles that became the labels in the center of the miniature vinyl records.
Step 2: Prepare the album covers
Start by printing the square album covers. Cut them out carefully so they are roughly the same size as the vinyl records.
You don’t need to be perfectly precise, but keeping them small helps them look more realistic.
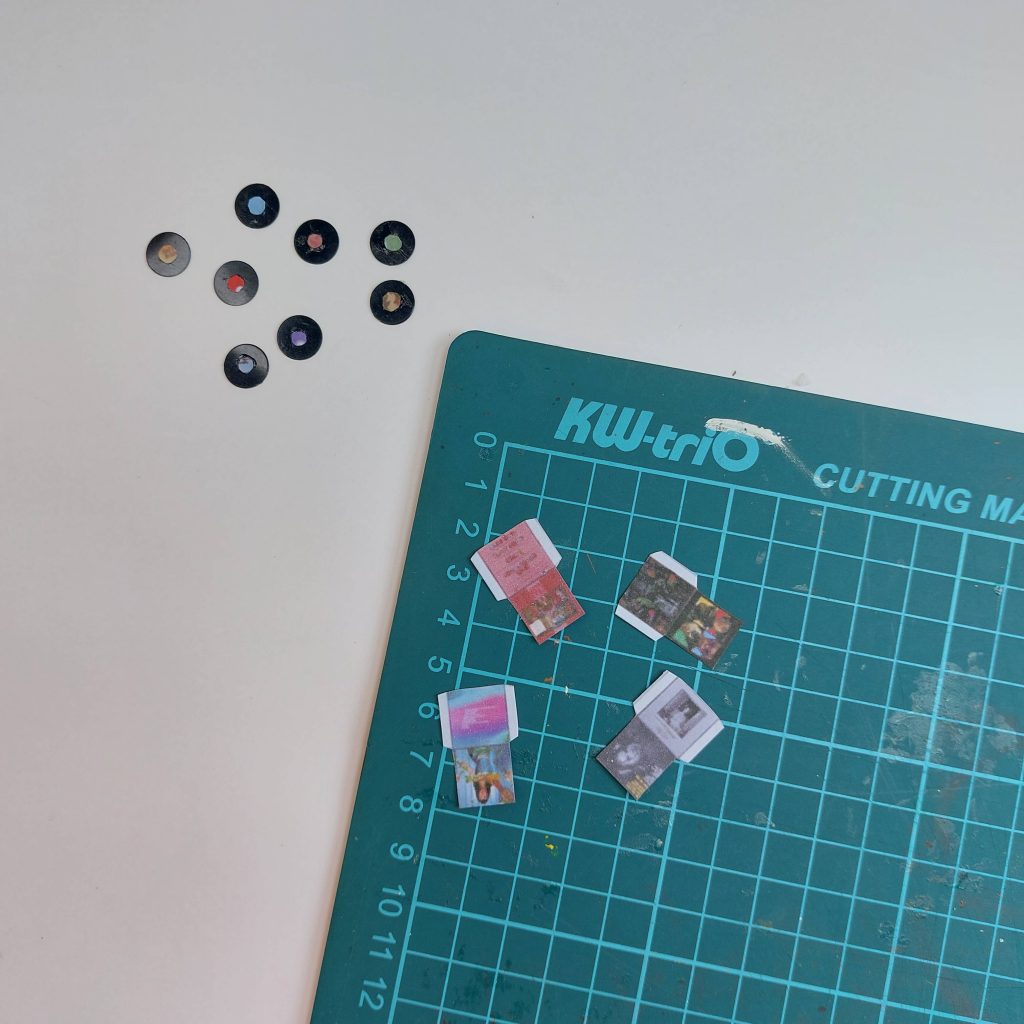
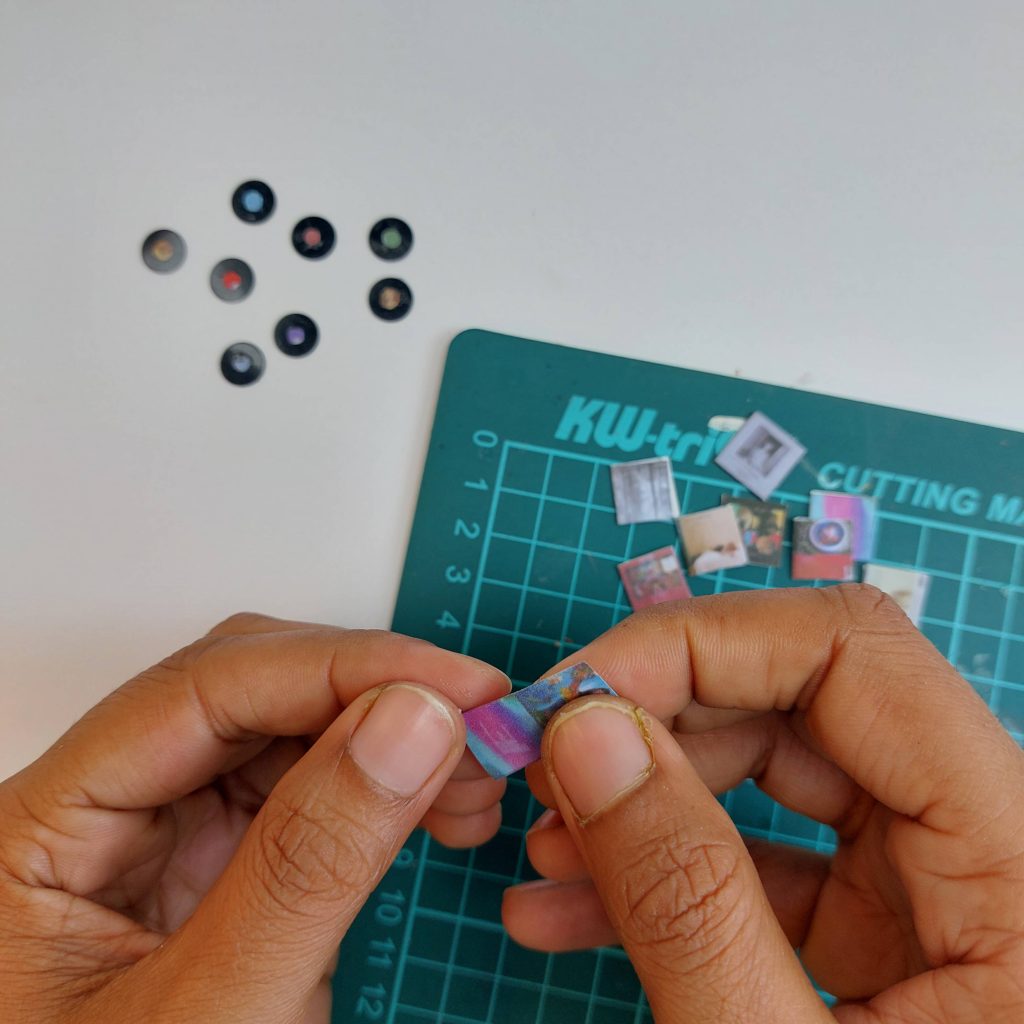
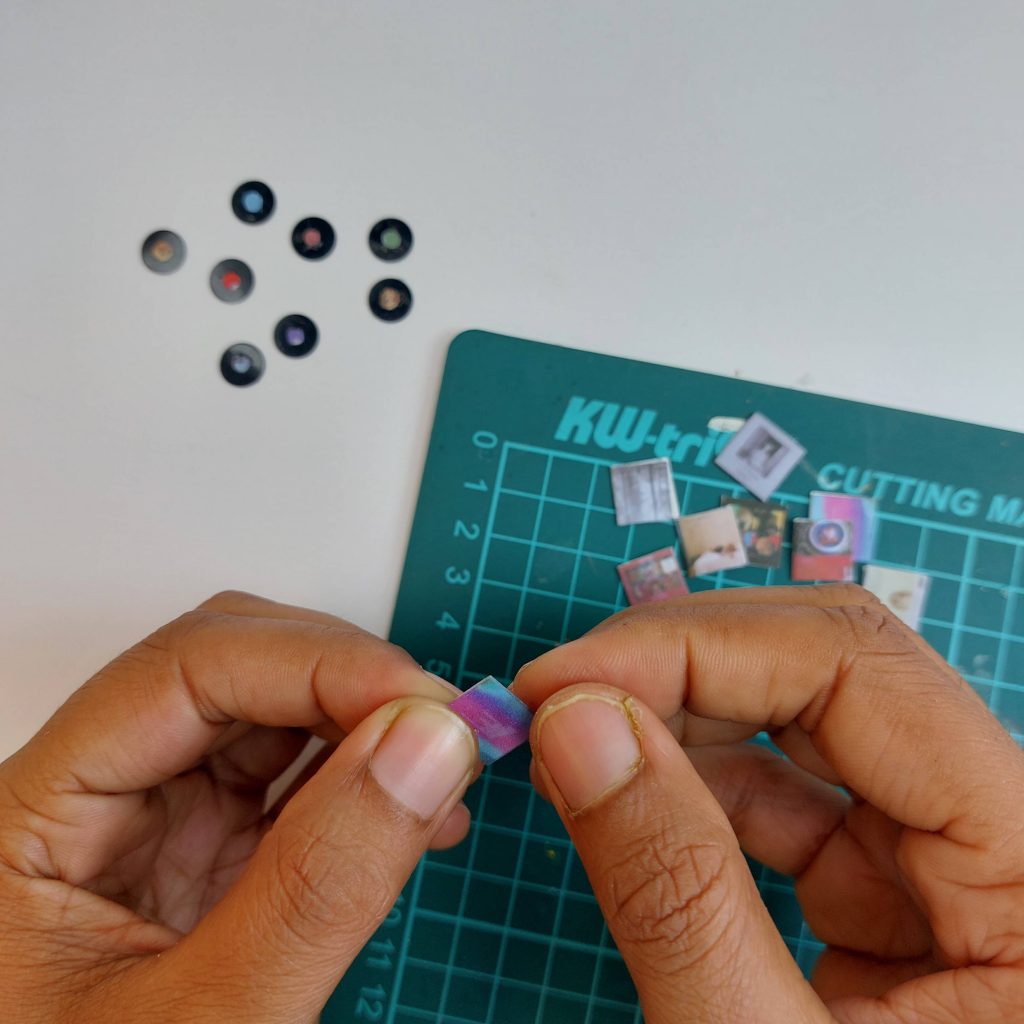
Fold them along the lines and assemble your covers.
You can now simply slide them in and out, just like a real vinyl record.
Once you start making them, it’s hard to stop. I made a whole pile of miniature records with different covers so they can be scattered on a table or stored in a dollhouse record crate.
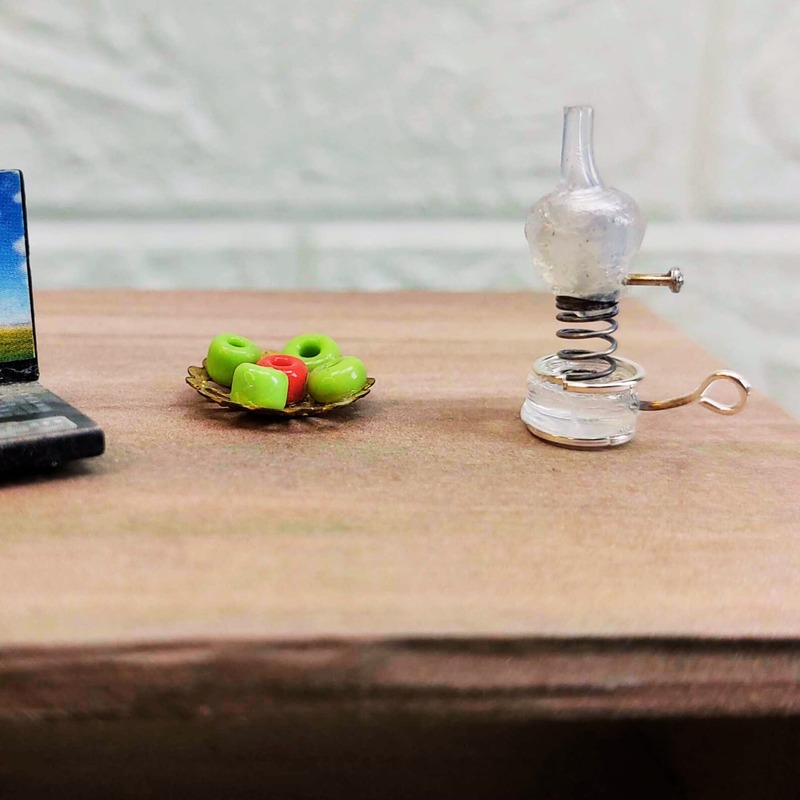
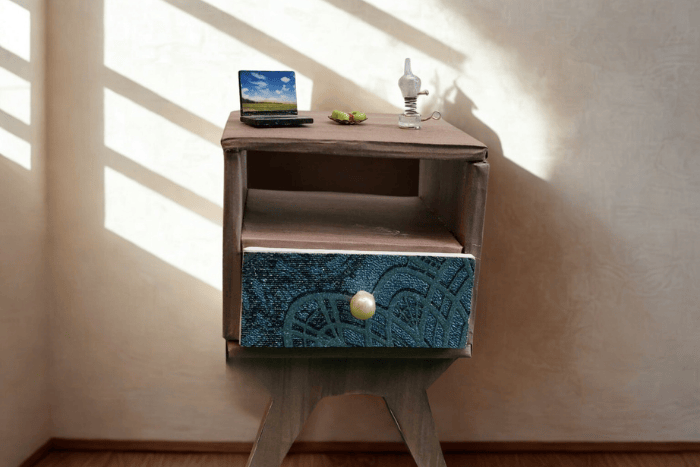
DIY Miniature Oil Lamp (Made from Hot Glue Sticks)
In this part of the project, we’re creating a tiny miniature oil lamp using simple materials like hot glue sticks and thin wire. Even though the finished piece is incredibly small, it adds a lot of character.
This little lamp is designed to look like a classic vintage kerosene oil lamp, complete with a glass reservoir, a small chimney, and even a delicate handle.
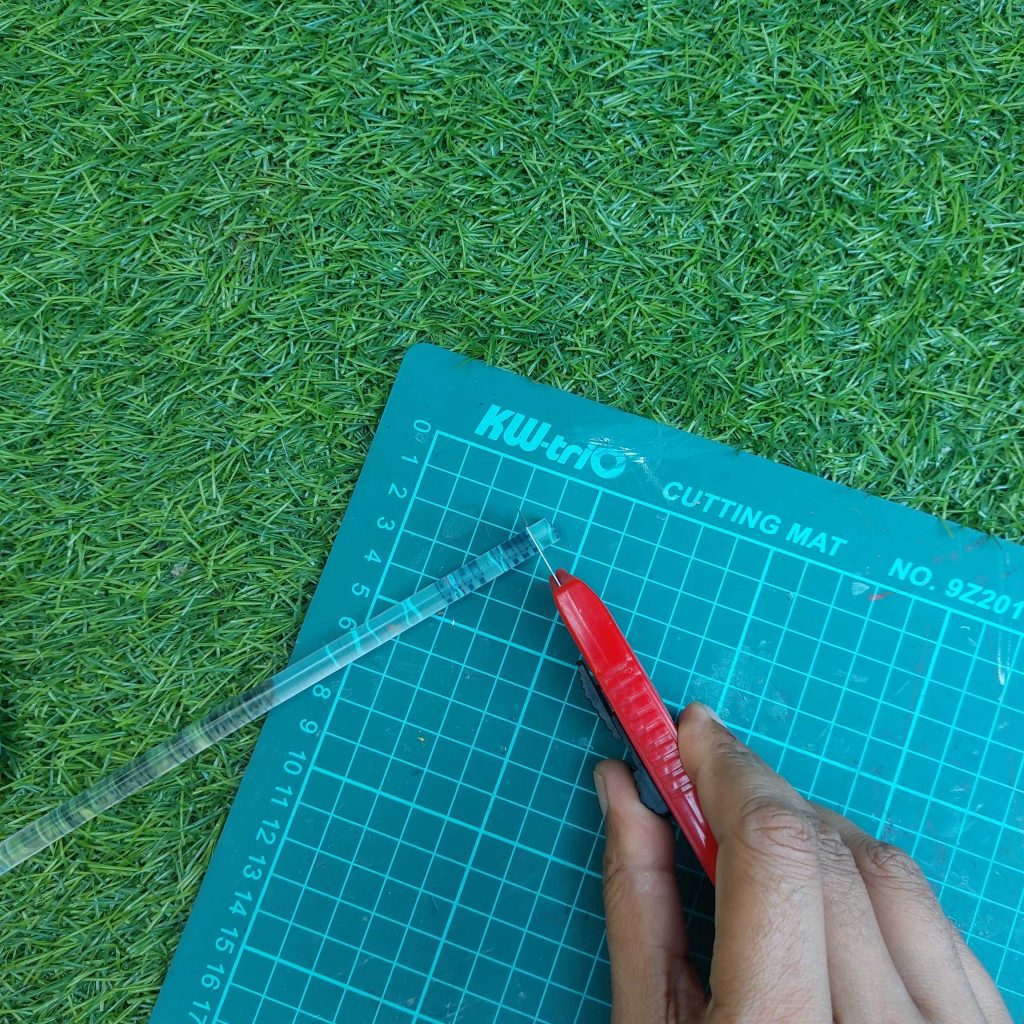
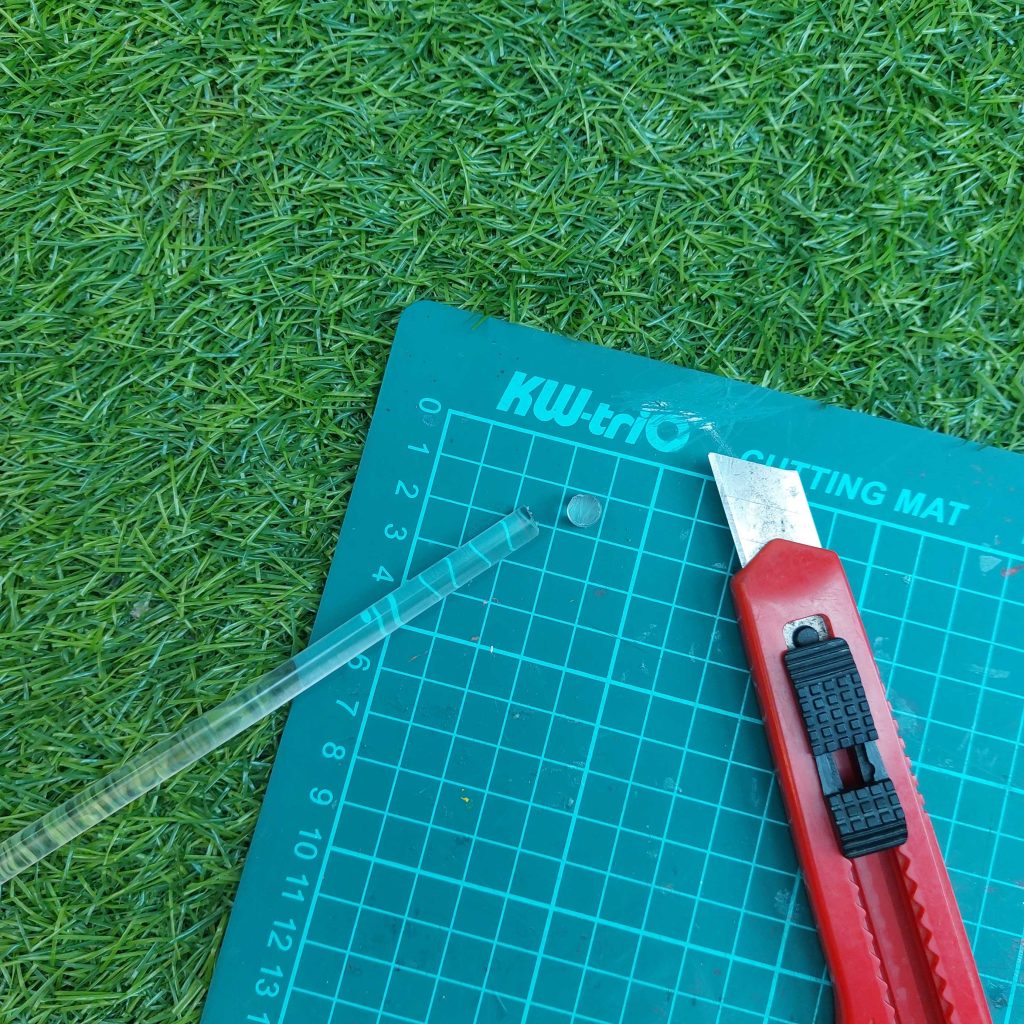
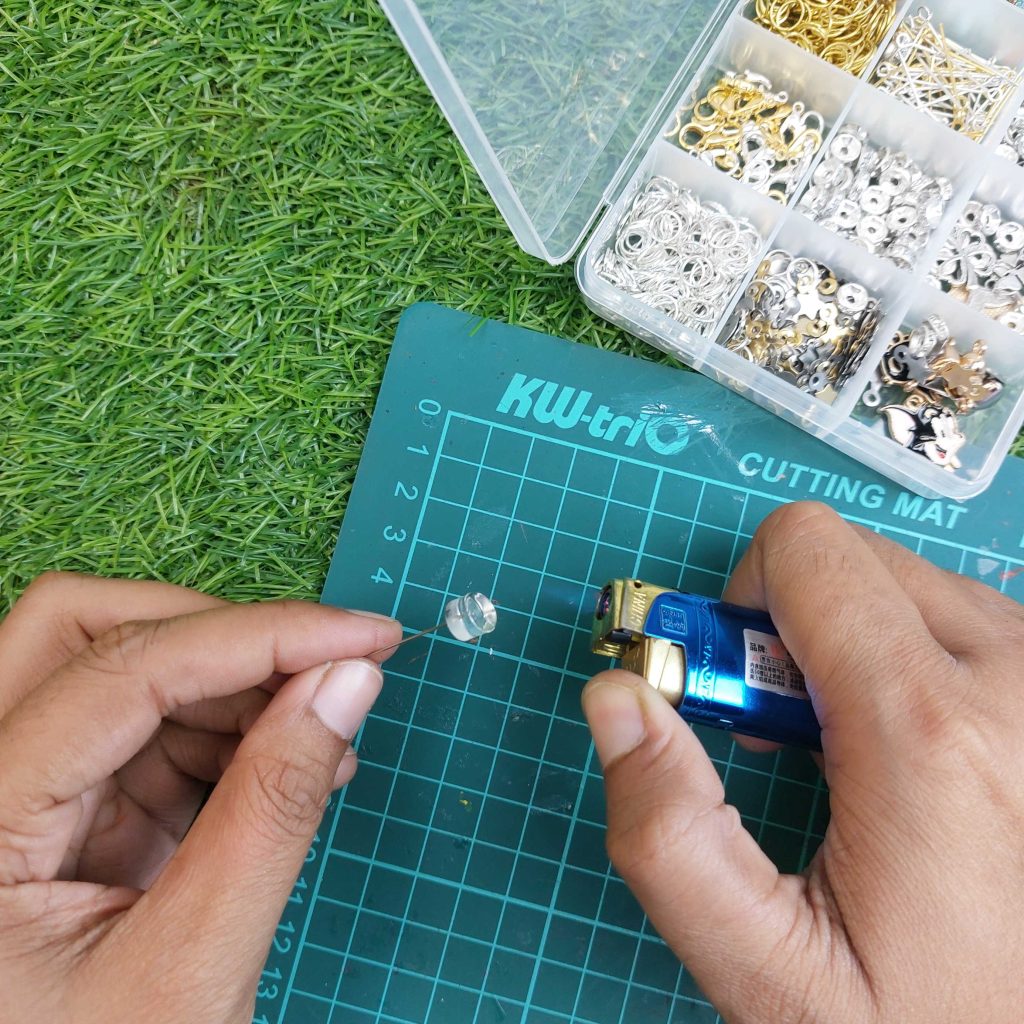
Cut a small section from a clear hot glue stick using a utility knife. This piece will be used to create the glass body of the miniature oil lamp.
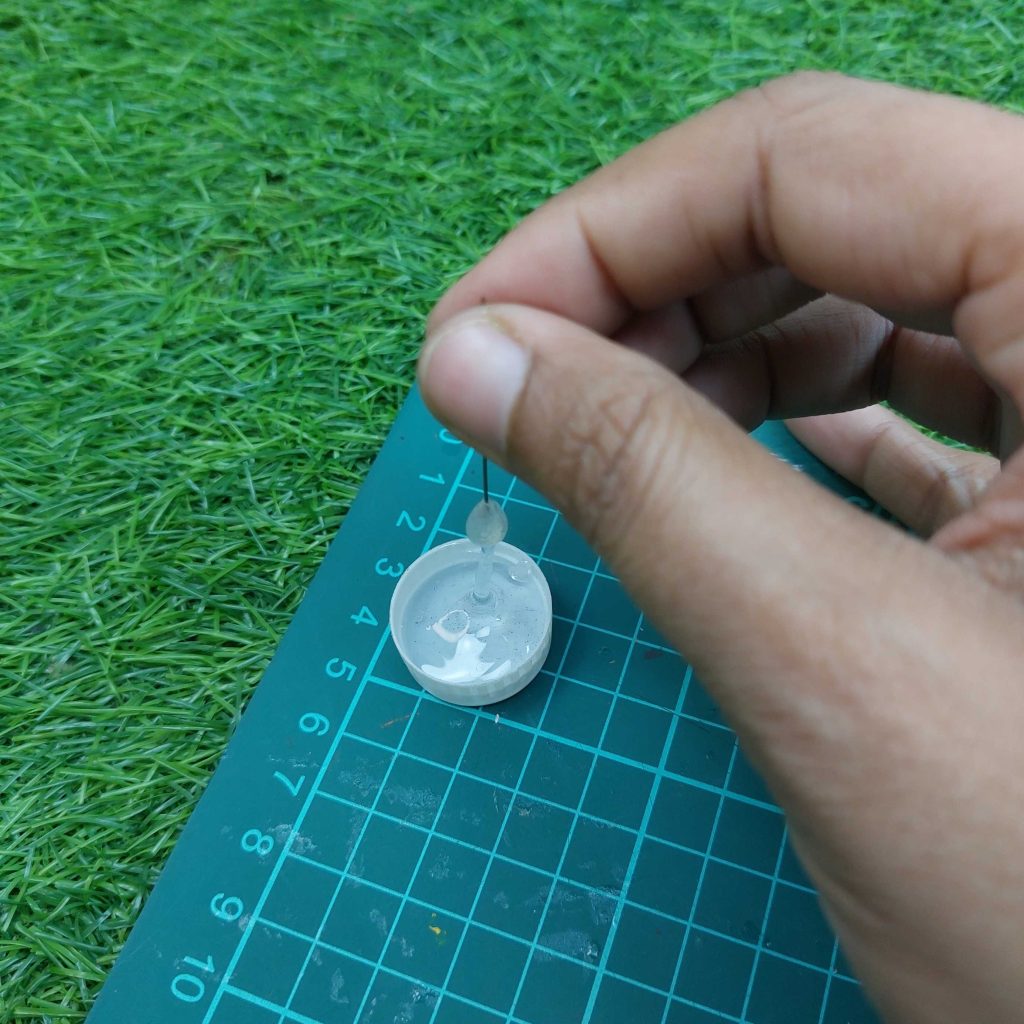
Gently heat the cut piece of glue stick with a lighter to soften the plastic. Carefully shape it so it forms a small, rounded reservoir with a narrow top.
Use a needle or thin wire to help shape the softened glue and create the opening where the chimney of the lamp will be.
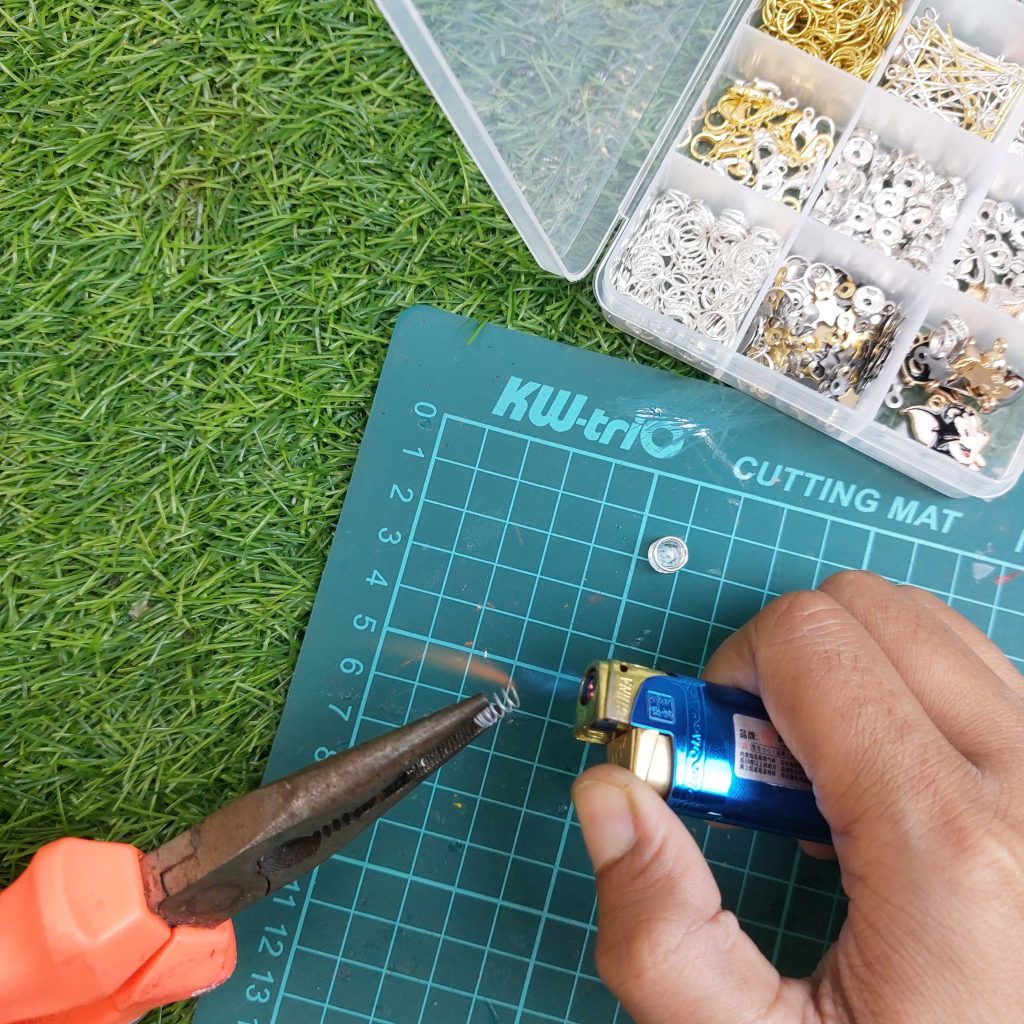
While the glue is still warm, insert a thin spiral wire into the center to create the connection point for the lamp structure.
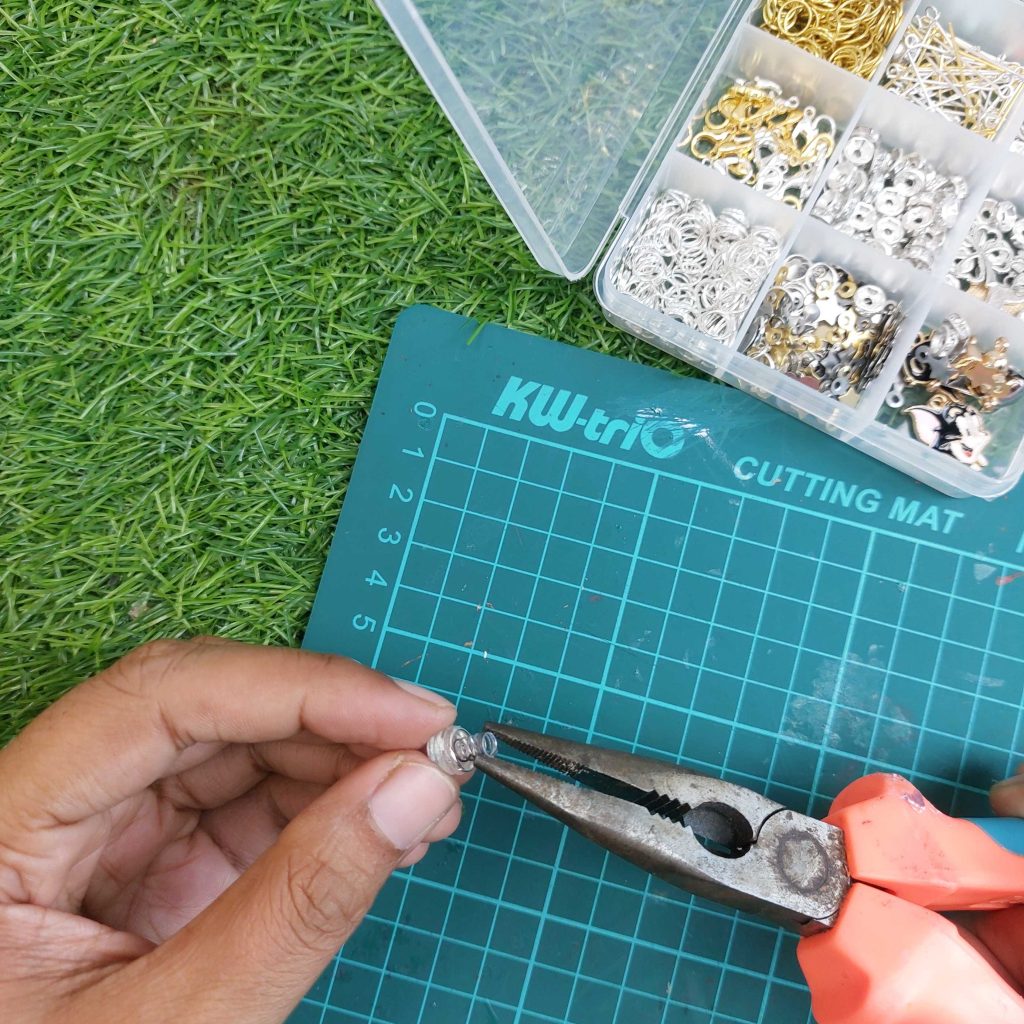
Use pliers to shape a small metal spring that will act as the stand between the lamp base and the glass reservoir.
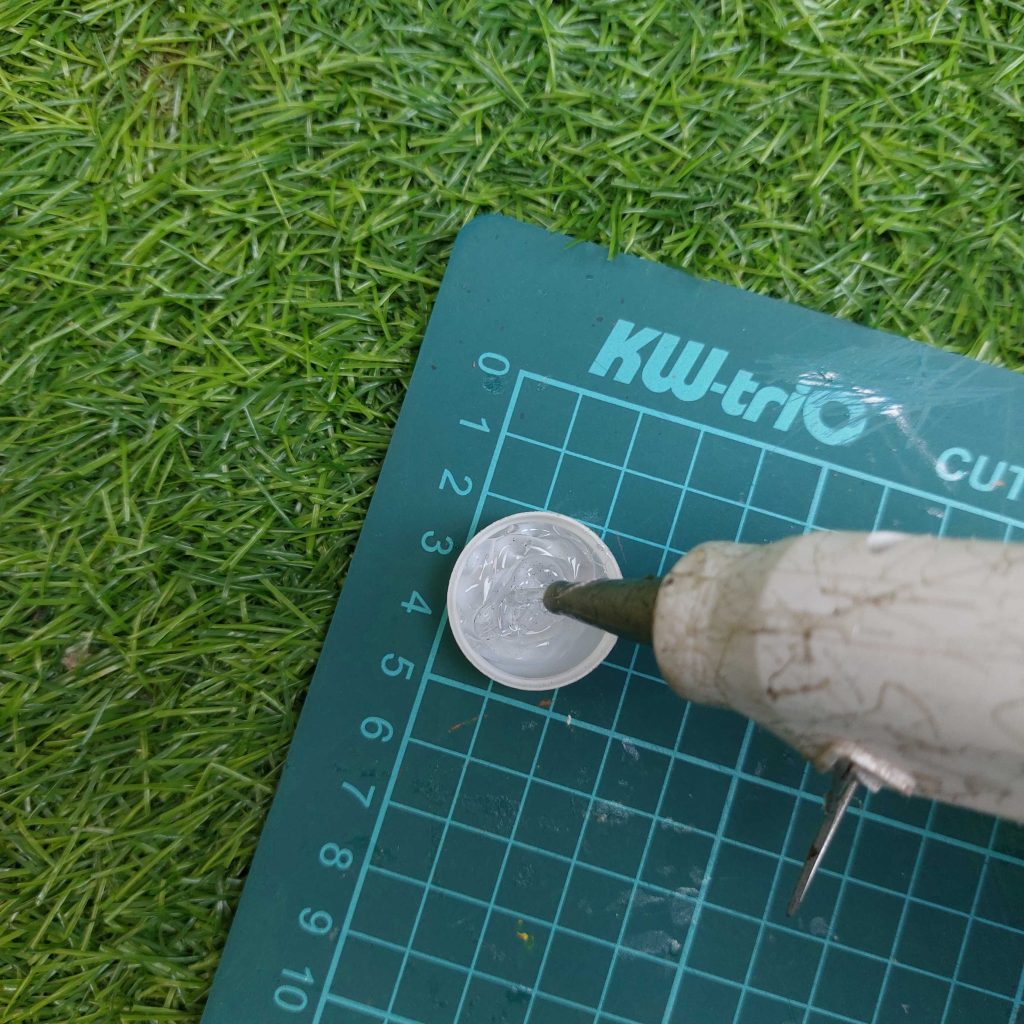
Prepare the base of the lamp by placing hot glue into a small plastic cap. This acts as a mold and will create a flat circular base.
While the glue is still hot, carefully start shaping the lamp part by using thin wire.
Here’s where the round shape (glass bulb) comes together.
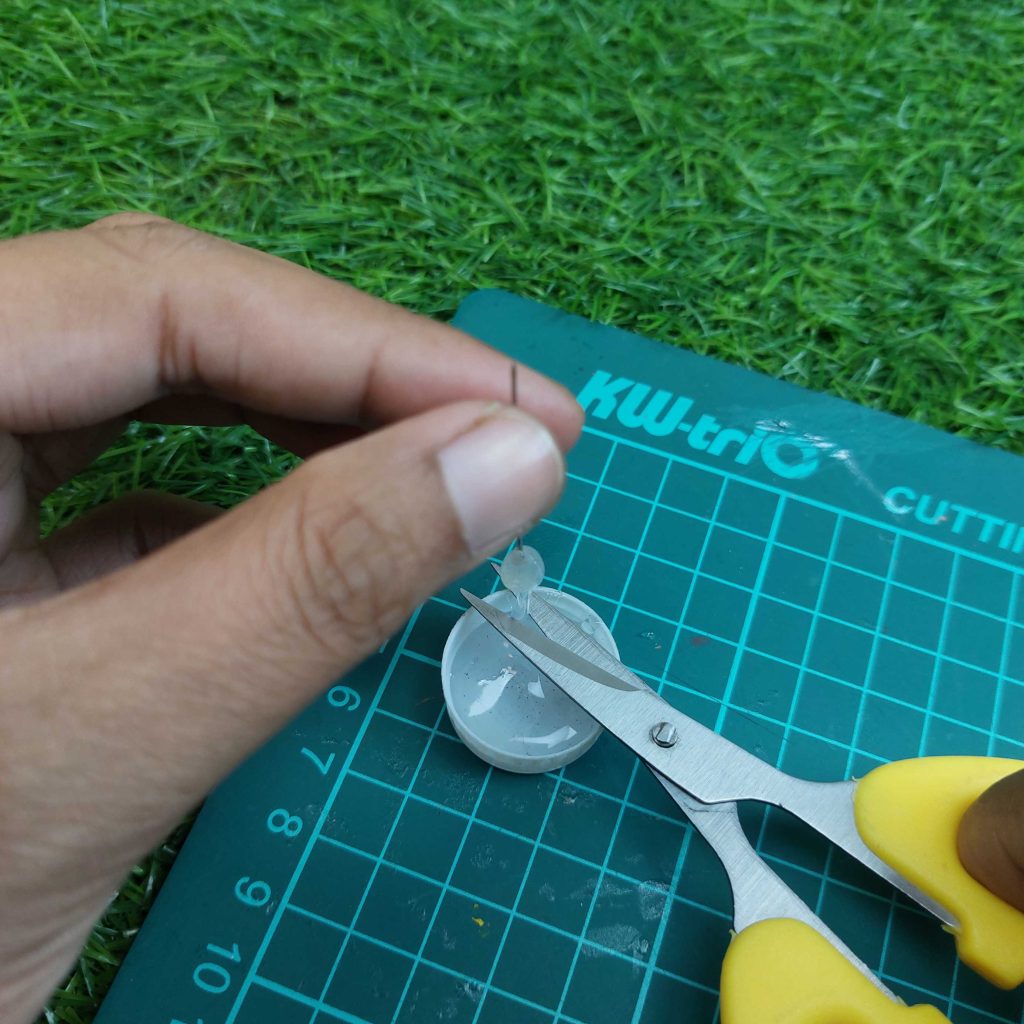
Letting it run out further, you should finally get to the neck of the bulb.
Cut it off to a fine point with your small scissors.
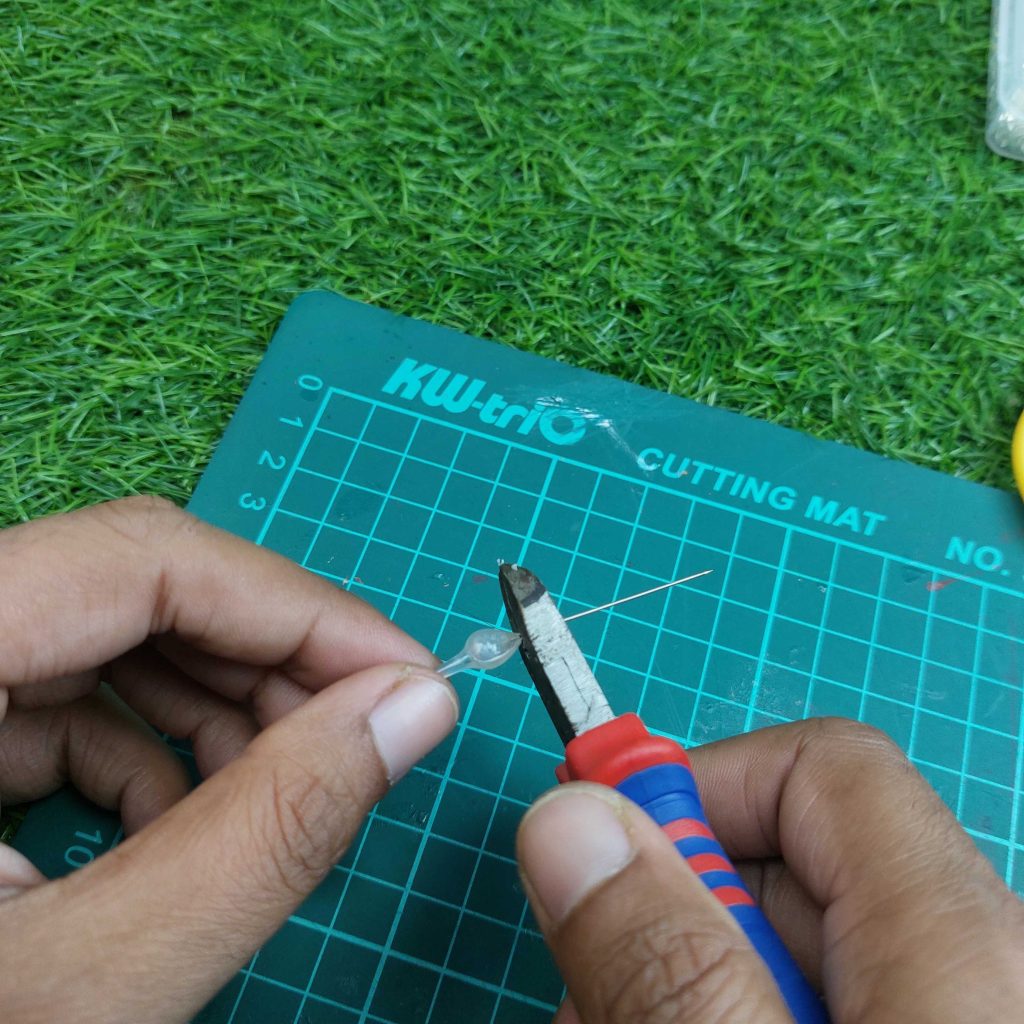
If you are sure it is dry enough and hard enough, you can now cut off the wire part that you just held on to, to create the bulb and neck.
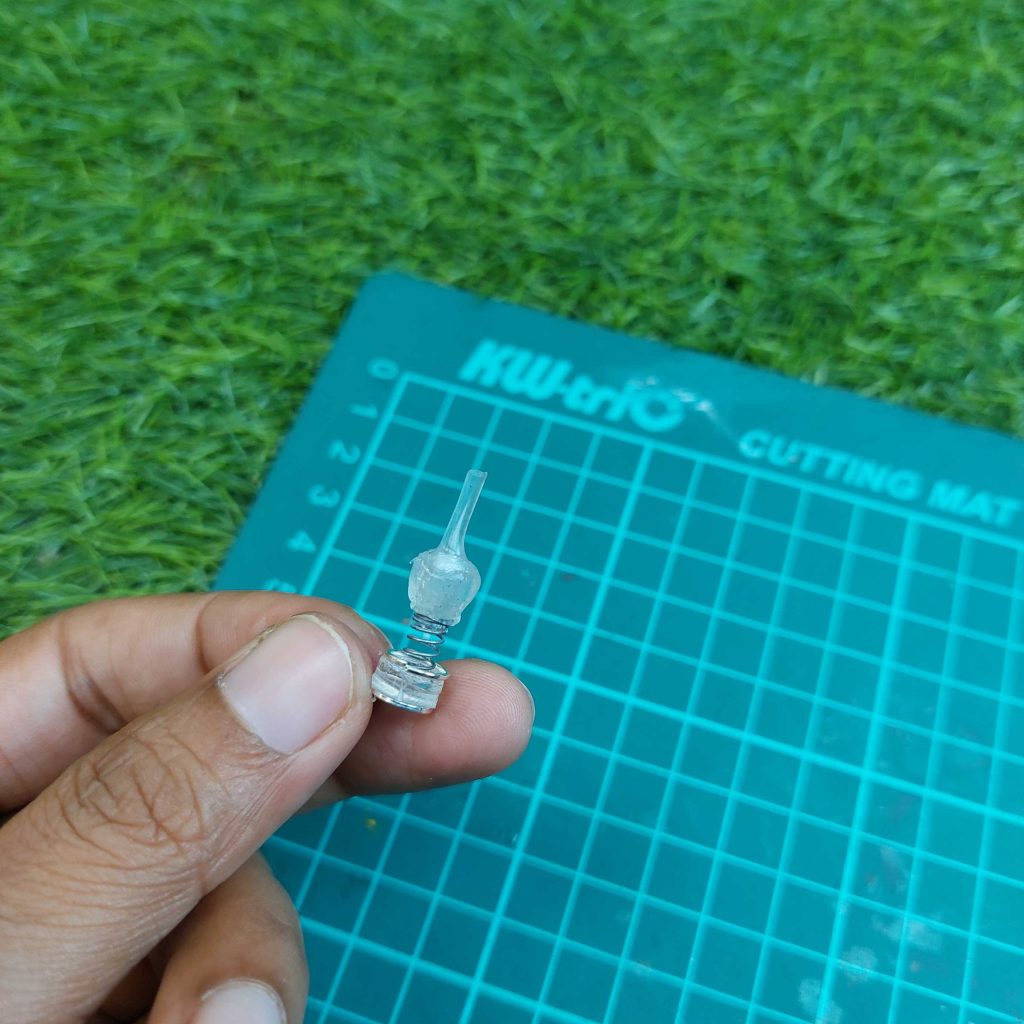
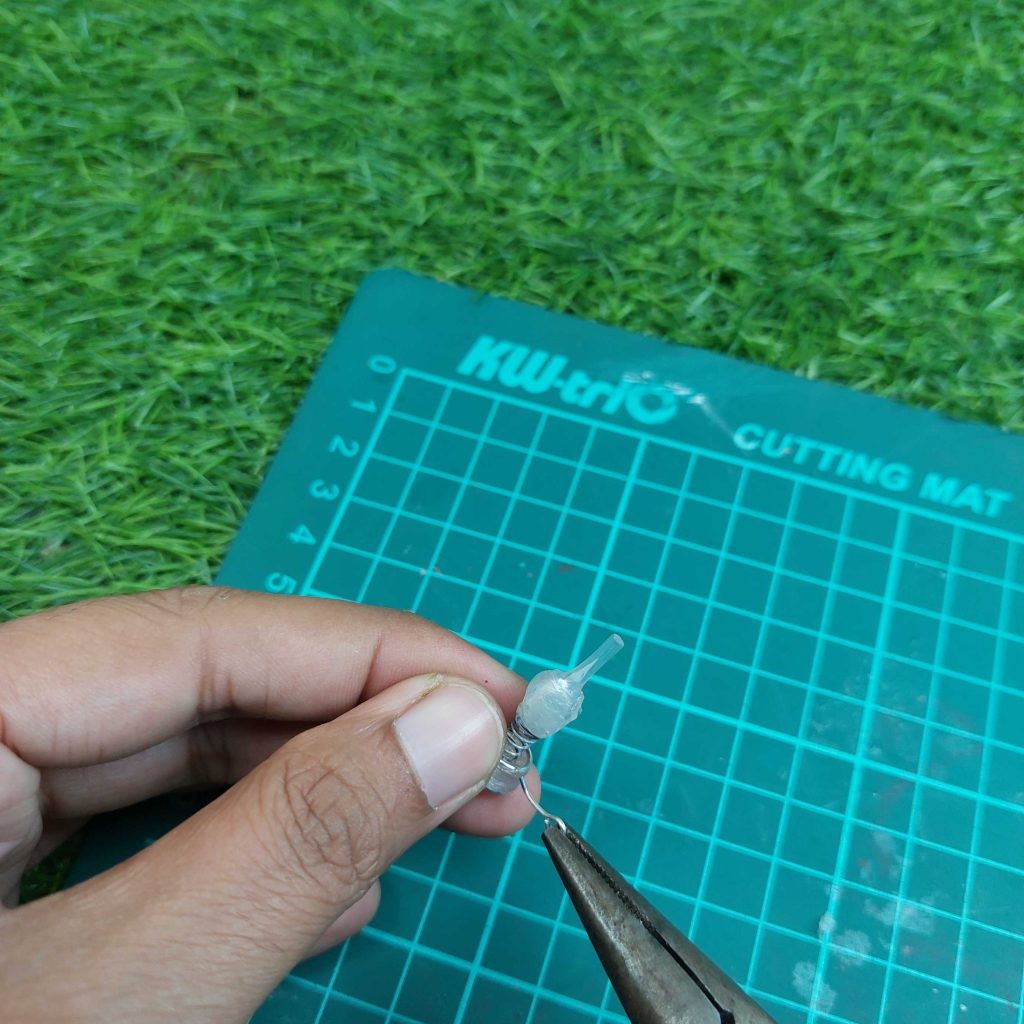
Attach the bulb and neck carefully to the lamp base and adjust it until it looks balanced.
Make final adjustments to the lamp shape and ensure all parts are securely attached.
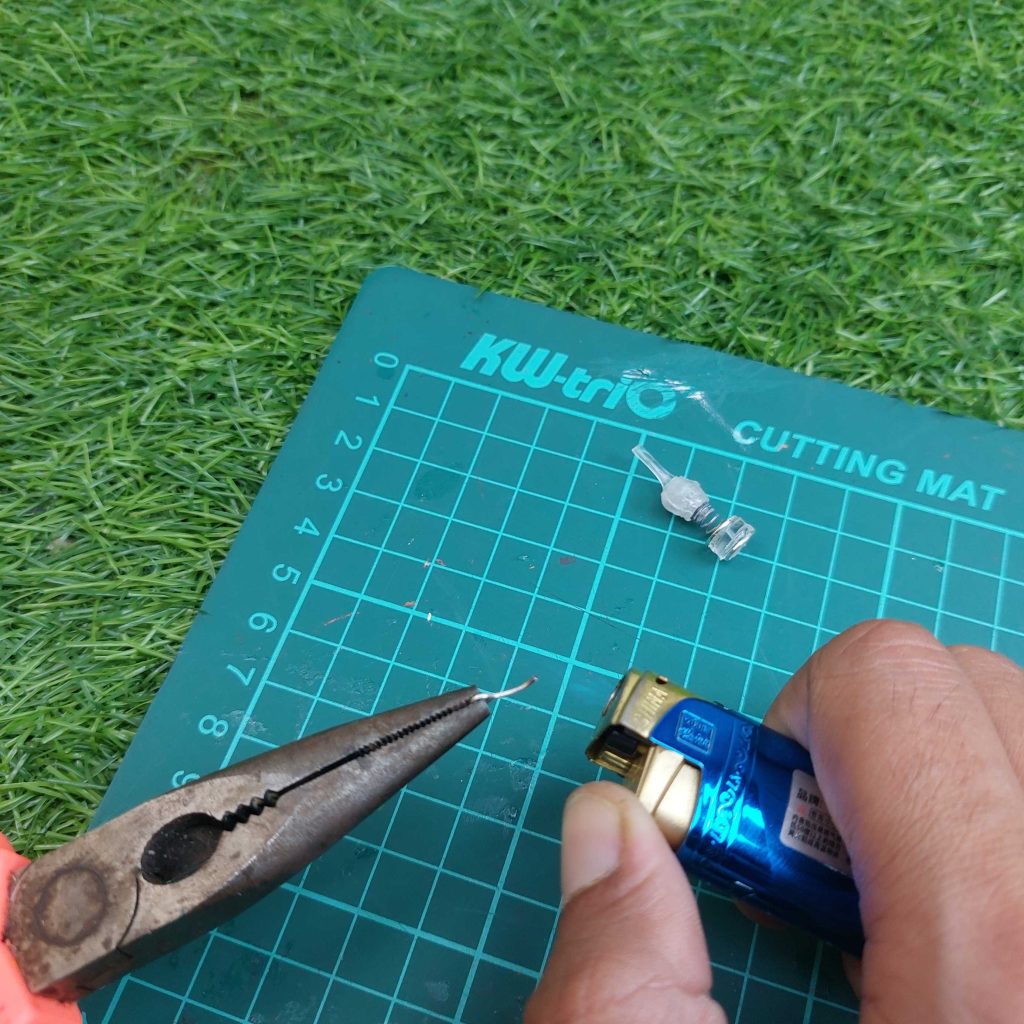
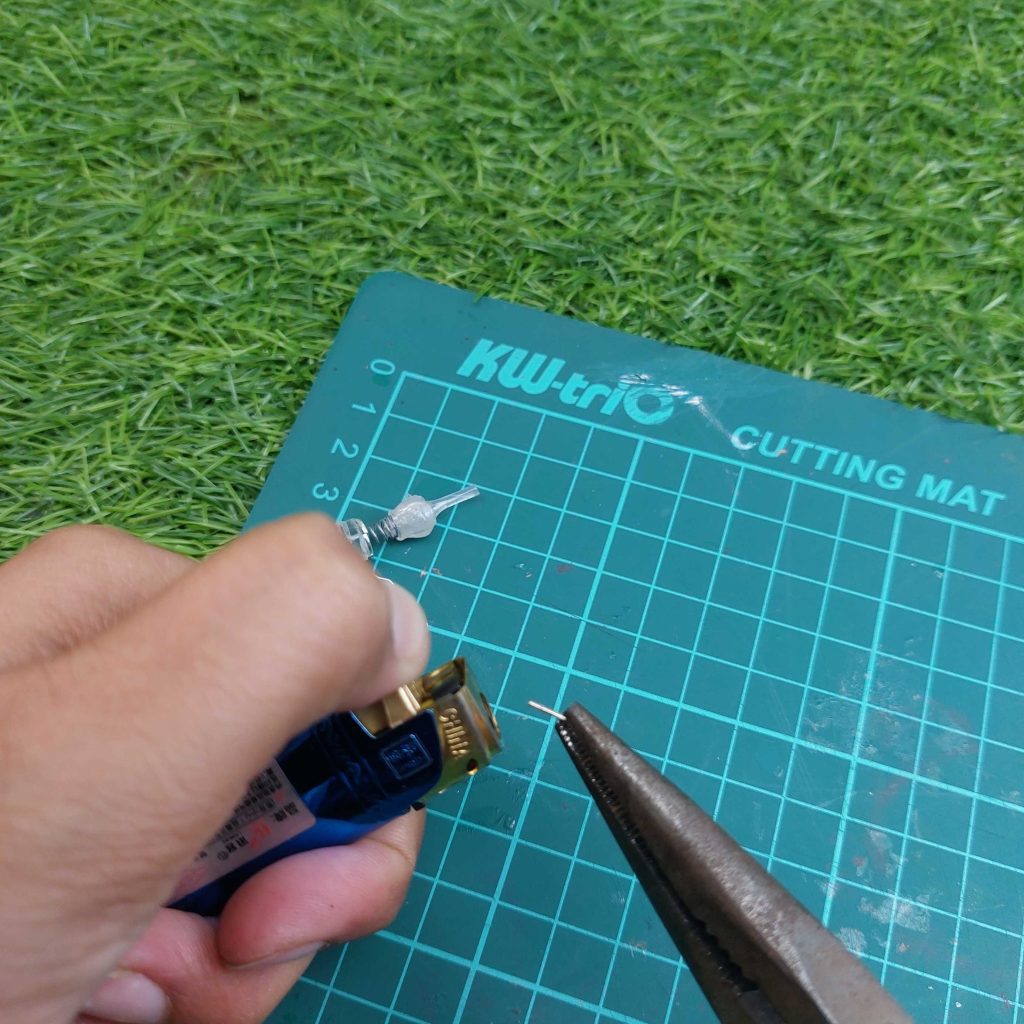
Heat another short piece of wire and bend it with pliers to create the small side handle of the lamp.
Insert another piece of wire to have it look like a wick adjustment knob for the oil lamp.
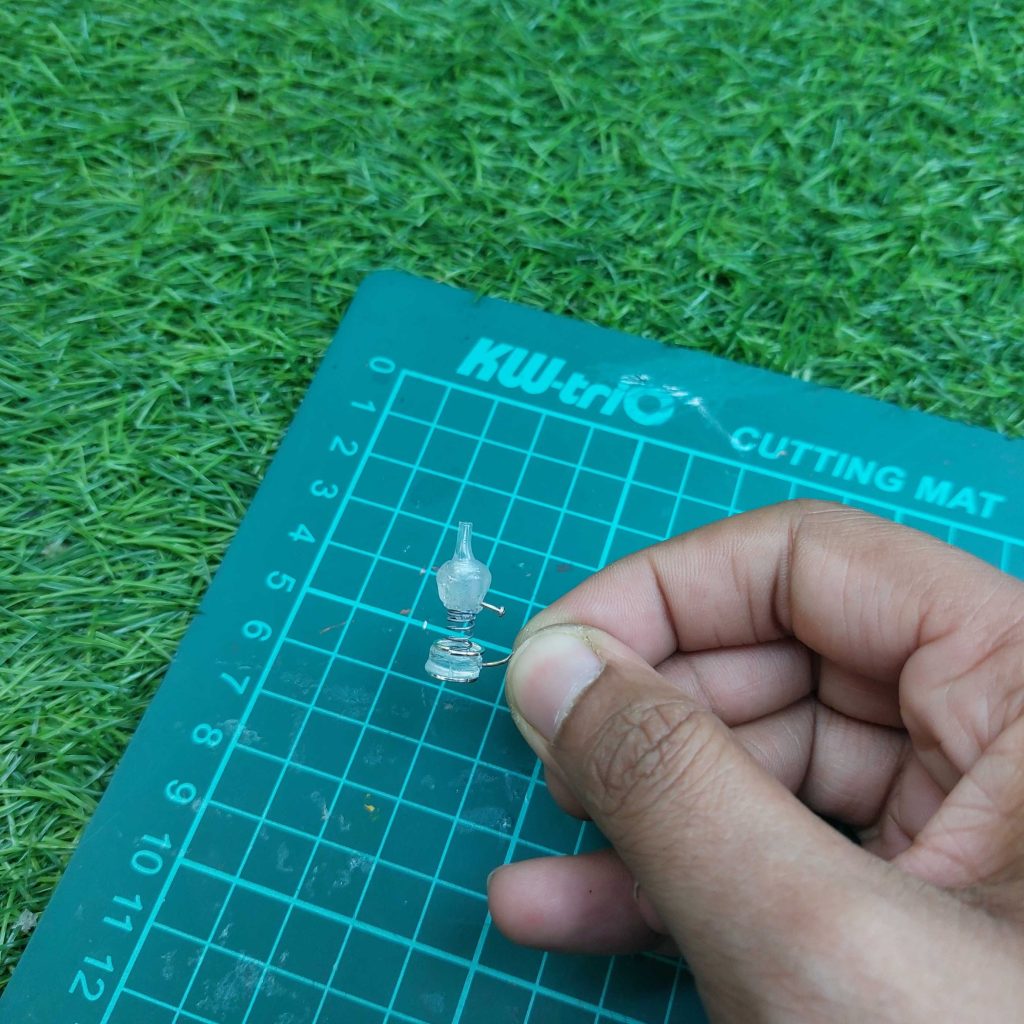
Your tiny miniature oil lamp is now complete and ready to decorate a miniature room, table, or dollhouse scene.
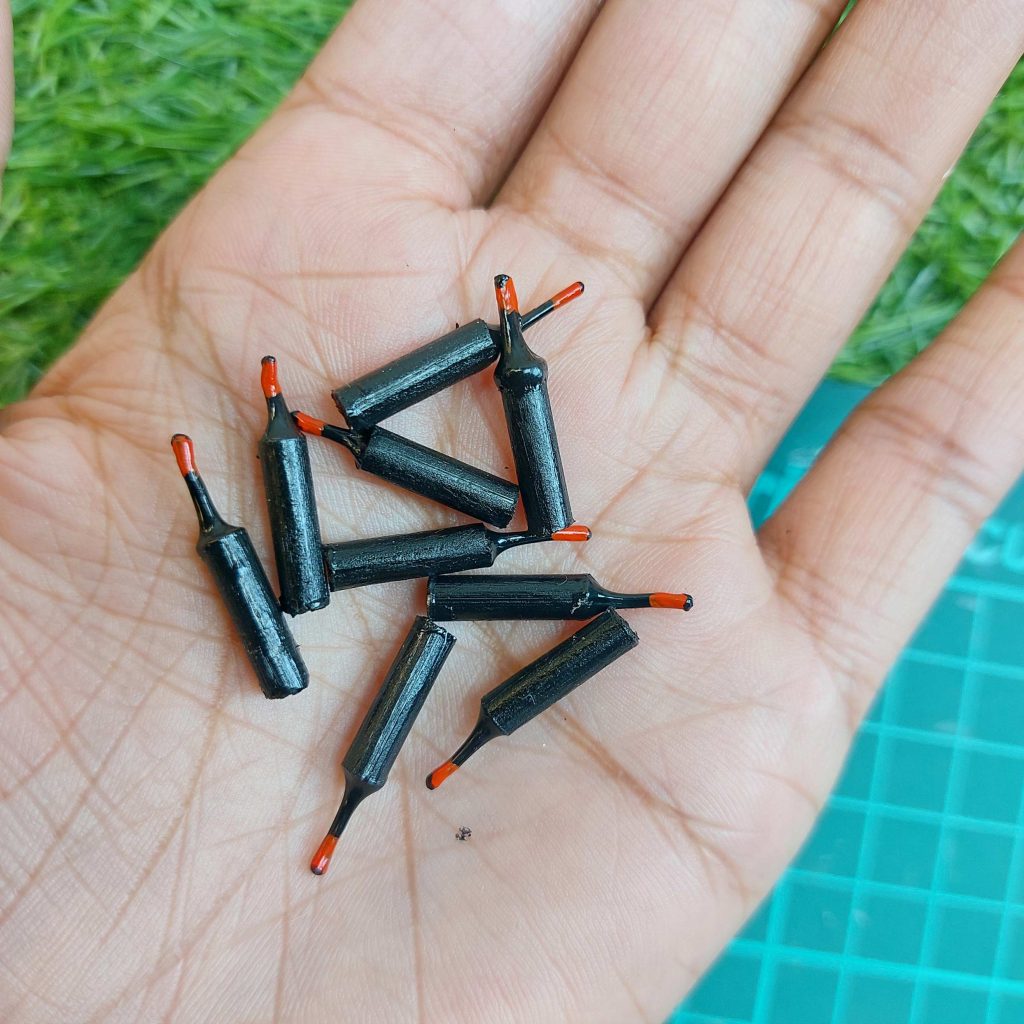
How I Made Tiny Miniature Bottles (Using Hot Glue)
I wanted to make a batch of really small bottles for my miniature pub, and this method worked surprisingly well. They’re quick to make, and once painted, they look much more realistic than you’d expect.
Materials I Used
Bamboo skewer
Hot glue gun + glue sticks
Lighter
Craft knife
Scissors
Super glue (or strong glue like UHU)
Acrylic paint (black + a bit of red/orange)
Small brush
Scrap wood strip (for drying rack)
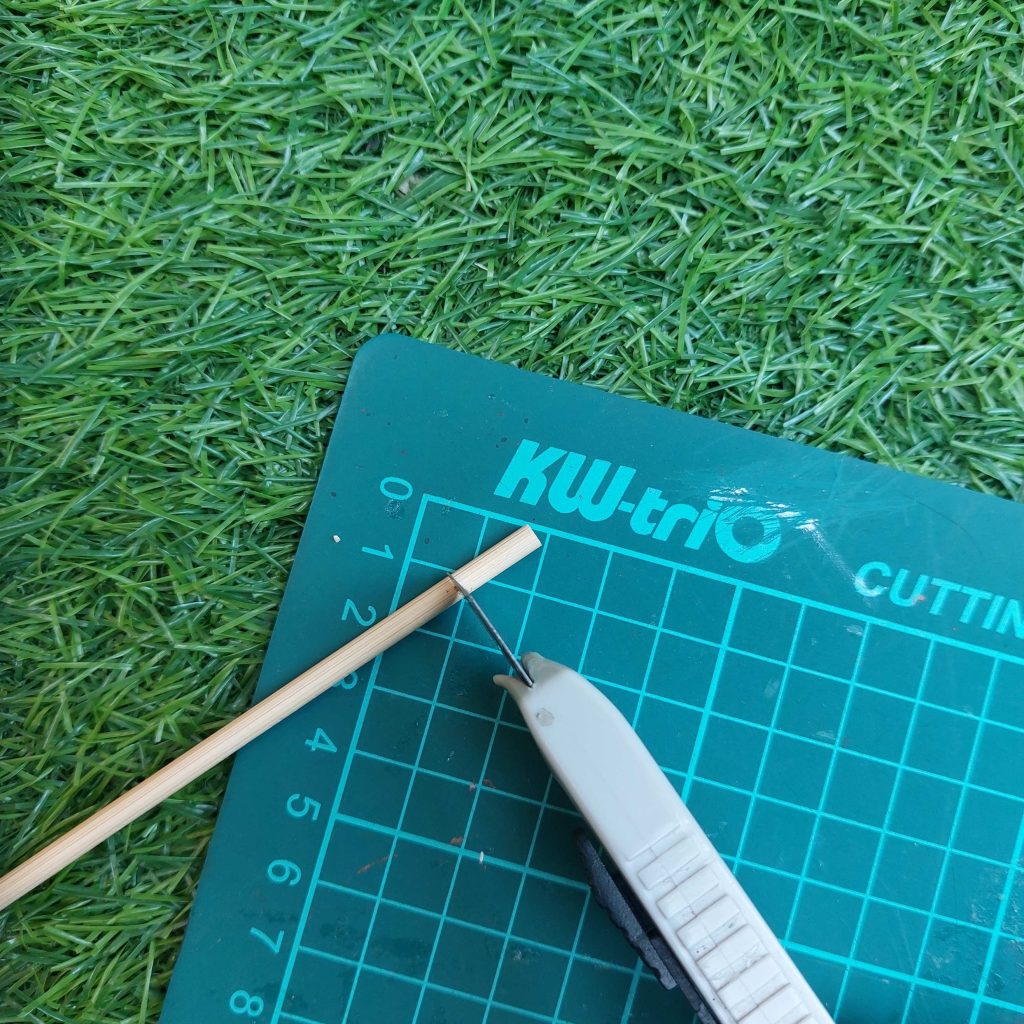
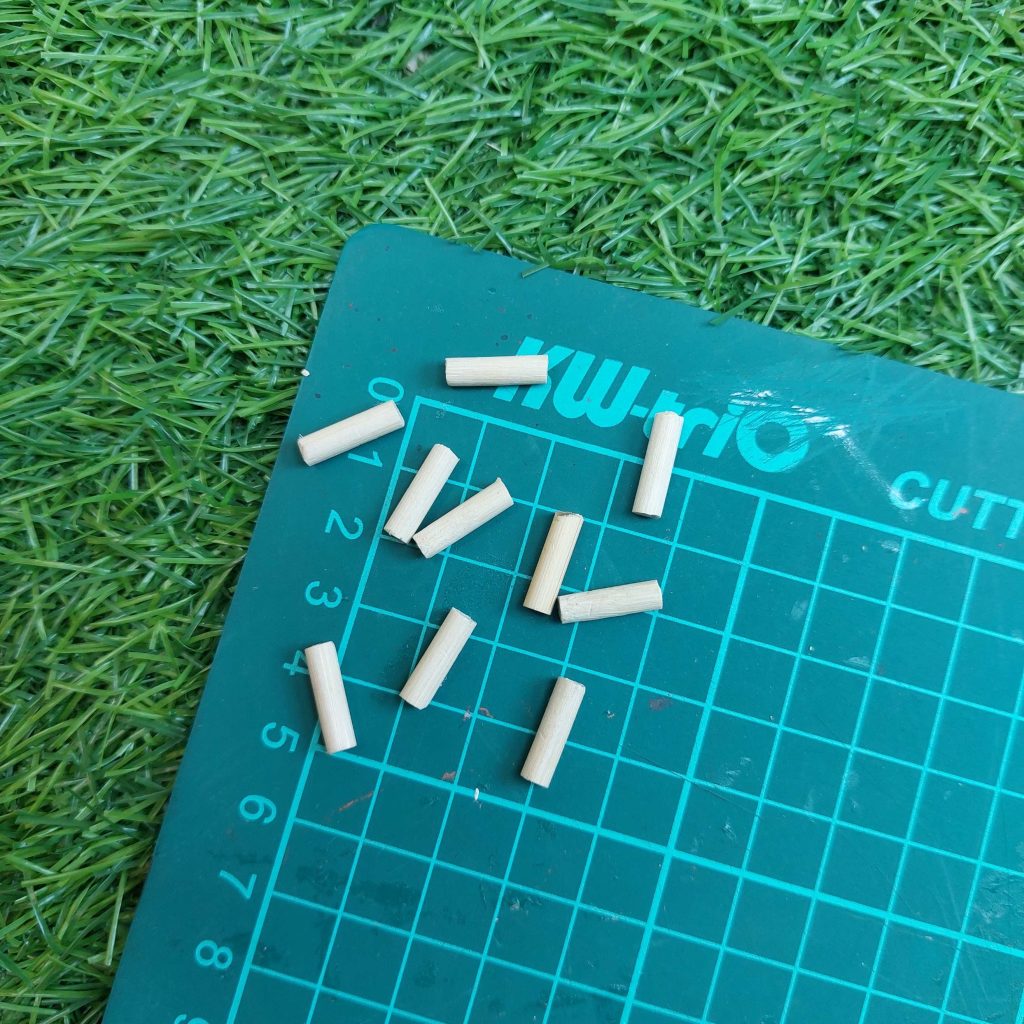
Step 1 – Cut the Handles
I cut the bamboo skewer into small, equal pieces. These act as holders, so you don’t have to touch the glue while shaping. You can have these as large as you want for your scale.
Step 2 – Make the Bottle Neck
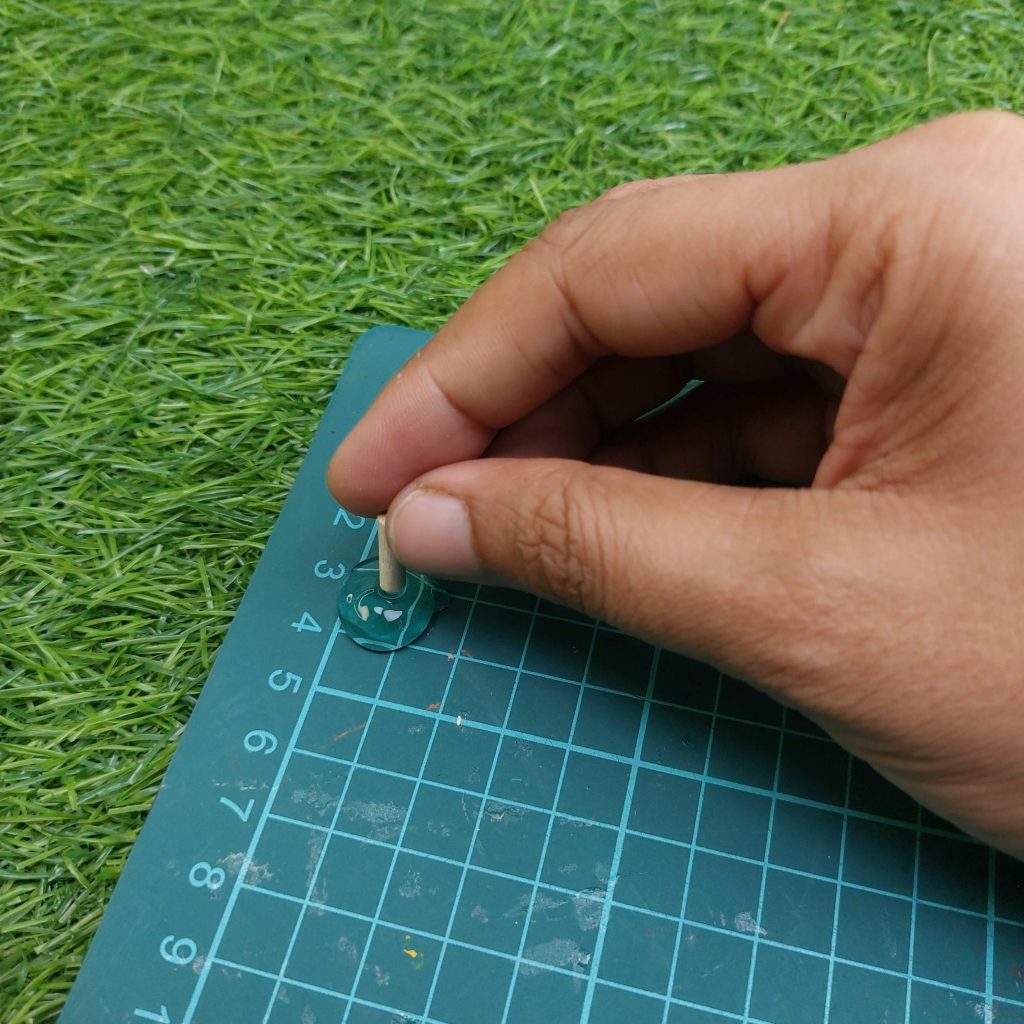
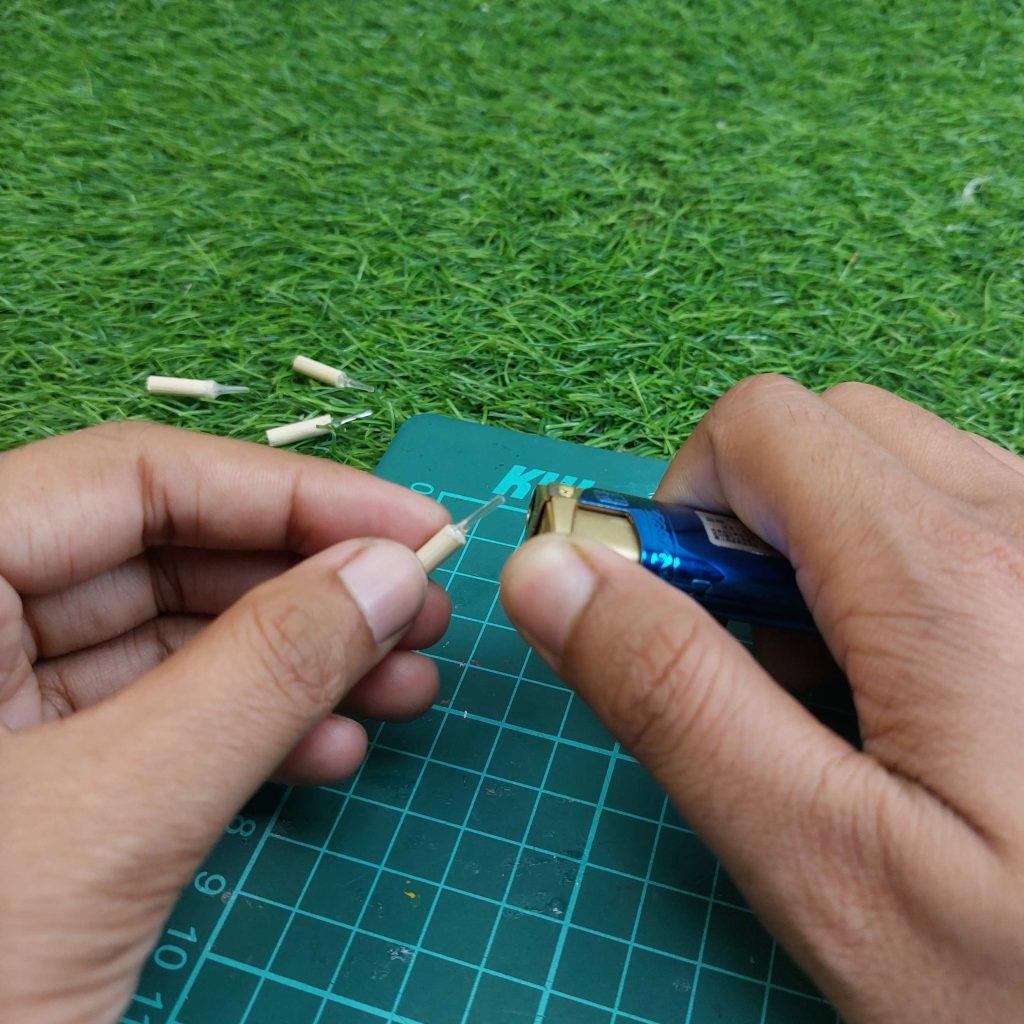
I placed a small drop of hot glue on my cutting mat and immediately pressed a wooden piece into it.
As the glue softens, you can pull it slightly and shape a thin neck.
This is where the bottle really starts to look realistic.
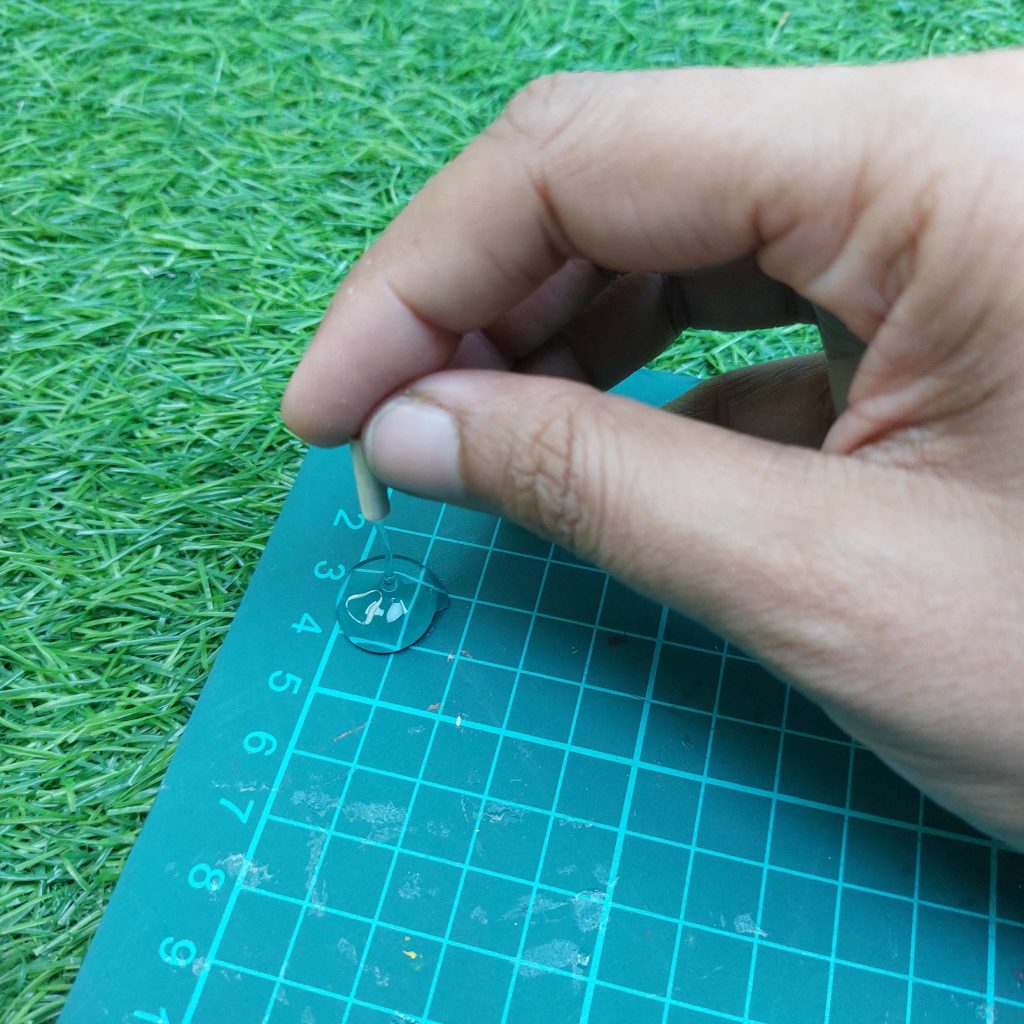
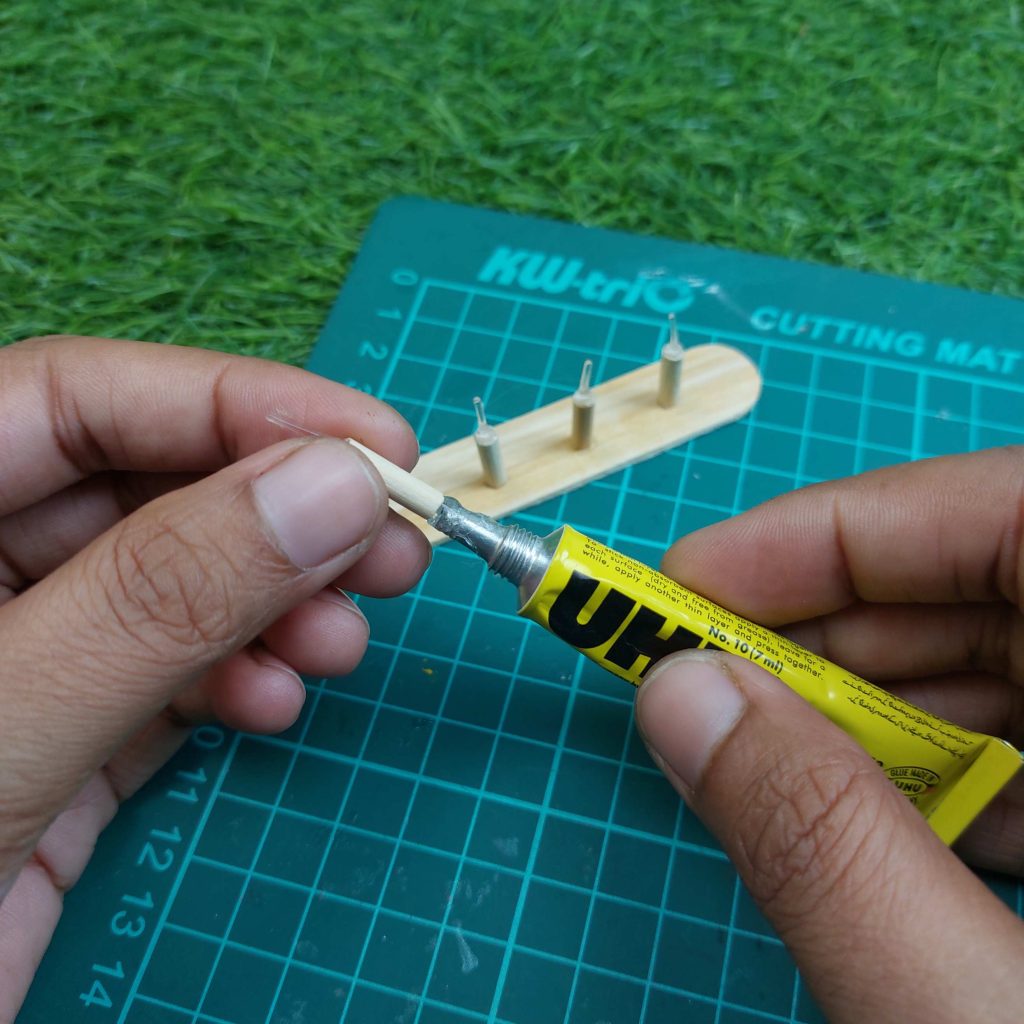
Step 3 – Clean Them Up
Once cooled, I trimmed off glue strings and uneven bits.
Just small corrections make a big difference here. Using a lighter, you can shape the bottles nicely.
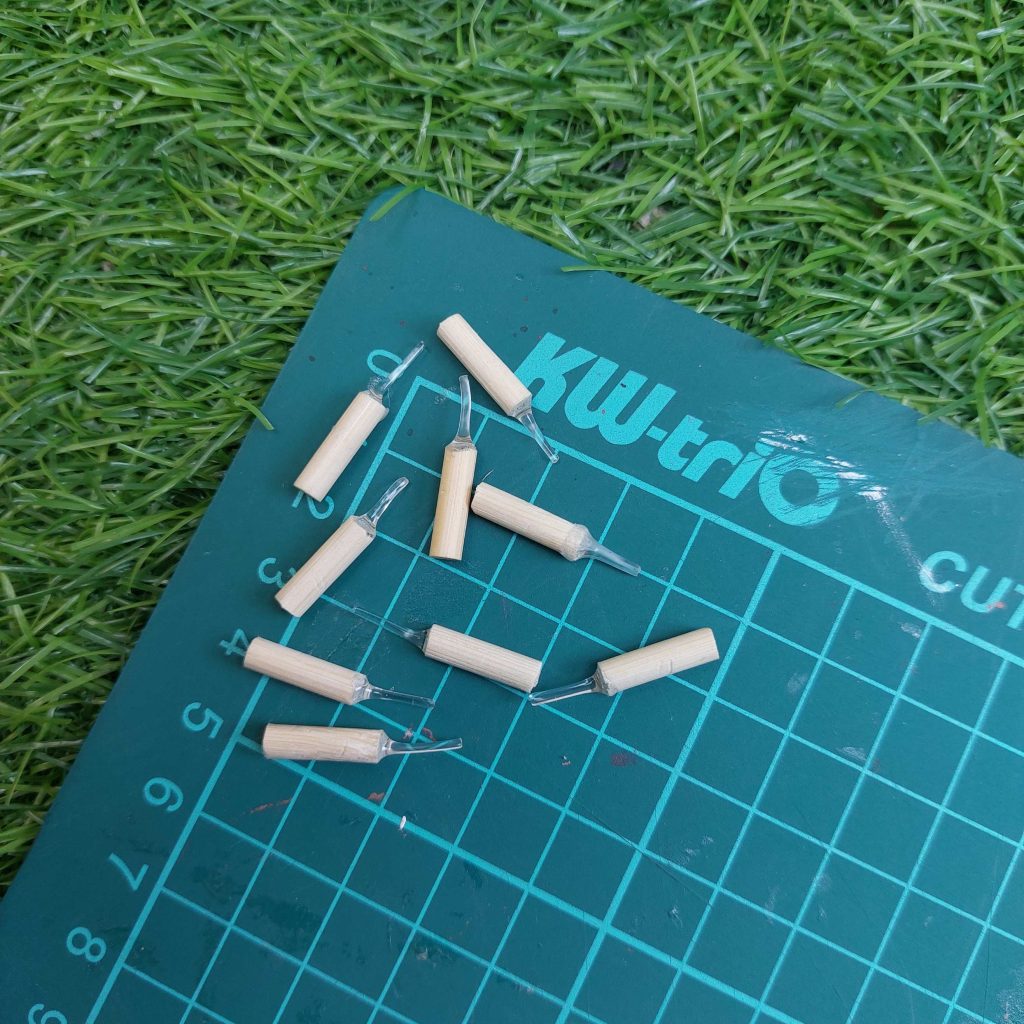
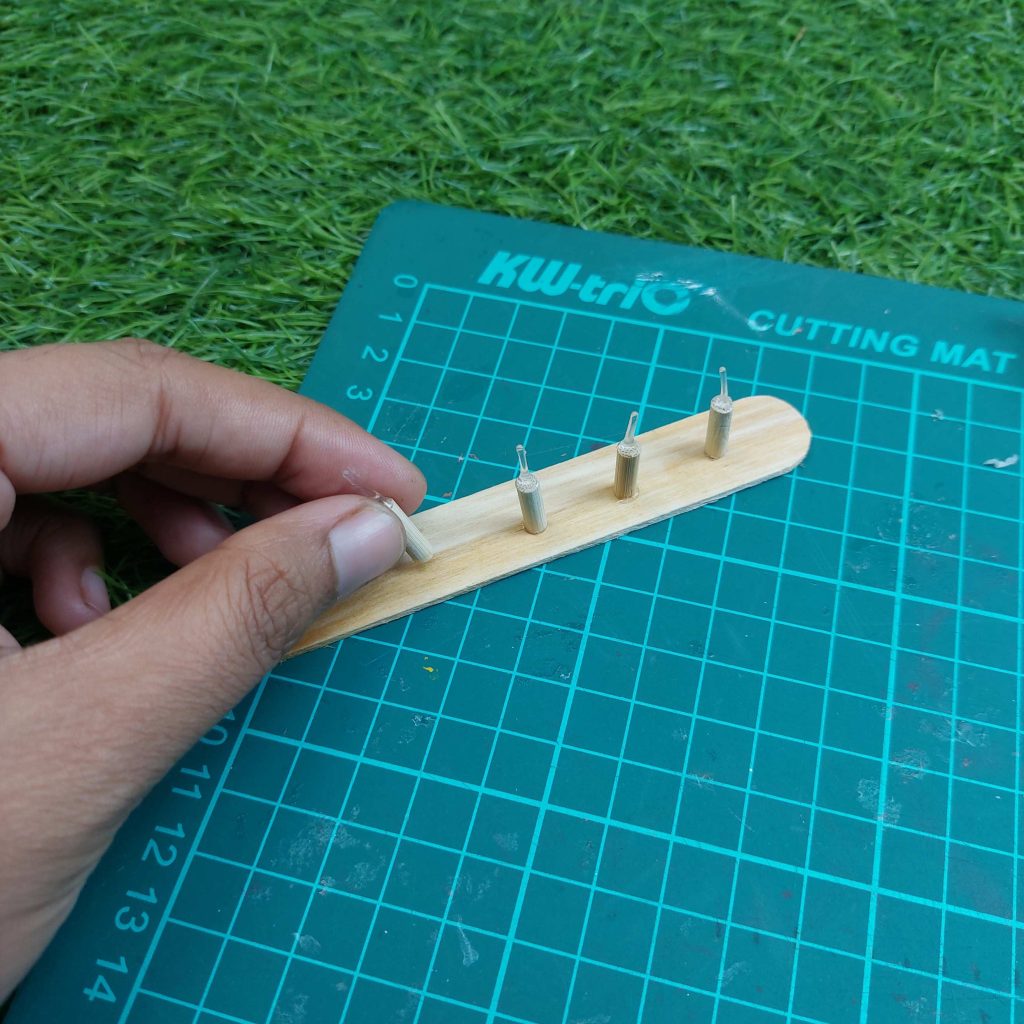
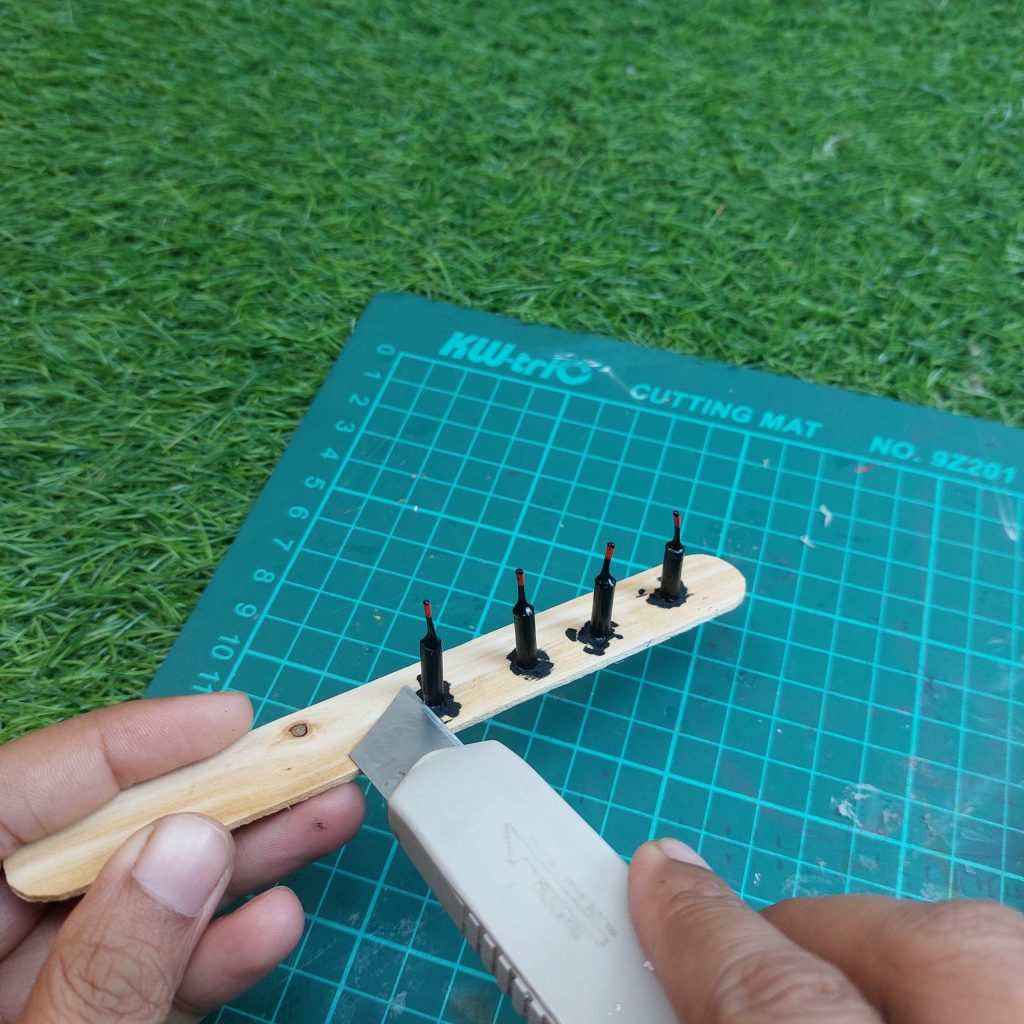
Step 4 – Set Up a Drying Rack
Instead of holding each piece while painting, I glued the sticks onto a strip of wood.
This gave me a simple drying rack so I could paint multiple bottles at once and let them dry without touching anything.
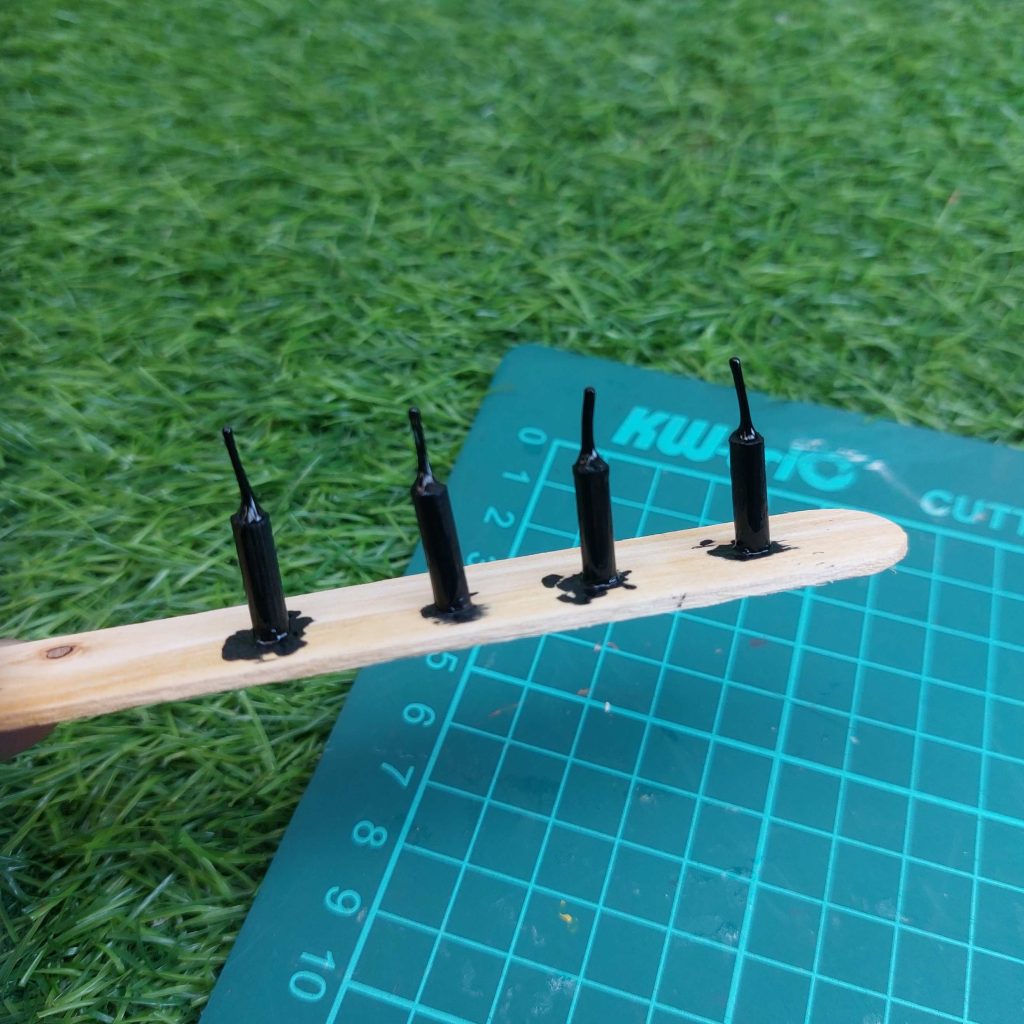
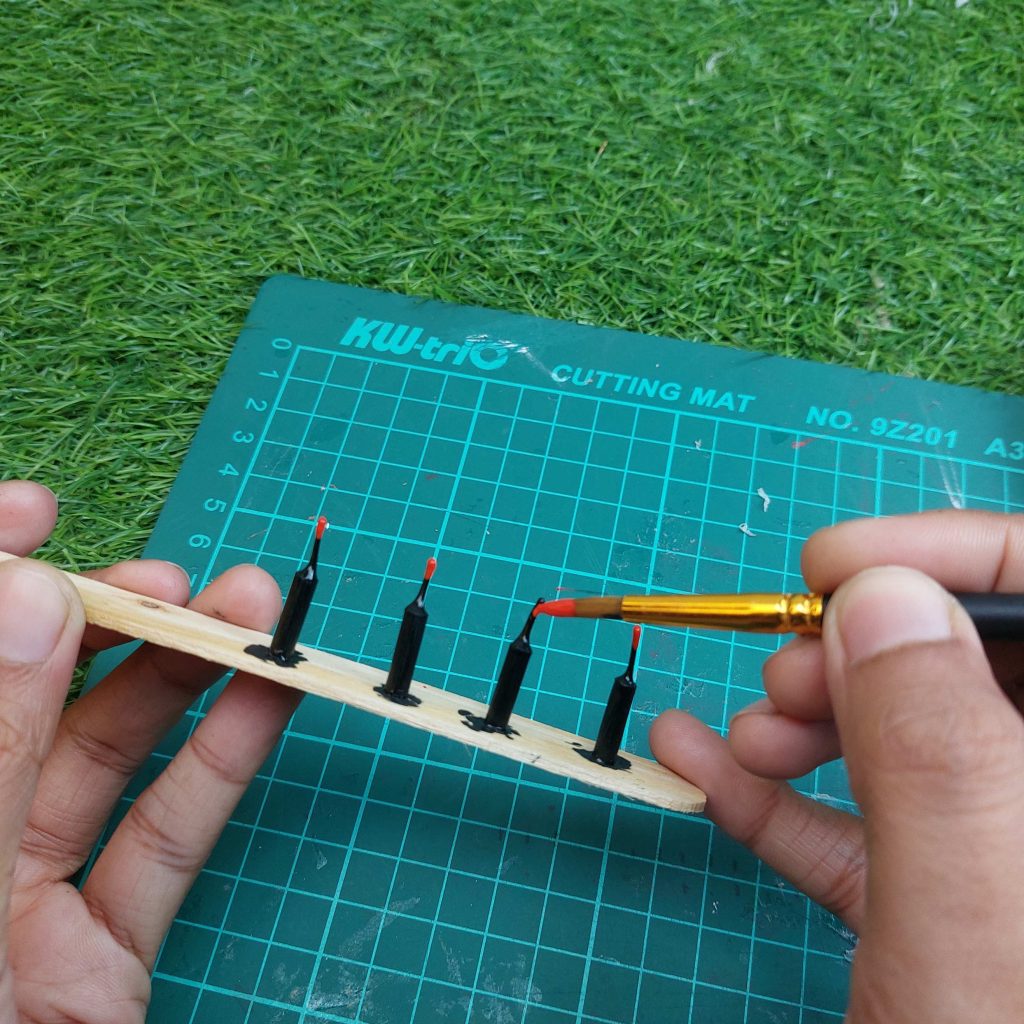
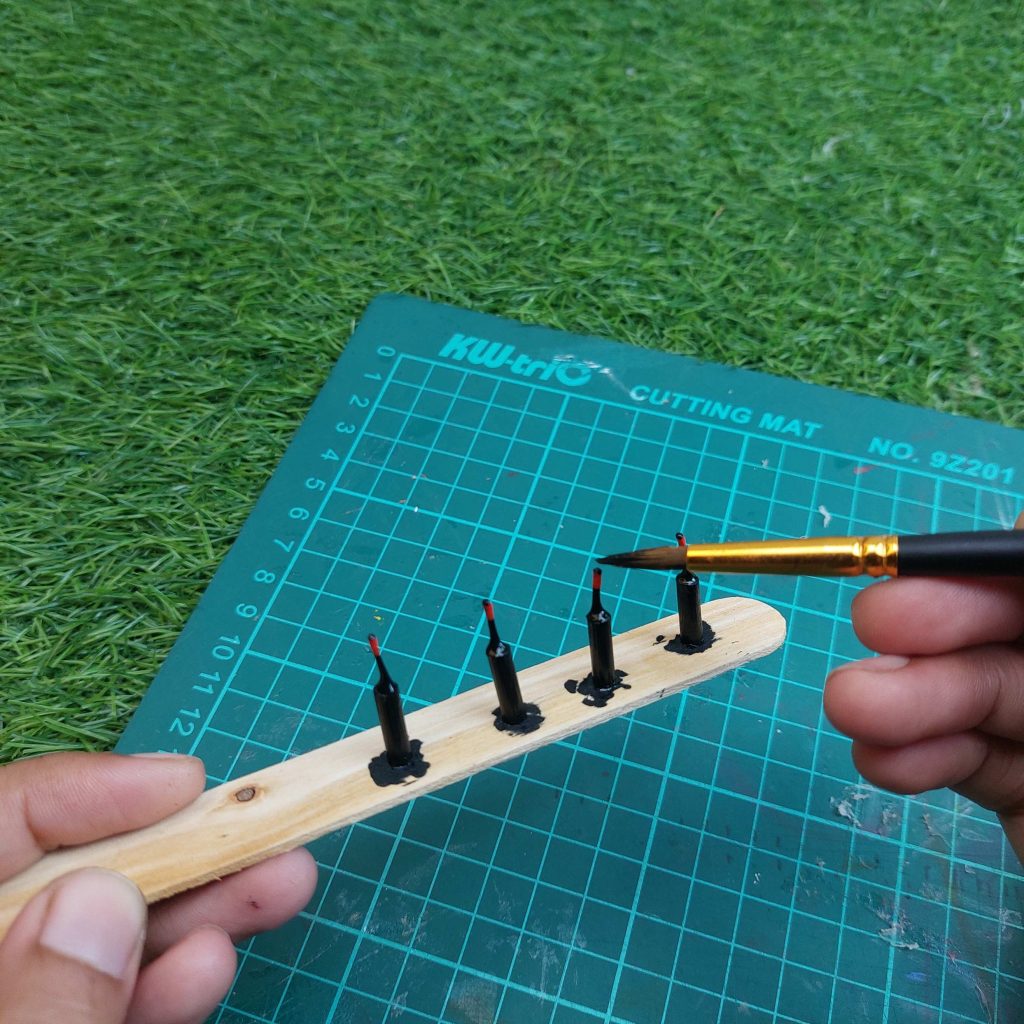
Step 5 – Paint the Bottles
I painted the bottles black using acrylic paint.
Because the surface is slightly textured, one coat already gives a nice effect. You can always add a second coat if needed.
Step 6 – Add Detail to the Tops
I added a small touch of red or orange paint to the tips.
This instantly makes them look more like sealed bottles or miniature props.
Finish with another small layer of black to resemble cork.
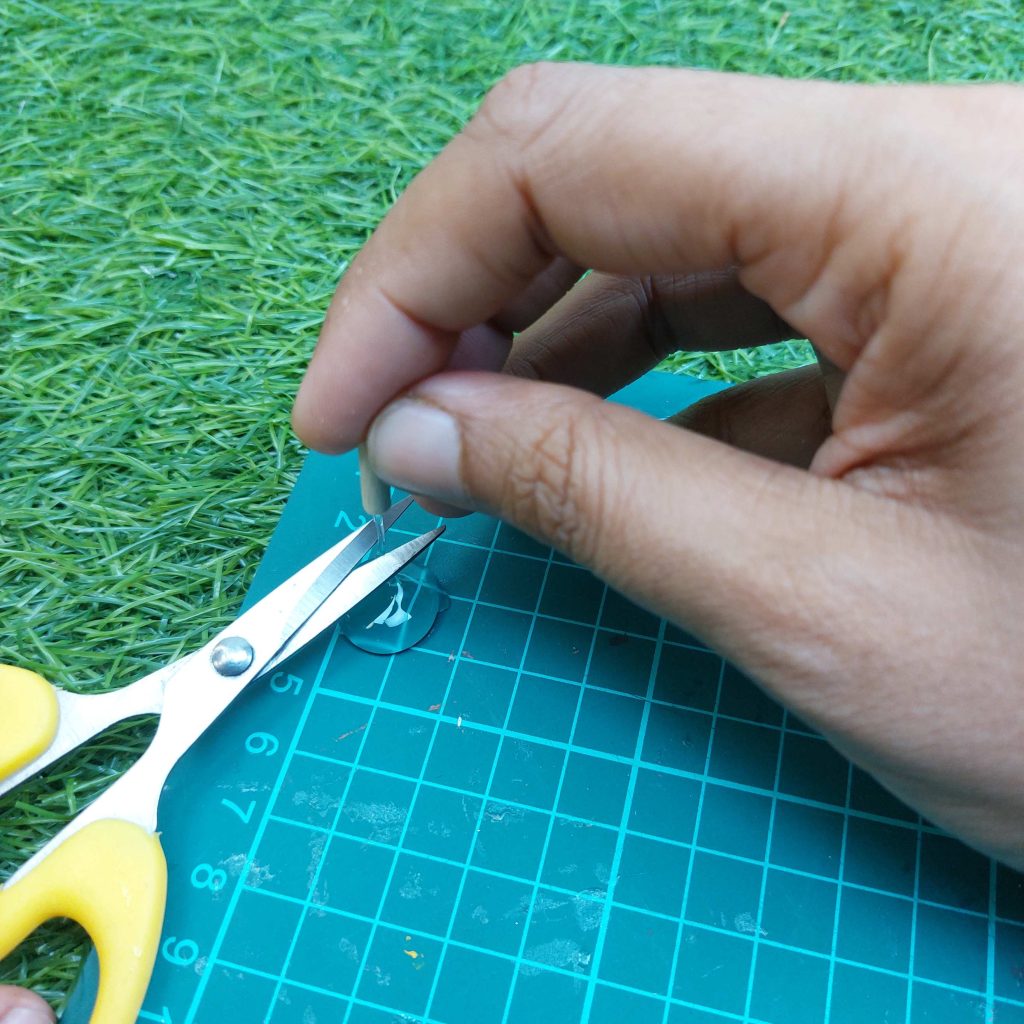
Step 7 – Remove from the Rack
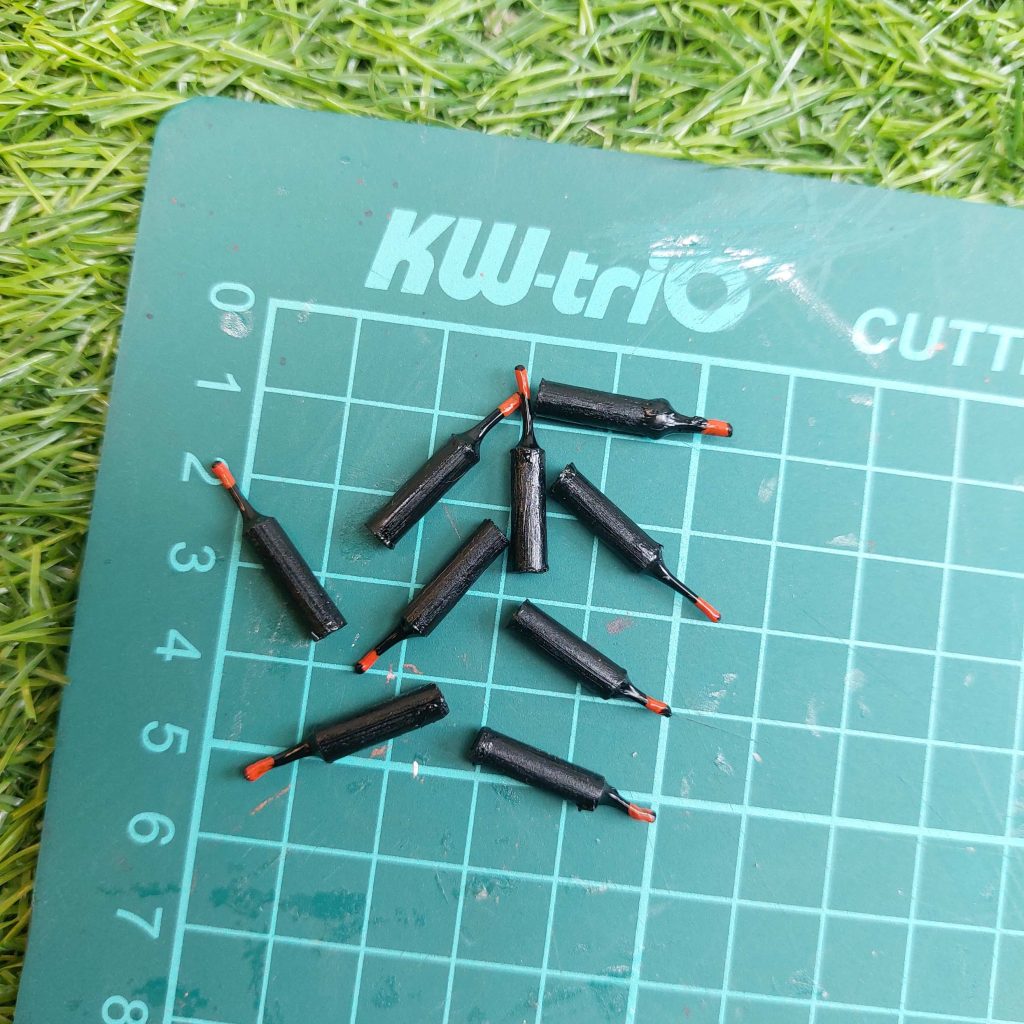
Once everything was dry, I carefully cut them loose using a craft knife.
You end up with a batch of small, slightly varied bottles that look natural and fit perfectly into a miniature scene.
Paint the bottoms black after cleaning it up.
My Final Conclusion
Miniature projects don’t always require special tools or expensive materials. As you’ve seen in these tutorials, many tiny details can be made from simple craft supplies you might already have at home.
If you have any questions, feel free to leave them down below in the comments section!
3 thoughts on “5 Simple Dollhouse DIY Ideas Using Things You Already Have at Home”
You are so talented and have a very good eye at looking at something and being able to visualize what it could be. I truly enjoy your tutorials! Keep up the great work!


")


You are so talented and have a very good eye at looking at something and being able to visualize what it could be. I truly enjoy your tutorials! Keep up the great work!
Where can we get the printable album covers?
hello, I found them on Pinterest