If you’ve ever wondered how to make miniature plates for dollhouses using everyday materials, you’re in the right place. In this blog post, I’ll show you two fun and affordable methods to create tiny, realistic dishes without buying any special supplies.
We’ll turn scraps like plastic packaging and old buttons into miniature plates that look perfect on a dollhouse dining table!
How to Make Miniature Plates from Plastic
If you’ve ever looked at leftover food packaging and thought it was useless, think again! In this tutorial, I’ll show you how to turn a simple piece of plastic into miniature plates for your dollhouse.
We’ll go step by step through cutting, shaping, and painting so you can create realistic little dishes that look like porcelain but cost nothing at all.
These plates also pair perfectly with the miniature bowls and plates from quilling paper I shared earlier.
Materials You Need
A piece of clear plastic (like from food packaging)
a tealight
Circular stencil or shape (like a ruler template)
Scissors
Acrylic paint (white, optional gold for details)
Small paintbrush
That’s all!
Step by Step Tutorial
Cut a square piece of clear plastic packaging large enough for your plate.
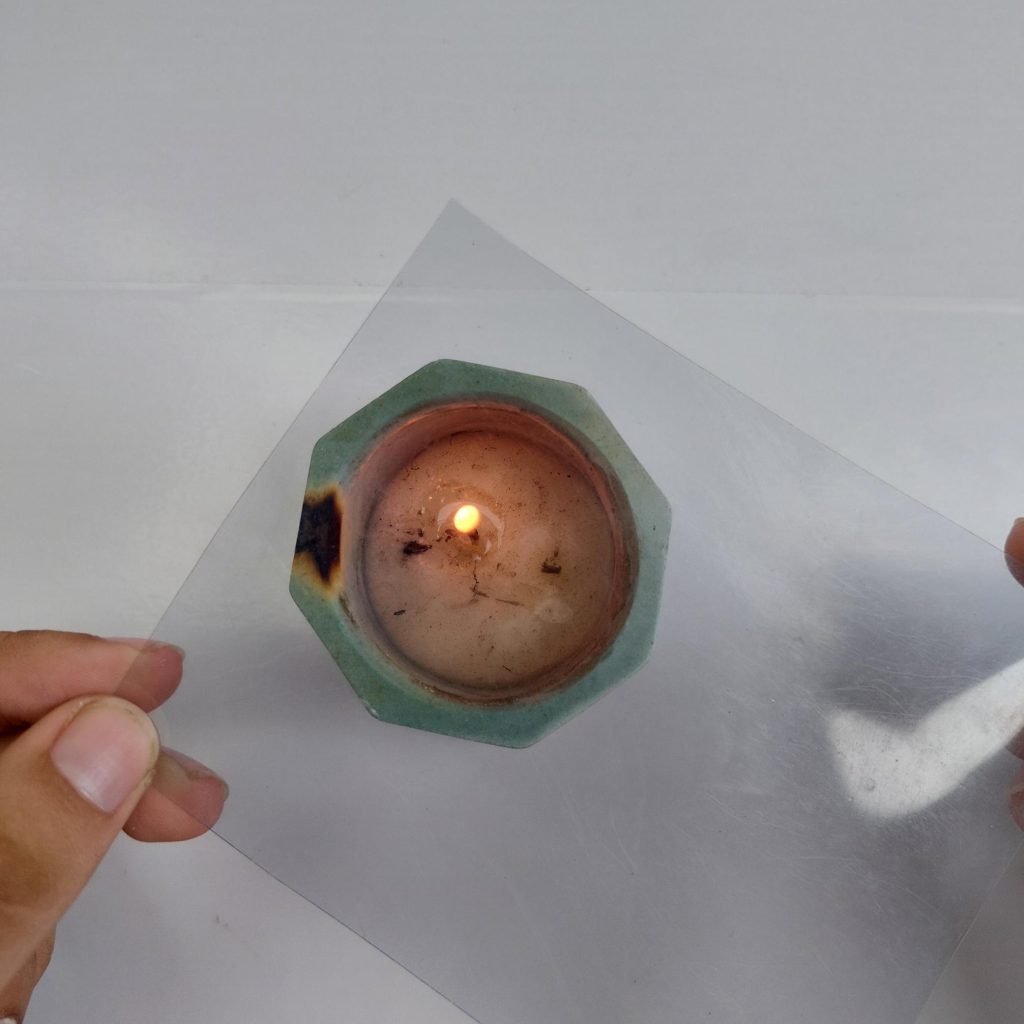
Hold the plastic carefully over a candle flame, moving it around so it softens evenly. Not to close so it doesn’t burn to become black or brown!
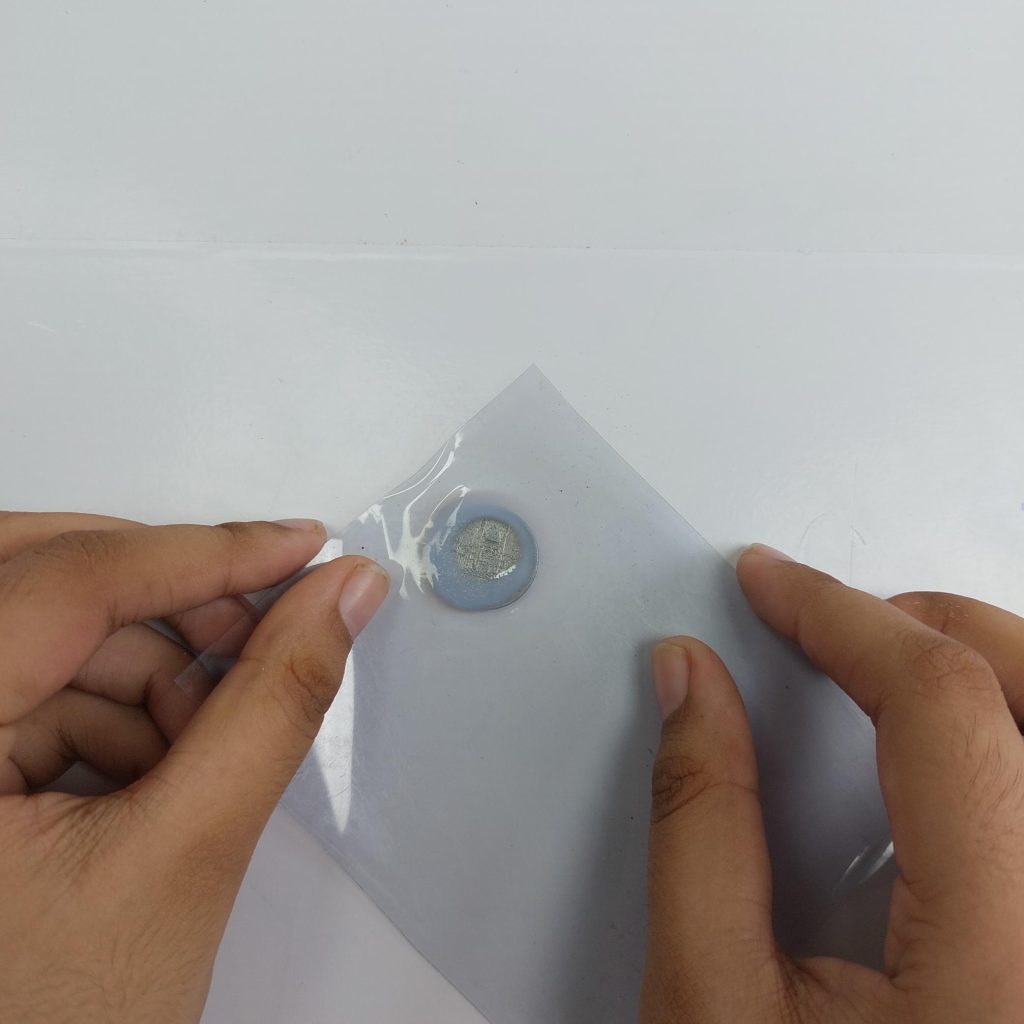
Once soft, press the warm plastic into a round stencil shape to form the plate curve. Underneath the soft plastics, you can use anything , from buttons to coins. And to form the top of it, use a circle stencil. I hope you understand what I mean? If not, feel free to leave a question in the comment section!
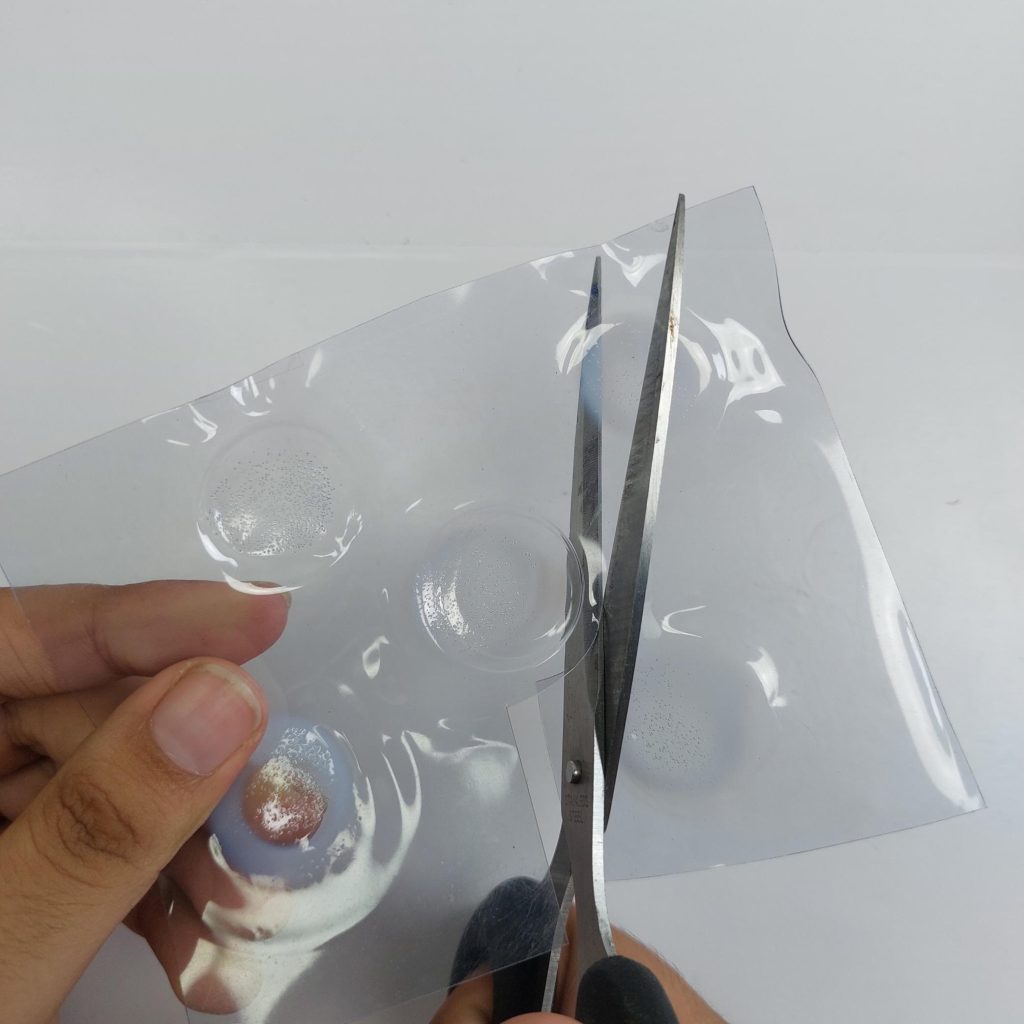
Let the plastic cool and harden, then cut out the plate neatly with scissors.
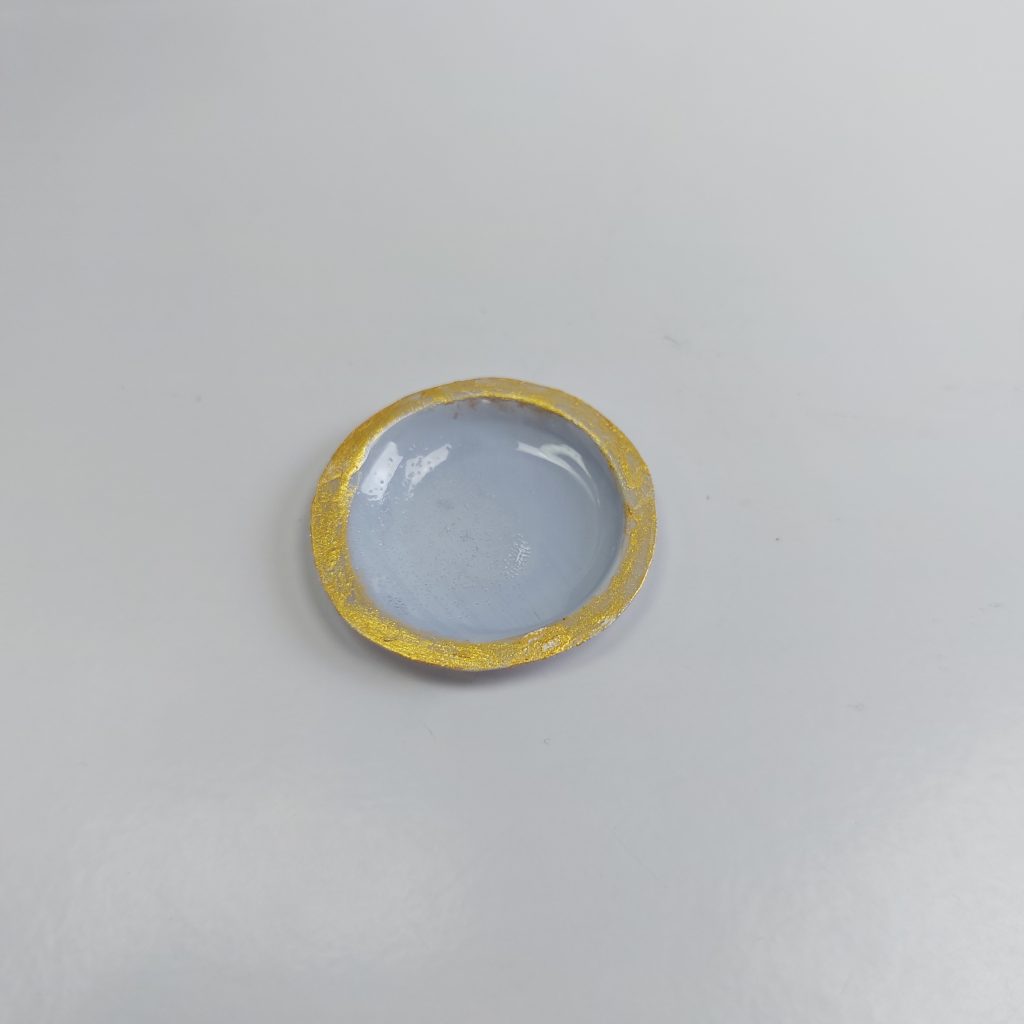
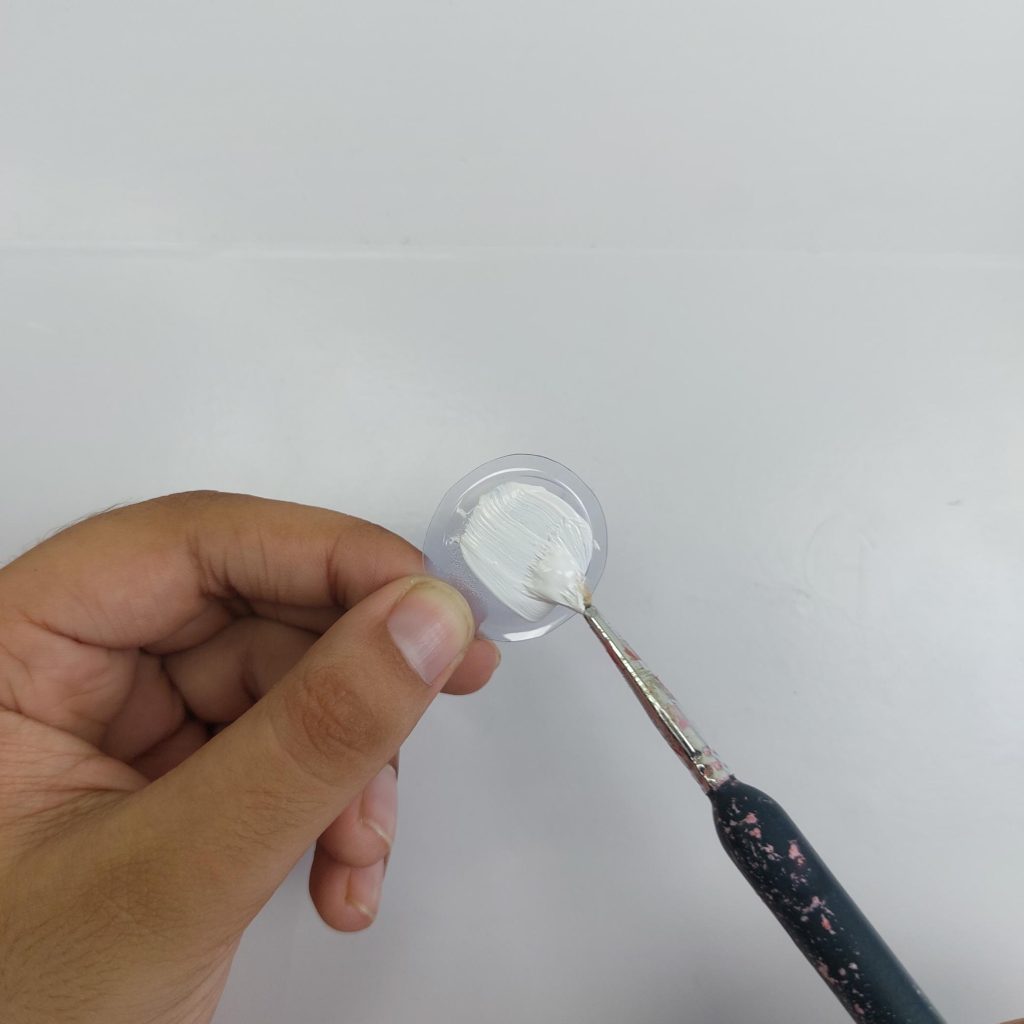
Paint the plate with white acrylic paint so it looks like porcelain. It’s better to use 2 layers, first a primer and then the final layer. ( a real primer instead of just using white paint is probably even better, but I didn’t have it in my house at the time of making this tutorial )
For extra detail, add a thin gold rim or small decorative touches with a fine brush. You can finish up by adding gloss nailpolish to make them shine!
There you go, you can now have ordinary plastic sheets turn into mini plates and decorate them any way you like: by painting or by adding miniature printable plates from paper!
Turning old buttons into dollhouse plates is one of the easiest and most satisfying miniature hacks.
With just a few household supplies and some printable plate designs, you can create charming little dishes that look like real porcelain. In this tutorial, I’ll show you how I transformed a handful of plain buttons into beautiful vintage-style miniature plates using my own printable designs.
Materials Needed:
Clear nail polish (top coat) for sealing
Old buttons (flat ones work best)
Sandpaper
White acrylic paint or white nail polish
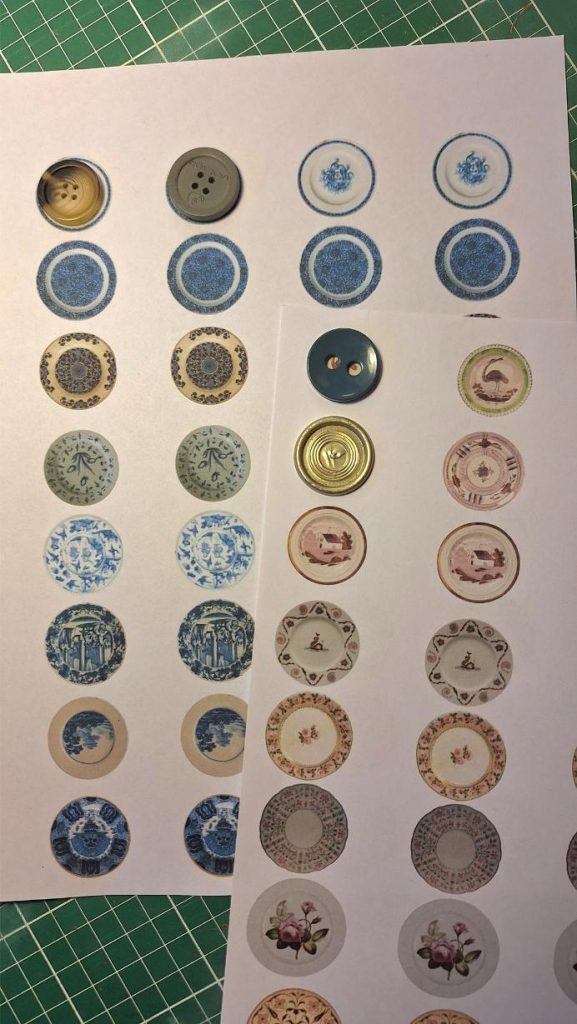
Printable miniature plates (get them here: set 1 and set 2)
Mod Podge or any decoupage glue
Everyone has a collection of old buttons, no?
Step-by-step tutorial
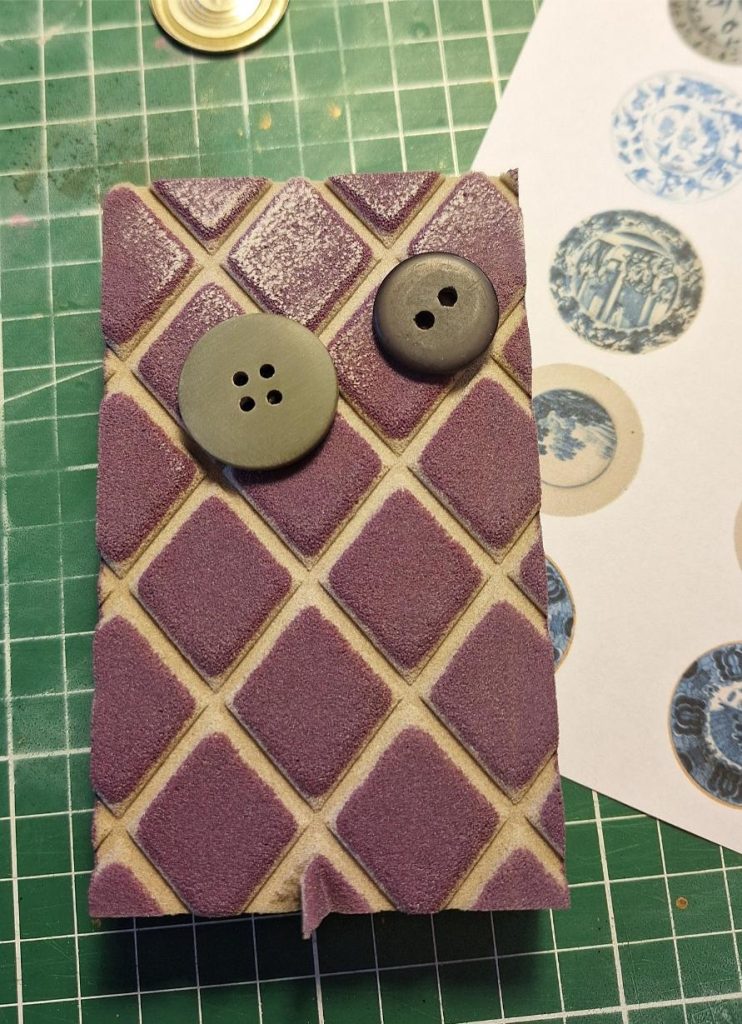
Step 1: Prepare the Buttons Choose flat buttons that will serve as the base for your miniature plates.
My printable miniature vintage plates are in my Etsy store
Step 2: Sand the Surface Use sandpaper to smooth the button surface and remove any raised texture. This helps the paint/nailpolish and printables stick better.
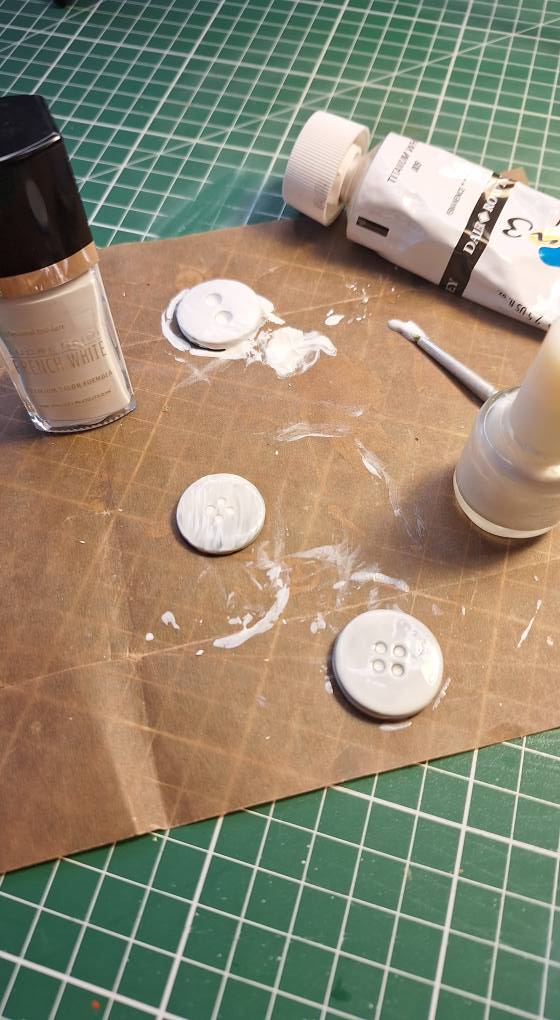
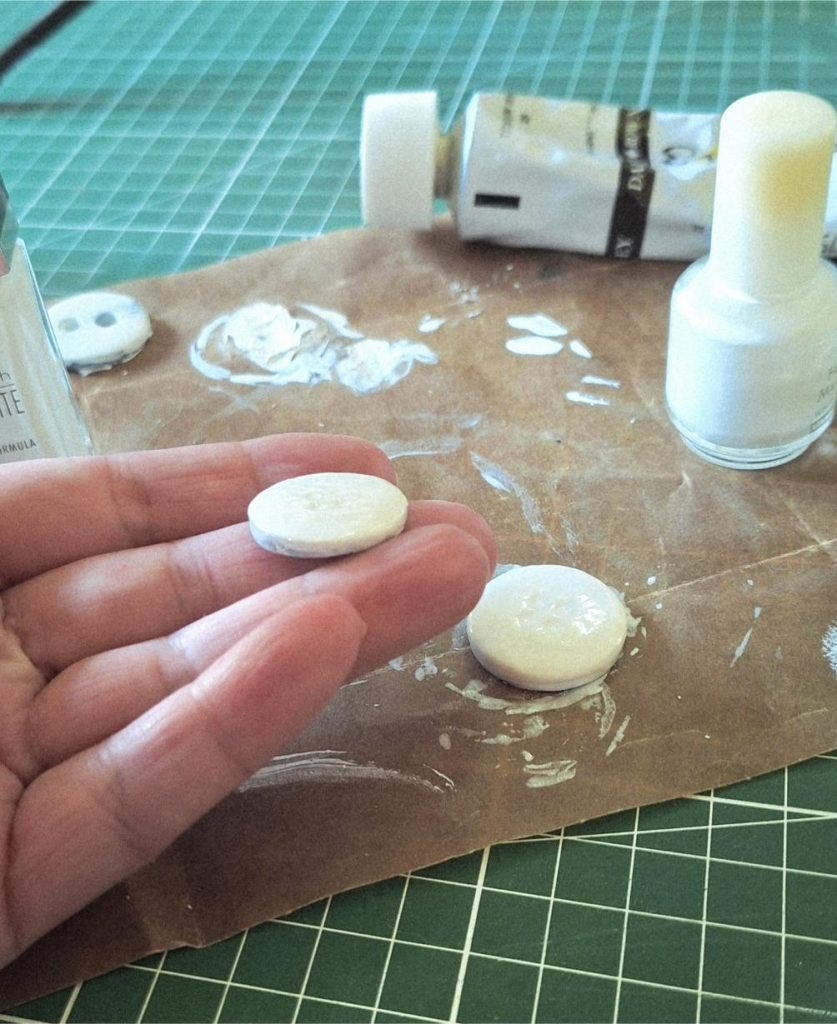
Step 3: Apply a Base Coat Paint the sanded buttons with a layer of white acrylic paint or nail polish. This will cover the original button color. Make sure the button doesn’t have holes that are too big; as you can see in the picture, paint or nail polish doesn’t cover them up.
I just stuck to the white nail polish after this.
Step 4: Add a Second and even athird Layer Let the first coat dry, then add a second layer for an even finish. You can repeat this step until the button is fully covered.
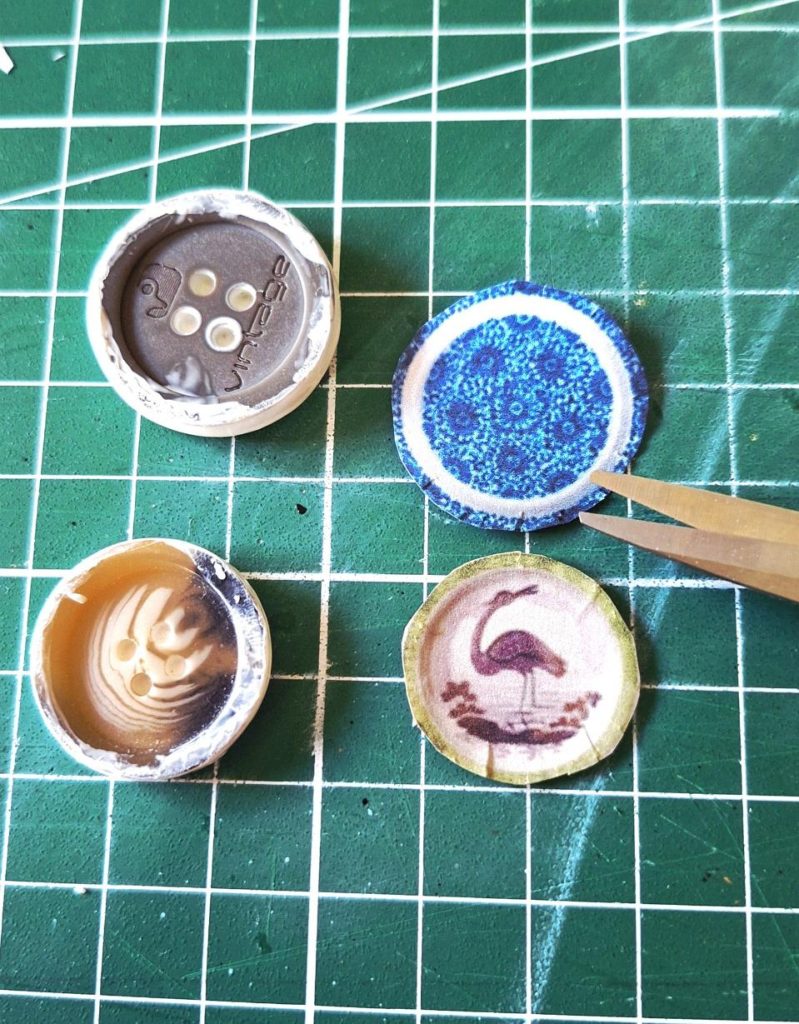
Step 5: Cut Out the Plate Printables Carefully cut out your chosen designs from the printable sheets. Trim slightly around the edges so they fit perfectly on the button. To help them fit smoothly on the slightly curved button surface, make a few tiny snips around the edges of the circle. This way, the paper bends better and won’t wrinkle when glued down.
Step 6: Glue on the Design Apply Mod Podge or a thin layer of glue onto the button surface. Place the printable design on top and smooth and press it down gently.
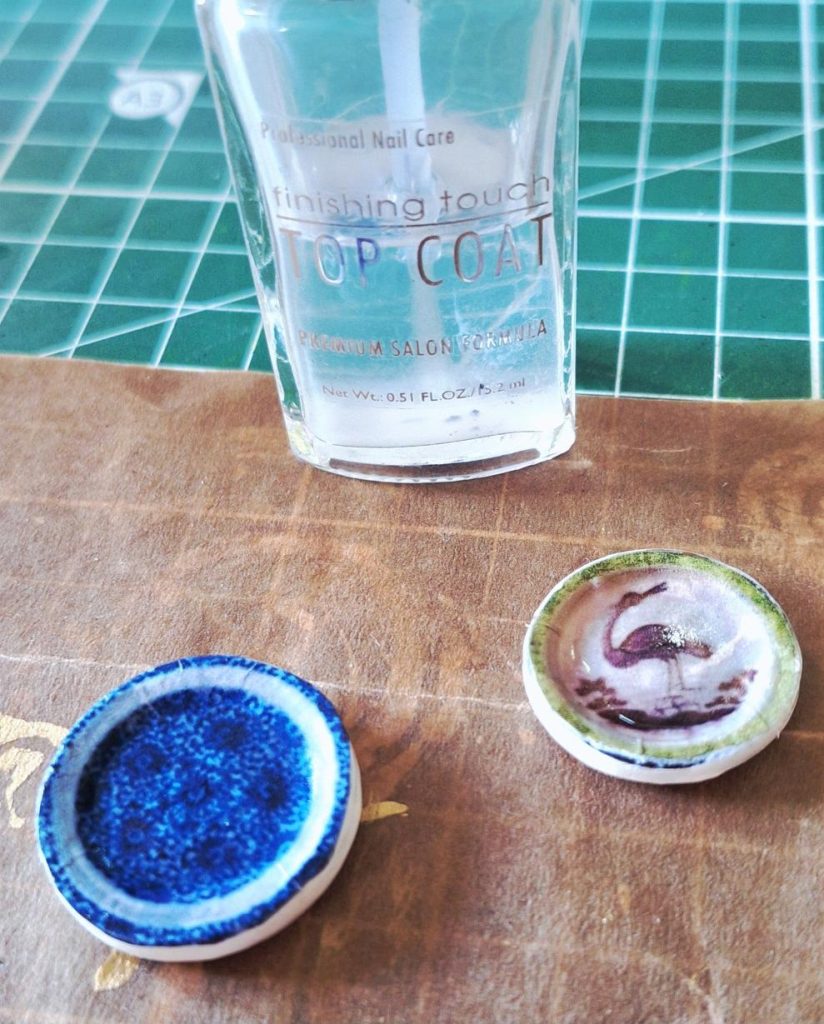
Step 7: Add a Gloss Finish For a realistic plate look, apply a clear nail polish top coat. This will give your plates a shiny, ceramic-like finish.
Step 8: Finishing Touches Once dry, your miniature plates are ready to display! Mix and match different designs for a beautiful set of vintage-style dollhouse dishes.
Mini Plates DIY with the Air-Dry Clay Method.
If you don’t have buttons or printables at hand, air-dry clay is another simple way to create miniature plates. The process is quick, beginner-friendly, and allows you to paint and decorate your dishes however you like.
Materials required:
Clear varnish or nail polish (optional, for shine)
Air-dry clay
Coin (for cutting circles)
Pen cap, bottle cap, or marker cap (as a mold)
Acrylic paint (any colors you like)
Fine brush or dotting tool
Step-by-step tutorial
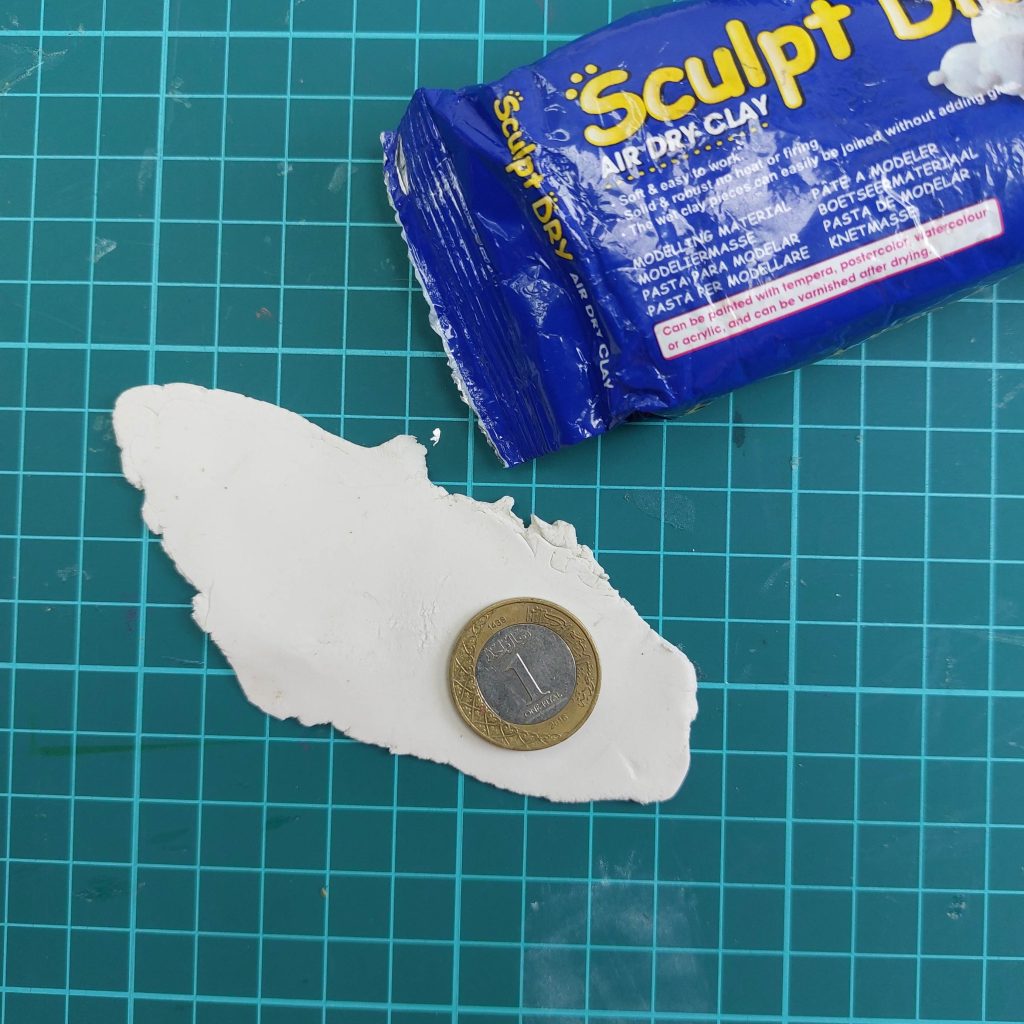
Step 1: Flatten the Clay Roll out a piece of air-dry clay about 2–3 mm thick. Try to keep it even for a smooth result.
Step 2: Cut Out Circles Place a coin on the clay and cut around it with a craft knife to make a round plate base.
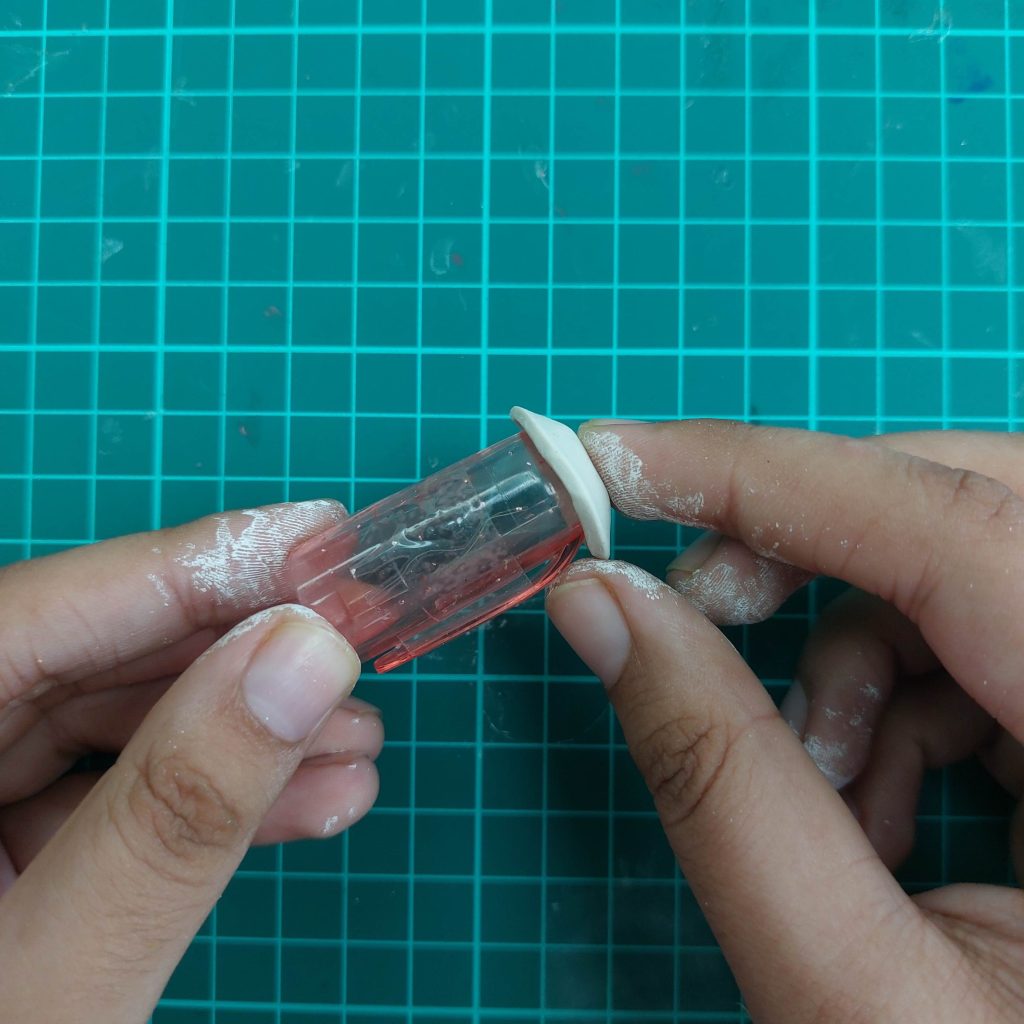
Step 3: Shape the Plate Take a pen cap or similar rounded object and press the clay circle over it. This gives your plate a gentle curved shape.
Step 4: Smooth the Rim Run your finger lightly around the edge to even it out. Set aside and let the clay dry fully.
Step 5: Paint the Plates Apply a base coat with acrylic paint or nail polish. White works well for a ceramic look, or finished with clear nail polish.
Step 6: Add Designs and another seal for shine.
Use a fine brush or dotting tool to add simple patterns like dots, stripes, or borders. Make each plate unique or create a matching set.
You can finish with another layer of clear varnish or nail polish to give your plates a glossy ceramic finish.
And there you have it: three simple but effective ways to make miniature plates for your dollhouse or diorama.
I’d love to know which method you’d like to try first, or if you have another creative idea for making tiny plates. Drop a comment below and share your thoughts. I always enjoy hearing your tips and seeing what you come up with!
6 thoughts on “From Trash to Treasure: 3 DIY Methods For Miniature Plates for Dollhouses!”
Hi Lizzy, regarding painting the plates with two coats of white paint, I’ve used Gesso as a first coat. After a light sanding, I add whatever color paint as the second coat. The Gesso gives a nice texture and “weight” to the piece. Love your great suggestions on making all things mini.
I found some beautiful picture buttons that already look like plates. I love all of your tutorials and would like to know how to fill the holes. I can varnish or nail polish it and even use it as pictures for the walls, but I would love to make a couple plates out of them as well.
I’ve just started working with miniatures and I am hooked!! I have 3 rooms and a full dollhouse. It’s so much fun and the 1:12 size is my favorite!!
You can easily fill the holes with lightweight air-dry clay, wood filler, or even thick acrylic paint. Push a tiny amount into the holes with a toothpick, let it dry, lightly sand if needed, and then seal with clear varnish or nail polish. They work great as plates once the surface is smooth 🙂
I am confused about the method using a stencil. Did u place the heated plastic on top of the circle stencil, then place circular object(like a coin) in that hole the press in the plastic? If so, how did u form an even rim for the plate?
I heat the plastic first until it’s soft (not melting, just pliable). Then I place it over the circular opening of the stencil. Underneath that opening, I put something rounded like a coin or small cap.
When I gently press the warm plastic down into the hole, the object underneath pushes it upward in the center and naturally forms the shallow curve of the plate.
The rim becomes even simply because the edge of the stencil is perfectly round. As long as you press evenly all the way around while it’s still warm, the plastic cools into a nice, balanced rim shape.


Hi Lizzy, regarding painting the plates with two coats of white paint, I’ve used Gesso as a first coat. After a light sanding, I add whatever color paint as the second coat. The Gesso gives a nice texture and “weight” to the piece. Love your great suggestions on making all things mini.
Hi Shell! Thank you for the tip and you are very welcome!
Lizzy
I found some beautiful picture buttons that already look like plates. I love all of your tutorials and would like to know how to fill the holes. I can varnish or nail polish it and even use it as pictures for the walls, but I would love to make a couple plates out of them as well.
I’ve just started working with miniatures and I am hooked!! I have 3 rooms and a full dollhouse. It’s so much fun and the 1:12 size is my favorite!!
You can easily fill the holes with lightweight air-dry clay, wood filler, or even thick acrylic paint. Push a tiny amount into the holes with a toothpick, let it dry, lightly sand if needed, and then seal with clear varnish or nail polish. They work great as plates once the surface is smooth 🙂
I am confused about the method using a stencil. Did u place the heated plastic on top of the circle stencil, then place circular object(like a coin) in that hole the press in the plastic? If so, how did u form an even rim for the plate?
Yes, you’re thinking in the right direction 😊
I heat the plastic first until it’s soft (not melting, just pliable). Then I place it over the circular opening of the stencil. Underneath that opening, I put something rounded like a coin or small cap.
When I gently press the warm plastic down into the hole, the object underneath pushes it upward in the center and naturally forms the shallow curve of the plate.
The rim becomes even simply because the edge of the stencil is perfectly round. As long as you press evenly all the way around while it’s still warm, the plastic cools into a nice, balanced rim shape.
Hope that makes it clearer!