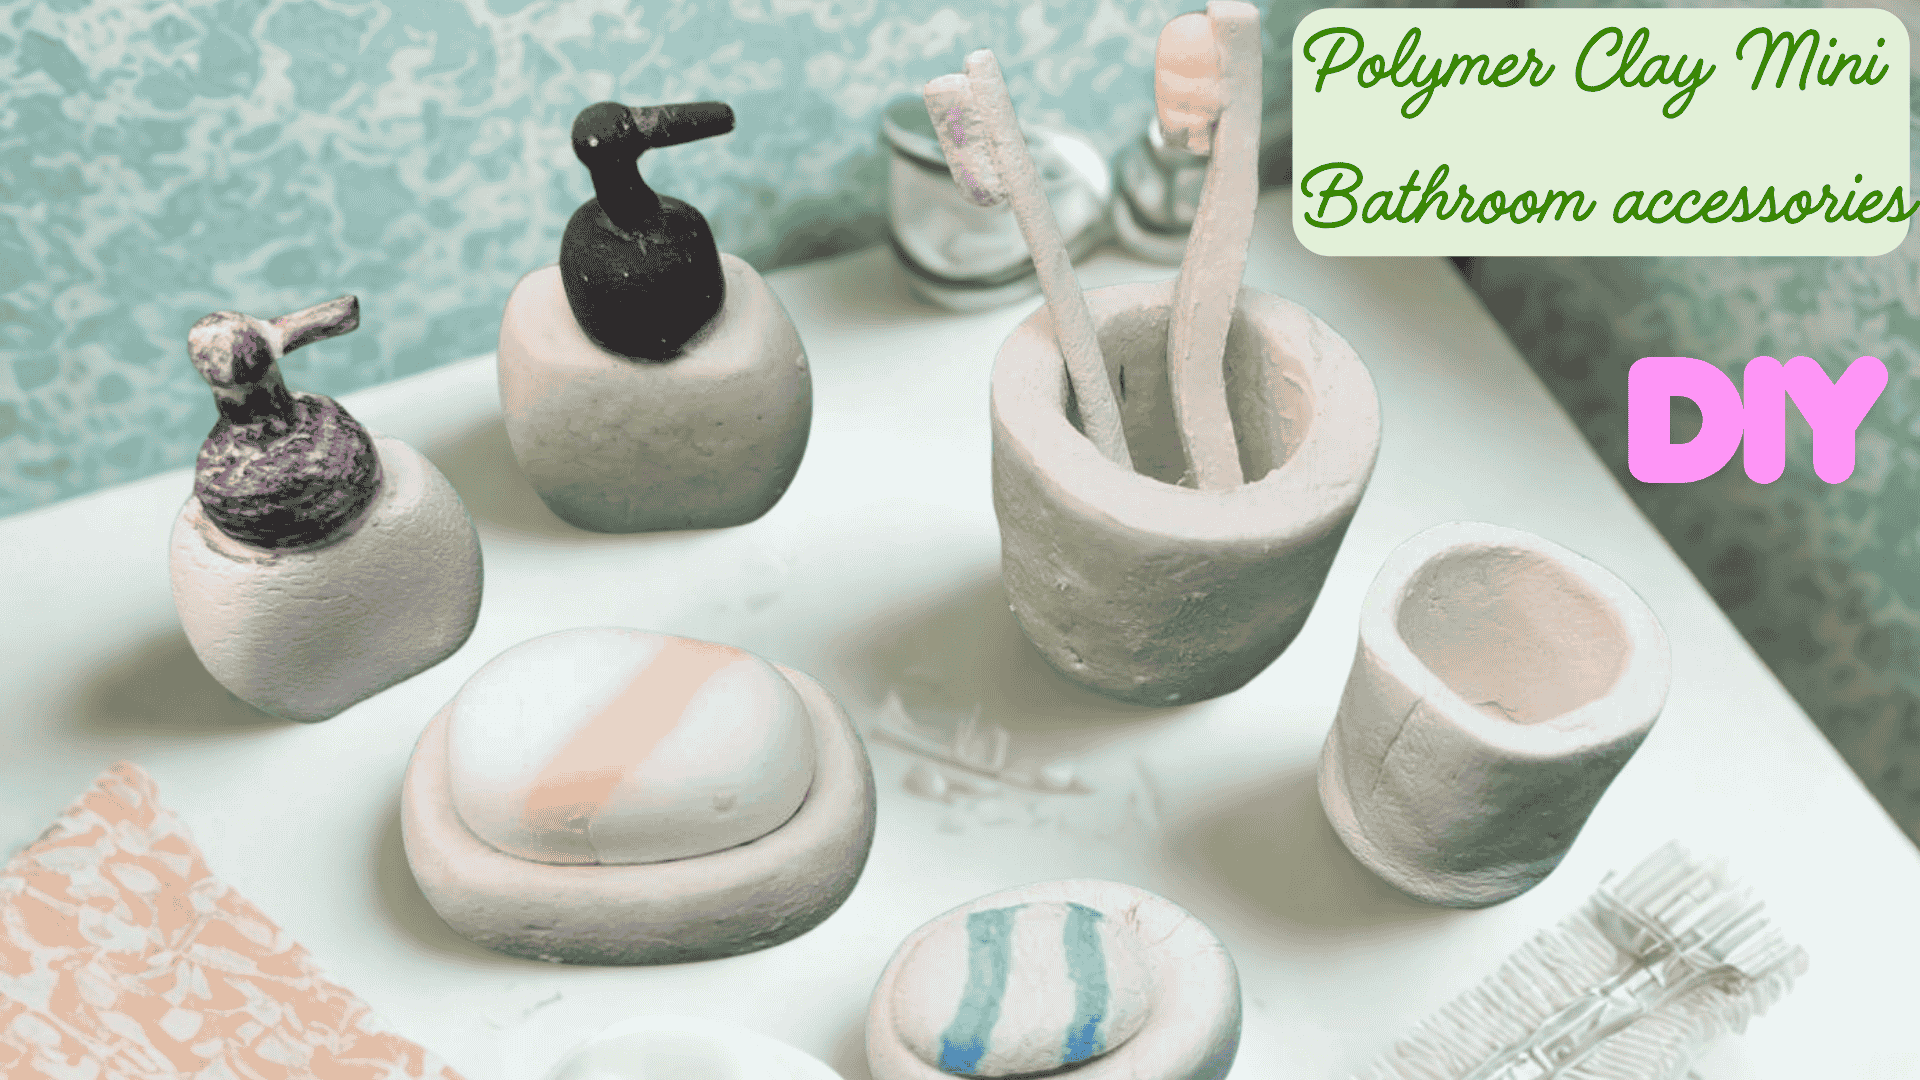
I love working with polymer clay, especially for those tiny details that bring a dollhouse to life. This time, I made a full bathroom set: a cute soap dish with a striped bar of soap, a toothbrush cup, and a little soap dispenser.
It’s a fun and beginner-friendly project, and you can make it with just a few colors of clay and some toothpicks or sculpting tools. Whether you want to decorate a bathroom roombox or just enjoy mini sculpting, this one’s a satisfying build.
As an Amazon, Etsy and Anavrin associate, I earn a small commission from your purchase, with no extra charges for you.
Materials You’ll Need
- Air-dry or polymer clay (Sculptey) in white, pink, black, and beige
- Toothpicks or sculpting tools
- Small brush or cotton swab (optional for texture)
- UHU glue (if needed for attaching parts)
- Varnish or gloss (optional)

Sculpd Air Dry Clay – Premium Sculpting & Modeling Clay for Arts and Crafts
Buy Now →Step-by-Step Instructions
1. Sculpting the Soap Dispenser
- Start with a small ball of air-dry clay and press it into a slightly rounded cube shape.
- Create a little top with some black clay and make it a little flat and round by using sculpting tools or just your fingers and some patience 🙂
The step-by-step instructions are quite easy to follow with all the pictures below!


Roll a tiny piece of black clay and shape it into a pump. You can bend it slightly at the end to mimic a real dispenser.
Sand the edges if needed to smooth them out.


UHU 38106 All Purpose Adhesive – 125ml Tube
Buy Now →2. Sculpting the Soap and Soap Dish
- Roll a small piece of white clay into a ball for the soap dish.
- Gently press in the middle to create a dip, and round off the edges.


- To make the dish, shape it into a shallow oval ( which should be slightly larger than the soap bar you will create after )
- Gently press in the middle to create a dip, and round off the edges

For the soap bar: roll out 2 pieces of colored clay and ‘swirl’ them together, like in the pictures below, and gently press them down.


Sculp it into a piece of soap that fits the dish:


3. Creating the Toothbrush Cup
- Once again, first sculpt a ball from air-dry clay
- This time, use a pencil or something round to push it in deep to form the cup.


- Use a craft knife to slice off the excess clay around it, revealing a clean and neat cup shape.


There you go, cup is done!

4. Making the Toothbrushes
Now, I have created these tootbrushes to complete the setup, but I am looking for a different way to make them more realistic. To be continued, but for now:
- Roll out a small piece of clay into a flat circle using a rolling pin.
- Cut thin strips with your craft knife—these will be the toothbrush handles.
- Take one strip and bend one end slightly to imitate the toothbrush neck.
- Add a tiny piece of clay to form the brush head. Use your knife or a needle tool to score bristles into the surface.


That’s it for now, to be continued!

Final Thoughts
And that’s it: your miniature bathroom set is complete! Whether you’re decorating a tiny modern bathroom or just want to try sculpting something small and fun, I hope you enjoyed making these little miniature accessories.
Let me know in the comments: Have you ever made your own miniature bathroom items? What did you use, or what would you like to try next? I’d love to hear your ideas and tips too!
Happy crafting!
Kind regards,
Lizzy

Hi everyone!
My name is Lizzy, and I am an amateur miniaturist obsessed with everything in the dollhouse and miniature world, ever since I was a teenager.
So far, I have created 2 dollhouse projects, a backyard shed and a miniature treehouse, tons of DIY dollhouse kits, and “hacked” some.
I also created a fairy garden, and lots of small and simple miniature projects on my YouTube channel. (mostly made from trash or everyday items).
I love to write as well about all things happening in the miniature world, hence the reason why I created this blog!
I wish you happy reading and crafting!
Lizzy


Hello,
I’ve been following you for a while now and I just wanted to let you know that I appreciate everything you post. I love the bathroom accessories you posted about! I can’t wait to try it out. Think I’ll do that now,..
again thank you very much for your time and help with our mini lives…
Hey Lisa
Thank you very much for your cheerfull comment and I wish you happy crafting!
Lizzy